AutodeskEd’s Youtube channel has been very busy – I have collected 25 videos specifically relating to Structural users, including information on:

  • Reinforcement
  • Rebar
  • Assemblies
  • Parts
  • Loads
  • Interoperability

Link to playlist:
http://www.youtube.com/watch?v=2p1NoxzJz1A&feature=share&list=PLdw8FwXDx_djMvsIrcdzRMyEZ4WSBV4Fj


Check out lot’s more at:
Autodesk Building Solutions channel — http://www.youtube.com/user/AutodeskBuilding?feature=watch

Question from Alaa El Kabbany:
I’m asking if anyone knows how to show the local file path on the revit file interface (like autocad)…..is there a way?

Answer:
Download the Revved tool package from here.  After it is installed, on your Add-Ins bar you can click on ReVVed — Open Folder to access the “local file path” in explorer.

You can download  ReVVed 2011 or ReVVed 2012 or ReVVed 2013 for free. (via PKH Lineworks)

Query via:
What Revit Wants: Revit 2013 Direct Download Links

Also, check out my recommended Revit add-ins on Pinterest.

  1. COINS Auto Section Box (download)
  2. QuickViewAccess2013 (2013 download) (2012 download)
  3. ZoomToAwesome (download)
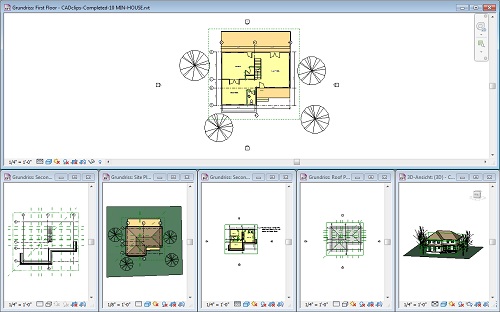
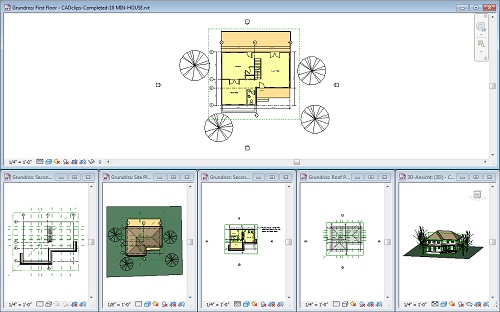
  4. Palladio X BIM – WindowsLayout (download)
  5. Ok, its not a view addin, but – set a keyboard shortcut to Isolate Element, and another one to Zoom Extents.  When you want to find and zoom to a selected element, just type the two shortcuts one after the other … Isolate Element then Zoom Extents.

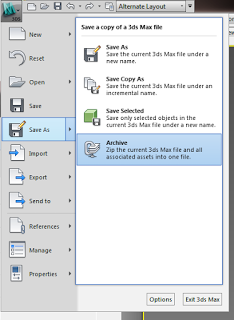
    1. File – Save As – Archive
    2. This will make ZIP with all the resources.
    3. If you want to view them all in one folder, use 7-Zip, Extract Files… with no pathnames (this will put all the files in one folder)

    If you have exported a file from Revit to 3ds Max Design (perhaps using Suite Workflows), this is a good way to capture all the texture and material resources that are needed and put them in one easy-to-use location.

    This may allow you to export more easily to other formats and use the associated bitmaps in those other formats (like OBJ or similar).

    The two step process is:

    1. Export STL from Revit
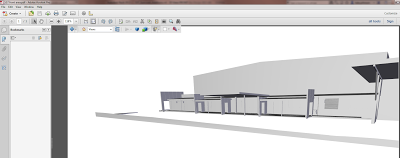
    2. Use U3D-2-PDF to turn the STL into a 3D PDF (a one click process).

    This is the fourth free method I have posted on how to make 3D PDFs from Revit (go to end of post for the other three).  Pros for this method – quick and easy once you are set up.  Cons – can’t really get materials or colours to show (just geometry).

    You will need to setup your environment first.  Here is what you need:
    1) The STL Exporter (Revit 2013 version add-in here.)

    2) Then, get U3D-2-PDF at:
    http://sourceforge.net/projects/u3d2pdf/?source=recommended

    It requires MeshLab and MiKTeX (see here).  You also need .NET Framework 4 (here if you don’t already have it).

    You can get them from:

    3) Meshlab software:
    http://sourceforge.net/projects/meshlab/?source=recommended
    and
    4) MiKTeX download at:
    http://miktex.org/download

    (yes to automatic package installs)

    Once you have installed all 4 items, then:
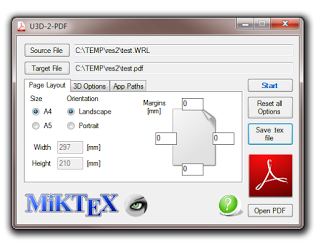
    Extract and Run U3D-2-PDF.exe.  You will need to specify some paths like:
    “C:Program Files (x86)MiKTeX 2.9miktexbinpdflatex.exe”
    “C:Program FilesVCGMeshLabmeshlabserver.exe”

    Select a source STL or WRL, then an output PDF filename and click Start.  Once finished, click Open PDF.

    If you want additional steps, you can go Suite Workflows to Max, then from there out to STL or WRML.
    NOTE:  if you do go to Max first, then Topography WILL be included in the 3D PDF.  If you don’t go out to Max, then it won’t (because the Revit STL Exporter will not pick up topography properly.)

    I got some clues from an explanatory PDF via download at:
    Generate U3D files from STL models for making multilayer 3D PDF figures

    Once a U3D file has been created, there are two basic options to convert the U3D files into PDF format. One requires the commercial Adobe Acrobat Pro software (versions 7, 8, 9, or X all include the required functionality), while the other option uses the free open-source LaTeX software package (MiKTeK and the movie15 package) to compile the final PDF. Both these options use a .U3D file of the model in order to generate the 3D figure. However, U3D files are not very easy to create directly.

    Instead, an IDTF file must be created, and that is in turn converted into a Universal 3D (.U3D) file. Fortunately, the IDTF to U3D converter is freely available (sourceforge.net u3d). Unfortunately, the free software comes as a fairly large download (U3D_A_061228_5.zip, 2007-01-16, 36.3 MB).  

    Previous methods:

    1. Using the i-model plugin
    2. Converting a DWF,
    3. Revit to OBJ to DAZ Studio to U3D to Adobe 3D PDF
    4. The method described above

    Starting today, each new FormIt file you create (or old one you edit) will be converted to a RVT file – in addition to the SAT file you currently get. Of course, this all requires that you use your free Autodesk 360 account.
    Each RVT file contains the following

    • an in-place mass with a form element for each object that can be edited using the Revit/Vasari conceptual massing tools. That is, it has a clear extrusion between two profiles. All other objects (boolean cuts and joins and objects with edges modified in two or more axes) will come in as non-editable imports. 
    • The latitude and longitude of the location – if you set one in FormIt.
    • Sorry, no images yet.

    via
    Get your Revit files! | Autodesk� FormIt

    Top-11-Tips-Tricks-Revit-2013.pdf (application/pdf Object)

    Here’s a taste:
    3. Need a slope annotation on your ramp in a plan view? It can’t be done without this trick!
    Why won’t it work? Okay, I’ll check with the Revit developers… but in the meantime, do this:
    a. Open a 3D top-down view (click on the Top of the view cube) showing the ramp.
    b. Use the Spot Slope tool to place a slope arrow on the ramp in the 3D view.
    c. Select the spot slope annotation. Click Ctr-x (cut to clipboard).
    d. Open the plan view. In Modify tab, click Paste drop-down and choose > Aligned to Current View.
    e. The parametric slope arrow now exists on the ramp in the plan view!

    Thanks to author Trey Klein.

    Heads-up and link from betterREVIT:
    Where’s my Chair? | betterREVIT


    You may have already heard about Boost Your BIM – a new and quite prolific programming (API and macro) blog for Revit by Harry Mattison.  If his recent posts are anything to go by, this blog should be on your ‘must follow’ list.  Also, I could be wrong, but I think his profile image might be a reference to my post here

    On Twitter at twitter.com/BoostYourBIM

    Here is some recent posts that I found to be pretty interesting:
    Macros vs. Add-Ins – What’s the difference?
    The code for your macro is stored in an RVT file if it is a document macro. If you create an application macro the code is stored independently on your computer … The code for your Add-In gets compiled into a DLL file.  

    Revit API Wiki and RevitAPI.chm
    Revit API Developer’s Guide Wiki at http://wikihelp.autodesk.com/index.php?title=Revit/enu/2013/Help/00006-API_Developer%27s_Guide

    Scrubbing Out Dimension Styles
    Harry provides a deleting / purging macro that handles both dimensions in sketches and dimensions in unplaced groups.

    Save a Set of Elements with SelectionFilterElement
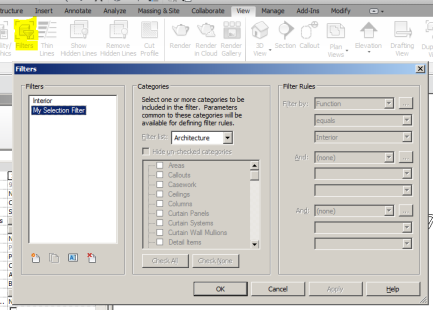
    Although full Revit 2013 (Onebox) has built-in Saved Selections, you can see how little code is required to actually make basic selection filters on this post.

    I previously posted about a free add-in for single selections, and there is also Case Apps Reusable and Sharable Selection Sets

    Finally,
    Making Lines Not Print (with Events)
    I can’t say I’ve ever wanted this … but it basically switches a certain line style to white before printing, then back afterwards… 

    Some info about Harry (from BIMopedia):
    Harry joined Revit Technology Corp in 1998 and spent his last few years at Autodesk as a software developer on the Revit API team. Now Harry has set out on this own and would like to help more people appreciate and benefit from the Revit API.