Read more:
in the comments at this post
What Revit Wants

Read more:
in the comments at this post
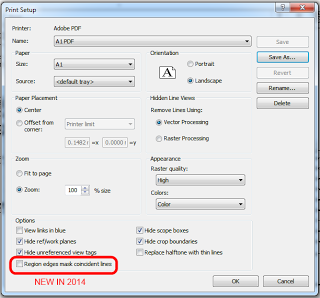
Have you noticed this in 2014?
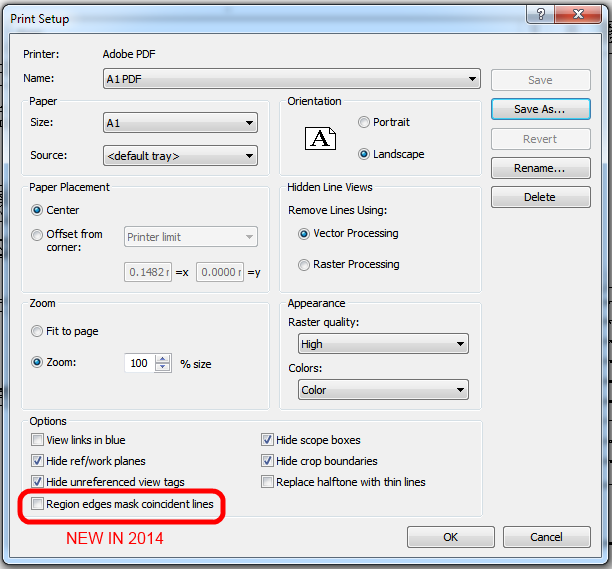
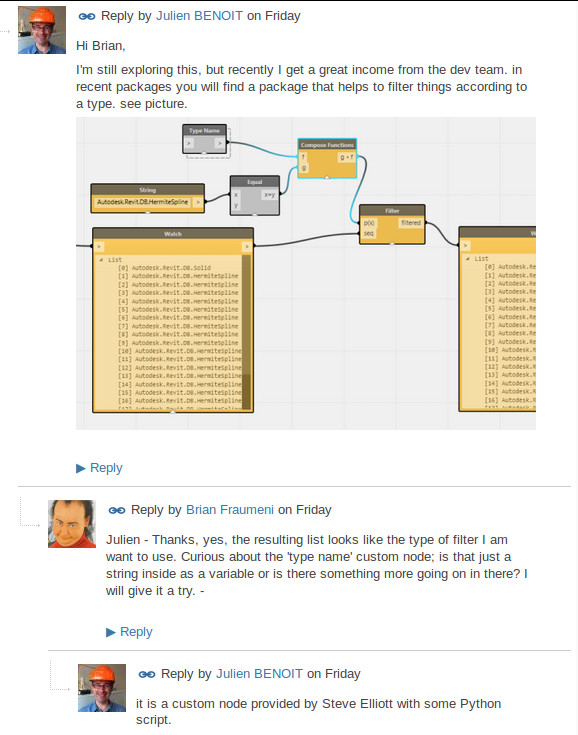
If I can borrow some imagery from Caddman13 on the Autodesk Forum, this is what it means:
Unticked:
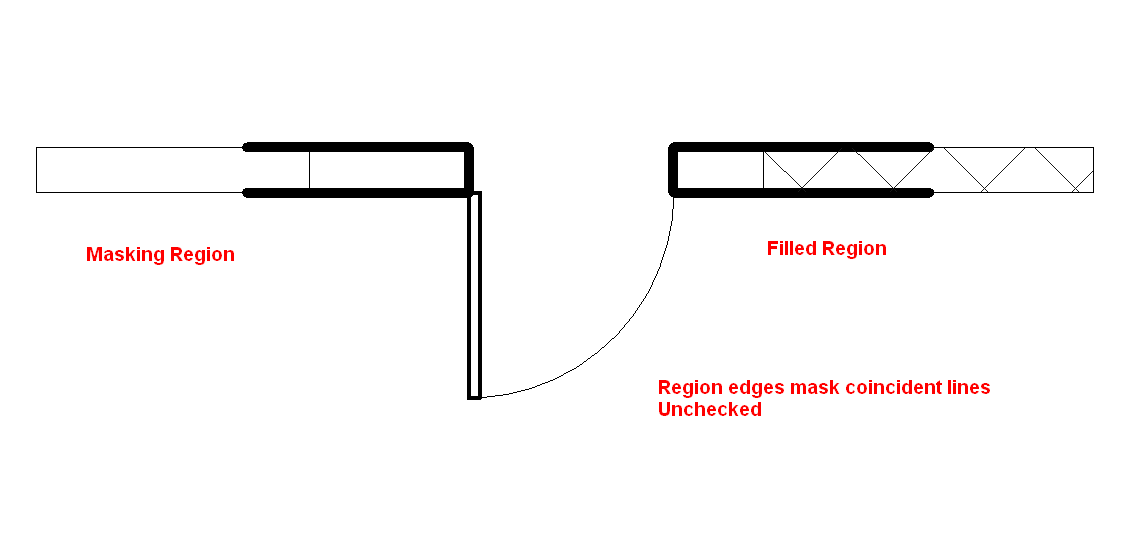
Ticked:
You don’t even have to register to download… Check it out at:
PARAMETRIC COMPONENTS
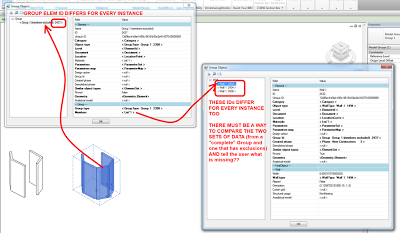
Let’s say you have inherited a multi-storey project that has been set up with Model Groups for Typical Levels – not necessarily a bad thing (see this post).
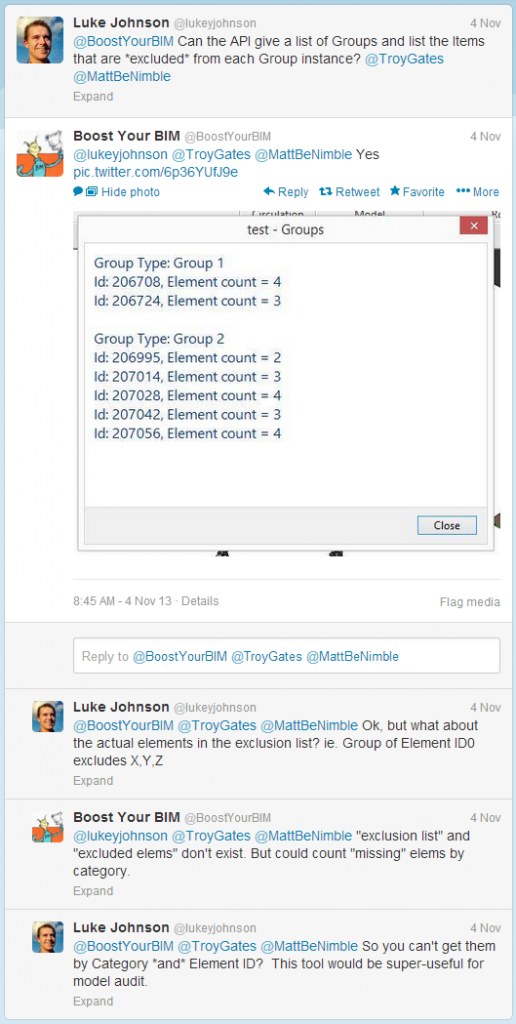
After installing Compare Models, you need to open two files. I opened a ‘live’ version and a detached version of the same model. Go to Extensions – Tools – Compare Models. Wait for a while… you will get a list that shows you which Group instances have Members Excluded.
However, this method does not give the actual Excluded Elements, just the Group Instances with Exclusions.
@lukeyjohnson I do: use Model Compare.open project.rvt & 000#.rvt. Compare equal, list groups and excluded with IDs. pic.twitter.com/tGLfP9C9yd
— Julien Benoit (@Jbenoit44) November 14, 2013

Does anyone have an awesome way to list group instances and their excluded elements? Anyone? 🙂

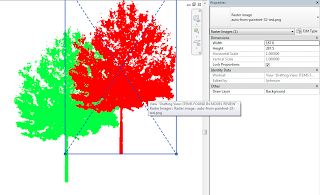
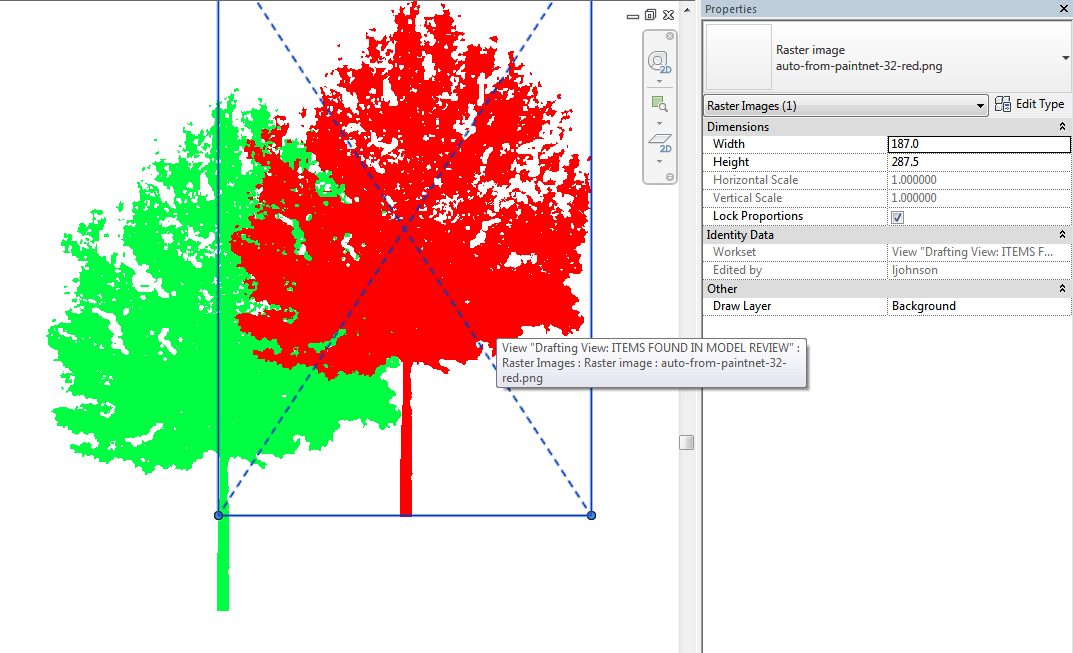
You need to save as PNG – but not any old PNG will work.
I have consistent success using Paint.NET, deleting the “background” so it is empty (checkerboard), then saving as a PNG. But here’s the main lesson – make sure you tick 32-bit. No other option seems to work, only 32-bit PNGs seem to respect transparency in Revit.
You can even use Bring to Front, Send to Back etc to overlap these images. Quite useful for Entourage in coloured Plans and Elevations…
via
Point Cloud to NURBS with EvoluteTools PRO for Rhino3d: http://t.co/mKMr0M9mDT
— Evolute (@evolutegeometry) November 13, 2013
Over at this link
There are “generic” families and also manufacturer specific content…
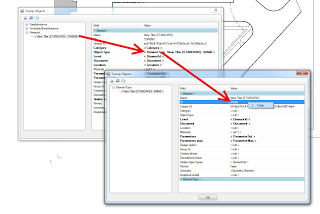
Firstly, consolidate your Viewport Types by using Select All Instances – In Current Project and switching them to the Types you want to keep.
Then, change a Viewport to one you want to delete, and use Snoop Current Selection (RevitLookup). You can drill down to find the ElementID of the Viewport Type Definition:
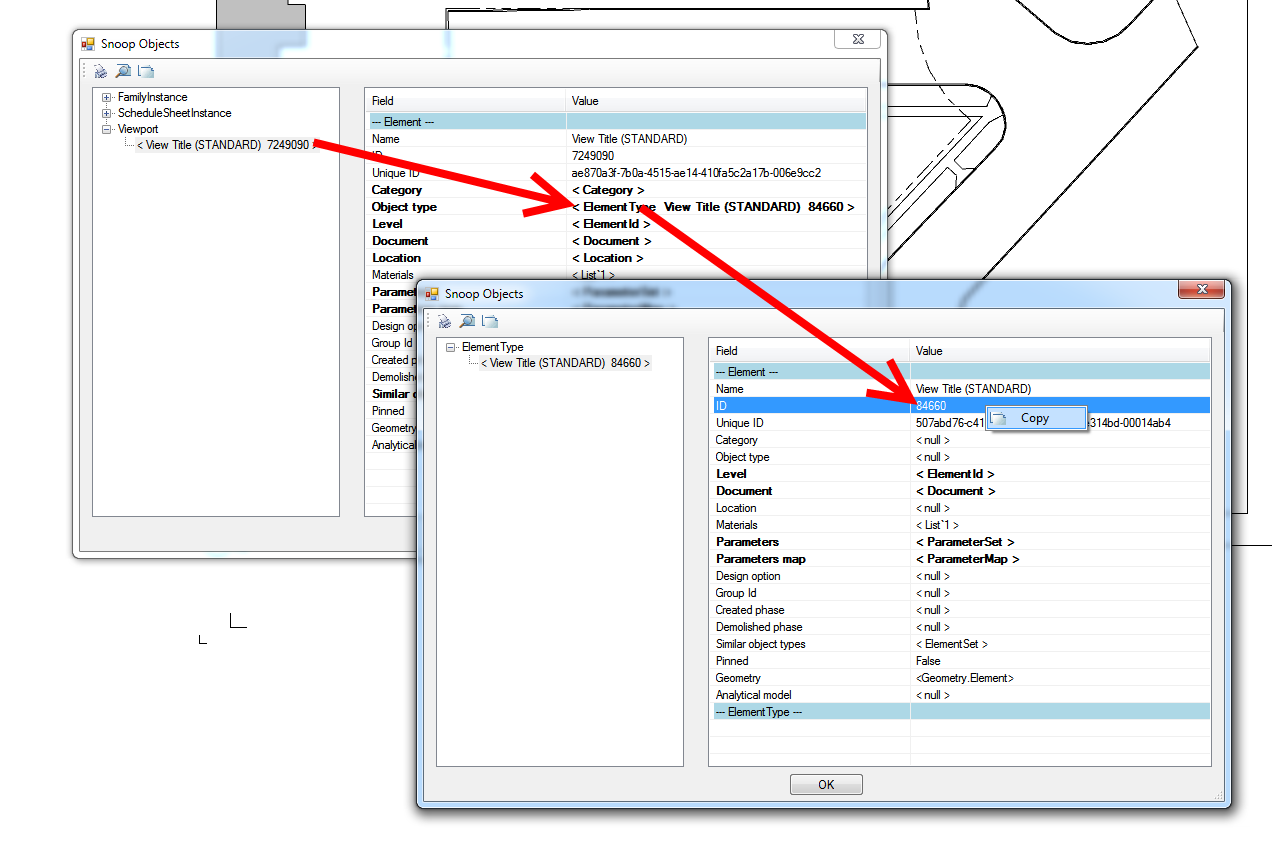
Ok, with this in hand:
A new challenge faced by collaborative design teams – how to work concurrently, yet not do the same thing four times?
Consider these comments from Glenn Jowett:
“If you look at the process of designing a steel framed building there is the potential for at least four steel frame models to exist within one design team, four models that have been built from scratch by different people within that design team.
…
The design team should sit down at the start of a project and map out who owns what elements at what stage of the project
…
The copy monitor tools within Revit are far from perfect, but this seems to be the only option for walls at the moment.
…
In traditional 2D, drawings would be issued and revisions clouded; in the 3D model revisions can’t be clouded and drawing issues between the design teams are becoming less and less frequent.”
via
http://revitst.blogspot.in/2013/08/revit-collaboration.html
Checklist:
Finally, some great ideas of what to discuss at a pre-project BIM meeting from the same post:
“An initial BIM or Revit meeting should take place at the start of every major project, purely from a Revit and collaboration point of view items for discussion should be:
· File format for data exchange
· How often are files exchanged
· Clearly define what the model is to be used for at what stage in the design process
· Who models what and when
· Who owns what and when does element ownership go from one discipline to another
· Level of development (LOD) – what level of model information should I expect to receive at what stage? And does that meet my expectations
· How often should clash detection take place
· Project coordinates and project north position.
It is important that the above items (at least) are discussed before a project really starts to evolve, and the decisions on each item should be documented and set out in a BIM Execution Plan. Collaboration will be much easier to manage if every member of the design team has the same set of core principles to follow from start to finish.”
To the above list, I would add at least the following:
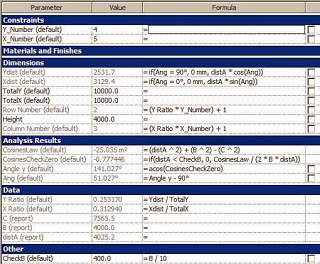
If you ever feel like your Revit day is just too basic and straightforward, you should definitely read this post by the RevitCat. There are some serious formulas in place:
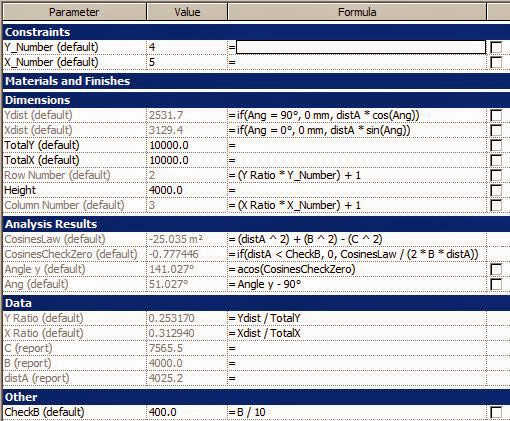
This technique will not work with a curved surface because it all works by calculating the actual distance from the control point to the BL corner of the pyramid and relating that to the overall length of the surface.
Read more:
http://revitcat.blogspot.com.au/2013/10/how-to-schedule-panel-locations-on-flat.html