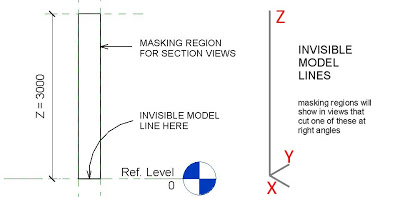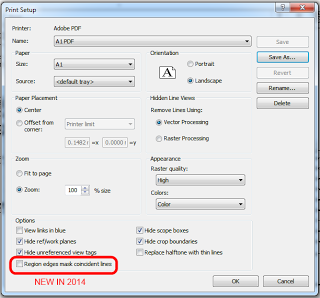
Have you noticed this in 2014?
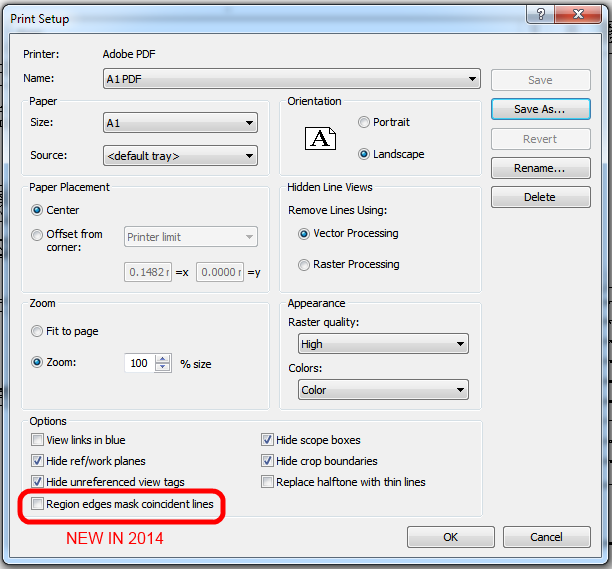
If I can borrow some imagery from Caddman13 on the Autodesk Forum, this is what it means:
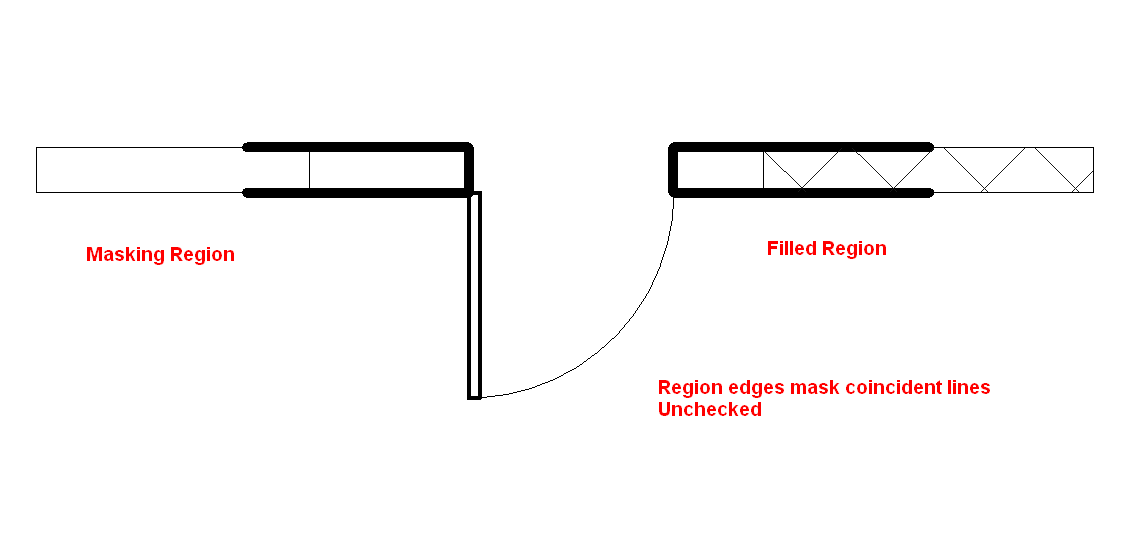
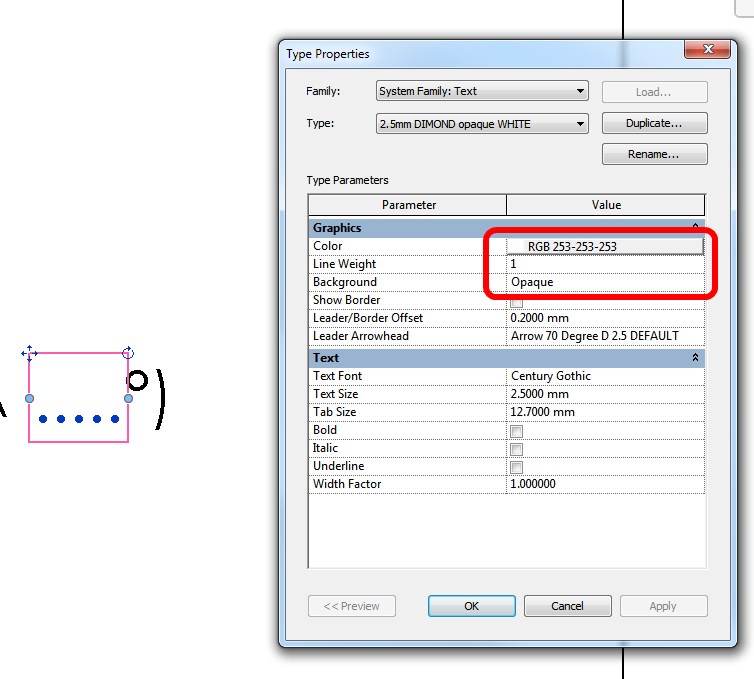
Unticked:
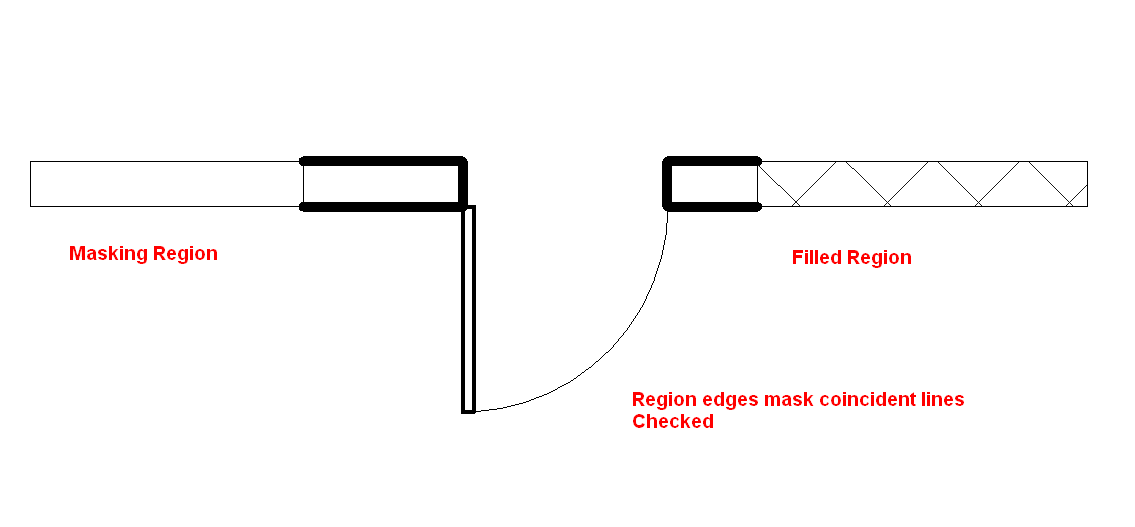
Ticked:
What Revit Wants + Black Grid AI
AI Empowered Project Management
Have you noticed this in 2014?
If I can borrow some imagery from Caddman13 on the Autodesk Forum, this is what it means:
Unticked:
Ticked:
Interesting aberration that you could use to your advantage – reposted from SARUG:
I had Sam override the visibility setting for the masked region and make it transparent, in the linked file, and then update the link. For some baffling reason the ceiling could now be seen and the ACAD file was properly masked where the ceiling was.
The only thing I can figure is that the override to transparency was carried through to the active project revealing the ceiling but the masked region was still seen as a masking element as it related to the ACAD file.
via
AutoCAD in Revit – A Bizarre Linked File Approach | Southern Arizona Revit User Group

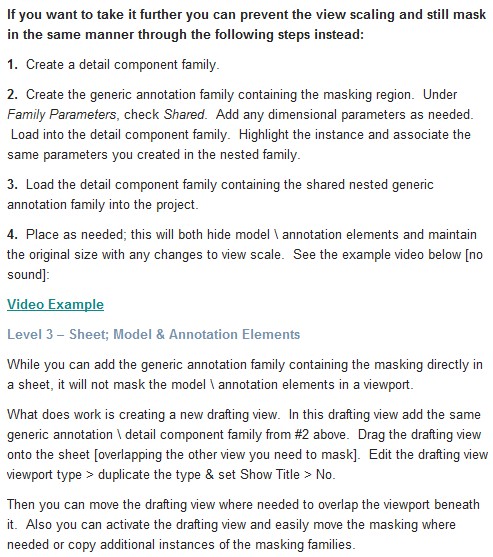
Masking can be a real pain in Revit. Sometimes you just want to hide some bits of geometry on multiple views, but it is difficult to actually model what you want in 3D. So you may resort to Masking Regions in Detail Groups, Copy-Paste Aligned – but all of that is suboptimal.
Today there was a great tip on Masking in multiple views over at Shades of Grey:
I could use a masking region, but this is like going back to CAD drafting … separate regions in each affected view. What if I place the mask into a generic model family? If this family has a vertical model line (use invisible lines) the masking region will show up in any plan where the cut plane intersects the model line.
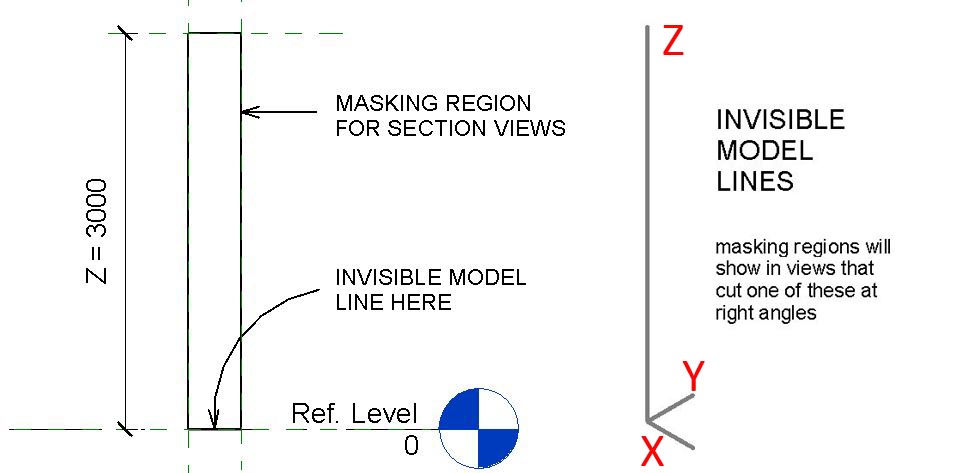
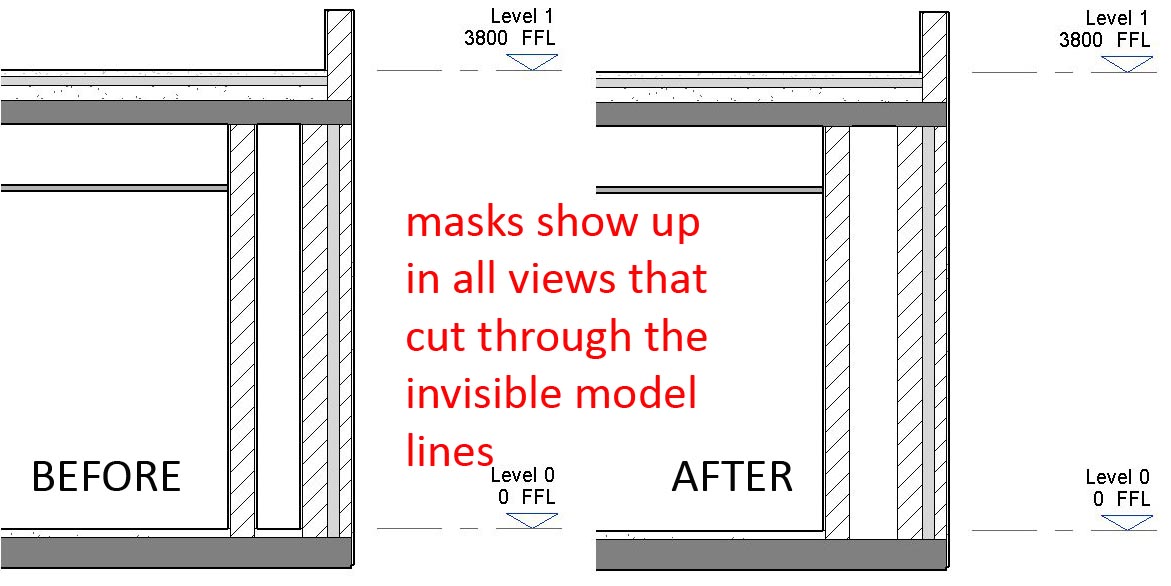
Extending this idea into 3 dimensions I can create a family with 3 model lines (X,Y,Z) and 3 masking regions. Give it instance parameters to control the size of this “virtual box” and it will mask out the finish layers for any view that cuts through the duct at right angles.
Read more:
Shades of Grey: MACAVITY UNMASKED
Some objects in Revit are very difficult to mask over. However, sometimes you just really need that quick method of masking something to save yourself hours of work.
Here is how you do it:
In the video below, I show how this method works to mask a Color Fill Legend.
There is another method that is slightly more involved – you can put a shared Generic Annotation family with a Masking Region into a Drafting View and put that on the sheet. Check out this link, where I reposted this method from The Revit Clinic.
You learn something new every day – and today I was schooled by this Revit Clinic post – 3 Levels of Masking.