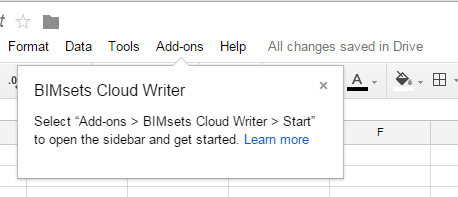
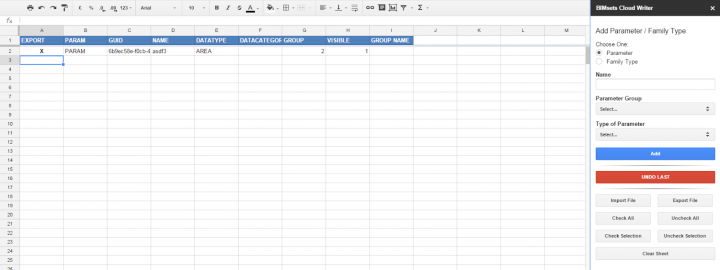
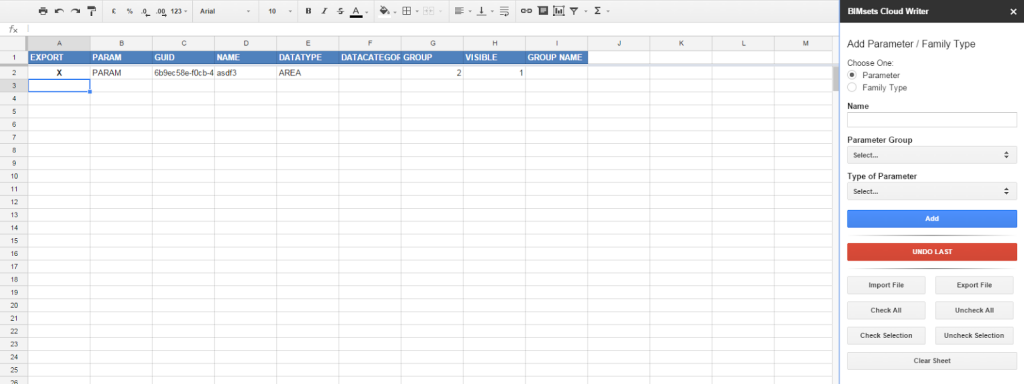
I have posted about SP.Writer before, but this is the next iteration: BIMsets Cloud Writer.

UPDATE: if you want to update to the latest version of the add-in, in Google Sheets you may need to go to Add-on > Manage Add-Ons and then remove it, and then search for it and install again.

If you just want to build a new parameter file from scratch:

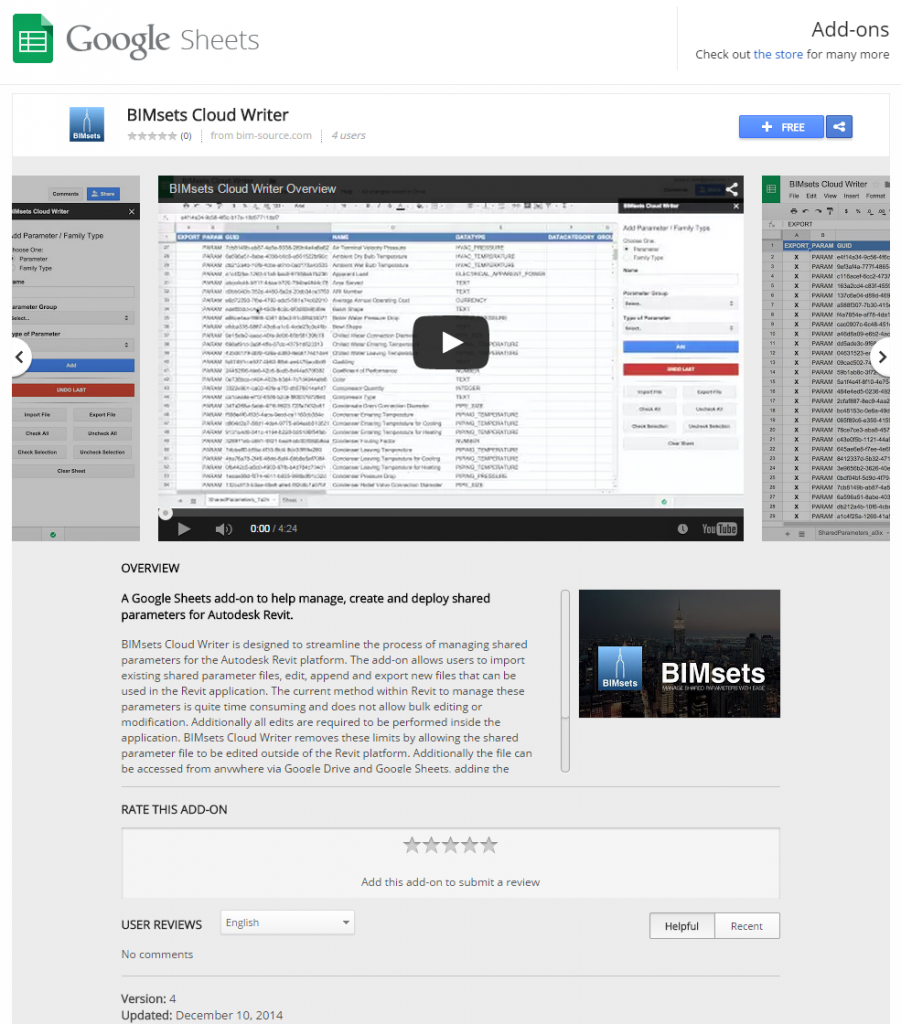
  1. Go to https://chrome.google.com/webstore/detail/bimsets-cloud-writer/mkcicdhocfdpjpdljamehafdafonfodh?authuser=1
  2. Press the Free+ button to install
  3. Say yes to all the prompts  
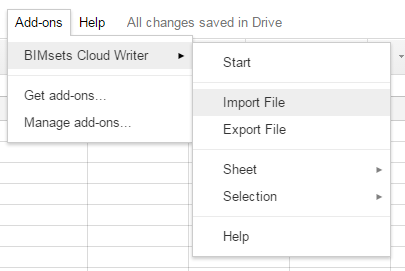
  4. In the new Spreadsheet, go to Add-ons, BIMsets Cloud Writer, and press Start
  5. Start filling in the form and pressing Add for each new parameter
  6. Parameters are created and you can choose to Export to a TXT file

If it keeps failing to Import for you, this will probably be the reason:
Can I use custom groups with this add-on? No. The add-on uses a specific set of parameter groups designed to be compatible with the Autodesk Seek Style Guide. If you have a parameter file that uses the same groups as the Style Guide it should be compatible. If you are starting brand new there should be no issues. If you have used the old SP.Writer Excel tool in the past, those files will also be compatible.
via
BIMsets – BIM Source

If you have any other issues you can contact the developer.

Heads-up:
https://twitter.com/MattBeNimble/status/542825879919792129
and

Download:
v2 of the Style Guide is here
and 2.1 here
http://revit.autodesk.com/Library/RMCSG/Revit_Model_Content_Style_Guide_v2_1.zip
This is an extreme measure, but it will get everything fixed up and create a new Default Notebook for you. If you have some corruption or severe sync problems, it may break the me@onenote.com system for your account. Here’s how to fix it:

  1. Make sure you have copied or moved or backed up everything from your entire Default Notebook (the one where me@onenote emails usually go)
  2. Close the Notebook in the desktop app and close OneNote 2013. I would also recommend closing this notebook on any other devices that may have it open.
  3. Open OneDrive and navigate to your Documents folder
  4. Select the Default Notebook (usually “YourName’s Notebook“), rename it, and then delete it
  5. On you PC, go to the OneNote backup folder (something like C:UsersLuke JohnsonAppDataLocalMicrosoftOneNote15.0Backup) and move the folder relating to your now deleted Default Notebook somewhere else
  6. Everything is basically nice and clean now. How do we get a new Default Notebook?
  7. Go to your primary email alias for Microsoft (the one you just deleted the default notebook in) and send a test email to me@onenote.com – the content doesn’t really matter
  8. At this point, OneNote will create a new Default notebook for you, it will make a Quick Notes section, and it will place the email in as a new page. Everything should now be ‘back to normal’.
  9. Restart the desktop app and re-open the Notebook
  10. Open the Notebook on any other devices

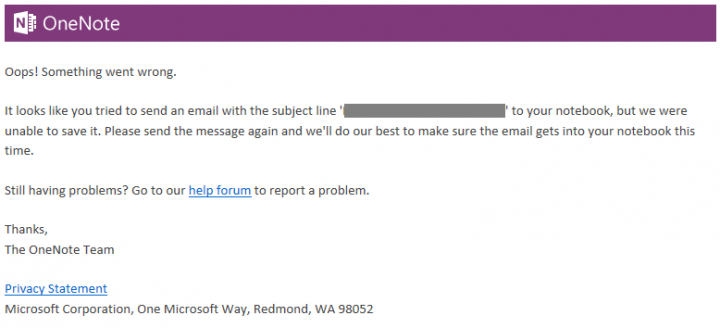
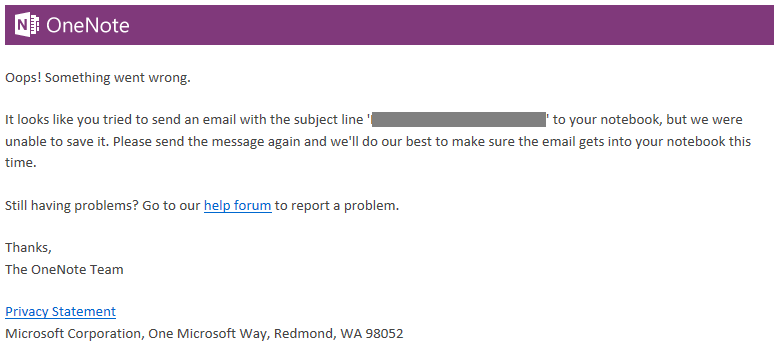
 Here is the full message you might get if your OneNote to email service is broken:
“We couldn’t save your email, please try again.”

Oops! Something went wrong.


It looks like you tried to send an email with the subject line ‘…………..’ to your notebook, but we were unable to save it. Please send the message again and we’ll do our best to make sure the email gets into your notebook this time.


Still having problems? Go to our help forum to report a problem.


Thanks,
The OneNote Team


Microsoft Corporation, One Microsoft Way, Redmond, WA 98052


Related question:

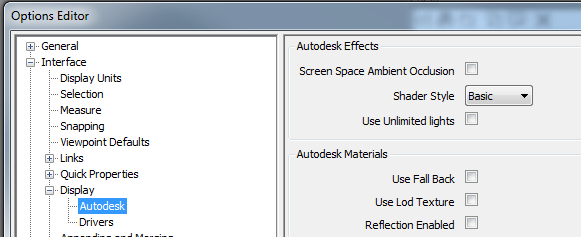
Sometimes it can be difficult to get Autodesk Rendering lights in Navisworks to work properly. When doing services coordination, you don’t really want to have to deal with placing new lights just so you can see things in the federated model. In this situation, you could try using these ‘Baseline’ settings:

  1. Options – Interface – Display – Autodesk – Shader Style, set to Basic
  2. Viewpoint set to Shaded
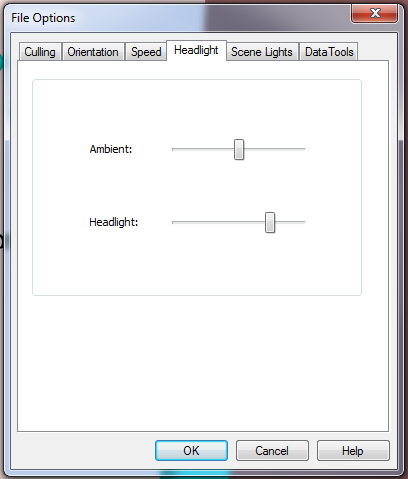
  3. Viewpoint lighting set to Headlight

These Headlight sliders seem to work pretty well:

Personally, I prefer using Gooch and Rendered with some nice lights if I can, but this can occasionally cause problems (depending on your Graphics Card and other material settings). That is when I fall back to the baseline settings above.

Here’s another way to make a 3D PDF, this time with all native Autodesk products.

  1. Use Virtual Agent to download Inventor Publisher 2015 trial
  2. Export a view from Revit (or 3dsMax, or AutoCAD, or Navisworks) as FBX that you would like to make into a 3D PDF
  3. Start Inventor Publisher
  4. New file
  5. Select the FBX
  6. Orient the imported FBX in the view and use the Viewcube to Set Current View as Front or Top as appropriate
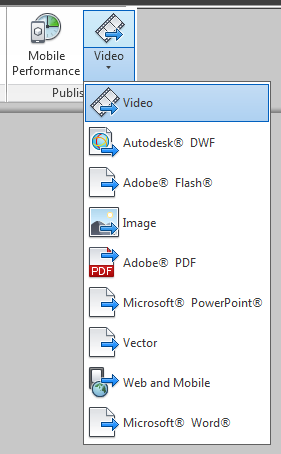
  7. On the Home Ribbon under Publish, choose Adobe PDF
  8. Select 3D PDF
  9. Save the file

It makes very decent quality 3D PDFs, with good colour representation.

Idea via:
http://forums.autodesk.com/t5/revit-architecture/3d-pdf/td-p/2843148

Note: If you install the non-Subscription Update Release onto an R2 Revit, you will probably find that the nice extra things like Site Designer disappear. If this happens to you, reinstall R2 from the Subscription page and your new features should come back. The Autodesk_Revit_2015_R2_UR5.sfx.exe should hopefully not ‘break’ your R2 install.
More at:
http://knowledge.autodesk.com/support/revit-products/downloads/caas/downloads/content/autodesk-revit-2015-update-release-5.html

Direct link:
http://download.autodesk.com/SWDLDDLM/Updates/RVT/UR5/Autodesk_Revit_2015_R2_UR5.sfx.exe

Readme:
http://download.autodesk.com/SWDLDDLM/Updates/RVT/UR5/Autodesk_Revit_2015_R2_UR5_Readme.htm

Enhancement List:
http://revit.downloads.autodesk.com/download/2015RVT_RTM/UR5/Enhancements_List_RVT_2015_UR5_forR2.pdf

EDIT: More links from Revit Clinic:
Direct links:
Revit 2015 UR5
Revit Arch 2015 UR5
Revit MEP 2015 UR5
Revit Struct 2015 UR5
Revit LT 2015 UR5
Installation Readme files and Enhancements Documentation are available on each product page.

UR5 enhancements:
Improvements made in Update Release 5 build (20141119_0715):
 

Autodesk® Revit® Architecture 2015 Updates
Improves resolving of the Revit Server saved paths.*
Corrects the behavior of placing families in a project when the family type selector is expanded.
Improves stability when loading families that contain data created by add-ins.
Improves stability when ungroup a group.
Improved stability when filter a schedule.
Improved stability when opening projects with bad dimensions.
Improves stability when making edits in the Sun Settings dialog.
Improves stability when deleting parts while modifying division.
Improves stability when canceling new label creation in family environment.
Improves stability when editing materials in families in a workshared environment.
Improves stability when clicking the Macro Manager tool in the Family Editor.
Improves stability when multiple users load families and undo their actions in a workshared file.
Improves stability when two users loaded families of the same name.
Corrects an issue with ceiling-hosted lights that caused the lights to be deleted when the ceiling was moved or copied.*
Corrected an issue related to placement of face-based families on certain part elements.*

Autodesk® Revit® MEP 2015 Updates
Improves stability when editing a conduit temporary dimension in an elevation view.

Autodesk® Revit® Structure 2015 Updates
Improves stability when exporting multi-rebar annotation into DWG format.*
Corrects an issue with incorrect warning and error messages for groups in design options with a group containing structural framing elements or columns.*
Fixed an issue with the generation of the analytical surface for a vertical floor and slab.

Autodesk® Revit® API 2015 Updates
Allows the ability to offset the end of a wire when it is connected to other elements.

A360 Drive (previously known as Autodesk 360 Sync) is a file storage tool that syncs with your Desktop and makes your files accessible on the web, you can access your files here:
https://360.autodesk.com

A360 (or A360 Team, or A360 Project) is a project and team collaboration tool, you can access it here:
http://autodesk360.com/
and your project ‘hub’ is here:
https://myhub.autodesk360.com/portal/

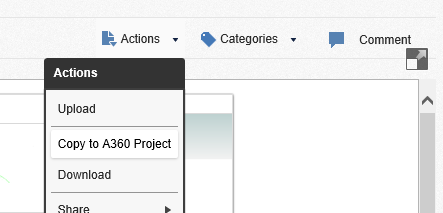
You can copy something from your A360 Drive to A360 by using this drop down list option:

You will then be allowed to choose an A360 project. This creates a copy, there is no real link between the A360 Drive version and A360 version of that file. Obviously, the viewing and discussion capabilities are more collaborative in A360, so you may wish to take advantage of that feature if you are an A360 subscriber.

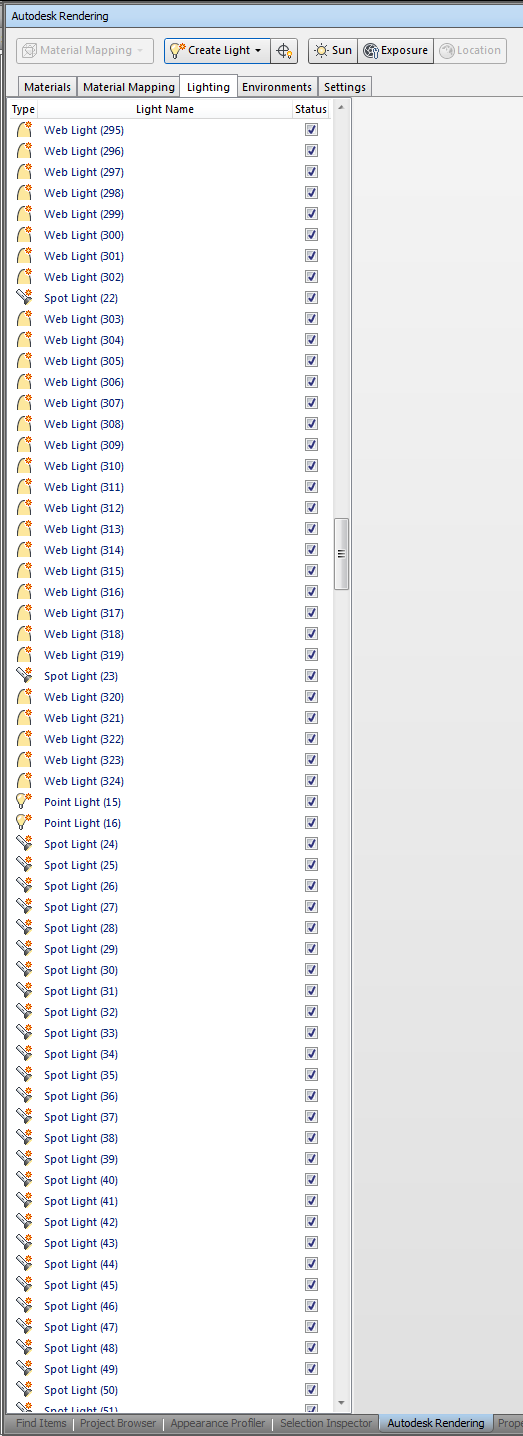
The problem – Appending a given NWC creates hundreds of lights in your NWF, as they were exported with light sources from Revit:


Update: scroll to the bottom of the Autodesk Rendering, Lights pane and select the last entry. Press and hold the Delete key on the keyboard – it will rapidly delete lights out of the Navisworks model.

One way to get rid of all these light sources is to use a macro recorder to delete them all. This is because Navisworks 2015 does not allow you to delete multiple light sources at once (sadface), and it doesn’t allow you to “Clear Palette” like Presenter did.

The immediate workaround is to use Shaded mode with Headlight only, as this ignores Light sources. Not pretty.

You could also down-save to 2013, delete the lights in Presenter, then save-up to 2015, but that seems a little too hacky, even for me.

Here’s the clicky mouse macro method:

  1.  Install MouseController (I used choco install mousecontroller)
  2. Open the problem NWF
  3. When it “Can’t resolve external references” for each .ies file, just click Ignore All
  4. Set up a macro to delete lights (see the Screencast below)
  5. My best result was using Time Stretch 3.0x and Repeat every 0.8 seconds
  6. Set it and walk away from your PC for a bit

Some other things to try:

  1. Look for a light source subcategory in your NWC export view
  2. Turn it off
  3. Re-export
  4. Append to a brand new NWF and see if the lights show up in Autodesk Rendering

Another thing to try:

  1. Navisworks Exporter settings/File Reader/Revit
  2. Untick “try and find missing materials”. Make sure that box is NOT checked.
  3. Also turn off light source as in step 1 above.
  4. Re-export
  5. Append to a brand new NWF and see if the lights show up in Autodesk Rendering

Some of the bugs that might show up:

Missing IES file references

Regenerating thumbnail image …

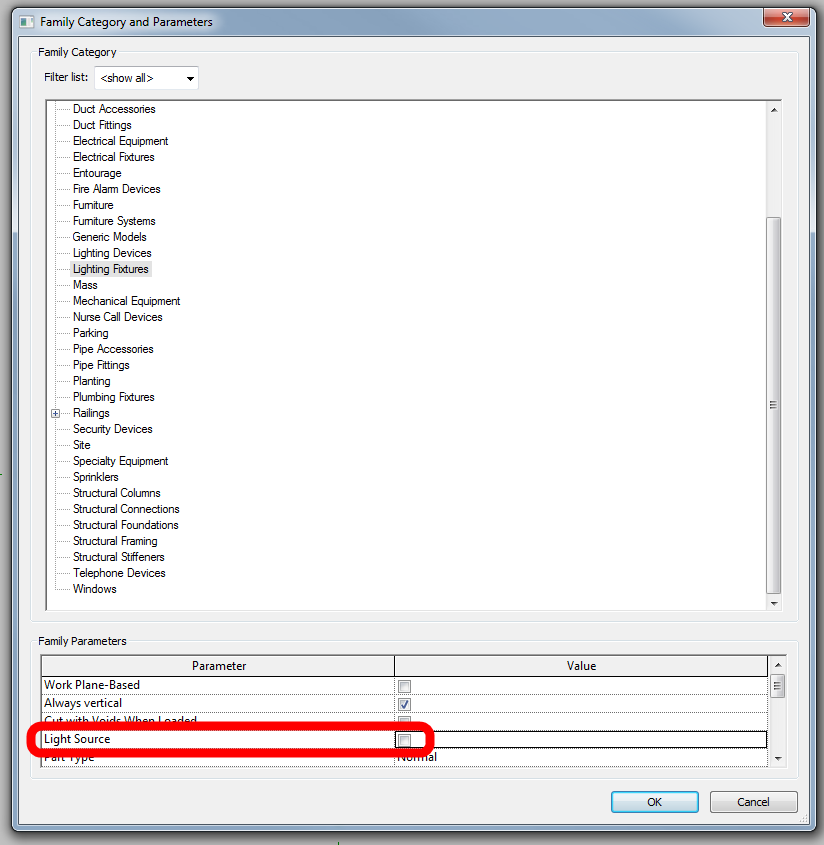
The only real fix (at this stage) is to open each Lighting Family and untick Light Source. Obviously, this is not really an option if you are doing lighting analysis or using the lights for rendering in Revit or 3dsMax etc:

Related forum links:
http://forums.augi.com/archive/index.php/t-98820.html

http://forums.augi.com/showthread.php?133133-Revit-light-fixture-light-source-geometry-won-t-go-away/page2

Visible Light Source – Autodesk Community