Here’s how:

  1. Filter and group your Schedule so that it shows the elements you want on a particular row
  2. Select that Row and pick Highlight in Model
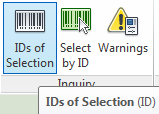
  3. After the elements are highlighed, you can start the “IDs of Selection” command. This will provide a text box with a list of every single element ID that was selected. You can then copy (Ctrl+C) and paste this into your desired application, like Excel or even a text file for consumption in Dynamo.
  4. Optional: Save the selection using typical Revit “Save Selection” option

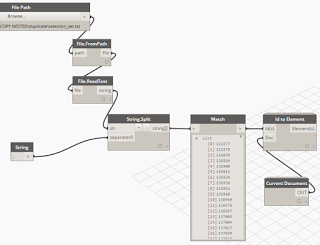
If you do copy the IDs to a text file, you can use a simple Dynamo definition like this to convert the Element IDs to actual elements. Obviously, once you have the element list in Dynamo, you can do lots of fun things with it.

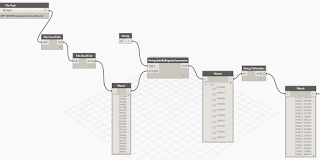
What if you have a list of line separated element IDs, like one per Excel row? You can use Dynamo to parse these to Elements, and even create a saved Selection Set too (thanks to Clockwork), like this:

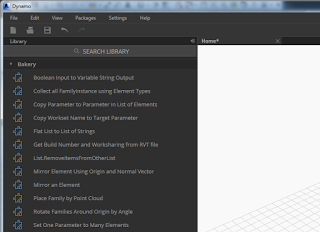
Honestly, I’m not that great at Dynamo and Python and the rest… hopefully one day? In the meantime I have been helped a lot by Andreas and Konrad and Julien and a few others on the forum. I’ve decided to combine my currently released custom nodes into a package called Bakery that I intend to add to and maintain. You can download it through the package manager.

Also, check out this forum post for a list of Dynamo resources (thanks to Sol Amour):
http://www.revitforum.org/dynamo-bim/24005-dynamo-learning-resources.html#post136270

Building Design:
Design Continuity; Building Performance Analysis throughout the Design Process
May 21, 2015 11am PDT / 2pm EDT

Live Webcast: Keys to a Successful BIM Pilot Series: Piloting your first BIM Program. See how one company did it right
May 27, 2015 11am PDT / 2pm EDT

Construction:
Reduce Time Spent on Construction Documentation
May 28, 2015 8am PDT / 11am EDT

Count on BIM: Exploring the productivity benefits of enhanced model based quantification techniques
June 10, 2015 8am PDT / 11am EDT

Conquering the chaos: How BIM can help improve project coordination
June 25, 2015 8am PDT / 11am EDT

Read more:
Building Design, Fabrication, Construction and Infrastructure Events Center

You may have to clean up or fix up a mechanical Revit model where the Duct Fittings have become out of sync with the system they are supposedly connected to. For some reason, the System Classification and System Type may not match up. There are at least two ways to fix this:

  • drag and rejoin one of the connectors to the correct system. The system should regenerate.
  • Cut one of the problem elements, then Paste Align – Same Place. After this, you will need to use Connect Into to get the element connected with the system. You might find that doing this on one Fitting will force a regeneration on the entire system, fixing all Duct Fittings with this problem at once.

I have put together a quick screencast for each of these methods:


If you have another way of fixing these problems, feel free to comment. Thanks!

At various points in a BIM project, Revit models may get passed from one consultant or contractor to the next. After this handover occurs, a change in project requirements may mean that the recommended modelling practice has now slightly shifted. For example, in healthcare and hospital projects, host and nested Revit family arrangements are often used to control repeating layouts, such as in wet areas and other typical rooms.

Often, many of these nested fixture families are also Shared families, meaning they can be scheduled and accurately counted in Revit schedules.

However, what if a contractor needs access to some of these nested families in their own model? For example, what if a plumbing contractor wants to copy all nested plumbing fixtures into their own model, perhaps to add parameters or generate maintenance schedules for FM?

There are a few different ways to go here, with varying degrees of hackiness and/or gracefulness. An extremely hacky way to go might be to export IFC, open IFC to get each of these nested families as their own instances. Or, you could use Copy/Monitor. When using Batch Copy, each family gets emancipated from its original host family. It certainly should be used with care, as some things don’t work especially well… Like instance parameters aren’t really copied across, and you may end up with some duplicated elements. But for the most part, as a built-in Revit solution, it can do a decent job. I put together a brief workflow on how you might go about this process, and you can download it here.

As usual, test the workflow thoroughly before implementing it, and use at your own risk.

Oh, I wanted to mention yet another way this could be done… with Dynamo. I recently developed a solution that can free nested families for an entire rvt at once, including:

  • create new instances of all nested families of a desired category in correct locations
  • set original element IDs to original and new instances
  • set a parameter to determine if an element was ‘original’ or newly created by the script
  • rotate instances to match original
  • mirror or flip if necessary
  • copy all parameters from original elements to new instances
  • select top level elements for deletion

But that’s a subject for another post… 🙂

If you are having trouble getting a particular NWC uploaded to Glue, here are some steps to try:

  • you can open it in Navisworks, export to DWF and try Uploading that using the Glue client
  • you could open it in Navisworks 2015 and then Glue It from there. Unfortunately, there is no ‘Glue It’ addin available for Navisworks 2016. As I understand it, the new Glue sync features in 2016 mean that a simple Glue It button for Navisworks will not be available in Navisworks 2016.

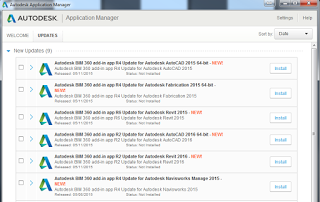
Also, there are new addins available today (11 May 2015):

Go to this link to download BIM360 addins (you will need to sign in to Glue first, then use the link below):
https://b2.autodesk.com/downloads/unknown

More at: To Install BIM 360 Add-Ins | BIM 360 Glue | Autodesk Knowledge Network