Download it here, quick summary below:

  • IfcOpenShell is now our preferred render engine
  • new feature in this release is the “model checking” capability. We implemented model checking in two places: before data is stored in the database, and before a notification to a remote service is send out
  • With the ‘send notification’ features (find it under settings) an e-mail is send out to project members every time a new revision is checked-in
  • new version of BIMserver is already started and progressing very nice

Read the whole article:
Open source BIMserver | Release 1.3.0 final

via https://twitter.com/bimserver/status/464504361700167680

I have previously discussed going from Navisworks to Revit using FBX – 3dsMax – SAT. However, maybe we can do this without 3dsMax. Did you know that vanilla AutoCAD has a FBXIMPORT command?

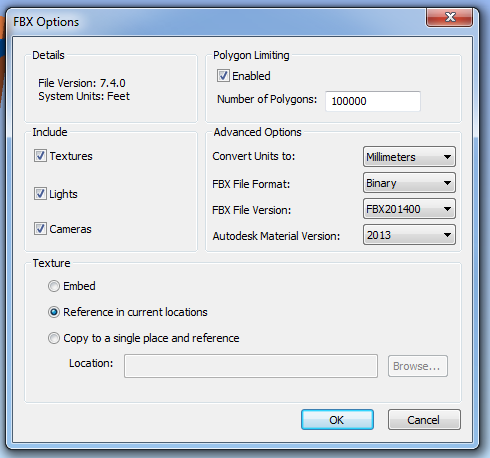
1) Export FBX from Navisworks – it will ignore Section clipping planes, but it will respect the Hide/Required setting of the view. You can limit polygons (advised for big models)

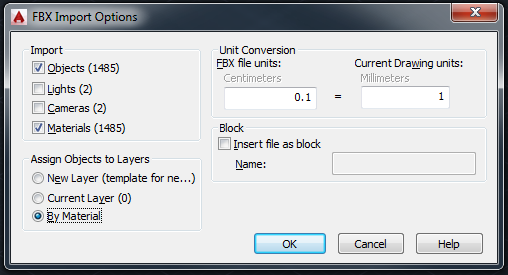
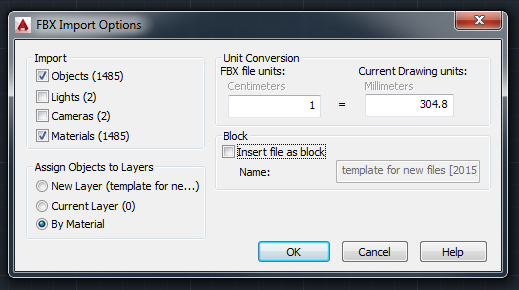
2) FBXIMPORT in AutoCAD – untick Cameras and Block options as they can be problematic.
Then save DWG. (Note – see below for correct 1:304.8 import scale)
EDIT: If using Navisworks 2015 FBX export to version 2014, with Advanced Options units set to millimeters, you can import to AutoCAD 2015 with 1:1 scale factor (using latest service packs)

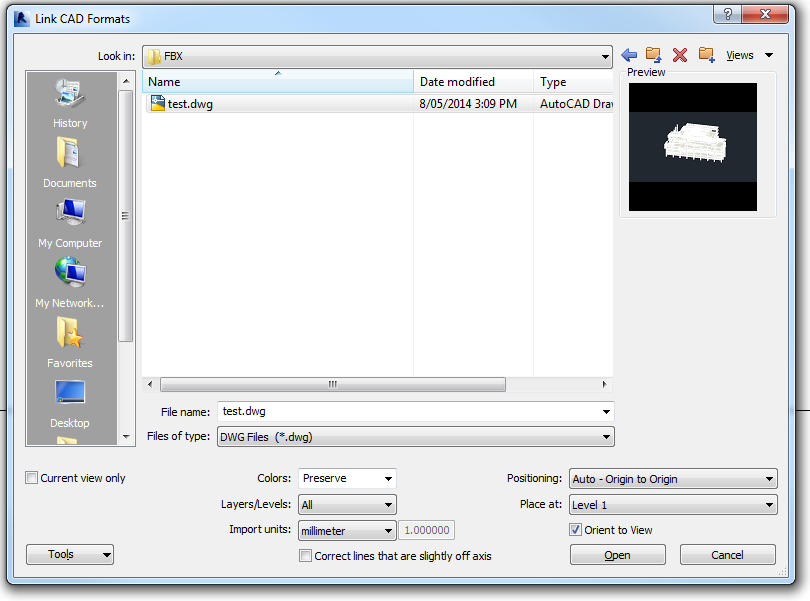
3) Open Revit and Link in the DWG.
For this example, I used Origin to Origin as I wanted to try round-tripping back to Navisworks.

Once I exported the NWC and put it back into Revit, I noticed the file was out of scale. Now, I experimented with a few different scale settings, but everytime it was a scale of about 30 or 300 wrong. 1 foot = exactly 304.8 mm. Evidently, the “internal” units of an FBX are feet. So, when we import to AutoCAD we need to use this setting to translate to mm:

This time, when I exported the Revit view to a NWC, and then appended it back to Navisworks – it can came back in exactly the right place. This workflow relies on using the internal Revit Zero point and Origin to Origin linking.

There you go – now you can roundtrip any mesh geometry from Navisworks to AutoCAD to Revit and back to Navisworks 🙂

The DevTV videos are one of the best ways for new Revit programmers to start to get their head around things, and they have been updated for Revit 2015. Links:

  • DevTV Introduction to Revit 2015 Programming Part 1 – a short video tutorial demonstrating the basic steps to start developing with the Revit .NET API – View online | Download
  • DevTV Introduction to Revit 2015 Programming Part 2 – a short video tutorial demonstrating selection and filtering API through a Room Renumbering application – View online | Download
  • Revit 2015 API Labs

via
The Building Coder: On Handling Warnings and Failures

Let’s say you have a nested family with a formula driven parameter, something like =Length/10. You want to expose this to a host family and make it a Reporting Parameter, but that option seems to be grayed out (firstly, because its formula driven, secondly because its a nested family):

Here’s what to do:

  1. Remove the formula from the nested family and reload it (so you can now apply a parameter to it in the host)
  2. Add an instance parameter as per the image above
  3. Close this dialog by clicking OK
  4. Go to the Family Types dialog
  5. Select and Modify that parameter
  6. Now you can tick the Reporting box
  7. Edit the nested family again – reinstate the formula
  8. Reload the family
  9. You now have a Reporting parameter in the host family that tells you the value of a nested, formula driven parameter

Another workaround that may assist with reporting parameter restrictions is to:

  1. Save the family and close it
  2. Rename with extension .rft
  3. Make a new family based on this “template”
  4. Maybe the problems you were having with Reporting parameter restrictions are gone, but you might have mixed results