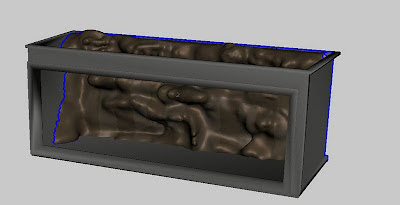
This is an example of an family with an array that kinda mimics a curtain that opens and closes.
http://revitlog.nl/images/stories/families/82_meubels/82_gordijn.rfa

However – it is also a good example of what happens if you don’t create a fix for when an array drops to only one item.  You need to formulaically stop this from happening, by doing something like this:

Applied Array=if(Calculated Array>1,Calculated Array,2)

(where Applied Array is the parameter applied to the physical array in the family, and Calculated Array is the number that is formulaically derived)

Family via
Google Translate
of
http://revitlog.nl/index.php?option=com_content&view=article&id=395:11-gordijn-op-en-dicht&catid=113:logs-april-2012&Itemid=89

You have installed the Metric content for Autodesk Revit 2013 and found that you are missing two railing template files.

Solution

The two missing template files are available for download below:

Metric_Support.rft (rft – 240Kb)
Metric_Termination.rft (rft – 240Kb)

via
Autodesk – Autodesk Revit Architecture Services & Support – Missing railing templates in metric content

There are quite a few different content ‘standards’ being bandied about lately, from ANZRS to the Revit Model Content Style Guide.

There is a partial list of these content standards at the page below:
Content|Studio Blog: BIM Show Live – Content from inception to reality

Direct link to the current Autodesk Revit Model Content Style Guide:
http://revit.autodesk.com/Library/RMCSG/Revit_Model_Content_Style_Guide_v2_1.zip

I was speaking to CJ from Crossley Architects yesterday.  He said that he had been experimenting with creating freeform rocks in Meshmixer and bringing them into Revit.  Here is an example of what he has produced:

 As part of his workflow, he first of all used the STL Exporter add-in to export the fishtank context from Revit.  This ensures that sculpting work is done in a way that can be accurately scaled and proportioned.

After importing the STL context into Meshmixer:

  1. Bring a plane object (Import Plane) into Meshmixer and transform it to suit the tank wall that is to be sculpted.
  2. Do the freeform modelling in Meshmixer.
  3. Export to 3ds Max (see previous post).  Holes may need to be capped.
  4. Go from 3ds Max to a SAT file into a Revit family.

I’m glad to see that the Meshmixer organic workflow is getting some real-world Revit use!

Here is my previous post on Meshmixer:
What Revit Wants: Freeform and organic modelling from MeshMixer to 3ds Max to Revit

BIM Coordinator for AutoCAD® Civil 3D® and Autodesk® Revit® software is a free* technology preview that assists project team members with building and site grids.

Go to:
Autodesk Labs Utilities BIM Coordinator for AutoCAD Civil 3D and Revit

Heads up from BIM Apps:
http://bimapps.typepad.com/bim-apps/2012/05/share-coordinates-between-autocad-civil-3d-and-revit-structure.html

Interesting tip from the Autodesk BIM Blog – after you upgrade Railings to 2013, the actual extended parameter values are not populated until you Duplicate the upgraded railing types…see image.

This goes for upgraded Project Templates too – you won’t see the additional parameters until the types are Duplicated.

via
Google Translate
of
http://bimblog.typepad.com/autodesk_bim_blog/2012/05/erweiterte-typenparameter-von-gel%C3%A4ndern-aus-vorg%C3%A4ngerversionen-anzeigen-revit-2013.html

In Revit 2013, the Properties Palette does not expose the Graphic Display Options button in the Family Environment:

However, you can still get to the Graphic Display Options by using the View Control Bar:

This is handy, because it lets you use the nice Transparency slider while editing complex families or when tracing over Raster Images.

On a side note, if you ever want to know what each part of the User Interface in Revit is officially called, check out this link.

In the past, a workflow was available in which you could rename older RFT files to RFA, then upgrade them to the most recent version of Revit (perhaps using a batch upgrade tool), then rename back to RFT.  This was one way to upgrade your customized family template files.  This method does not always work in Revit 2013, due to newly introduced restrictions.

There are still a few ways to upgrade your Template files, however:

  • Use the free File Upgrader add-in.
  • Make a new Family using the RFT file that you want to upgrade.  Then, save as RFA.  Navigate to the folder, then rename the RFA to RFT.  This is a slow, one-at-a-time method.

In some cases, you can still use the original workflow (rename the RFT to RFA and then open) – but this likely will only work on 2011 and older RFT files, not 2012 RFTs.

Confused yet?

Please comment if you have any tips or workarounds related to upgrading Template files.