I have been using Foxit Reader for a number of years. It allowed me to print PDFs with a custom scale of 50%. In Australia, we often print A1 size drawings to A3 paper for in-office review, so Foxit was a better alternative than Adobe Reader. It was also nice and fast.
However, after installing Foxit version 5, I was very disappointed. Custom scale printing seems to have disappeared! And there was silly looking themes as well! You can even turn on a Ribbon!
Looks like PDF-XChange Viewer has come to the rescue. As with other free PDF viewing programs it is crippled a little bit compared to the Pro version. However, it has some nice features:
Custom scale printing
Ability to save PDF as an image direct from the viewer (File – Export – Export to Image)
Ability to stamp / markup PDF files and then save them (and that’s without using Pro version)
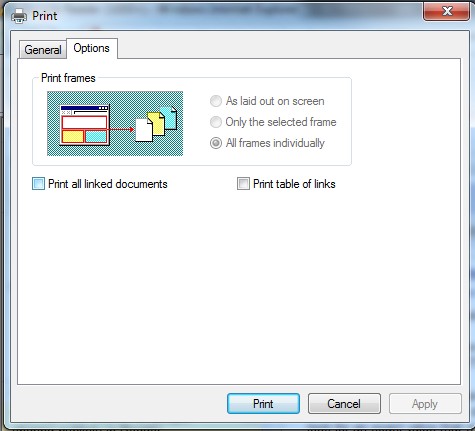
If you want to print all the .htm or .html files in a folder, you could use the function in Internet Explorer that allows you to ‘Print All Linked Documents’:
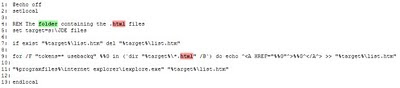
To use this, you need to have a HTML document that links to all of the .htm or .html files in the folder. To automatically generate such a document, you could use this script (you will need to copy the text to a .cmd file, and change the ‘target’ to the folder you want to make a list.htm for):
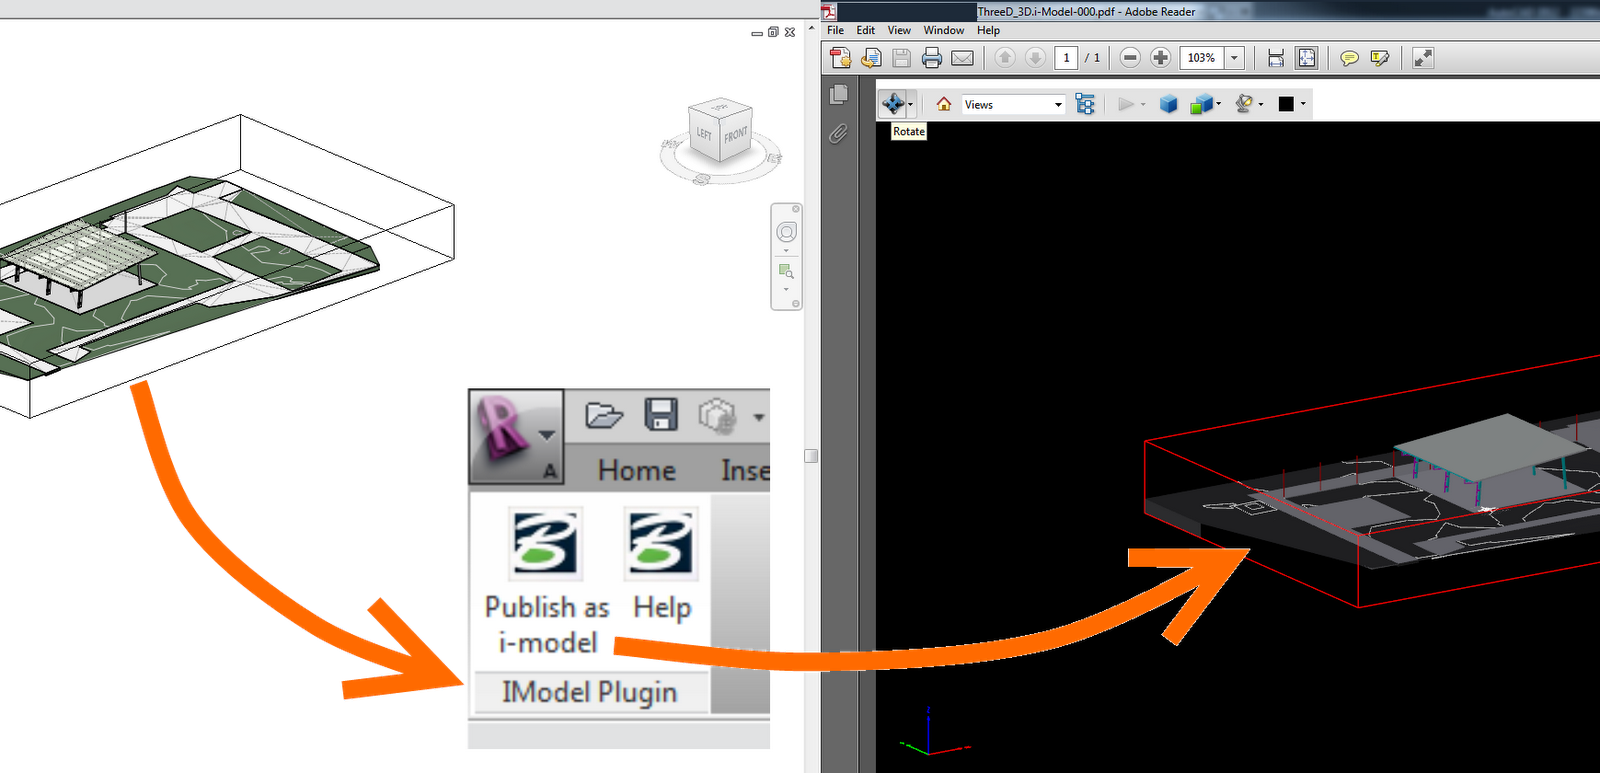
Sometimes you will have access to a PDF file, but not to the original DWG. Is there any way you can get the base vector data, such as lines and arcs, out of the PDF and back into a DWG? Yes, there is – and it’s free.
Download and install each of the above tools. Make your life easy and stick with the 32-bit version of everything.
Once you have installed them all, open a PDF file using GSView. GSView is usually located in C:Program Filesghostgumgsviewgsview32.exe
With your PDF open, take the following steps:
Click on ‘Media’ and set the correct paper size.
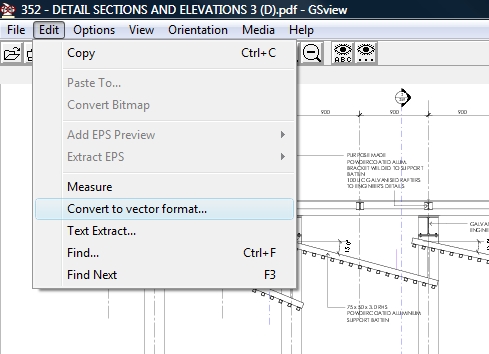
Go to ‘Edit’ and click on ‘Convert to vector format…’
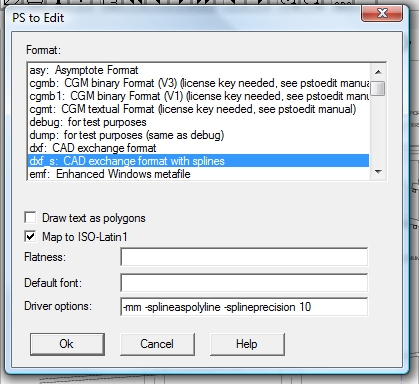
At the resulting PS to Edit dialog box, choose dxf_s, and add the following Driver options: -mm -splineaspolyline -splineprecision 10
(I have found these settings to work quite well)
Click OK.
Select the page in the next dialog (usually only 1), press OK, and then pick a place to save the DXF file.
Click Save.
Open in AutoCAD and scale to correct size.
Save as DWG.
If you have any problems, feel free to comment and I will try and help you out. If you intend to import the DWG into Revit, keep in mind that Revit is not very impressed with very short lines.
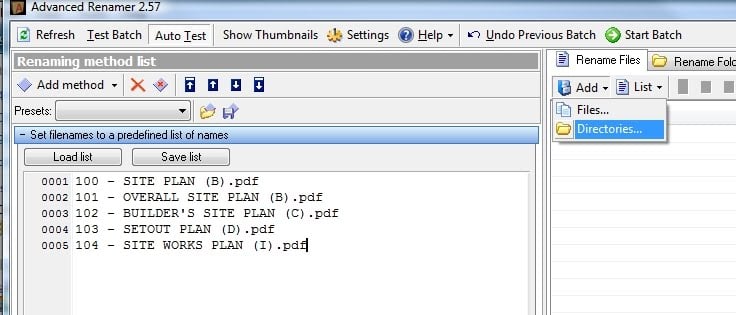
Let’s say you have printed a bunch of PDFs to a folder, hopefully using one of the techniques described in my previous two posts (links below), and now you want to rename them to match the data exported from a Revit schedule? Part 1 Part 2
Here is one method:
Create a Revit schedule with all the data you need.
Export the schedule, such that you have a file like this one (view the sample)
Open the exported Revit schedule in Excel. You will need to choose file type – ‘All files’ and go through the steps to convert to the schedule to a spreadsheet.
Copy all the cells from the Revit schedule spreadsheet and paste into the cell in the Rename-files-using-schedule-data.xls file
You will notice that the 3 columns have been joined into one in Column A.
Copy the data from Column A and go to a new blank worksheet (can be in the same file).
Paste the data using the ‘Paste Special’ command and choose ‘values’. This data is now ‘clean’ and can be used for renaming purposes.
I traditionally use Free PDF Tools from PDFill for this kind of task, but there is a download available today at giveawayoftheday.com for Foxonic Professional 4.0..
There is still 8 hours remaining to download and activate the program…
Sometimes you will want to produce a large set of PDFs where each drawing sheet is in its own PDF file. You also want the PDFs to be automatically named and created. There are a number of ways to accomplish this – here is the simple way that I use.
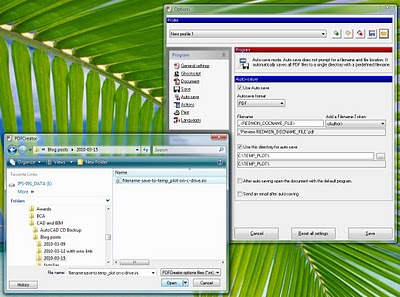
Download and install PDFCreator ( if you don’t have it already)
Go to Printer – Options, and then ‘load’ the settings from the ini file you downloaded (use the little folder at the top of the window to load settings), then hit ‘Save’ at the bottom of the window.
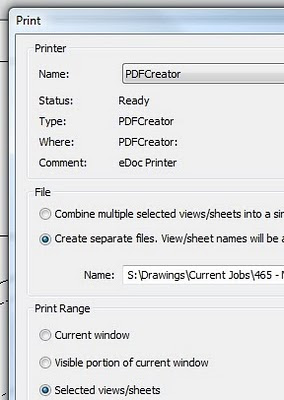
Now, when you print from Revit, be sure to choose the options to ‘Create separate files…’
When you click ‘Print’ in Revit, each sheet will be sent individually to PDFCreator. PDFCreator will then use the View or Sheet name (as per the REDMON_DOCNAME_FILE setting) to Autosave the PDFs to a specified folder – the above ini file uses C:TEMP_PLOT by default.
You can tweak these settings to your own individual taste – you may want to change the Autosave folder, for example. Revit wants you to work efficiently, and it wants you to maximise the value of the data inherent to the BIM model. In this case, we leverage the View/Sheet name to automatically name the PDF files. But what if you want to modify the filenames – perhaps adding a prefix or suffix to all PDF filenames? Well, you will just have to subscribe and wait for the next post…
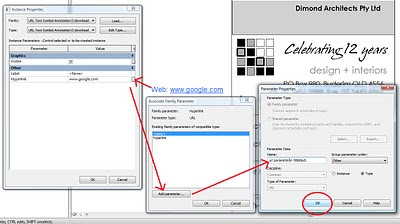
No doubt you issue many PDF files to consultants, Clients, Builders and the like. Why not add a URL link to your titleblock, so that anyone receiving your PDF files can jump directly to your webpage?
Its as simple as adding a parameter of type:URL into your titleblock.
To make it even easier for you, I have created a Generic Annotation family with a URL parameter inside it. Simply load this family into your titleblock, then link the parameter from it to a parameter in your titleblock (see image).