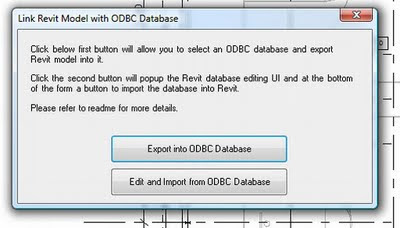
As a follow up to my previous post (Exposing the Revit Database), I will now explain how to install and use the RvtMgdDbg add-in for Revit, which allows you to “Snoop” the Revit database.
What does RvtMgdDbg really stand for? ‘Rvt stands for Revit, Mgd for Managed, and Dbg for Debug.’

It is most commonly used by programmers in the Revit API. You may find it useful, however, in just understanding the structure of the database. You can also use it to find information that otherwise may be very difficult to obtain.

How do you get this RvtMgdDbg, and how do you make it work?

It’s not too difficult:

  1. Download the RevitAPI_2010_Webcast.zip file (I got this link from The Building Coder) (or if you are part of the ADN, download from 2010 alpha version).
  2. Extract the RevitAPI_2010_Webcast.zip file.
  3. Go in to the RvtMgdDbg_0504 2009 subfolder. Then, double click the RvtMgdDbg2008.sln file.
  4. If your PC is set up correctly, Microsoft Visual Studio Tools for Applications 2.0 should open up.
  5. Now, just click on the ‘Build’ menu, and then click ‘Build RvtMgdDbg2008’.
  6. If all goes well, you can now close Microsoft Visual Studio Tools for Applications 2.0.
  7. Go to the RvtMgdDbg_0504 2009bin folder. RvtMgdDbg.dll should be present in this folder.
  8. There are a few different ways to do the next couple of steps. I’ll just describe one simple way…
  9. Go to your C: drive and make a folder called RVTMGDDBG.
  10. Copy the RvtMgdDbg.dll file into the C:RVTMGDDBG folder.
  11. In your Revit program folder (usually C:Program FilesAutodesk Revit Architecture 2010Program), open the file Revit.ini
  12. Scroll down until you see the [ExternalApplications] subcategory.
  13. Check the EACount= value
  14. Change the EACount= value by increasing it by 1 (eg. if 2, change it to 3)
  15. After the final EAAssembly line (eg. EAAssembly1 or EAAssembly2 etc), add the following lines (you need to replace the question mark with your EACount= value PLUS 1):

EAClassName?=RvtMgdDbg.App
EAAssembly?=C:RVTMGDDBGRvtMgdDbg.dllThere you go! Close and save the Revit.ini file.Now, to try it out…
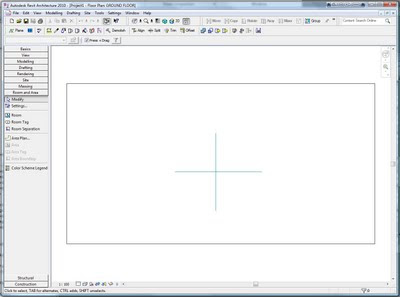
  1. Open Revit.
  2. Make a new project.
  3. Make a bit of wall.
  4. Select the wall you just made.
  5. In the Ribbon, go to the ‘Add-Ins’ tab.
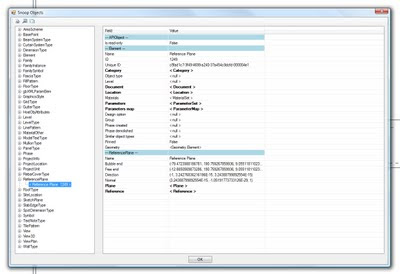
  6. Click Snoop Current Selection… button on the RvtMgdDbg panel.
  7. A window should come up showing you the properties of the wall you made.

Or, to browse most of the Revit database at once:

  1. On the RvtMgdDbg panel, click Snoop Db…
  2. The window should look something like this:


You can now browse around and learn how the database is put together.Keep in mind that there may be issues and bugs with this method. For instance, on one version of RvtMgdDbg that I was using, it seemed to cause Revit to prompt me to Save Coordinates (on a project with linked Revit models using shared coordinates) – even though I had not moved the linked models.So, be careful! You might want to use this on ‘test’ projects to start with. If you want to remove this add-in, simply reverse steps 15 and 14 in the first list (remove the lines you added to Revit.ini and reduce the EACount= value by 1).Feel free to comment or contact me if you have any problems or questions related to the above method.If you are really interested in the Revit API, head over to http://usa.autodesk.com/adsk/servlet/index?siteID=123112&id=2484975 and check out some of the material on that page.

If you really hate the ribbon (also widely known as DLM – Drunken Leprechaun Mode) in 2010, give this a go:

  1. Create this file:
    C:Program FilesAutodesk Revit Architecture 2010ProgramDebug.ini
  2. In this file, type:
    [DebugModes]
    Use2009UI=1

When you next open Revit, you will be using the ‘Classic’ UI.If the above is too much of a pain for you, go to http://forums.augi.com/showthread.php?t=103069&page=14 and get the AutoHotKey executable that does it for you (you will need to login).

If you want to use your 2009 Keyboard Shortcuts, make a copy of your 2009 keyboard shortcuts file in your 2010 program folder and rename it “KeyboardShortcutsOld.txt”. Restart Revit.

(it really does work)

Thanks to ArchTech and the AUGI Forums for this.Use this at your own risk, and keep in mind that Autodesk will not support issues specifically related to use of the ‘superseded’ user interface. Enjoy!

Ooh La La! Does Revit really want you to see what goes on under the hood? Well, if it can help you understand Revit better, then I would suggest that it does (because it will help you know how to ‘treat Revit right’). So, how do you do it?

There are two main ways:

  1. Using the RvtMgdDbg API add-on
    This is the most comprehensive method, in that it allows you to ‘Snoop’ virtually all parts of the Revit database.
  2. Using the RDBLink Tool from Autodesk Labs
    This method actually allows you to modify and then update Revit model element properties.

Both of these methods expose the Revit database, which allows you see how things really go together. The Revit database is really what makes everything else possible: from environmental analysis to the basic parametric nature of elements. It’s exciting stuff!I will do individual posts on how to setup and use both these methods in the near future.

Sometimes you really want to copy some model lines from a project RVT to a family RFA, but Revit says NO!

This is the workaround:

  1. In the Project, create detail lines that describe the elements you want to copy
  2. Make New Family – Generic Profile
  3. Copy the detail lines in the Project (Ctrl + C)
  4. Paste them into the Profile family (Ctrl + V)
  5. Open / create the other family you want to put those lines into
  6. Copy them from the Profile family into the other family (lets say it is a Planting family). They will appear as model lines in the Planting family. Yay!

Sure, this method has some limitations, but it is a valid workaround in a lot of situations.

Autodesk Impression 3 has been readily available for some time now. But would you like to know how to turn your Revit drawings into ‘sketchy’ looking plans?

Its simple:
1) Install Autodesk Impression 3 from Subscription (or the trial from here)

2) Open your Revit project, and open the view that you want to make ‘sketchy’

3) Export the view to a DWG file. Ensure that it is a ‘single’ DWG – untick the ‘Xref views on sheets’

4) Open AutoCAD and open the file you just exported.

Now, we want to make a CTB from the PCP, so do the following:

5) In AutoCAD, type ‘STYLESMANAGER’ – this opens the location for all your CTB files.

6) Double click the ‘Add-A-Plot Style Table Wizard’ shortcut

7) Select ‘Use a PCP or PC2 file’ and hit Next 
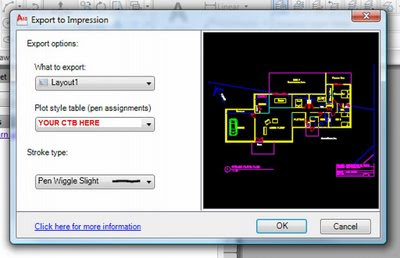
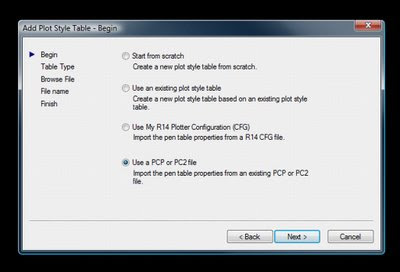
8) Select ‘Color-Dependent Plot Style Table’9) Browse for the PCP that Revit automatically created when you exported the DWG earlier and hit ‘Next’

10) Choose a filename for the new CTB file that you have createdOkay, now we go back to AutoCAD and export Impression. I found that the scaling was simpler direct from AutoCAD, rather than trying to put the DWG file straight into Impression.

11) In AutoCAD, you should still have the file open that you exported. Now, type ‘IMPRESSION’ and hit Enter.12) Under ‘What to Export’, choose ‘Layout1’
13) Choose your CTB under ‘Plot style table’14) I like the ‘Pen Wiggle Slight’ for ‘Stroke type’15) Hit ‘OK’ – Autodesk Impression will now open, and your file will look sketchy!!16) You could do more work in Impression, or you could just hit ‘File – Save As…’17) Choose PDF (if that’s what you like), then under Resolution, choose ‘Custom’ and type 300 dpi if you want decent quality. Type your File Name and hit OK.There you go! It seems like a lot of steps, but once you have done it a couple of times, you will very quickly be able to convert your Revit floor plans into sketchy drawings for presentation!These can be very useful early in the design process – if your drawings look ‘sketchy’, the Client may feel like you haven’t resolved everything without consulting them. Therefore, the Client may feel that you care more about them and their ideas.

Check out this link for some examples.

There is a nice, basic guide on using the Revit 2010 Macro Manager in the latest AUGIWorld Magazine.
(LINK UPDATED 14/03/2011)

Check it out if you are interested in the API.

Picture from AUGIWorld Magazine.

Once you get into Revit programming, check out The Building Coder.

There is also an article in the magazine on Autodesk Impression, if you are interested.

There are many ways to present a building in context (with trees, vehicles and other entourage) in Revit 2010, but they fall into two main categories – using a Shaded view or using a Rendered view. At Dimond Architects we use both methods, depending on the project and the situation.

We are currently working on a number of school projects. One such project is a large Multipurpose Building (meaning it can be used as a sports hall, theatre and the like) for a local private school. The Client wants the building to achieve an ‘iconic’ status. One of our staff members recently produced the rendered view below:
The above image was produced from Revit 2010 using some standard RPC. Some work was done in Photoshop (mainly on the sky).

Now, to shaded views – why would you want to use them?

  1. They can take less time to produce than rendered
  2. Indicates less ‘finality’ to the Client – conveys ideas without being heavy handed
  3. WYSIWYG – don’t need to worry about materials not being applied etc

The negatives? Shaded views can:

  1. Clog up your model
  2. Be hard to find content for.

The workarounds to the above two points:

  1. If detailed shaded views really slow things down for you, try this – make a new phase after the final construction phase. Call it ‘Drafting Phase 1’ or similar. Select the ‘detailed’ 3D objects (cars, trees, people) and set them to this phase. Now, set your shaded 3D presentation view to this phase. This stops Revit from thinking about and drawing those objects when you are working in the project generally.
  2. Content for shaded views can be found at Google’s 3D Warehouse. First, download some of the Sketchup models that you like the look of. In Revit, create a New-Generic Model family. Then, import the SKP file using Import CAD. Make sure the resulting geometry is of an appropriate size. Save the family and load it into your project. Heaps of shaded content is available for everyone!

Here’s a shaded view I worked on this week:

In some cases, you may need to use ‘Shaded’ instead of ‘Shaded with Edges’ (as the Sketchup files may present with a heap of edges – nasty).
This technique is not for everyone, and it certainly is not useful in every instance. But once you have some content in your library, it can be a very quick way to convey how a building looks in context.
Let me know what you thought of this tip – feel free to comment.

***applause*** (as I finish listening…)

I really enjoyed listening in to a Webcast through the New York City Revit User Group. Its the morning for me here in Australia, and it was a refreshing start to the day. Thanks to David Fano from Case Design, Inc (DesignReForm.net) for sharing his knowledge.

I was also quite excited to hear my name (Luke Johnson) credited for a tip on how to Orient View to a Plane…would you like to know how to do it? Like this:

  1. Shift + W to show the Steering Wheel
  2. Right-click on the Wheel and select ‘Orient to a Plane…’
  3. Select the Plane you want to Orient to.

No doubt this is something I learnt from a blog or from AUGI or somewhere…I recommend you check out the New York City Revit User Group and listen in on their next webcast.

We are all grateful for Update 1 for Revit 2010. But who in the blogosphere posted it first?

According to my research:

EDIT: Steve from Revit OpEd has quite rightly noted that he was actually the first at T minus 56 minutes (56 mins before Gregory). Touché!

  1. Gregory Arkin – Revit3D.com (first!)
  2. Harlan Brumm – The Revit Clinic (about 1 hr 41 mins later than the first)
  3. Jay Polding – revit in plain english (about 1 hr 59 mins later than the first)
  4. The Revit Kid! (about 2 hr 25 mins later than the first)
  5. Erik Egbertson – Inside the Factory (about 2 hr 47 mins later than the first)
  6. Jeremy Tammik – The Building Coder (about 3 hr later than the first)
  7. Erik Lewis – Who’s afraid of the Big Bad BIM? (about 12 hr 51 mins later than the first)

What’s the point of this? Well, it shows that ‘the system works’ and the word certainly gets out! It also shows who I subscribe to and how quick they were off the mark!Hopefully I have helped you connect to some of these great blogs.