At Virtual Built, we typically create a federated Revit model for every project we work on. This allows us to run a host of automated processes on the links, right from the federated file.

Recently we received a dataset for a high rise building. The Architect had used 5 typical linked ‘module’ files, copied throughout a master file.

Initially, I used a Dynamo script to collect all the link instances into a saved selection set. I could then copy / paste aligned the link instances into our federated Revit model:

Link Instances to Selection Set


The Problem

This works fine, but in this models there were also nested consultant links inside the Architectural linked modules. So we have:

Architectural container file -> Architectural module files -> Consultant nested links


We want:

Federated Central file -> Everything else (no nested links)


Next challenge: how can we quickly promote those nested links into our federated model? Well, we currently have the module files populated, so how can we leverage those positions to promote the nested links?


Promoting Nested Links

It is a bit hacky, but here is how I went about it. For each module file:

  1. Create an empty proxy file (New Revit project, no template)
  2. Open the Module file and resolve all link paths (so they are loaded)
  3. Set links to Attachment
  4. Copy / paste the link Instances from the module file (Level 0 or Base Level) into the empty file (Level 1, default level). You can use Dynamo graph above.
  5. Save the new proxy file as ‘ModuleContainer’ or similar. We know have a file that only has link instances in it.
  6. Open a detached copy of the Federated Central file (you can save as temporary copy if you like)
  7. Manage Links
    • Select the current Module file,
    • Reload From,
    • replace with the ModuleContainer you created. Once you have done all the modules, you are ready for binding as described below.

After populating the detached Federated Central file, we just need to Bind and then Copy / Paste the free instances:

  1. After load, Bind the ModuleContainer files to the detached Federated Central model
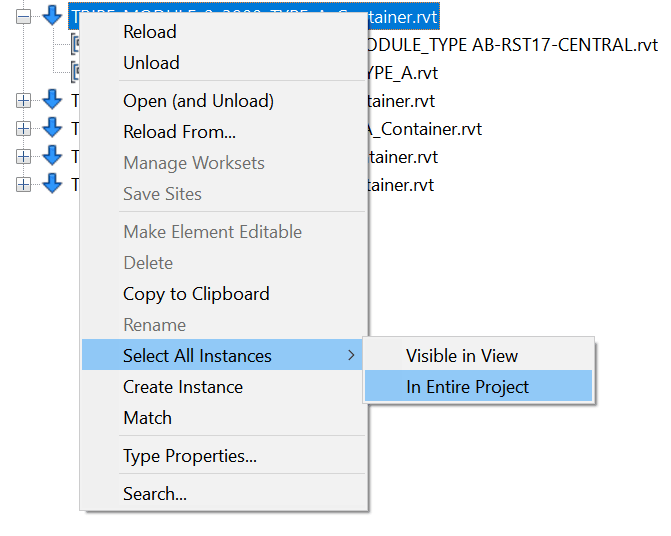
    1. To do this, right-click on the file in Revit Links in Project Browser

    2. Select All Instances – In Entire Project
    3. In the Ribbon, click Bind Link
    4. Untick Attached Details, Levels, Grids
    5. Click Remove Link when prompted
    6. Your nested links are now promoted!
  2. Optional: Ungroup all of those bound free instances (select all from Project Browser, Ungroup in Ribbon)
  3. Open the real Federated Central file
  4. Copy / paste the populated free instances from the detached Federated Model to the real Federated Model. Use the Dynamo script to collect them.
    Tip: Paste into a closed workset for better performance.
  5. Close the detached one, and sync the real one

The only thing we technically ‘broke’ or lost in this process is the module link->nested link relationship. So if someone decides to move one of the nested links in the module link, obviously that won’t replicate into the Federated Central file.

Hope this helps some of you out there building or dealing with large federated models.
 

Now that is a very Revit blog title, for sure 🙂

So I had a nice old Curtain Wall Panel Door family, which had a nested ‘container’ Generic Model family…

old2bversion-7701979

… in which I arrayed a shared, nested Door Panel Generic Model Family. Basically, it allowed for automatic stacking and sliding doors of varying numbers of panels living inside a Curtain Wall Panel Door, all working automatically. You could tag and edit the Comments and Mark of the nested Panel, but couldn’t change its visibility.

This means that things like slide direction arrows were a problem. I previously had some messy approach to arrows and offsets, but there were tied to the array so they were not flexible enough. As the only parameters that I could access for the shared, doubly-nested panel were Comments and Mark and Image, I couldn’t really use these in visibility parameters or formulas. I wanted to be able to turn off and on arrow annotation (for slide direction), and also set a Keynote or taggable text parameter for ‘FG’ (fixed glass)  or ‘SL’ (sliding) and so forth.

What’s the answer?

For one thing, I’m sorry but you probably have to ditch the array. It is simply too difficult to link through parameters to the elements inside an array, plus you probably really don’t want to.

So, save a backup of your ‘array’ family and rebuild it to use individually placed family instances with visibility parameters based on the ‘Array number’ you had before. You will have 2 panels that have their visibility set to a parameter with a formula like “Array number = 2”. You will have to duplicate all of your elements for each set, and constrain them all individually. This is a pain, but if you want to get the sub-element visibility control, you may think it is worth it. You will have to do this for as many array conditions as you want to cover (like 2, 3, 4 etc).

With this new ‘non array’ family, how do we set up the parameters?

We are going to drive all of it with a single integer value instance parameter in the shared panel family. Then we will tie that to element visibility parameters.

We will link that integer instance parameter through each level like so:

instance2bparam2blinking-9187315

… until we get to our ‘container’ that used to hold an array, but now holds individual family instances that we turn on and off with the array number. From here, we make a new instance parameter for each placed family instance, so we can drive the nested family. So for a three panel sliding family, we might have 3 instance parameters in the ‘container’, like:

  • Left Panel vis type (used for 2 and 3 panels)
  • Centre Panel vis type (used in the 3 panel type only)
  • Right Panel vis type (used for 2 and 3 panels)

Link these three parameters through to the Curtain Wall Door family (they can be instance or type here at the parent family). They are now accessible in the project. Essentially, we can select our Curtain Wall Door family, modify the 3 integers, which drives through all the way to our most deeply nested Panel family.

In the deeply nested Panel family, we use the integer to drive other things, like:

  • turn Plan and Elevation arrows on and off, 
  • set a Shared text parameter to a certain value (with a nested IF statement). Note: Add the Shared text parameter to a Generic Model tag and you can tag and schedule it in the project. 
  •  show / hide model geometry

Note: You can’t use Keynote here because we are not allowed to drive a Type Parameter with our instance parameter.

param_linked-6748504

Unfortunately, we can’t drive a Material parameter directly with the integer value. But, we can have multiple copies of geometry with different materials, and drive the Material visibility with the above process.

Finally, you can do this structure as many times as you like, but obviously the amount of integers you have to keep track of is going to get more and more difficult. You will also need some way of explaining to users what each integer actually does – like if I set the Left Panel to integer 1, what will show up and what will the tag value be? You will probably need some kind of explanatory schedule or document for this…

But there you have it, a framework for driving deeply nested shared family visibility. Congratulations if you made it to the end of the post 🙂

At various points in a BIM project, Revit models may get passed from one consultant or contractor to the next. After this handover occurs, a change in project requirements may mean that the recommended modelling practice has now slightly shifted. For example, in healthcare and hospital projects, host and nested Revit family arrangements are often used to control repeating layouts, such as in wet areas and other typical rooms.

Often, many of these nested fixture families are also Shared families, meaning they can be scheduled and accurately counted in Revit schedules.

However, what if a contractor needs access to some of these nested families in their own model? For example, what if a plumbing contractor wants to copy all nested plumbing fixtures into their own model, perhaps to add parameters or generate maintenance schedules for FM?

There are a few different ways to go here, with varying degrees of hackiness and/or gracefulness. An extremely hacky way to go might be to export IFC, open IFC to get each of these nested families as their own instances. Or, you could use Copy/Monitor. When using Batch Copy, each family gets emancipated from its original host family. It certainly should be used with care, as some things don’t work especially well… Like instance parameters aren’t really copied across, and you may end up with some duplicated elements. But for the most part, as a built-in Revit solution, it can do a decent job. I put together a brief workflow on how you might go about this process, and you can download it here.

As usual, test the workflow thoroughly before implementing it, and use at your own risk.

Oh, I wanted to mention yet another way this could be done… with Dynamo. I recently developed a solution that can free nested families for an entire rvt at once, including:

  • create new instances of all nested families of a desired category in correct locations
  • set original element IDs to original and new instances
  • set a parameter to determine if an element was ‘original’ or newly created by the script
  • rotate instances to match original
  • mirror or flip if necessary
  • copy all parameters from original elements to new instances
  • select top level elements for deletion

But that’s a subject for another post… 🙂

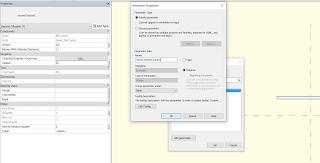
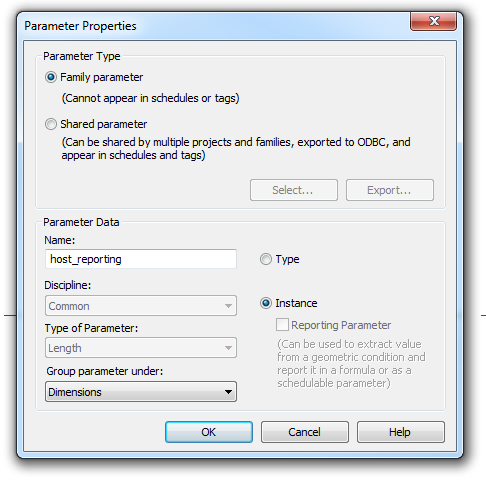
Let’s say you have a nested family with a formula driven parameter, something like =Length/10. You want to expose this to a host family and make it a Reporting Parameter, but that option seems to be grayed out (firstly, because its formula driven, secondly because its a nested family):

Here’s what to do:

  1. Remove the formula from the nested family and reload it (so you can now apply a parameter to it in the host)
  2. Add an instance parameter as per the image above
  3. Close this dialog by clicking OK
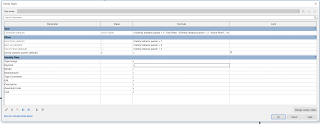
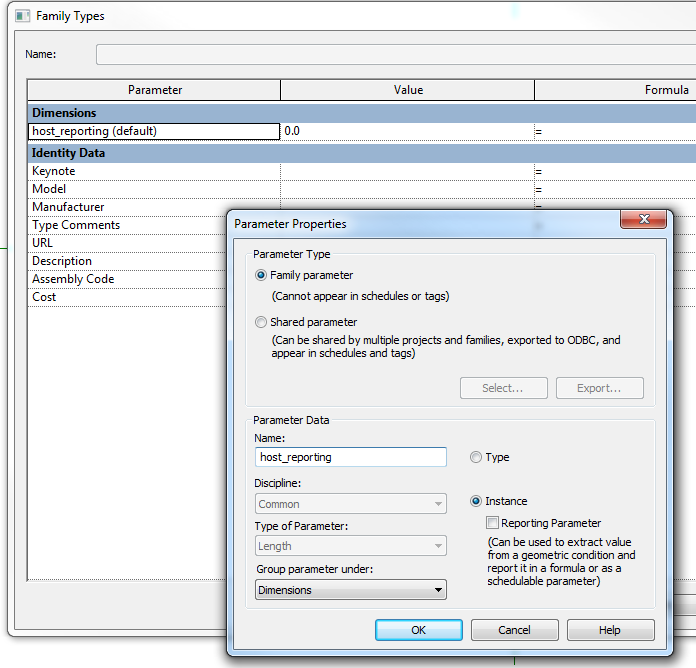
  4. Go to the Family Types dialog
  5. Select and Modify that parameter
  6. Now you can tick the Reporting box
  7. Edit the nested family again – reinstate the formula
  8. Reload the family
  9. You now have a Reporting parameter in the host family that tells you the value of a nested, formula driven parameter

Another workaround that may assist with reporting parameter restrictions is to:

  1. Save the family and close it
  2. Rename with extension .rft
  3. Make a new family based on this “template”
  4. Maybe the problems you were having with Reporting parameter restrictions are gone, but you might have mixed results

Dieter Vermeulen describes an interesting workaround – when using a Family Type parameter, how can you turn “off” the family without using Visibility parameters?

His solution is essentially to delete geometry out of a copy of the Nested instance, and leave only one Type in that blank instance.  Call it None, and it shows up in the Family Types list that way.

Read the whole post:
http://revitbeyondbim.wordpress.com/2013/12/03/how-to-set-family-type-parameter-to-none/

via
https://twitter.com/RevitbeyondBIM/status/407975518768594945

Credit to Doug Bowers:
In the Project Browser, expand the Families category, then expand the Profiles portion.  Locate the desired profile and expand it.  When you see the types displayed under that profile, right click on the desired type name and select “Type Properties…” from the menu.

This process is different for profile families from other families in that with other families you can simply highlight the nested family and pick on the Type Properties button in the Properties palette to access the parameters.  That process does not work with Profile families.

Read more
Passing Revit Parameters to Nested Profile Family | Applying Technology to Architecture

In a future post – swapping Profiles completely in Adaptive scenarios…

Ever wanted to get a Tag to pick up the hardcoded Elevation value given to a nested Family?  Then check out this great little thread and cool answer by Julien!

Answer:
You need to set a SP in the nested family.
Make the plate geometry attached to ref planes that are not the 2 from the template. Assign a SP to the distance between the RP at center of geometry and the RP that defines origin. SP will be by instance. Beware of directions for correct behavior when loaded in the host.
In the host family, add the same SP, select the plate, and in properties palette, look for the tiny button on the left. Click and choose the SP you’ve added. The insert point of the plate must be set to the ref level of the host.
Now you have the elevation of the plate driven by a SP in the host. Create a tag for this SP. You’re done. 

By Julien Benoit at
How can I get this parameter into a tag?

Very cool and advanced workaround by Jose Fandos over at Andekan:
We will route around this limitation by first inserting the annotation family into another face-based family, and using this intermediary face-based family to place the annotation the way we want into the final Lighting Fixture.
via
Symbols for Lighting Fixtures Showing in Plan – Andekan � Blog

He also demonstrates that some Lighting Fixtures will display the Maintain Annotation Orientation checkbox, but some will not, and how to work around this.

While discussing an interesting baluster-with-lighting family, Steve reminds us that “Revit hates switching between shared and not shared status.”

You have to follow a strict process of deleting and / or renaming affected families that exist in the project if you wish to switch them from Shared to non-Shared, or vice-versa.

If you want to read the rest of Steve’s, post, here is a link:
Revit OpEd: Dept. of Quirky – Baluster with Light Fixture