I have posted about Profiles and Adaptive components before, but more recently Tim Waldock put together a nice, detailed post on the subject over at this link.

In the post, he states:
You can host it on a divided path node; but don’t bother to convert it to a repeater because it cannot then be used to create a solid form.

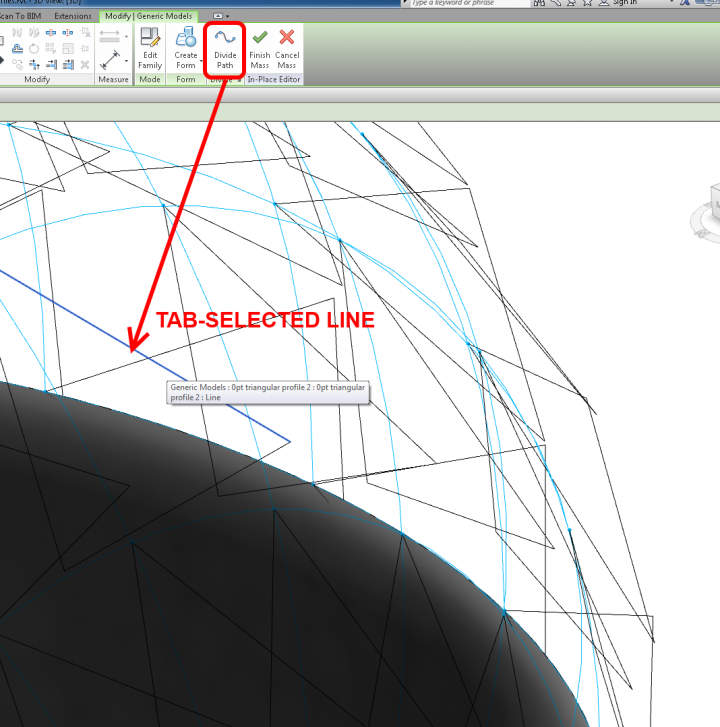
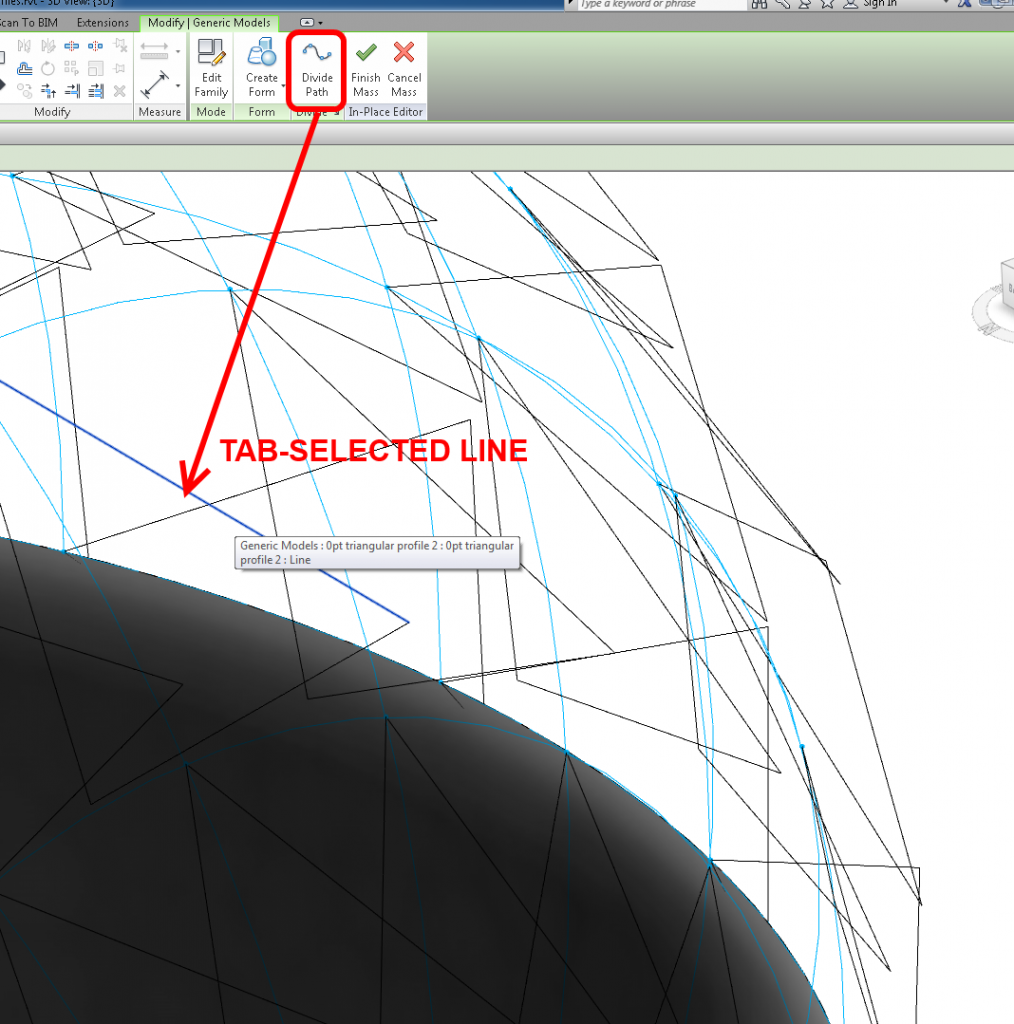
Technically, this is true.  If the element is not a Repeater – just a set of Profiles in an Adaptive, you can then Tab-select until you get the “closed” loop of lines, and use these to generate forms.  In other words, you aren’t selecting the Component – just the lines inside the component.  It can be a little fiddly, but it does work.  This is only really necessary if the normal workflow of selecting the Components and using Create Form does not work or is not available.

However, when it comes to Repeaters, even the above idea does not work.

Neither does “doubly nesting” another shared Component inside the Repeated Component.

One of the few things you can do is to select a Line in the Repeated Component and use the Divide tool.

You are then left with using the Repeater to set up a “rig” to place multi-point line families on or between, and using this skeleton to generate forms.  In some ways, it depends how parametric and adjustable you need the resulting form to be…

To make the swappable profile, use a Generic Model Adaptive template, but don’t add any Adaptive points.  Set the 2 reference planes in the template to “Defines Origin”.  You can parametrize this as much as you like (just don’t use Reference Lines – you need a closed profile of Model Lines as per any Profile).  Then, load this into another new Generic Model Adaptive family.  Host the Profile component on a hosted point (that is, one that has been placed on a line).  You will need one of these nested Profiles at each end of a line to control the form properly.

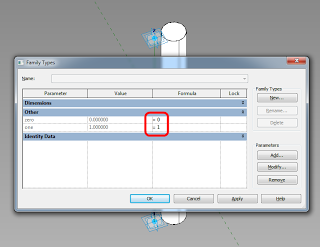
I am in the habit of using hosted points to host Profiles now.  For example, in a 2pt Adaptive with a Reference Line, I will add 2 hosted points to the Reference Line to carry the Profile instances.  These hosted points will be forced to the end points by using a parameter for zero, and another one for one, and forcing these values by putting 0 and 1 in the Formula box of the Family Types dialog (see image).

If you are using hosted points (make a new point, and drop it on a Reference Line – it will be come a small dot if it is hosted on the line), you can actually adjust the rotation Angle using a parameter – this makes it easy to rotate the profile around the hosting line.

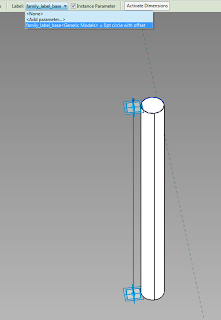
Here is the really cool part – you can apply a Label parameter to the Profile instance in the host family, and then directly swap Profile shapes (different nested RFAs or types in the same RFA, both work).  This even works from the Project Environment.

If you want to drive the profiles parametrically via the host family, you will have to make them un-Shared (otherwise you can’t map parameters from Type to Host).  You can swap between un-Shared and Shared profiles using the Label parameter.

Finally, to create the form, select the Profile families (the ones at each end of the Reference Line) and click Create Form.  Unlike other form creation scenarios, you do not want to select the “lines” by Tabbing through – you actually want to select the family itself.  The Label parameter will allow you to swap these families, which will drive the Form.

In the image below, all of these are one Adaptive family – with profiles swapped, and parameters adjusted, including rotation about the axis.


Download the above example here

Credit:  I’m fairly sure I read about this general idea somewhere… it was a while ago.

Credit to Doug Bowers:
In the Project Browser, expand the Families category, then expand the Profiles portion.  Locate the desired profile and expand it.  When you see the types displayed under that profile, right click on the desired type name and select “Type Properties…” from the menu.

This process is different for profile families from other families in that with other families you can simply highlight the nested family and pick on the Type Properties button in the Properties palette to access the parameters.  That process does not work with Profile families.

Read more
Passing Revit Parameters to Nested Profile Family | Applying Technology to Architecture

In a future post – swapping Profiles completely in Adaptive scenarios…

Did you know you can nest a Generic Model family in a Generic Model Adaptive family and create a form that allows the swapping of the Profile Type?

Post by gaby424
Use Adaptive Components
-you can draw profiles as simple shared generic models families (you don`t have to use profiles template)

-nest them in a generic model adaptive family and instanciate them 2 times in paralel planes
-put a family type parameter on their label fields (the same for bouth)
-carefully select only theirs segments for bouth the profiles using ctrl+click & TAB key (you can also just select the 2 instances but you can receive an error message in the next step)
-press create form button
-create voids to cut the ends as in your truss family
now play with changing the family type parameter (assuming you have more than one profile in family/project) 

via
2013: Chnage profile of sweep in nested family

Direct links:
James Hardie Revit curtain wall files 2013.zip
James Hardie Revit basic wall files 2013.zip
JH_Product_Profiles_Archive.zip (CAD DWGs)

(you *may* have to use Firefox with Downthemall to properly download from these links)

To recursively extract all of the DWGs from the last link, use the method described here.

via ACCEL HARDICONTENT | JAMES HARDIE

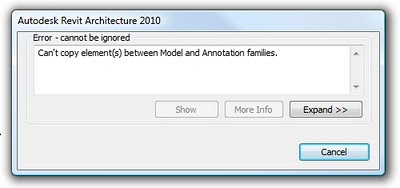
Revit doesn’t want you to copy lines between Annotation and Model Families (see below)

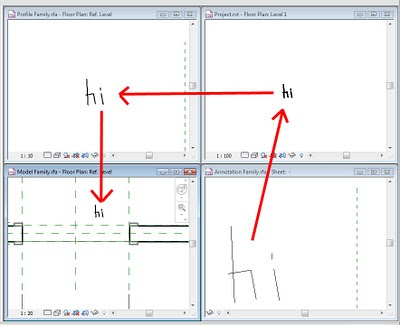
However, it can be done. This is the workflow to copy lines from Annotation to Model families:
  1. Copy lines from the Annotation Family to a plan view in a Project File.
  2. Copy the lines from the Project File to a Profile Family.
  3. Copy the lines from a Profile Family to the Model Family.


Pretty tricky workaround huh?