Box is great, and Box Sync is still the most robust file sync tool I have used for huge datasets. In BIM and VDC, our data is getting bigger, primarily due to the prevalence of point clouds. It is not uncommon to have 50gb of scan data for a single site scan. Moving that data to the cloud is challenging, and a lot of data processing and point cloud indexing work still happens on local machines. This means we have to upgrade our local storage devices (hard drives) to handle those tasks.

Recently I went about upgrading the storage on both my Workstation and my Laptop (a Metabox). I wanted a relatively huge platter drive in my workstation, and a relatively huge SSD in my laptop. I had a look online and after a bad experience with Umart, I ended up buying an 8tb Seagate Barracuda from MSY, and a 2tb Samsung 970 EVO from an eBay vendor. Both drives come with a 5 year warranty.

I’ll describe both of these upgrades in detail below
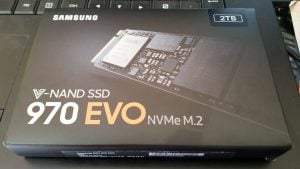
Samsung 970 EVO NVMe M.2 SSD 2tb
Seagate BarraCuda Pro 8tb – and a new SATA cable

Upgrading the Box Sync Hard Drive on my Workstation

Box recently released ‘Box Drive’, but it has a local cache limit of 25GB, which is quite useless for BIM in my opinion.  That means I still wanted to keep using the old faithful Box Sync.  But…

Box Sync does not allow you to move or change the folder location of its data (actually you can, but you only get one chance when you first install it).  After installing, you can’t move the Box Sync root folder without some kind of hacky tricks like pointers, and I didn’t want to go down that path.  We have been syncing Box to a folder on our E drives (secondary hard drive), and now it was time to upgrade that 2tb secondary drive to something bigger.

Here’s how I kept all my Box Sync data and upgraded the hard drive:

  1. Shut down computer
  2. Install the new hard drive (it was a simple SATA drive with data and power cables)
  3. Boot up the computer
  4. Initialise the drive with GPT Partition Style

    GPT Partition Style


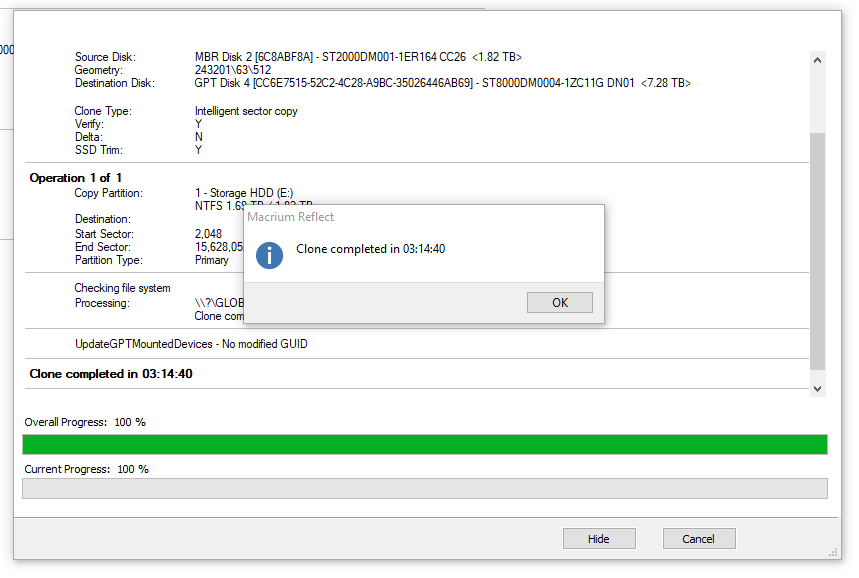
  5. Use Macrium Reflect to clone the partition from the old drive – including all Box data – to the new drive

    Cloning with Macrium Reflect
  6. Reboot into Safe Mode
  7. Use the video below to ‘swap the drive letters’. This step basically tricks Windows into using the new, larger hard drive (as the ‘E’ drive in my case). And Box Sync works perfectly, it just picks up where it left off.

Now we have lots of room for Box Sync and more:

New hard drive capacity

One final thing I had to do was “uncompress” the drive data. I had used NTFS compression with the previous drive but now I no longer needed the compression. Just go to the file or folder properties and untick “Compress this drive”.

Adding a New SSD into My Metabox Laptop

The next thing I did was add another SSD to my laptop. I looked up the manual and it said I had another M.2 2280 (22mm x 80mm) slot available. In the first slot I already had a Samsung 950 Pro 512gb as my primary drive. I did some research and decided to go with a Samsung EVO 970 2tb drive. After waiting patiently for my ebay order to arrive, I then cracked open the Metabox to install it.

Here is what I did:

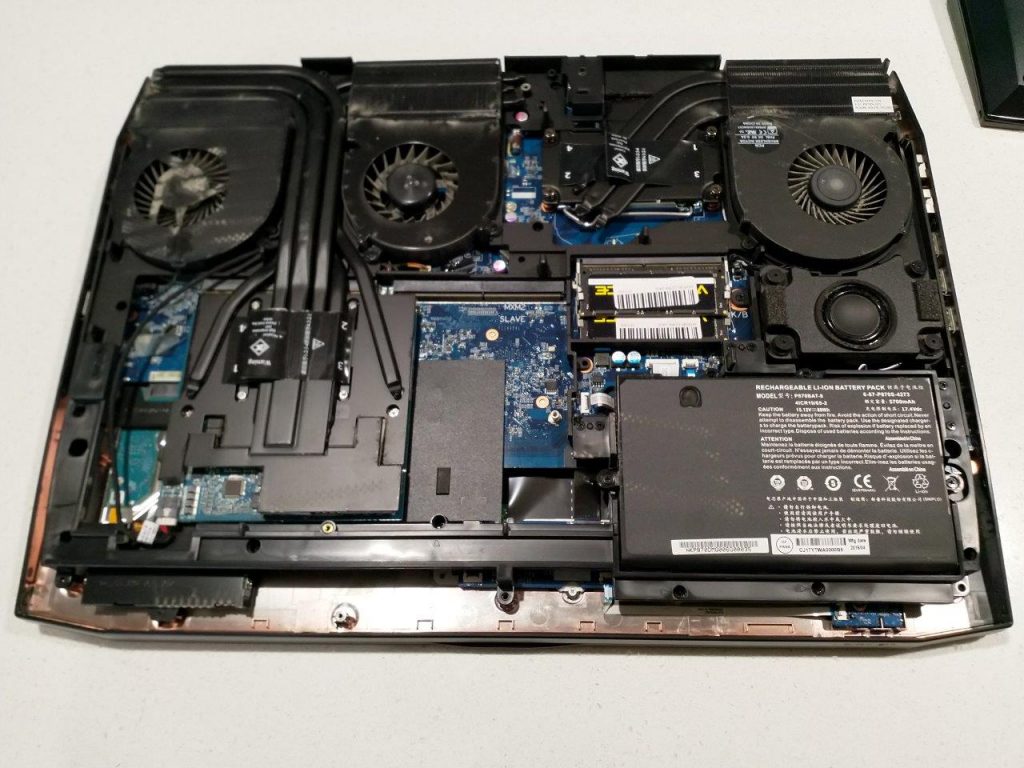
  1. Removed the back cover of the laptop

    This is under the back cover of the Metabox


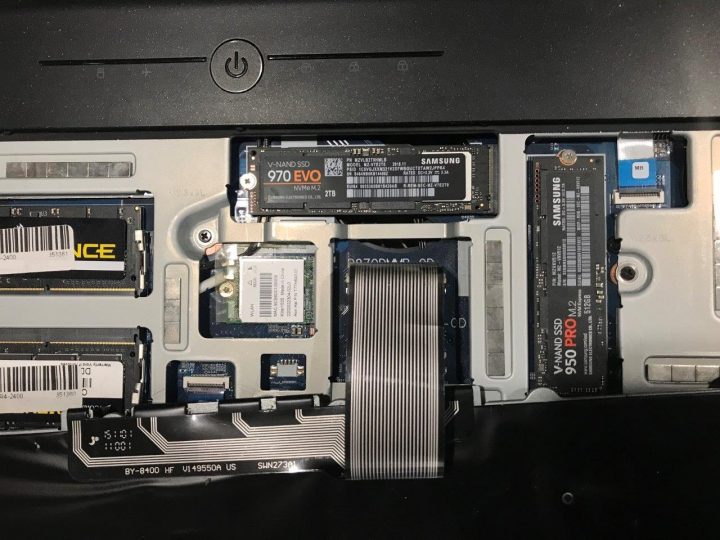
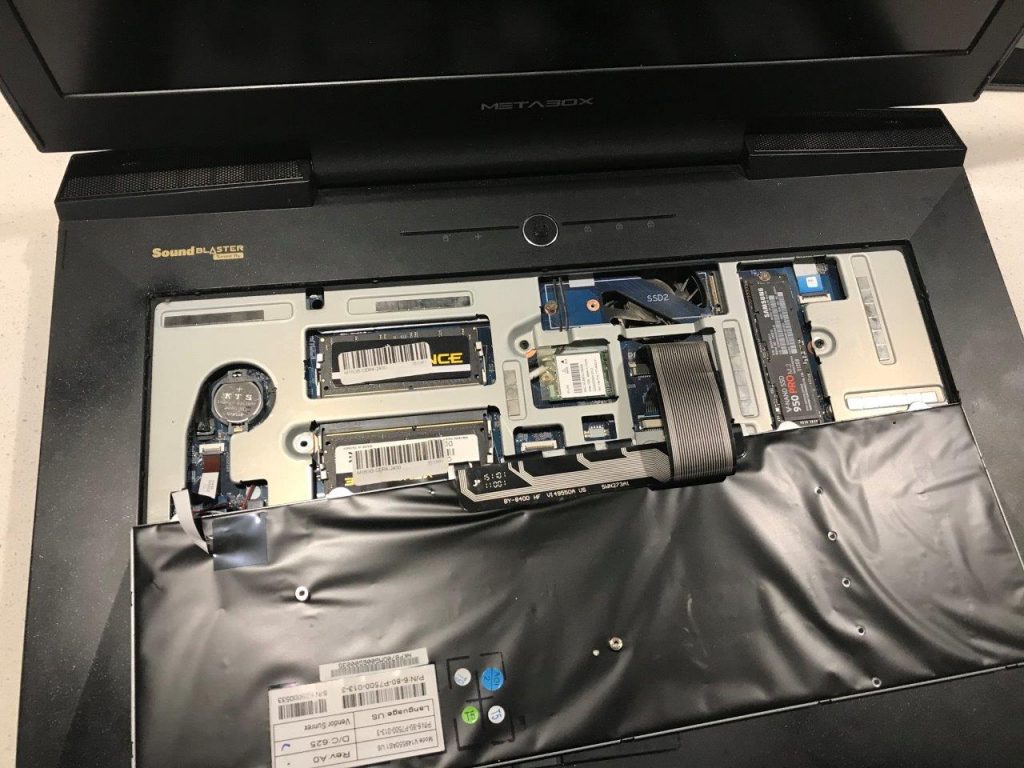
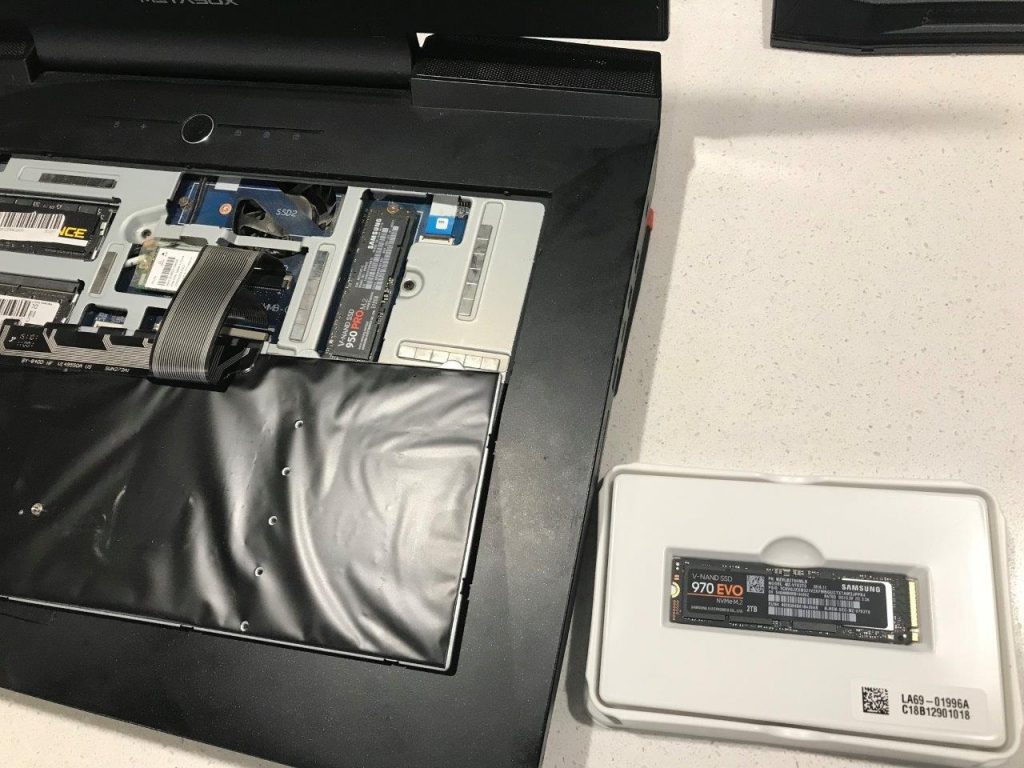
  2. Looked around everywhere and couldn’t find the M.2 slot – in fact I couldn’t find my primary drive. After a moment of panic, and then a quick look on YouTube, I realised I had to remove my keyboard. So I removed the KB screw and carefully pried the keyboard off, then there it was – my spare M.2 slot!

    Additional M.2 slot under the keyboard


    New drive ready to install
  3. I carefully installed the 2tb SSD and then closed up the laptop
    Installed
  4. The system booted up fine, then I went into Disk Management and initialised the disk with a GPT record,
  5. Created a new partition with NTFS default sector size, and
  6. We are good to go!

Now that I had a much bigger SSD to work with, I immediately moved my Revizto Working Folder onto that new 2tb SSD. This will allow me to fully utilise a lot of the great new Revizto Point Cloud features and at the same time have full M.2 SSD performance.

Update:

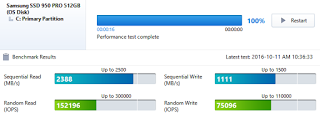
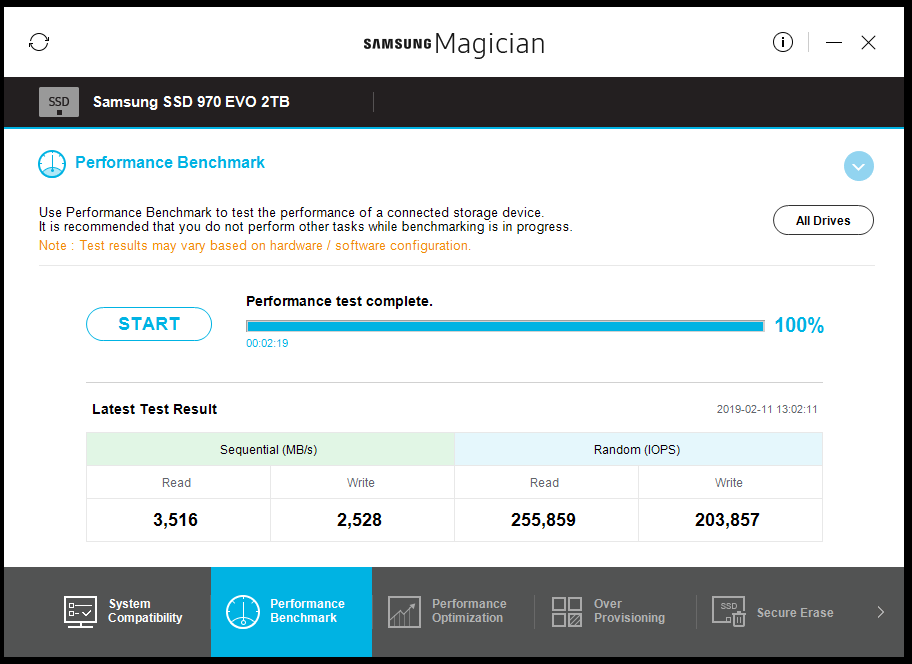
Out of interest, I have added the Samsung Magician performance scores for the Samsung SSD 950 PRO 512GB and Samsung SSD 970 EVO 2TB below:
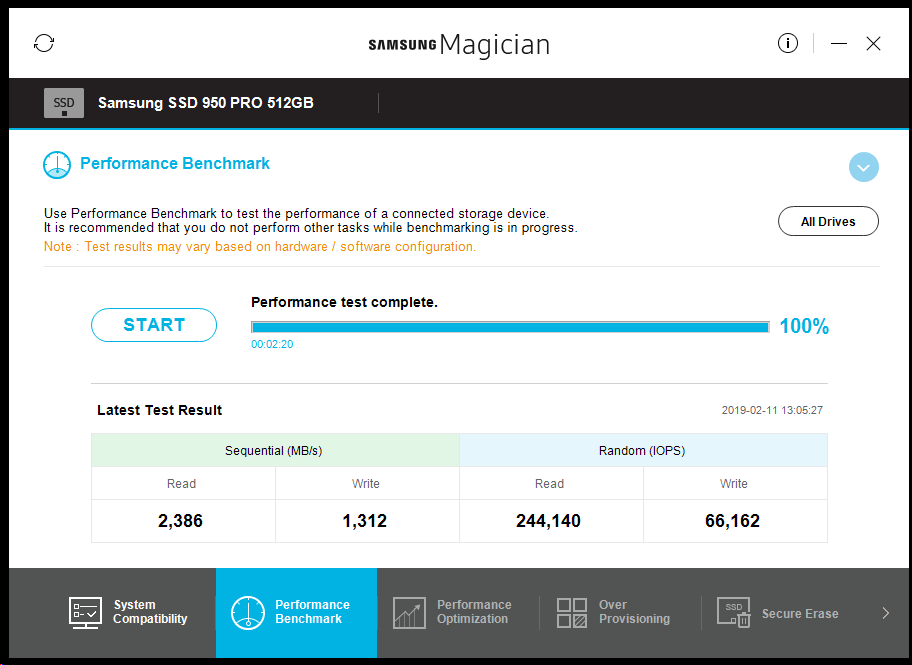
Samsung SSD 950 PRO 512GB Performance


Samsung SSD 970 EVO 2TB Performance

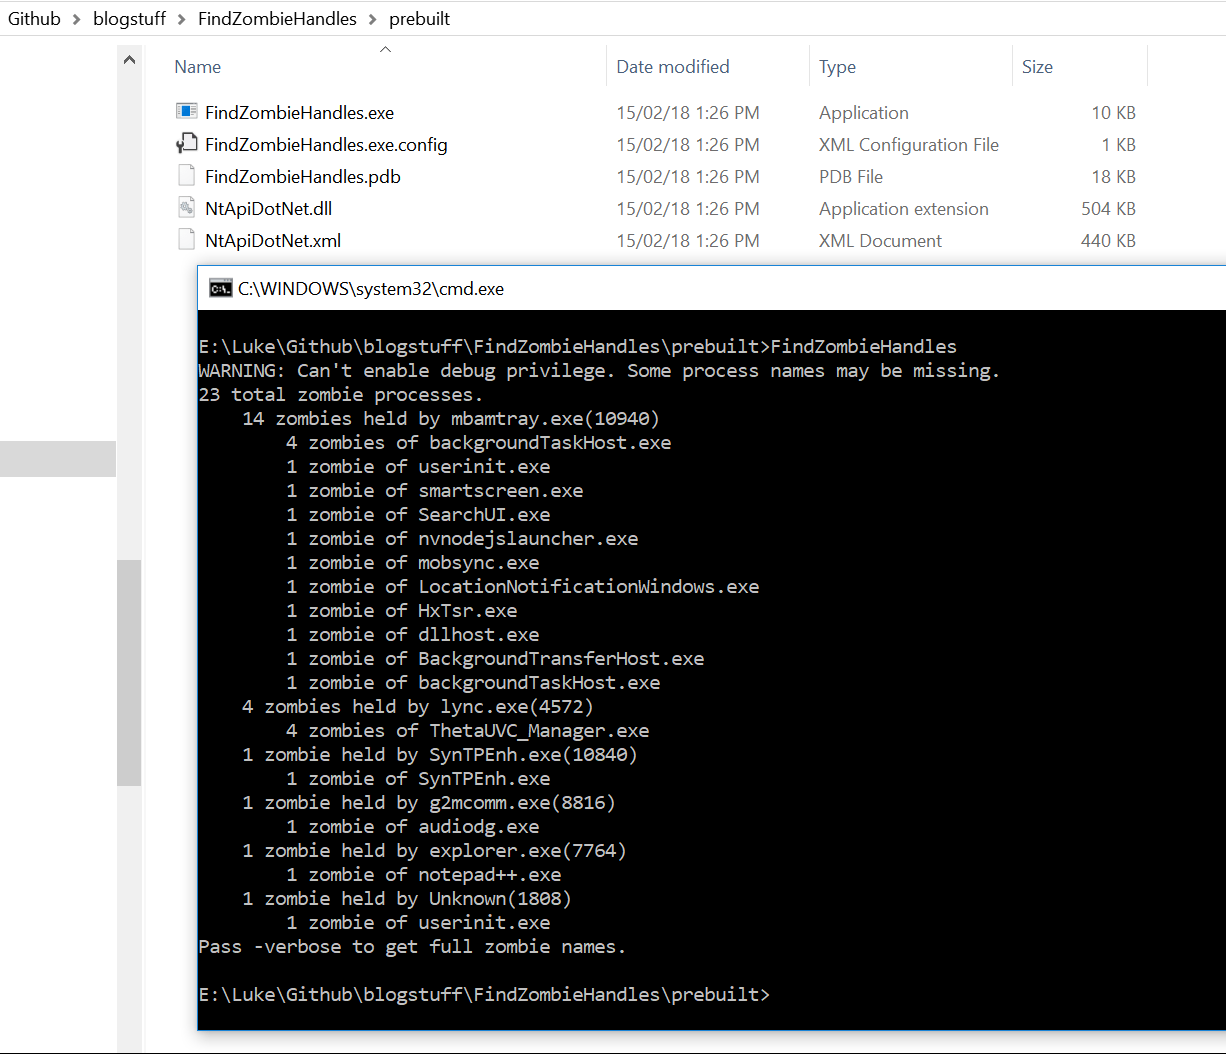
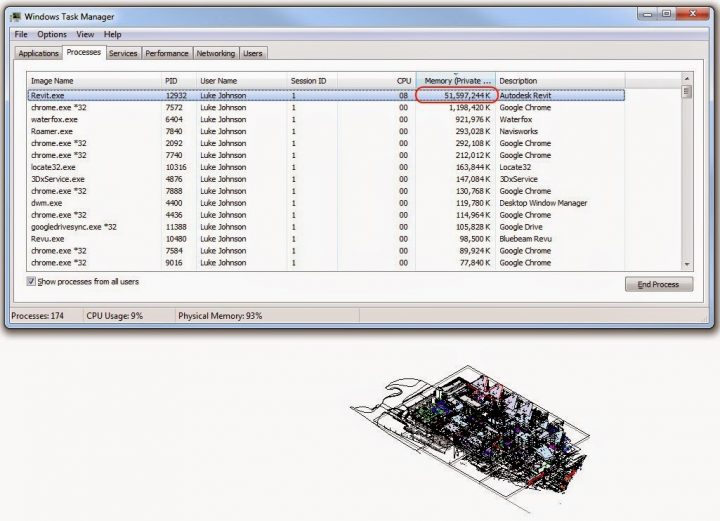
When working with serious hardware and big 3D models, computer memory management is an important thing. You want every byte of RAM to be doing a job for your system. So I was very interested to read this detailed write-up by randomascii where he describes ‘zombie handles’ that can hold or consume memory on your system. His post is very detailed, but I will go ahead and over-simplify it for you:

  1. Download findzombiehandles_prebuilt package from here (or clone the github here)
  2. Unzip it and open an elevated Command Window at that location
  3. Run FindZombieHandles

You should get a list of zombie processes and the parent executable that initiated them.

From here you could investigate further with Process Explorer or attempt to kill them with Task Manager or taskkill.

What specification did I end up with?
(Read the previous Part in this series to see how we established some baseline specs)

After checking out a few different manufacturers and comparing pricing, I decided to go with a Metabox rig.

Here are the details:
Metabox Prime-X P870DM-G

  • 17.3″ 4K QFHD 3840×2160 IPS WVA Matte 60Hz (100% SRGB) NVIDIA G-Sync LED
  • NVIDIA GeForce 980 (GXX) Extreme 8GB GDDR5 VRAM with G-Sync
  • Intel Core i7-6700K Processor (8M Cache up to 4.2 GHz)
  • 64GB DDR4 2400MHZ (4 x 16GB)
  • Samsung 950 Pro 512GB PCIe M.2 SSD
  • 2TB 5400RPM Slim line HDD
  • Killer 1535 AC Low Latency WIFI and Bluetooth

As you can see, it meets the following requirements:

  • 64GB RAM
  • High end desktop gaming graphics (not mobility)
  • High end consumer CPU
  • PCIe M.2 SSD

Here are some of the other things in the box:

  • External USB Slim Blu-ray Reader/Writer Optical Drive
  • Win 10 Professional 64BIT License & Media – Installed & Ready-Out-Of-The-Box
  • 2 Year Metabox Platinum Care Onsite Pickup Protection
  • Power DVD Bluray & DVD Playback w/ Burning Suite

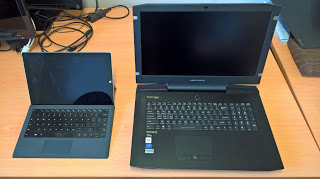
And here is what it looks like when compared to a Surface Pro 3 (my previous site office rig):

A__B017.jpg

Metabox Prime-X P870DM-G

I’ve been using this system for serious work for about 2 months…

  • How did I set it up, and
  • How does it perform?

We will consider these question in future parts in this series.

So, you are in the market for a new BIM workstation? Recently I was too, and I wanted to share my experience and the ‘process’ of specifying, buying, and setting up a BIM workstation.

Over the years, I have been involved in setting the recommended specs for quite a number of CAD and BIM machines, and have used various suppliers – from big name brands, to the smaller PC builders. I personally feel that the big name brands rarely make sense in terms of what you get for what you spend. Many large firms will go with HP or Dell because they have some kind of long term agreement with them. But for small to medium businesses, you can definitely shop around to get maximum performance for your budget.

Target Applications
Firstly, you really need to clearly define the purpose of this machine… and this often boils down to “Which software am I going to use most of the time?” It can be good to put an estimated percentage on this.

For me, it would be something like:

  • Revit 30%
  • Navisworks 30%
  • Revizto 20%
  • Other 20%

Portability
Secondly, you need to determine if you need portability. I move around quite a lot, typically spending a few days in a site office, a day in our head office, and a day or two doing training or implementation work each week. So I need a powerful machine that can jump from desk to desk. I’m not overly concerned with battery life or even weight, as it won’t ever really be a ‘lap’ top, but rather a portable desktop workstation.

VM? VR?
I thought it would be worth mentioning that some people at this point would immediately jump to running a thin client of some sort, connected to a web host virtual machine with heaps of grunt. And that makes sense for some people. But I need to be able to run things like the Oculus Rift and HTC Vive, and the internet connection is simply not good enough in parts of Australia to completely rely on a virtual workstation

vr1.png

Form Factor
With that in mind, I wanted to build the fastest portable Revit, Navisworks and Revizto machine without going too crazy on the budget. The Director here at Virtual Built understands the importance of good hardware, which is great. I have been in the situation at previous jobs where you are wrestling to get an outdated piece of hardware updated or refreshed… it can be a drawn out battle!

Moving on, what does the above actually mean in terms of platform and specs? I looked at mobile and compact tower PCs, but it didn’t seem practical. Some of these have a monitor engaged on the side of the tower, but again, this wasn’t really well suited to running meetings.

So, I ended up looking at laptops. I started to focus on gaming laptops. Because a big part of how we work involves Revizto, and Revizto is built on Unity, and Unity is a game engine… it makes sense that good game hardware will run nicely. I have already come to the realisation that high end (Quadro) graphics in terms of ROI doesn’t make a lot of sense on Revit, and even with Navisworks I don’t see it as a huge advantage. If you were doing a lot of 3dsMax work, maybe the high end graphics would be more important.

Memory (RAM)
It is actually quite difficult to find a laptop that can take 64GB of RAM. I feel that 64GB RAM is the new baseline if you are working on any kind of complicated BIM projects, such as large hospitals. This helped prune down the list to just those gaming laptops that could handle big memory.

CPU
My comments about Quadro graphics cards kind of come into play here as well. Most people in a normal working environment will simply get better value from the high end consumer Intel CPU range (such as i7), rather than going with Xeon/s. And I was more interested in clock speed than cores, because while Revit is getting better at using multiple cores, it still isn’t really there yet.

Graphics
So, what graphics card should we go for? Many laptops come with the M (Mobility) range of nVIDIA graphics, like 980M and so on. I guess I’m an nVIDIA guy? I was pretty interested to learn that some high end gaming laptops actually take a full desktop graphics card architecture and cram it into the portable form factor. This means I could have a portable machine, without sacrificing any graphics prowess.

Storage
Obviously, the main drive needs to be an SSD, minimum 512GB. But did you know about PCIe M.2 SSD drives? These things are ridiculously fast. We will also probably need a big secondary drive to store large datasets, including a sync location for our company Box storage. This doesn’t need to be an SSD, but it could be if the budget allows.

nonssd.png
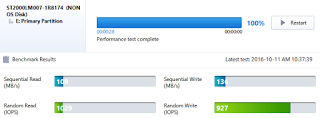
Non SSD drive performance


ssd950.png
PCIe M.2 SSD performance

Other
Some peripheral choices are not hugely important, but I think that getting the fastest and best network interfaces (Wifi and LAN) actually do make a productivity difference. Minimum of 3 or 4 USB3.0 ports if you can, and a few different graphics outputs – HDMI and mini DVI at a minimum. Would also be nice to have integrated Miracast (Wireless Display adapter) as well.

Summary
What does all of this mean? Well, let’s try and sum up the spec in one sentence:

A laptop with 64GB RAM,

the fastest i7 processor that can fit into the budget,

desktop nVIDIA gaming graphics (minimum 970),

a PCIe M.2 SSD primary drive, 2TB secondary,

and fast network interfaces.

In Part 1 of this post, we discussed the briefing and specification of a high end portable BIM workstation. But which one did I get? And how did it perform? You will find out in the future Parts of this series…

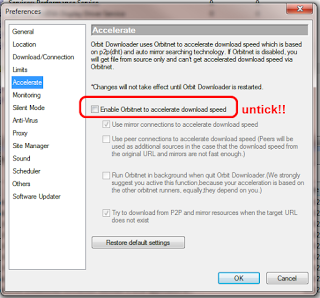
Orbit Downloader recently brought our LAN to a halt.  Where we should have been getting 2.2 mbps, we were getting 0.15 mbps.  I eventually performed an isolation test along with some bandwidth tests.  As soon as the offending PC was plugged into the LAN, the internet speed immediately dropped for all LAN users.  Very nasty.

To turn it off, open Orb preferences and untick this box:

Alternatively, just uninstall Orbit altogether.

This poem has done the email forward rounds for years, and has been incorrectly attributed to various authors.  It is in the style of Dr Seuss, but was authored by Gene Ziegler.  Here is the full version, from this link:

Bits Bytes Chips Clocks
Bits in bytes on chips in box.
Bytes with bits and chips with clocks.
Chips in box on ether-docks.

Chips with bits come. Chips with bytes come.
Chips with bits and bytes and clocks come.

Look, sir. Look, sir. read the book, sir.
Let’s do tricks with bits and bytes, sir.
Let’s do tricks with chips and clocks, sir.

First, I’ll make a quick trick bit stack.
Then I’ll make a quick trick byte stack.
You can make a quick trick chip stack.
You can make a quick trick clock stack.

And here’s a new trick on the scene.
Bits in bytes for your machine.
Bytes in words to fill your screen.

Now we come to ticks and tocks, sir.
Try to say this by the clock, sir.

Clocks on chips tick.
Clocks on chips tock.
Eight byte bits tick.
Eight bit bytes tock.
Clocks on chips with eight bit bytes tick.
Chips with clocks and eight byte bits tock.

Here’s an easy game to play.
Here’s an easy thing to say….

If a packet hits a pocket on a socket on a port,
and the bus is interrupted as a very last resort,
and the address of the memory
makes your floppy disk abort
then the socket packet pocket
has an error to report!

If your cursor finds a menu item
followed by a dash,
and the double-clicking icon
puts your window in the trash,
and your data is corrupted cause
the index doesn’t hash,
then your situation’s hopeless,
and your system’s gunna crash.

You can’t say this? What a shame, sir!
We’ll find you another game, sir.

If the label on the cable
on the table at your house
says the network is connected
to the button on your mouse,
but your packets want to tunnel
on another protocol,
that’s repeatedly rejected
by the printer down the hall,
and your screen is all distorted
by the side-effects of gauss,
so your icons in the window
are as wavy as a souse,
then you may as well reboot
and go out with a bang,
cause as sure as I’m a poet,
the sucker’s gunna hang!

When the copy of your floppy’s
getting sloppy on the disk,
and the microcode instructions
cause unnecessary risc,
then you have to flash your memory
and you’ll want to RAM your ROM.
quickly turn off your computer
and be sure to tell your mom!

via
http://web.archive.org/web/20070814042925/http://www.people.cornell.edu/pages/elz1/clocktower/DrSeuss.html

More info at:
Plagiarized Poem – Why Computers Sometimes Crash! by Dr. Seuss

RFO Co-founder iru69 recently (14 October) updated his very detailed post on video cards and Revit at:

Revit Hardware : Video Graphic Cards

I recommend that you read this prior to investing in a new graphics card for use with Revit.

The post even includes an FAQ section – here is a little sample:

“Autodesk/my reseller/unnamed CAD expert says I should only use “Professional” (workstation/CAD) cards with Revit. But then I read here that lots of people use and recommend “Gaming” cards for Revit. Who is right?”
Despite what you may have been told, consumer (gaming) video cards can work just as well with Revit as professional video cards.

“Someone told me that SLI or CrossFire will double the speed!”
SLI and CrossFire are great for the latest video games, but it’s of no use at all for Revit. At least it’s never been demonstrated. If you want to give it a try, be my guest. 😉

Don’t forget about Autodesk’s recommended hardware list page:
http://usa.autodesk.com/adsk/servlet/syscert?id=18844534&siteID=123112

Here are a couple of system utilities that may help you to squeeze maximum performance out of your hardware (to speed up Revit, of course).  Actually, my FX580 was struggling a bit with Showcase, so I wanted to overclock it a bit to make the augmented reality plugin work a bit more smoothly…

GPU-Z is a handy information tool for your video card.  If you are overclocking, it will tell you the current clock speed, as well as the default.  It will also tell you the driver and Forceware version that you are running, as well as additional advanced performance information.

Download TechPowerUp GPU-Z v0.6.4 | techPowerUp

(also, if you are overclocking a GPU, check out hwbot – it will give you an idea of the average overclock you can achieve using air cooling only for a given GPU model)

Core Temp will give you advanced processor information, including temperature and load for each core on your CPU.

Dev Eject will help you remove USB devices safely, even if Windows is struggling to do so.

Using my laptop with Revit 2013 and an ATI Mobility Radeon HD 4570 graphics card, I came across an interesting bug.  Using the Tab key, nothing seemed to be working.  But this is what was actually happening – I would:

  1. Hover over something
  2. Press Tab key, pre-selection does not cycle (but Status bar is correct, showing next item under cursor)
  3. Press Tab key again, pre-selection shows item from step 2, but again, Status bar shows the correct (next) item.  Left-clicking will select the item shown in the Status bar, not the one that is pre-selected.

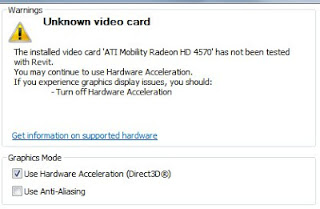
Obviously, the first port of call for these types of problems is Graphics Hardware.  And yes, I was using Hardware Acceleration, and yes, the Hardware had not been tested with Revit, as the Options dialog shows:

Simply turning off Hardware Acceleration fixed this issue, as it will for many graphic-related bugs and errors.

If you really, really want the nice Hardware-accelerated stuff in Revit 2013 and you are using suboptimal hardware, you will need to either:

  • look for better graphics drivers for your hardware (may not work anyway)
  • replace your graphics / video card with one that Revit Wants (very hard if you are using a laptop!)

Similarly:
RevitCity.com | Problem selecting glass using tab key