However, if we head over to revit-ifc Releases page on Github – Releases · Autodesk/revit-ifc · GitHub – then we see that there is a prerelease build for Revit 2020 that is version 20.3.3.0.
So this post is just a little reminder to check the releases on Github if you want the very latest IFC addins provided from Autodesk.
First, let’s manage some expectations – Aconex is generally viewed as a closed platform. They seem to deliberately resist platform-level integration with other tools like BIM 360 and Revizto. However, you can achieve the promise in the title of this post – with a bit of work!
The basic steps are:
Setup a sync between the Aconex Doc Register and Autodesk Docs (BIM 360 Document Management), using the Aconex PIF and Autodesk APIs
Connect the BIM 360 project to the Revizto project and connect your BIM 360 ‘official Aconex’ PDFs to Revizto 2D Sheets.
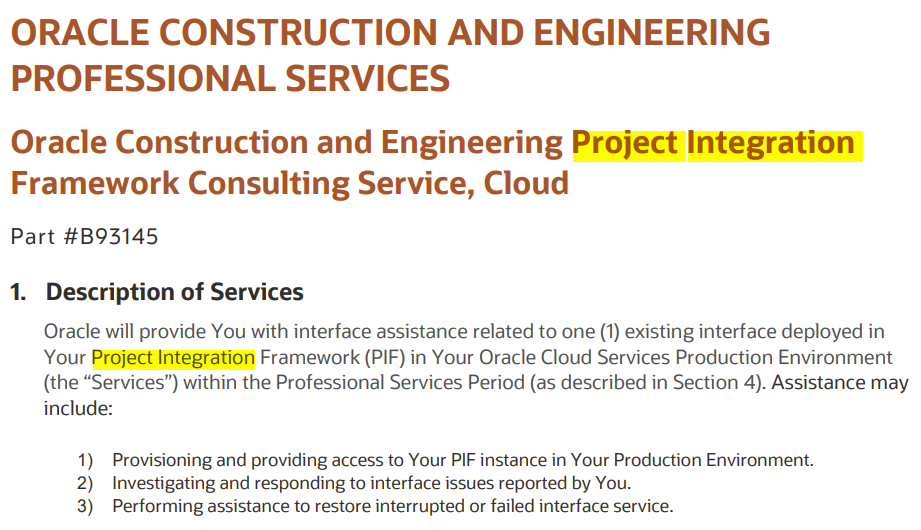
Aconex provides a PIF (Project Integration Framework). This essentially acts as an API, and clients are able to build integrations between Aconex and other tools using their own budget.
The Aconex PIF is hard to find on the inter-webs…
As part of my strategic consultancy work as a Director at Virtual Built Technology, I have assisted clients in setting up the Aconex to BIM 360 sync. This will require considerable time, effort, $$ and planning. Although the scope is basically the same for every Aconex client that wants this, it seems individual Aconex clients will be charged significantly for this development to occur and operate on their ‘own’ PIF.
Once complete, you will begin to see PDFs arriving in Autodesk Docs from Aconex on a daily / nightly basis. Depending on how you have briefed the Aconex development consultants, you may end up with some interesting PDF file naming in the BIM 360 environment – so how can we deal with that?
Step 2a – BIM 360 Preparation Script for Merging Filenames to a single Folder
Let’s say you have your Aconex-to-BIM360 sync running, and you have PDFs arriving in 360 into “Discipline” folders like Architectural, Structural and so on. Not bad! But what if your PDFs are named like this:
SheetNumberX_Rev_1.pdf
SheetNumberX_Rev_2.pdf
SheetNumberY_Rev_1.pdf
etc
When thinking about downstream applications like Revizto, this is really sub-optimal. Why? Because a Revizto 2D sheet will want to connect directly to a SINGLE BIM 360 PDF document with Versions – not to a mangled set of ‘revision suffixed’ pdfs like the above. So we need to clean this up! And it needs to be repeatable and automated…
For this, I have created a PowerShell script. Here is a description of the logic in the script:
it takes a list of BIM 360 Docs folder paths (the local folder path from Windows Explorer address bar), these are ‘monitored folders’
those folders need to be ‘synced’ prior to the script running (I’m still looking for a way to call the Autodesk Desktop Connector sync from a Powershell script, for now you have to right-click in Windows Explorer first)
it will process the folder list and:
create a subdirectory called “Current”
create a logfile in that subdirectory called deepSpaceSync.log
split the filenames at the _REV_ part
process each available Revision number individually in a loop (to ensure Aconex revisions are stored sequentially into BIM 360 versions)
check if the file was already copied – and skip it (using existence of that filename in the log folder)
or, copy the file to the “Current” subfolder
Sleep 5 minutes between each loop to allow Autodesk Desktop Connector sync to catch up.
So this script essentially merges the messy “REV” filenames into a nice clean SheetNumber.pdf filename structure AND actually creates BIM 360 file versions in the cloud (due to the sleep functionality).
Step 2b – Revizto 2D Sheet to BIM 360 PDF Connection
Now that we have a nicely named, version-rich PDF on BIM 360 Docs, its time to connect that up to Revizto.
Firstly – you should always publish 2D sheets from Revit BEFORE setting up the Docs connection if possible, as this is the only way to get the automated viewport overlays (Note – you can export with “Sheet coordinates only” option in Revizto Sheet Exporter from Revit).
Secondly – you then
open Revizto
ensure you have connected Docs to the right BIM 360 hub in Revizto
browse to the “Current” folder for a specific disciplines PDFs
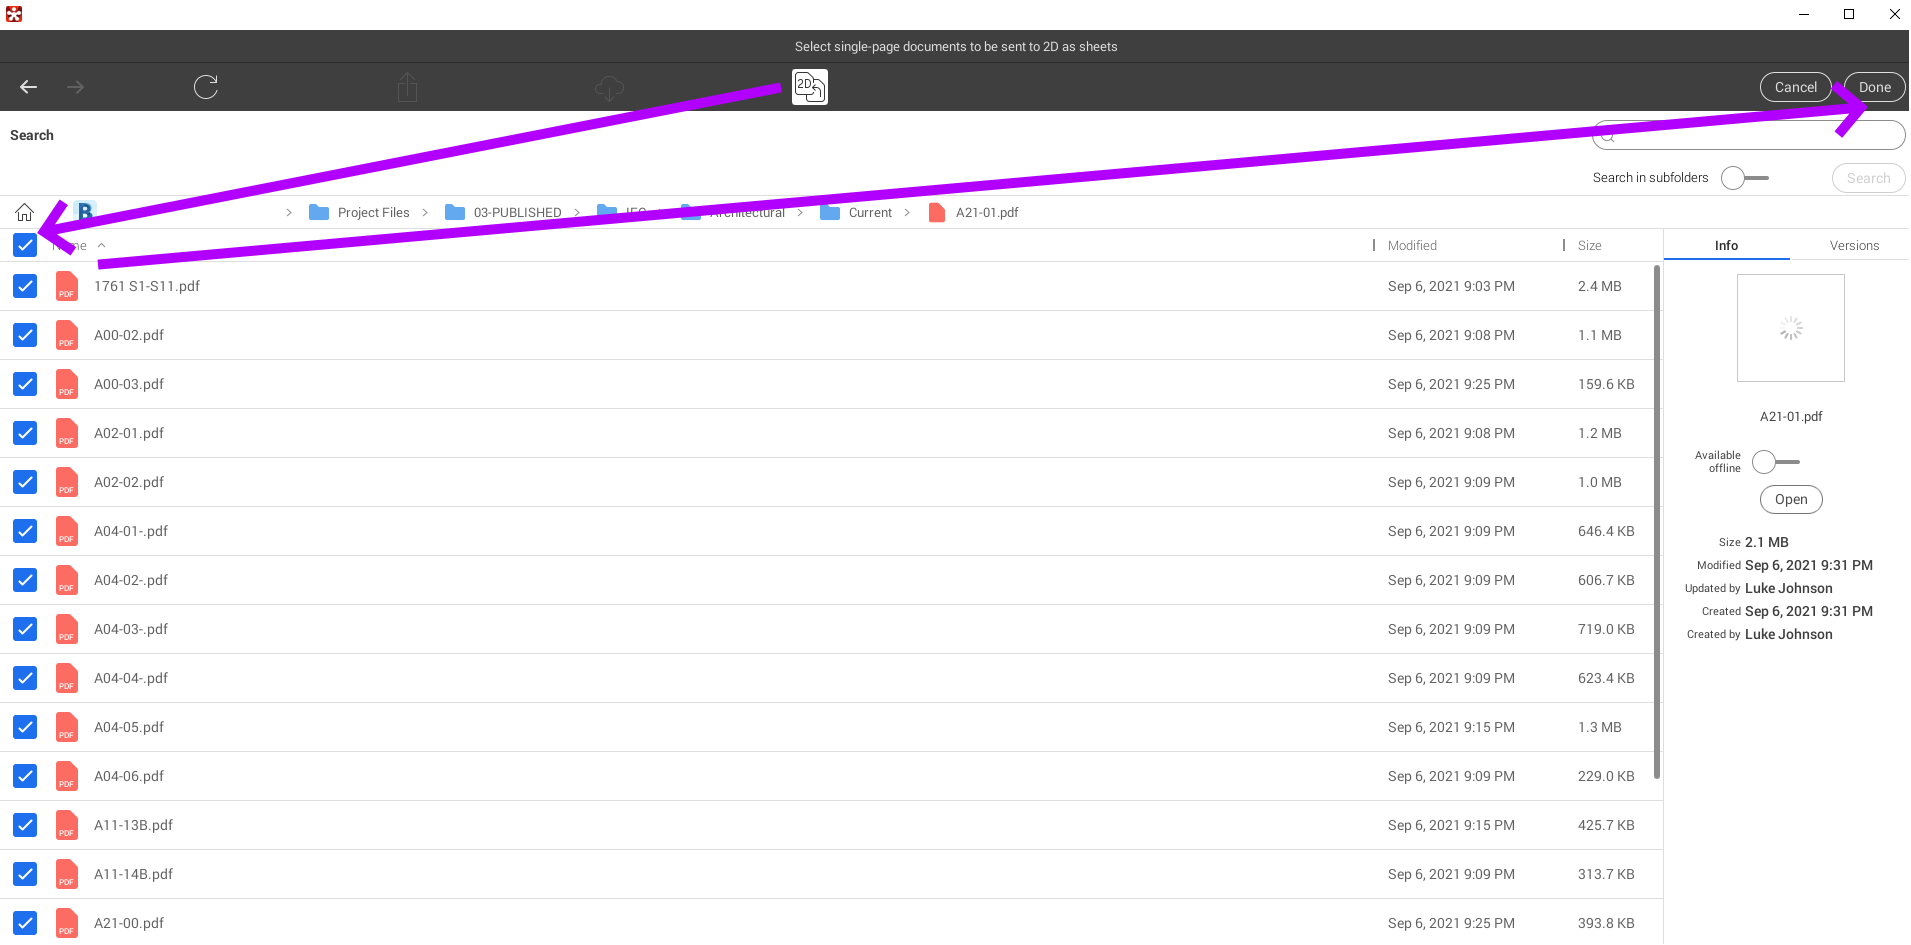
click “Send to 2D”
select all and Done
Connecting Docs to Revizto 2D Sheets
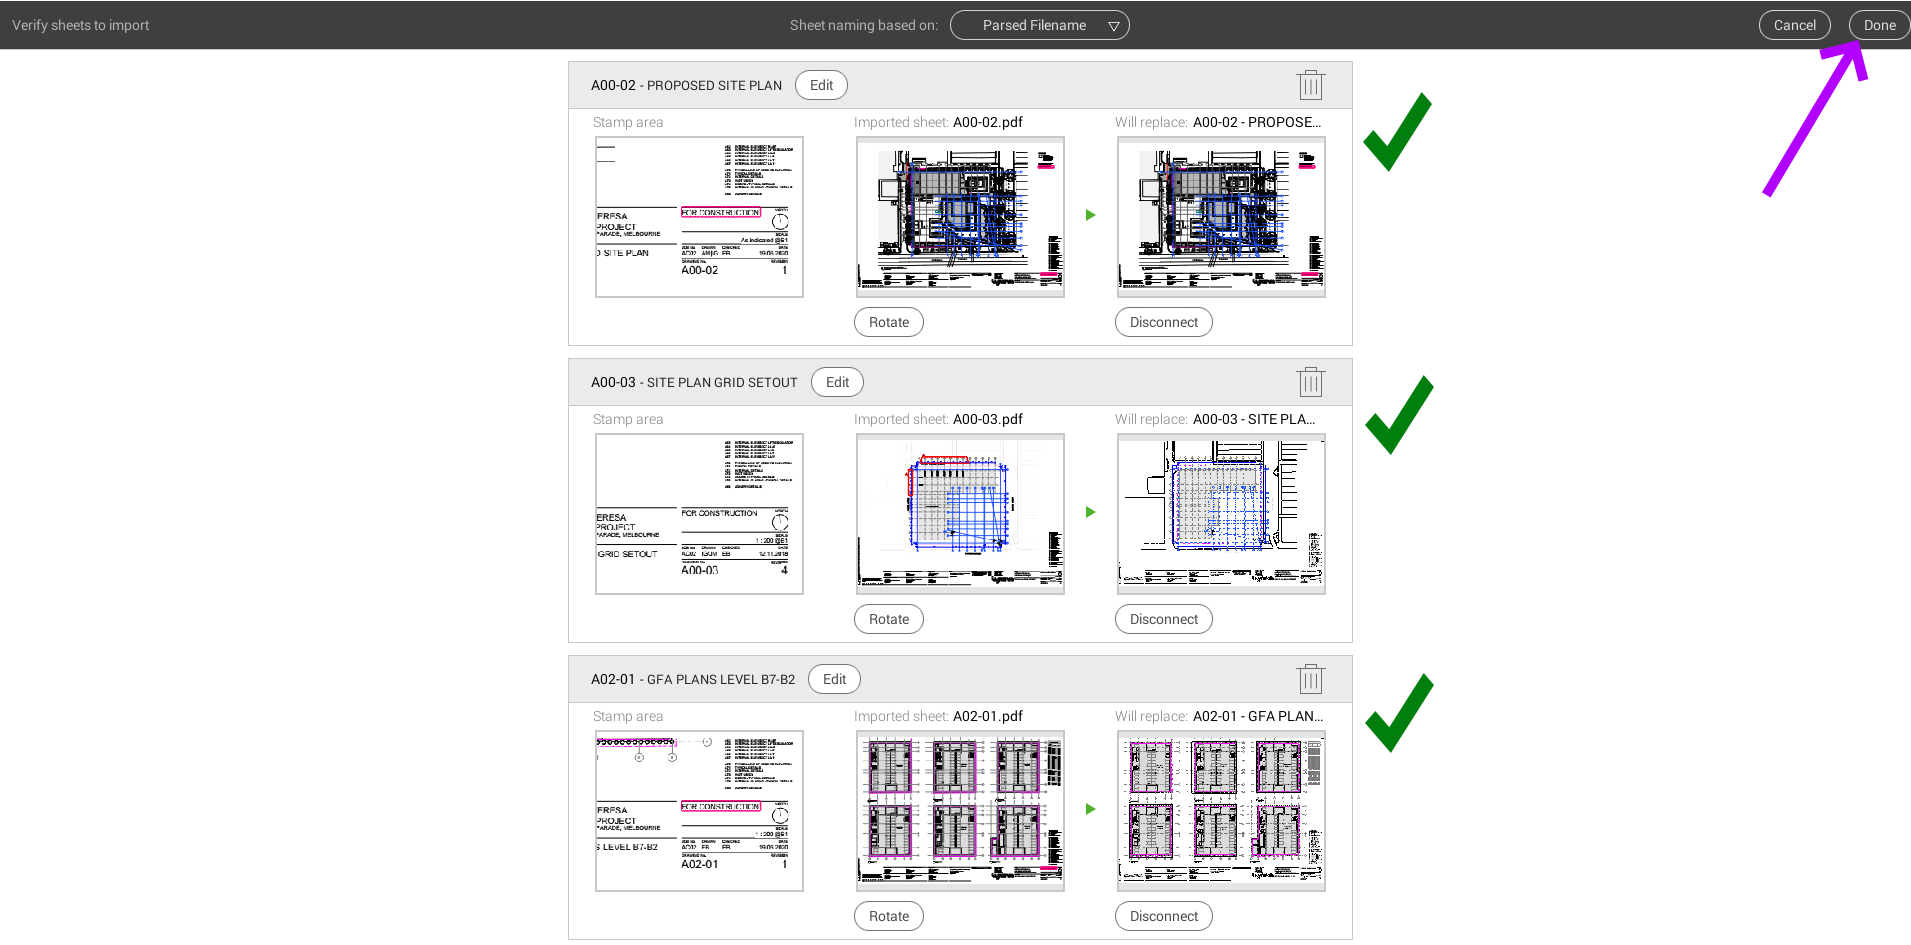
then review that the correct sheets are going to be replaced and connected to the BIM360 PDF
Confirm that sheets are correctly connected using the Sheet Number
Final steps
Once your PDFs are flowing well between platforms, you may want to automate further. For example, the PowerShell script provided above could be set to run as a Windows Task. You would want it to run as soon as possible after the Aconex scheduled sync to BIM 360. As always, you should monitor your inputs and outputs for any problems or gremlins.
Done! You now have official documents from Aconex flowing regularly into Revizto via BIM 360. This means your site teams using Revizto on the iPad can now be accessing the official For Construction PDF Drawings (synced from Aconex Doc Register) while in the Field!
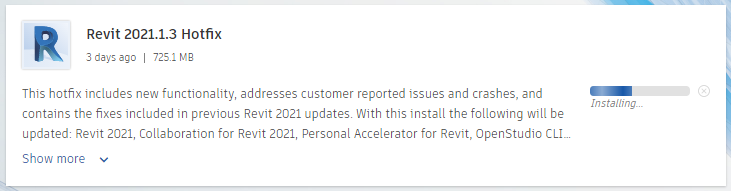
Steel Connections Content for Dynamo 2021 – version 2.6
Cloud Models for Revit 2021 – version 21.1.30.74
Generative Design for Revit 2021 – version 21.11.1.0
Personal Accelerator for Revit – version 22.0.1.0
OpenStudio – version 0.1.17
Issues Resolved
DirectShape Elements
Fixed an issue that could produce very large journal files during upgrade of models with many DirectShapes.
Improved upgrade of some families created in Revit 2018 or earlier to preserve some geometry created via import operations or API.
Duct/Pipe Display
Fixed an issue that incorrectly filtered out detail lines and masking regions when they conflicted with model lines at a specific detail level.
Electrical Circuits
Fixed an issue that the load can’t be propagated properly through a single phase transformer.
Electrical Panel Schedule
Fixed an issue where the Phase doesn’t display correctly when assigning a spare in single phase panel.
Energy Model
Fixed an issue that caused interior spaces to be excluded from an energy analysis.
Export DWG/DXF
Fixed an issue where small objects would not export correctly to DWG at large drawing scales.
Licensing
Fixed an issue where user license expired unexpectedly causing Revit to fall into a 10 minute grace period, after which Revit is automatically terminated.
Materials
Fixed an issue where the Material browser would load thumbnails unnecessarily.
Fixed an issue that material texture not found after moving textures to a new assigned render path folder.
MEP Fabrication
Fixed an issue that caused costing data to be lost after exporting parts to a .maj file.
Fixed an issue with kerf values resetting to 0 after importing a job file.
Open/Save
Fixed data corruption message displayed in error when opening a model.
Properties Dialog
Improved performance when using the type selector.
Reinforcement
Fixed an issue where the concrete cover of a model in place element cut by another element is reset after finish editing without any changes.
Revit Cloud Model (workshared)
Fixed issue that mirroring fails if a new workset has been added to the model but has not been saved to the cloud.
Fixed an issue where the Activity Indicator would show that the model is not being actively synchronized if the synchronize time is longer than 5 minutes.
Steel Connections
Fixed an issue that caused steel connections to become invalid after performing a Roombook addin calculation.
Improved performance for worksharing synchronization actions when the central model has link models attached that contain or have contained steel fabrication elements such as steel connections.
Units
Corrected symbols for Russian translated units.
Important Notes
Content
Updated Content for Revit 2021.1 is not included in the patch deliverable and is provided on the Autodesk Knowledge Network, link.
Update installation may fail if the original Content path location is not accessible.
Install
After applying the hotfix, Generative Design command may cause a “RestDynamoCore.exe – This application could not be started” errors. A reboot of the system should resolve the errors.
In some scenarios the original RVT.msi may be required to install the hotfix. If you are prompted for to specify the RVT.msi version and do not have access to the original installation files you may download the RVT.msi as follows. There are several unique Revit 2021 full product installers which have been released and each includes a unique version of the RVT.msi file. The following is the simplest way to identify which full product installer was used to install Revit 2021 on a workstation:
1. Open the Windows Registry Editor.
2. Browse to and select the HKEY_LOCAL_MACHINESOFTWAREAutodeskUPI2{7346B4A0-2100-0510-0000-705C0D862004} registry key in the left column.
3. In the right column, make note of the BuildNumber value.
If the BuildNumber is 21.0.0.383, then the installation used the initial Revit 2021 full product installer and the required RVT.msi is available here: link
If the BuildNumber is 21.1.1.109, then the installation used the Revit 2021.1 full product installer and the required RVT.msi is available here: link
If the BuildNumber is 21.1.11.27, then the installation used the Revit 2021.1.1 full product installer and the required RVT.msi is available here: link
Uninstall
Revit 2021 updates can be uninstalled to revert Autodesk Revit 2021 to its pre-update state.
Uninstalling this update after being applied to a Revit 2021.1 installation may require the original installation media to complete without error.
Uninstalling this update after being applied to a Revit 2021.1 installation may cause the Revit version displayed in Windows>Add/Remove Programs to be blank.
Autodesk Cloud Models for Revit 2020 – version 20.2.40.65
Personal Accelerator for Revit – version 21.0.11.0
OpenStudio – version 0.1.9
Issues Resolved
DirectShape Elements
Fixed an issue that could produce very large journal files during upgrade of models with many DirectShapes.
Improved upgrade of some families created in Revit 2018 or earlier to preserve some geometry created via import operations or API.
Duct/Pipe Display
Fixed an issue that incorrectly filtered out detail lines and masking regions when they conflicted with model lines at a specific detail level.
Electrical Cable Tray and Conduit
Fixed an issue that caused cable tray fittings to not display in a plan view with annotation scale turned on.
Export DWG/DXF
Fixed an issue where small objects would not export correctly to DWG at large drawing scales.
Help
Fixed the issue that F1 keys do not display the correct help page in browser.
IFC
Fixed an issue that caused steel elements with fabrication to change GUID on IFC export.
Materials
Fixed an issue that material texture not found after moving textures to a new assigned render path folder.
MEP Fabrication
Fixed an issue that caused costing data to be lost after exporting parts to a .maj file.
Properties Dialog
Improved performance when using the type selector.
Revit Cloud Model (workshared)
Fixed an issue which could cause BIM 360 links to fail to load when the user had their permissions on the linked model forcibly relinquished.
Fixed an issue where the Activity Indicator would show that the model is not being actively synchronized if the synchronize time is longer than 5 minutes.
Steel Connections
Fixed an issue that caused steel connections to become invalid after performing a Roombook addin calculation.
Improved time performance for worksharing synchronization actions when the central model has link models attached that contain or have contained steel fabrication elements such as steel connections.
Tags
Improved the stability when selecting material tags in 3D, section, or elevation views when there is a linked topographic file.
Important Notes
Dynamo for Revit
In some cases Dynamo will not be visible within the Manage tab after 2020.2.4 Hotfix is applied. To restore Dynamo, replace DynamoRevitDS.sig and DynamoRevitVersionSelector.sig in the following location: C:Program FilesAutodeskRevit 2020AddinsDynamoForRevitRevit .
Content
Updated Content for Revit 2020.2 is not included in the patch deliverable and is provided on the Autodesk Knowledge Network, use this link.
Licensing
For Vault 2020 users, after the 2020.2.1 Hotfix is applied replace AdskLicensingSK_2.dll in Revit 2020 install location: C:Program FilesAutodeskRevit 2020 .
Uninstall
Revit updates cannot be uninstalled to revert Autodesk Revit 2020 to its pre-update state. If you need to remove the update, please uninstall Autodesk Revit 2020 and then reinstall it.
When a recent update to Autodesk Desktop Connector forced a migration to Autodesk Docs, file paths were generally change like this:
FROM – C:\Users\USERNAME\BIM 360\YOURFOLDERS
TO – C:\Users\USERNAME\ACCDocs\YOURFOLDERS
If you were doing some interesting tricks with BIM 360 Docs, and sharing and federating Revit models as non-initiated files on BIM 360, you may find that links were broken and “Not Found” in Manage Links after that latest Desktop Connector installation.
But don’t worry! You can just set a symbolic link to point from the old BIM 360 Docs location, to the new location. The Command Prompt script looks like this:
The moment after this script was run, I was able to hit Reload from Manage Links in Revit and the new location was detected and links were loaded successfully. Note that they still appear in Revit as if they are in the old location, but really it is reading the latest data from Autodesk Docs, and that new location is being updated by Autodesk Desktop Connector.
At this stage it appears those links are still working, as the Revit CollaborationCache is a different technology to the simple file sharing mechanism of Autodesk Docs.
The IFC for Revit addins that improve IFC import and export functionality are maintained at this GitHub site for versions newer than Revit 2018. In the past 2 weeks, updates have been release for all current Revit versions, and I have collected the direct links for you below. Note that the GitHub versions can be more up-to-date and current than the ones listed on the App Store.
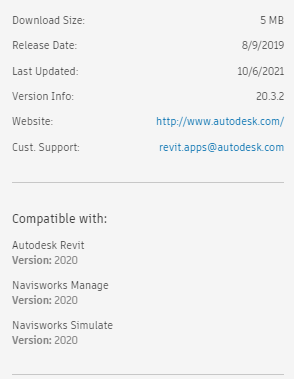
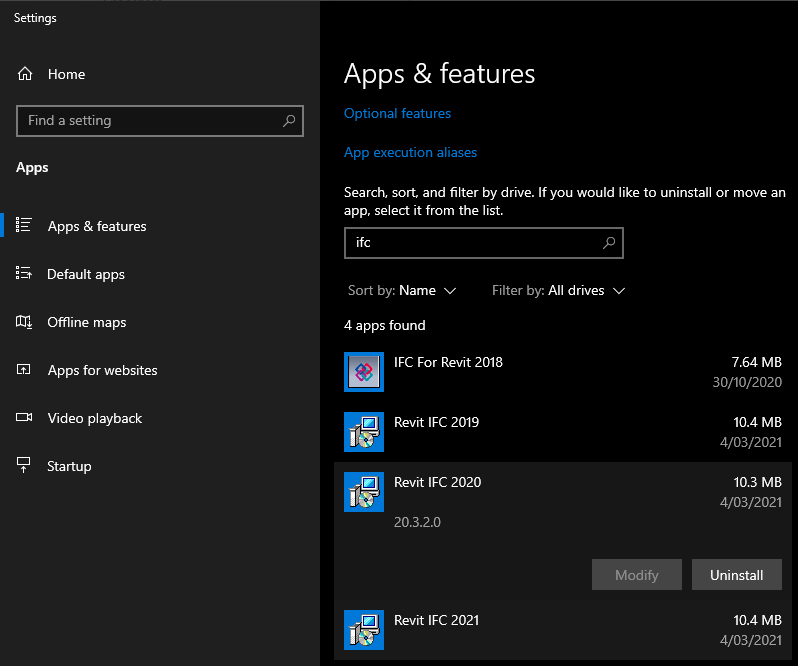
If you want to check which version you currently have, you could use Start – Add or Remove Programs to do that without opening Revit:
checking Revit version in Add or Remove Programs
If you are inside a Revit model, you can use File – Export – IFC and check the version in the dialog box header:
If you are looking for Revit 2018 and older versions of the IFC for Revit addins, check out the SourceForge site instead.
The update for Revit 2019 was particularly significant. Release notes copied below:
General:
This version marks a significant milestone for IFC Exporter as it is now IFC4 Reference View certified (for Architectural Export and Structural Export Exchange Requirements)
New Features/Improvements:
Export of Area can now be assigned to IfcSpatialZone in addition to the default IfcSpace using IfcExportAs
Support exporting IfcGroup using ZoneGroupName parameter
Improved heuristic for assigning color to polygonal face sets
Improved handling to support for direct export of polygonal face geometry in IFC4
Support for IfcShapeAspect in other objects that have part geometries
Improved handling of Complex Property in the PropertySet definition
General improvements to support IFC4 based geo-referencing information with addition UI in export, and integration to the information found inside Revit file (usually comes from AutoCAD or Civil3D)
Reorganize the location for Exchange Requirement setting in the header of IFC File to be less hidden (now located right after the IFC version in export option UI)
Updates shared parameter definitions and Property set definitions based on the latest IFC4 (4.4.0.2.2) specifications
Support allowing a predefined type for standard walls on export
General improvements dealing with objects with many holes
Added basic support to export Area as IfcSpatialZone entity
Bug Fixes:
Export bug fixes:
Fixed error during export for a specific object that became invalid in the export process with “Store the IFC GUID in an element after export” option
User defined property set can now be exported for IfcGeographiElement
Fixed export failure when ZoneClassificationName is set to Room for exporting IfcZone
Corrected GrossVolume quantity information with the correct unit
Fixed exporting issue for a Ceiling containing Arc geometry
Fixed issue with duplicate steel connection geometries or missing connection
Fixed issue with IFC export – steel connection steel connection elements missing or wrongly exported
Fixed issue on missing ceiling geometries in IFC4 RV export mode
Fixed issue on objects with Parts that is below the first (lowest) level
Fixed issue with export Roof in some cases
Fixed crash issue if the “Rasters” are set to be exported to “IFCGrid”
Fixed issue with IFC option “export links as separate models” causes wrong object placement
Improved export Parts functionality
Fixed issue that IFC Version doesn’t update when changing the “In-Session setup”
Fixed IsExternal calculation on element types to correctly determine value
New shared parameter assigned to Curtain walls is now exported when exporting from Revit to Navisworks
Update category mapping to deal with IfcSpaceTypes and IfcOpeningTypes
Fixed issue with incorrect slab thickness when Opening IFC in Revit
Fixed some issues on export with different coordinate base
Fixed some issues on exporting Wall elements
Improved handling reserved Windows name
Export HVAC_HEAT_GAIN with current units (Watts)
Removed duplicate base quantity NetSideArea exported for walls
Improved export with the Property Set option “Export schedules as property sets”
Fixed issue with IFC4 Reference view, which fails for some models from Factory Live
Update the CSIORG link in the IFC exporter
Changed IfcGeometricRepresentationContext from “Annotation” to “Plan”
ClassificationCode(2) is now processed during export even if ClassificationCode is missing
Corrected Area quantity property of doors
Improved Materials export, that works for some floors but not others of the same type
Fixed issue with wrong Base Quantity information in some scenarios in IFC export 2×3 Coordination View
Fixed issues with warnings are shown when exporting to IFC4RV in some models
Improved Railings import to Revit via IFC
Properly convert this Flow_Rate parameter on Export
Corrected 2D CurtainWall door swing on IFC Export
Nested curtain wall element now will get proper parameters while export to IFC
IFC-Export configuration will now remember the previous settings including: “Project Origin/Coordinate Base”
Improved exporting of Material parameter
Improved IFC4 RV Exchange Requirement, which may be missing when File Header is not initialized
Support allowing a predefined type for standard railings on export
Fixed IFC4 “opening as recess” code for ReinforcingMesh case
Fixed issue with IFC export where some geometries are exported slightly longer extrusion
Fixed issue with IfcGeographicElement not exporting user-defined PropertySets
Import bug fixes:
Improved Rebar import
Improved import of Windows that are not cutting a wall in a linked or opened IFC
Recognize the angle between Project North and Survey Point properly in Revit IFC import/link
Improved import of Columns that may be placed in the wrong location on IFC Link in some cases
Improved import of beam cover
Fixed issue with Certain Tekla IFC geometry not visible when using Link IFC
Improved link IFC that may have incorrect geometry imported for some cases
Improved Link IFC file in Revit that in some cases failed with the model empty and an error appears in log file
Fixed issue with translation IFC having mm units using Revit IFC loader makes default model view small unexpectedly on LMV
Fixed issue related to invalid/corrupt IFC files that “load” without any errors
Improved link IFC file properly inside Revit 2020
Grids placed by IFCOFFSETCURVE2D will be placed at open IFC in the correct unit
Fixed issue with multiple versions of the same IFC file get loaded into Revit Cloud Worksharing Host resulting in duplicate geometry
Improve the structure in Link IFC that may end up upside down
Fixed missing material information upon import IFC
Avoid duplicate instance and type names when linking in an IFC file
Improved creation of Geometry which may be missing for some IFC models
Fixed issue for some IFC files that failed to show in BIM 360 viewer
IFC link – model is now correctly positioned when there is rotation component in IFCSite local placement
Improved issue due to “bad” data involving Wall with zero thickness inside the IFC file that caused differences between IFC from Allplan opened/imported vs linked in Revit
Improved handling of detailed geometry containing IfcAdvancedBrep in REVIT 2020 and 2021
Improved slab elements import which may be missing in some IFC file
Corrected IfcPort ConnectedTo IfcGUID information that contained its own GUID instead of the GUID of its connected Port
Known Issues/additional notes:
This release still contains issue that Steel Connections may not be exported correctly
Export configuration “IFC2x2 ePlan Check” has been removed as it is already obsolete. If there is any saved configuration, the option will be automatically assign to IFC2x3 as default
Revit lets you model things that you can’t necessarily build, which shouldn’t surprise us given that “Revit was intended to allow architects and other building professionals to design and document a building” 🙂 wiki
However, in recent times Revit is getting used more and more for fabrication workflows, with core Revit features, addins, and Dynamo scripts developing to make that happen.
With that in mind, I was shared something recently and simply had to share it… check out the video below:
Basically it shows how we can quickly cut up impossibly long modelled Revit elements (like Pipes) into more ‘buildable’ fabrication lengths. Cool! The video also discusses how appropriate generic fabrication content could really begin to bridge the gaps between Revit models and actual things you can buy off the shelf.
Thanks to Nathan Moore for sharing this! And credit also to Jeremy Tammik and Pablo Derendinger.
I think we will inevitably see more and more automations like this that connect Revit to real fabrication and procurement workflows. Feel free to share your thoughts and ideas in the comments!
From the video comments:
Are you paying for a Revit M/P Fabrication add in or using ITMs to route and coordinate to LOD400? I think there is an opportunity to use native Revit to accomplish this. A properly “parameterized” fitting family combined with the correct pipe types and routing preferences would allow native Revit to produce what you need.
Some related thoughts and ideas from Nate here, pointing out a common problem with modelling generally (that in order to model accurately, you often have to select some kind of proprietary brand / make / model first):
I am in a situation (and I think most other companies are in similar situations) where I am not necessarily the final decision maker on the “BRAND” of pipe/fittings that we end up buying. There is a fundamental disconnect I think in the industry that fabrication software providers want to provide MANUFACTURER SPECIFIC items to help streamline the downstream purchasing/install/warehousing operations… My solution is to create a “SPEC DRIVEN” family library (similar to how duct works) so I can simply have an “ASTM SCH40 Welded” system or a similar Grooved system etc. That way the families placed will adhere to the spec and allow more flexibility downstream for the buyers/warehouse.
Every now and then you come across a project that is still using a super-old version of Revit (remember Revit 2017? Yeah, it was released about 5 years ago…) You might have found that your old versions of Revit have actually stopped working or stopped activating due to Autodesk license system changes.
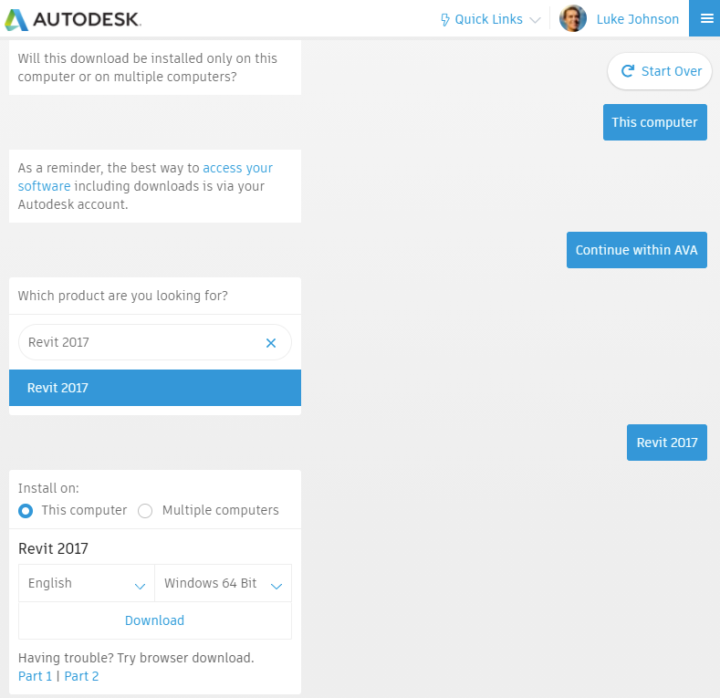
So… how can you get access to Revit 2017 or other old Revit versions? As recent as November 2020, Autodesk enabled access as shown below:
So you can use, at this point back to 2015 and next year and when the software advances to the new version in April, this will change to 2016.
There shouldn’t be any need to apply for the extra previous licenses. The seats won’t show up in the Autodesk Account however and you need to access the installers via AVA. https://ava.autodesk.com/
Please note that 2017 Autodesk software supports the login method. That means that you will not use a serial number when the install the software. You should gain access to 1 seat of the 2017 Revit for every applicable Revit product that you own on subscriptions. By assigning Revit to a user you will effectively grant them access to all versions so you don’t need to specifically assign 2017.”
As simple as that! Just use AVA to download and install the older version. See the short video below:
Thanks to Dave Murray from McGregor for the heads-up!
I was recently working on a multi-vector dataset comparison in Deep Space. We had received Revit, Navisworks and tabular data, and I was comparing 3 different data drops of that information, particularly for changes in the quantities of specific types of elements. A ‘data drop’ is a set of data or files that you receive at a given point in time.
In the course of exporting the Navisworks data through to CSV, I came across a specific problem – the number of rows in imported CSV did not match the number of elements processed. Why?
As you may know, you can store line breaks inside parameters in Revit. There are very few good reasons to do this, but it still does happen. Once this happens, those line breaks need to be processed by tools down stream. I spent a lot of time in the early days of Deep Space figuring out how to ‘clean’ bad Revit data so we could still bring it into the platform for analysis. Usually, if the CSV writer or reader are smart enough, they should be able to deal with this problem. However, I discovered a bit of a gap in the available tools this time. What was the problem?
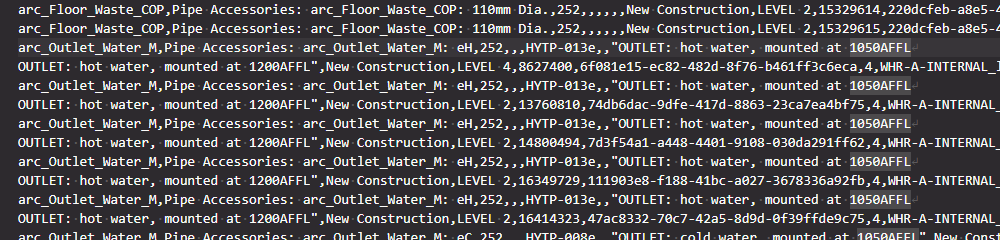
It turns out that the CSV was malformed, it was actually dirty or bad data. While it did have the line breaks, it did not consistently use double quotes to contain fields. So we had the situations where there would be line breaks that were inside the CSV fields or columns, but not inside double quotes. I tried a lot of different CSV readers, including Excel, LibreOffice, Google Sheets and PowerBI / PowerQuery, but they all tripped up at this data. Because they were using the rule ‘new line = new row of data’, the imported CSV information was coming in mangled.
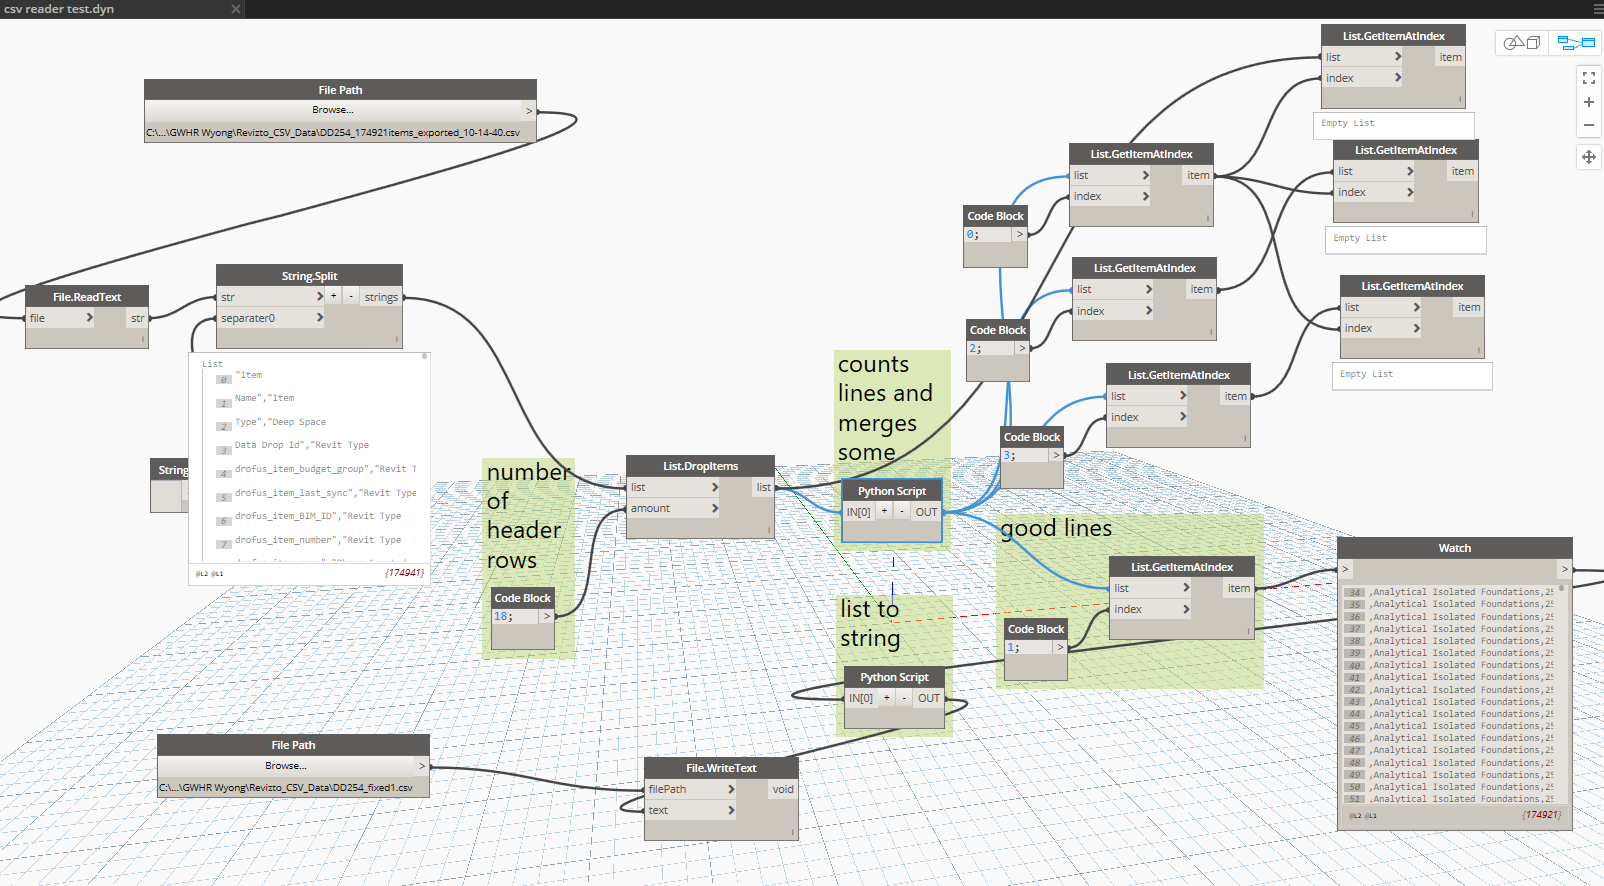
How can we clean this data? We generally know there should be 17 fields or 16 commas per row of data. But we also know there can be line breaks inside fields… so it is a challenge to map a data row to CSV lines. In some cases 2 or 3 lines of CSV data might still just be one row of actual data.
After trying to use various out of the box solutions, I decided to build some Python code to try and solve this. I used Dynamo Sandbox 1.3 to do this, primarily out of habit, not because it is the best Python IDE out there 🙂 I ended up with a kind of line-merging iterator, here is some of the Python code below:
biglist = IN[0]

commact=[]
for ctr in range(len(biglist)):
    astr=biglist[ctr]
    strct=astr.count(',')
    commact.append(strct)

counted=range(len(biglist))
fixedstr=[]
bad=[]
skips=[]
incr=0

for ctrx in range(len(biglist)):
    if ctrx==skips:
        pass
    elif commact[ctrx]==16:
        fixedstr.append(biglist[ctrx])
    elif commact[ctrx]>16:
        fixedstr.append(biglist[ctrx])
    elif commact[ctrx]+commact[ctrx+1]==16:
        jnr=[]
        jns=biglist[ctrx]+biglist[ctrx+1]
        fixedstr.append(jns)
        skips=ctrx+1
    else:
        bad.append(ctrx)

OUT = bad, fixedstr, commact, counted
What does it do? Essentially, it counts the number of delimeters (commas) on one line, then it processes or merges lines based on that information.
This actually got me around 90% of the way there. Then I still had to do some manual fixes of things like ‘double double quotes’ that were also tripping up the CSV readers.
Above is a snapshot of the Dynamo script. And here is the script for download:
I have recently developed a few Material and Object Procurement and Tracking solutions, primarily using Deep Space and Revizto together. These workflows also involved IFCs converted into Revit, so we could automatically set tracking parameters from Deep Space data back into Revit, and colourise the models. When converting Revit to IFC, I usually use IFC Link functionality, primarily for speed and geometric integrity.
However, some DirectShape objects created by IFC Link cannot be overridden in Revit using traditional methods. Even after setting Revit parameters from Deep Space, and using Visibility/Graphics Filters, the elements simply will not allow their colours to be overridden using a Shaded Surface pattern. So, we have to find another way…
It turns out that Phase Filters are really the only way to solve this problem, as they override the elements at the Material level. There are a few pieces to the puzzle:
Set up the necessary Phase Filter, with each item set to Overridden (this allows for basically 4 status overrides in total)
Set Graphic Overrides – Material definitions to have the colours you want (by changing Phase – Exist material etc to the desired colour / material)
Set the Revit view to the correct Phase and Phase Filter, and Realistic view mode
Here are some screenshots of the above steps:
1 – Create Phase filter for visual Overrides
Next…
2 – Edit Revit Material to match desired visual Overrides
Then…
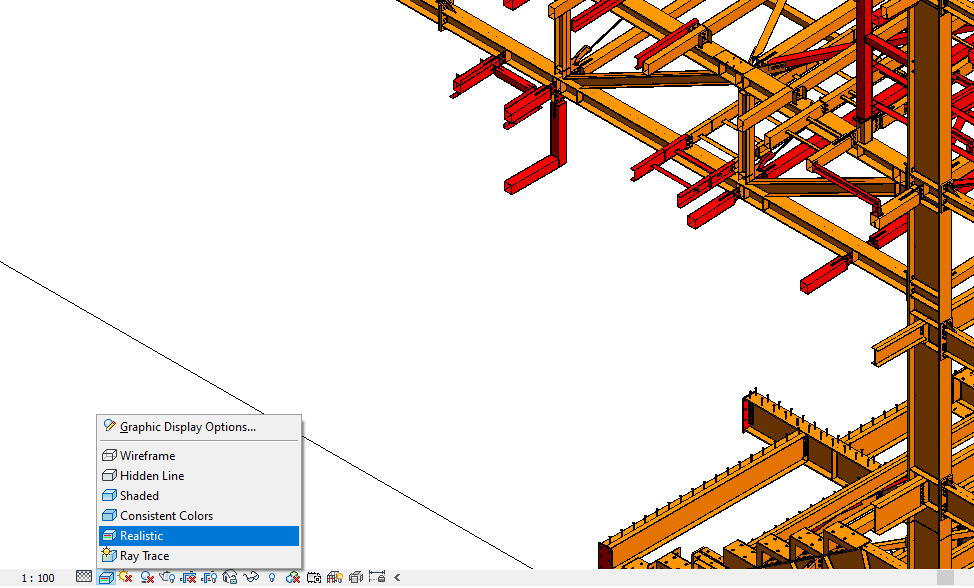
3 – Set the View Settings
Also…
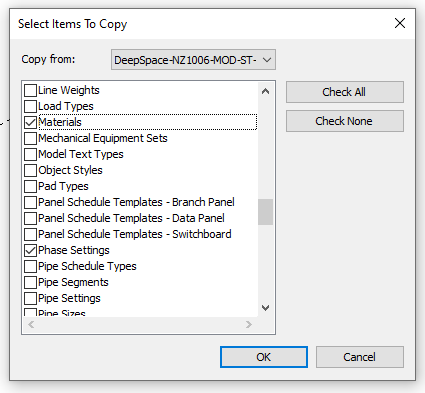
Keep in mind if you are using Container Files you will need to Transfer Project Settings and bring across your
Finally…
Make sure your View is set to Realistic in Revit, if you truly want to see the Material Phase override in the Revit view.
As you know, Revizto is the best Integrated Collaboration Platform on the market today, especially if we are talking about AEC and BIM Coordination and Management. However, some people and companies still do things ‘the old way’. For example, some companies still create Viewpoints in Navisworks, share those Viewpoints as actions, and call that ‘coordination’ or ‘collaboration’ (which it really isn’t). Instead, with the Revizto ribbon in Navisworks, you can simply click Create Issue, Apply a Stamp, and immediately start collaborating with your team in the cloud.
But, we generally still have to sometimes work with people who do things ‘the old way’. So, if we still want to mainly work in Revizto, but we are receiving Navisworks Saved Viewpoints as a kind of action list, what then?
Revizto allows us to import BCF files. So all we need is a Navisworks addin that converts Saved Viewpoints to BCF files … and CASE built one of those back in the day! I previously posted about the CASE BCF Exporter here.
I spent some time over the last day or so downloading the repos, setting references, and fixing the Build problems. I have now built the Case BCF Exporter ( CASE.Navis2BCF ) for Navisworks 2018 and Navisworks 2021 (update – I have also compiled and test for Navisworks 2020 as well):
Install the plugins. In the downloaded package, there is a ReadMe file. Depending on version, it says:
Copy CASE.Navis2BCF folder into:
%APPDATA%Autodesk Navisworks Manage 2021Plugins

Restart Navisworks

Open View - Windows and enable "Case BCF Exporter"
Open your Navisworks model that includes Saved Viewpoints. Sometimes you may be sent a Viewpoint XML file and you need to import it to Navisworks.
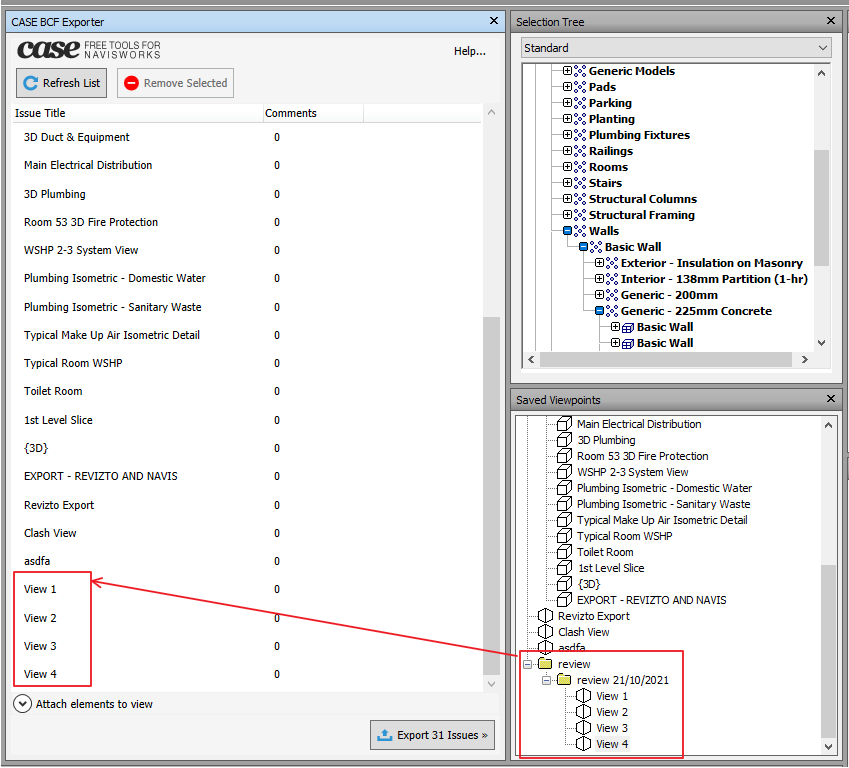
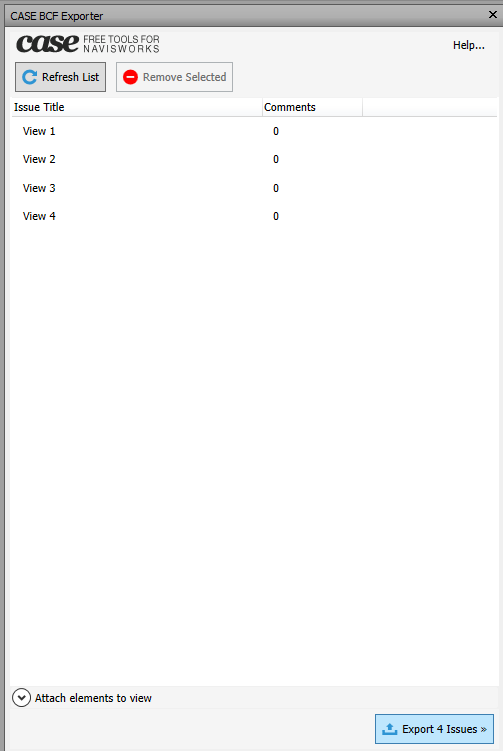
Now, with the BCF Exporter panel open, click “Refresh List”. You should see clearly the Viewpoints that you want to Export as BCF. You may need use Shift+select to select and Remove any Viewpoints from the BCF Exporter list that you DON’T want in the BCF.
With your shorter list showing, click Export Issues
Save the .bcfzip file when prompted. A descriptive name will be useful later, as the issues will be tagged with the filename.
Open Revizto Viewer and open the Issue Tracker
Click down arrow to Import issues from BCF
Select the BCFzip file you saved, then click Open
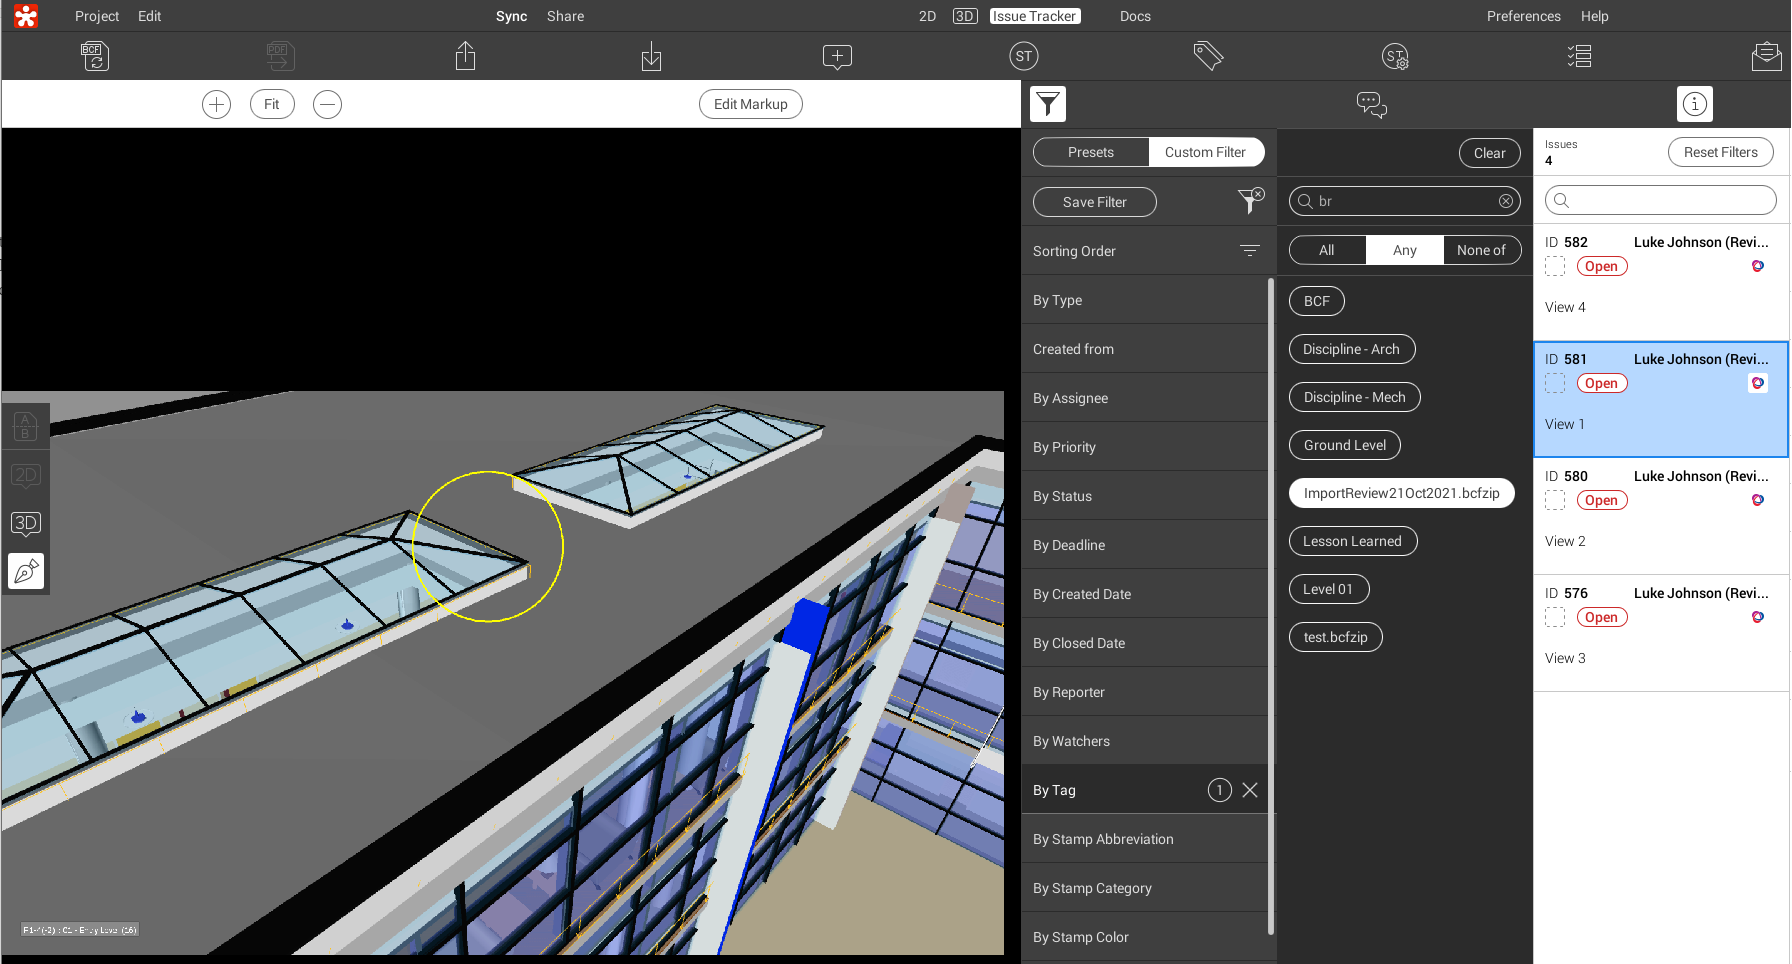
Now, the issues (including Camera location and Markup image) are all imported to Revizto from Navisworks Saved Viewpoints!
To quickly view these, open the Filters, Custom Filter, go to Tags, and choose the relevant BCF filename from here:
I would love to go ahead and build the plugin for Navisworks 2019 and 2020, so I will update the post here when that is done.
Hope this helps some of you to keep using Revizto to maximum efficiency, even if some people around you are still doing things ‘the old way’ 🙂
UPDATE:
I have now compiled for Navisworks 2020 and tested it.