At the risk of stating the obvious, learning is an important part of being a knowledge worker. But learning can be boring, right? There are a whole bunch of ways to learn and improve in our work skills, and it can be really hard to know which way is best. When it comes to BIM, and future technology in general, there is something electric about putting a large group of like-minded people in the same room together. And if you do that for a few days in a row, well, anything can happen…
So, yes, I am excited about the BILT conference in Adelaide this year, for quite a few reasons. In fact, BILT (previously Revit Technology Conference) has been around so long now, and is so well respected, that I wonder a little about what I can add by writing about it! But I can share some of my personal experiences, and hopefully that may encourage a few of you to really consider heading to BILT ANZ this year. A long, long time ago…
I had spent a few years as an Architectural Drafter in a small firm on the Sunshine Coast when RTC first came to my attention. It was the place to be! My job description had been steadily growing, to include more technology, hardware, software, and systems management. As BIM persons, we often have to wear various hats at various times, and usually at the same time. I really, really wanted to attend, so I made the suitable requests to my employer at the time and he was gracious enough to pay for the ticket and accommodation and allow me to attend. For some of you, that can be hard going.
You basically need to prepare to describe to your employer:
1. Your current value
2. Your desire to attend
3. How that will increase your knowledge
4. How that will help the business
5. And ultimately lead to more profits than the ticket price
It sounds like a lot, but depending on your work situation it may be as simple as a cup of coffee chat, or perhaps you need to put some of those ‘return on investment’ benefits into writing and send it up the management chain. If you haven’t attended before, I do recommend that you make the effort… which leads me back to RTC 2011.
It was a really eye-widening experience for me. I was already a Revit blogger and ‘thought I knew stuff’, but trust me I still learned. And it wasn’t boring. I have this really vivid memory of sitting in a class with Phil Read out the front, talking about how Revit was used to design and document these intricate, beautiful designs on some famous movie sets. He also had schwag (gifts), and he had some really down-to-earth comments about how there is more to life than Revit (this came as a surprise to me at the time). With three kids now, I definitely get it. I guess I’m trying to describe this moment when the technology was exciting, the lessons were well delivered, and the speakers were real and practical. That is what you can expect at a BILT conference.
Fast forward to 2016
My work situation had changed a few times, and as with all of us, my knowledge and experience had grown. I had started to specialize in a few specific areas. Its funny just how ‘big’ BIM really is. You can spend years learning, but still just feel like you are running to keep up with others. Would BILT still be of benefit to me? This time around, I was part of two sessions and also had the privilege of delivering the Keynote Sponsor address. Also, it was interesting to see how the conference had widened its scope to include so many related fields, including lots of sessions for the ArchiCAD crew, Facilities Management, Quantity Surveying. I could see that, just as my experience had grown and the industry had changed, BILT had adapted to those changes.
RTC 2016 was overall an engaging and positive experience. I was looking for different things, but I still found them. I was interested to meet some of the key Dynamo users and developers that I had been following online, like Konrad Sobon, Adam Sheather, and of course Marcello Sgambelluri. I really enjoyed a well researched session by Joe Banks, where he compared different collaboration platforms in a dynamic and thorough fashion. Also, Aaron Maller showed us just how easy it can be to set up your own virtual hardware. What I’m saying is that there is a session for every hat that you wear as a BIM person. There are sessions that reinforce what you know, or challenge what you thought was best practice. And along the way there are some good laughs and great conversations with interesting people. What about this year?
I was really happy to hear that BILT was coming to Adelaide, my home, in 2017. Adelaide has gone through a really accelerated learning and development period surrounding the massive nRAH project, and we are seeing the majority of significant projects now progressing towards a more developed and refined BIM flavour. At the same time, there is still some way to go, so hosting BILT will hopefully continue to energise that local market. What this means, too, is that there is a lot of ‘lessons learnt’ floating around. That is one reason why I chose to run a session called BIM Implementation in Real Life this year. I am going to interview people from a range of disciplines and job positions, and see what they have learned from the BIM implementation process in their office.
I’ll also be running a Lab where I hope to share a lot of real productivity-focused Revit tips. Enough about me! There is much more to see, like:
Dr. Louise Mahler will present the keynote address,
Dr. Daniel Davis will present a session on the research he is involved in at WeWork, and
Alain Waha will discuss digital transformation.
There is a new stream for Quantity Surveyors (first time with lab sessions), and
Some big announcements still to come in the Construction Stream.
This year the ArchiCAD sessions are fully integrated into the 3 day BILT program alongside the classes on Revit (and now also many other software packages, for example for QS and scheduling). The ArchiCAD program is here: https://www.rtcevents.com/blog/?p=6401
Finally, you can win a free ticket to the whole show! You can register for BILT, and also register for the Golden Ticket here:
There have been some similar attempts in the past. It is a bit of a challenge, because there will often be these ‘custom’ shared parameters that one company needs that are just very unique. But I’m interested to see how OpenRFA continues to grow. No doubt its success will depend on the number of contributors and their engagement.
Coordination Model Link: coordination model linking lets you use a Navisworks file as an underlay in Revit, making it easier to coordinate with outside teams that might not be working in Revit Railings: with Revit 2018 you can also attach railings to topography to model fencing, road barriers, or outdoor handrails New Structural Features: https://www.youtube.com/watch?v=HFL-YH4sFK8
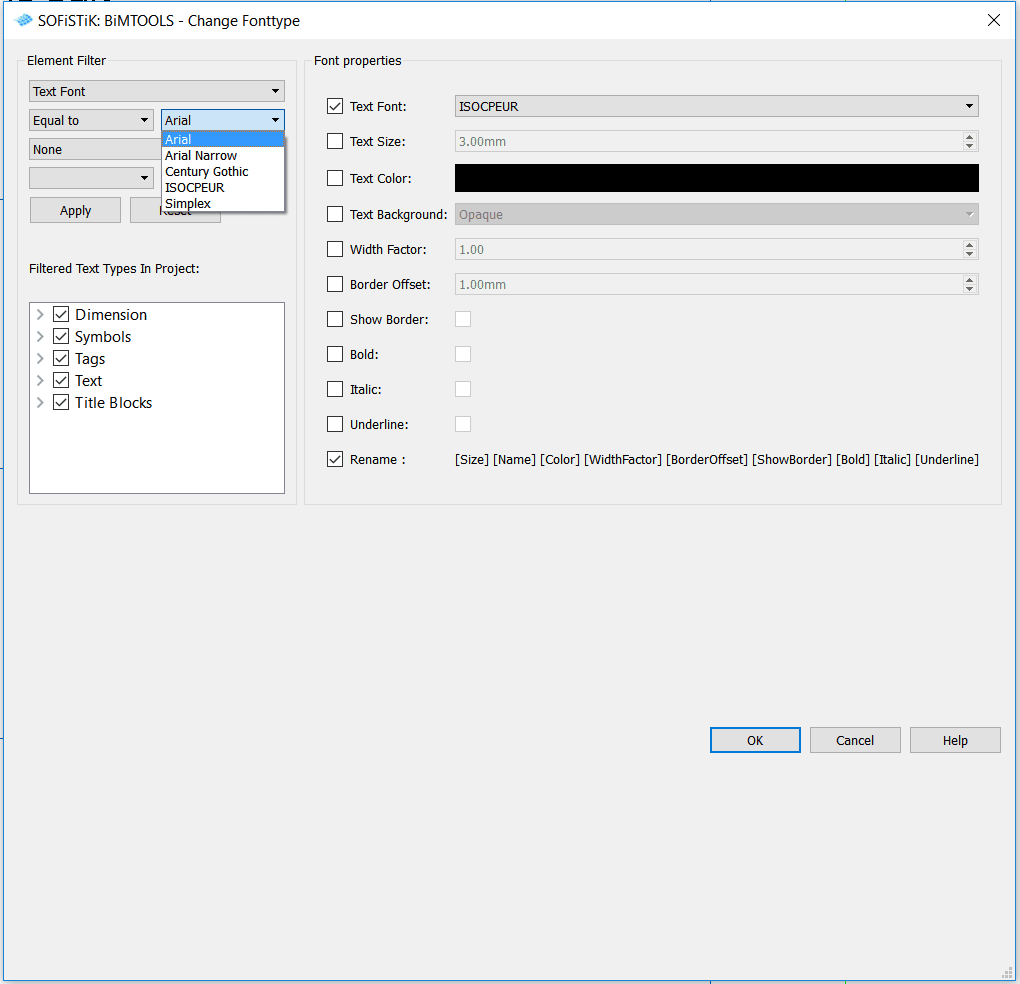
Massive free time saver for changing or swapping fonts in a Revit project!
Unfortunately, its not quite ‘everywhere’ – Generic Annotations need to be manually fixed. You can copy a text type to a Generic Annotation by first placing an instance of that text type on a Sheet in the Project.
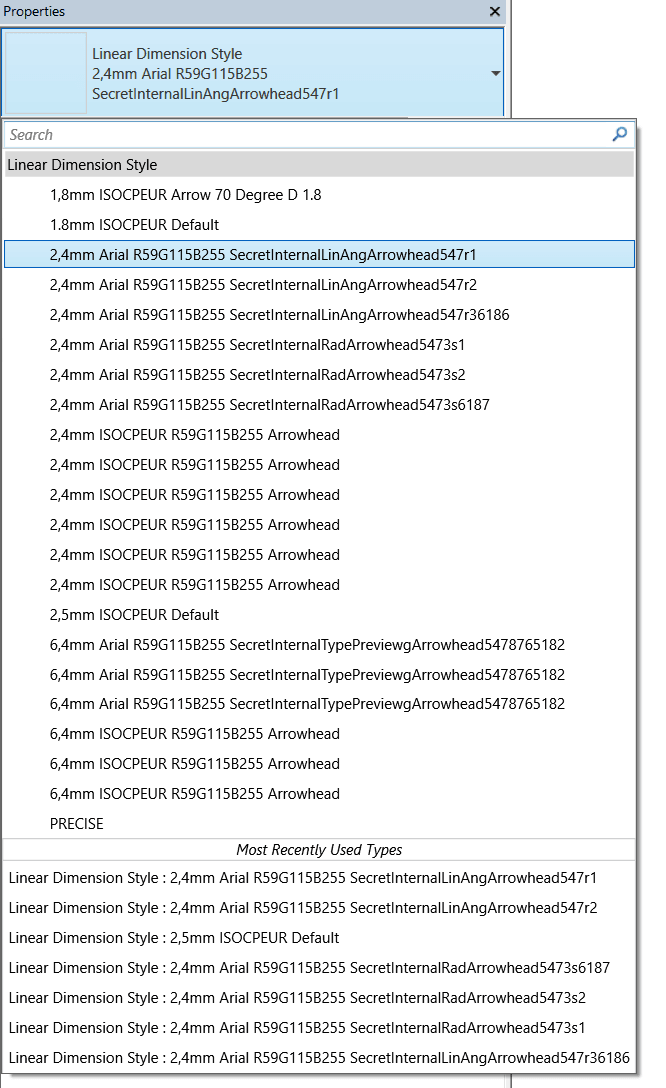
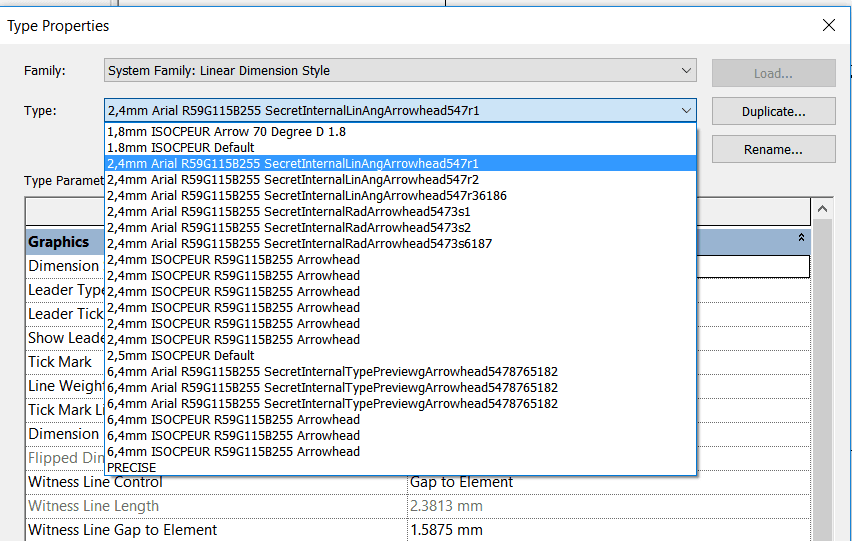
But what about SecretInternal Types?
This tool created another annoying problem for me… it exposed a whole bunch of ‘secret internal types’ in Revit.
How do we solve the SecretInternalTypes?
Here is what it they look like, along with how to fix them by deleting selectively with Dynamo.
Arrowheads:
Fixing / removing SecretInternal arrowheads with Dynamo:
Dimensions:
Fixing / removing SecretInternal Dimensions with Dynamo:
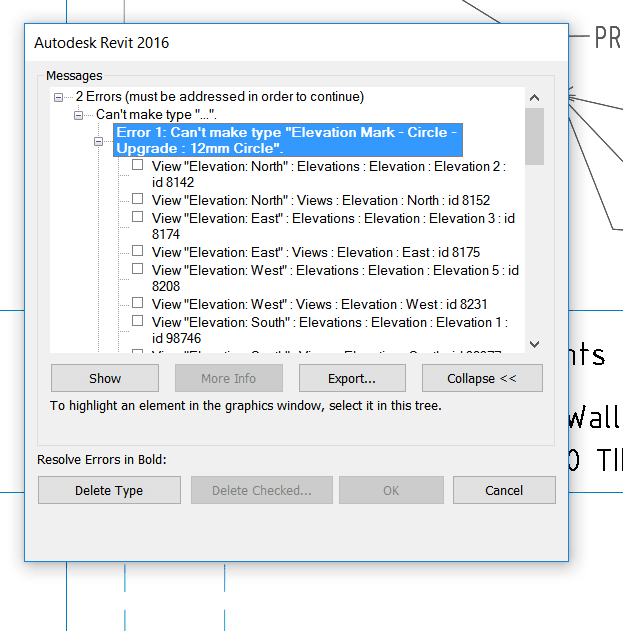
Removing the arrowheads resulted in a broken Elevation mark:
To fix this, I deleted the broken types and families (the Elevation Circle and Pointer) using the Project Browser, and then Transfer Project Standards – Elevation Types from a known good project.
So, now my fonts are changed and my SecretInternalTypes are fixed 🙂
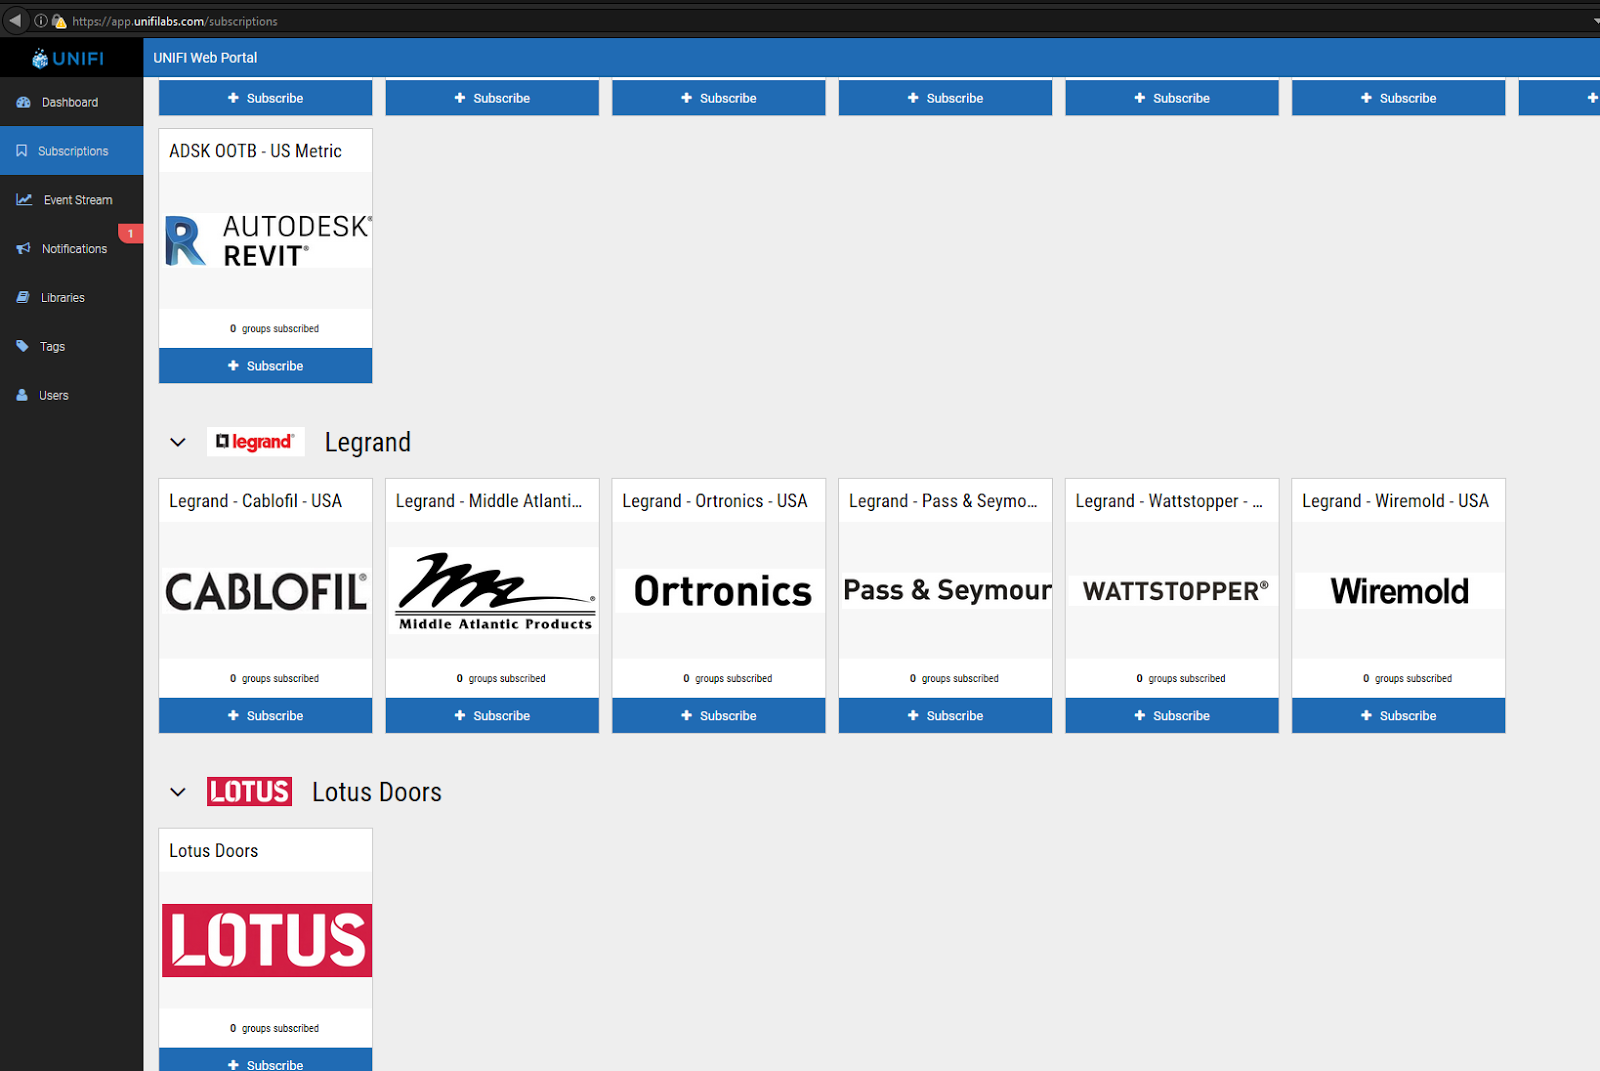
But … there are a handful of people using other platforms 🙂 And I guess even the most dedicated Revit user has to use other content creation tools from time to time. That is why UNIFI has decided to develop and release multiformat support, initially for these platforms:
Also, UNIFI are offering a free copy of their “How To Create and Maintain BIM Standards” guide to everyone who registers for their upcoming webinar. Here are the details:
full title is: “Accelerating ROI from Your Firm’s BIM Investment By Leveraging Analytics To Effectively Implement and Maintain Your BIM Standards“