At this link:
Revit PDF ( 36 PDF Books )
http://ebooks6.com/ looks to be some sort of metasearch / indexer for various types of documents.
Heads-up:
Revit Türkiye (CAD2BIM): BIM’in farklı alanlarda kullanımı ile ilgili PDF dokümanlar…
AI Empowered Project Management
At this link:
Revit PDF ( 36 PDF Books )
http://ebooks6.com/ looks to be some sort of metasearch / indexer for various types of documents.
Heads-up:
Revit Türkiye (CAD2BIM): BIM’in farklı alanlarda kullanımı ile ilgili PDF dokümanlar…
A couple of concise tweets from some Revit legends:
@jrostar Warnings, DWG links, Unused Groups, extraneous views, workset structure, phasing, design options, copy monitor, links, orphan tags
— Steve Stafford (@Steve_Stafford) December 5, 2012
@amyonymous @steve_stafford @jrostar also: unneeded imports, in-place families, family naming, images, use of a 2D starting view
— Sean David Burke (@seandburke) December 5, 2012
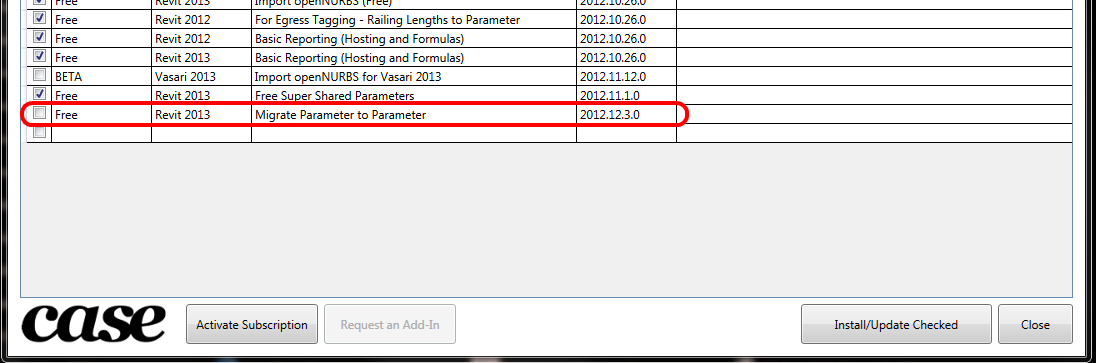
I think this was previously called DataSlider. To get it, just close Revit and Vasari and open your Case Add-in Manager (it may want to update itself). Then tick the Migrate Parameter to Parameter box and Install/Update checked.
From their website:
CASE APPS Migrate Parameter
Have you ever needed to schedule an item of data that Revit would not let you? This is a common hurdle for many and now there’s a free tool that you can use to get around this. Common uses include migrating Wall Base Constraint Element Names (Levels) into a schedulable parameter. I’m sure you guys will find lots of uses for this one.

David hinted at this a little while back:
Revit: Can’t schedule wall constraint – part 2

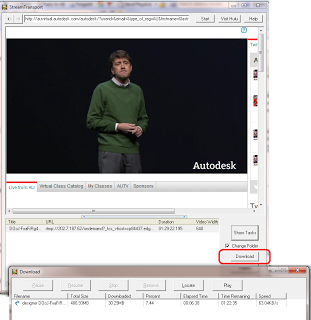
EDIT3 try using rtmpdump version 2.5, with the rtmpsrv method
EDIT Another, slightly more complicated option is RTMPDumpHelper with RTMPDump toolkit.
Choose the rtmpsrv.exe option.
EDIT2 After having more problems (the ooyala host used by AU2012 is particularly resistant to downloading methods), I used Coojah 6 with Firefox 3.5 portable after installing portable flash.xpi manually and running both Coojar and Firefox as Administrator and then downloading with Blader. All of this happened in a VirtualBox for safety.
Can’t download video from http://www.telegraph.co.uk – Google Groups
I recently tried to open an RVT project in Revit, and Revit 2013 with web Update 2 would just hard crash (no error report or anything).
What to do?
I copied the RVT to C:TEMP – still no go.
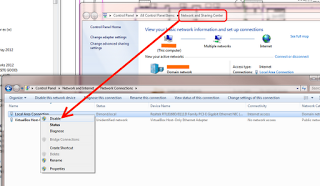
So perhaps a linked import with saved Absolute Path is causing the issue?
I disabled my LAN adapter, then opened the file from C:TEMP again (with Audit checked) – and it opened!
Next step – resave the file to its network location.
Then, one by one, reload links. Reloaded all RVT links ok. Save. Now for the DWG links. They all loaded ok too!
Save, close the file and re-open. No problems now.
It would seem that the Audit was able to correct something, but Revit wanted itself to be isolated from the network.
In conclusion, disabling your network adapter may allow you to open a file that is causing a hard crash in Revit.

EDIT – interestingly, opening the RVT in an NDA related product showed a ‘dimensions no longer parallel’ error message.
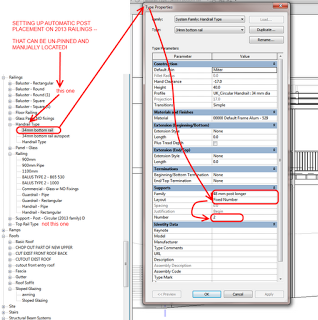
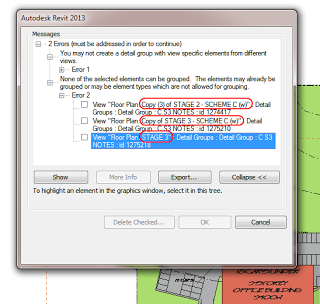
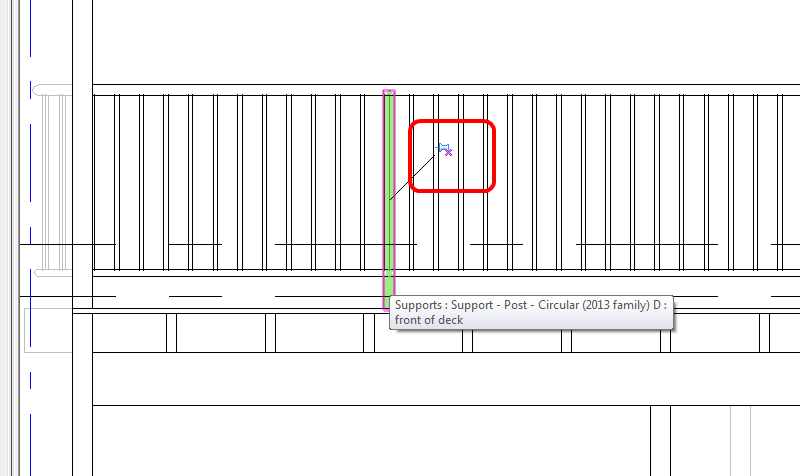
In Revit 2013, with Component Railings, you can unpin certain elements and modify them. For example, you can unpin a selected component Railing (Top Rail Type or Hand Rail Type) and swap it out for a different type. Similarly, you can unpin and swap out posts. However, you can also MOVE component posts after you unpin them. Some of this functionality is beginning to resemble Curtain Walls…
A word on terminology: pre-2013 we had Balusters. These appeared as a top level element under the Railings category in the Project Browser. In Edit Family mode, the Family Category and Parameters dialog did not tell you ‘this is a Baluster’. You could look in the Properties Palette and it would say Family: Balusters. In Revit 2013, the above condition still exists for Balusters (backward compatibility). However, the new component Posts are termed “Supports” and Supports is a proper sub-category of Railings (properties in Family Editor shows Family: Supports). Confused yet? If you want to dig a little deeper, check out the diagram on this page.
Ok, back to unpinning the posts (supports)–
What you need:
What you do:
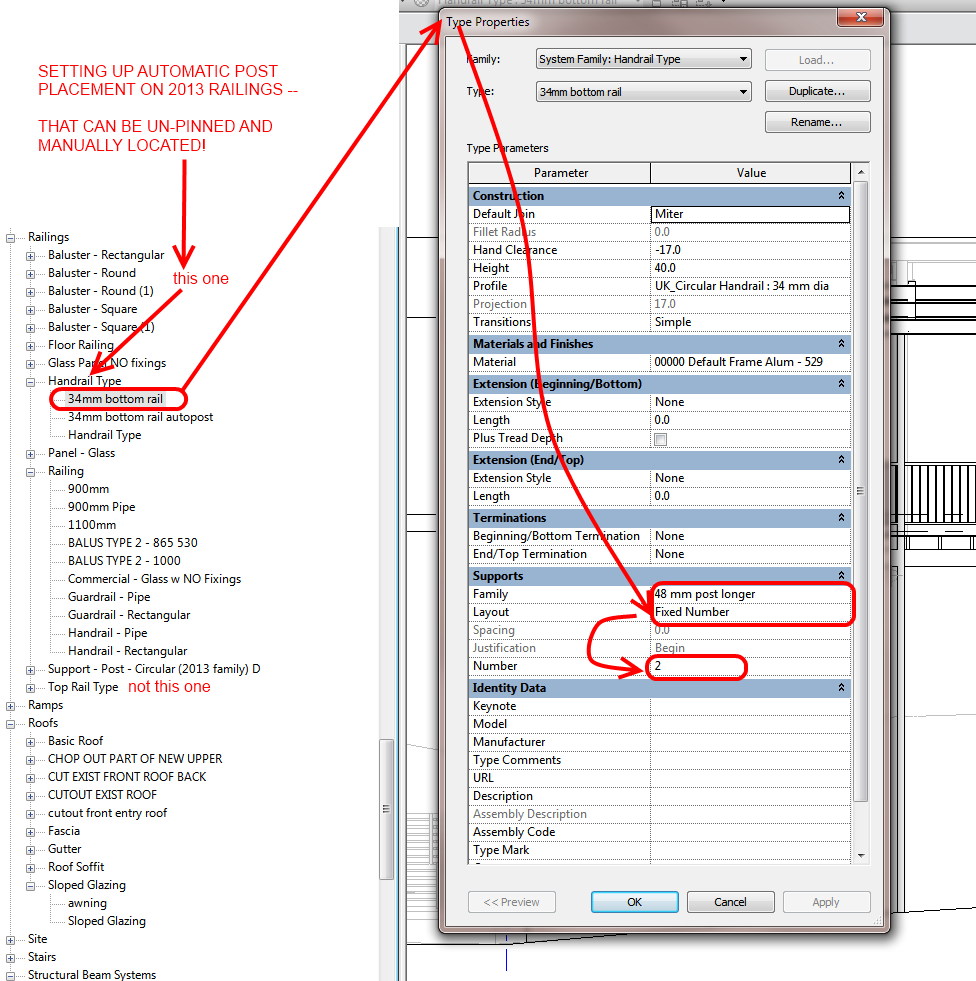
I have created a Supports family which allows resizing at both top and bottom – so I can create new types for various situations, unpin and then swap.
For a crash course in Revit 2013 component railings, check out:
Revit 2013 railings – almost 7 months old, but have you used them?
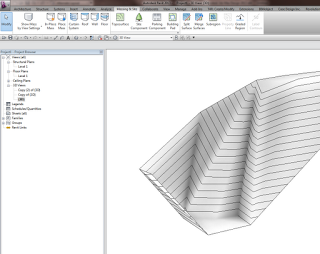
Yeah, Revit topo tools aren’t that great. Why don’t we try exporting to a sculpting tool like meshmixer, and see if we can make it work?
Let’s start with a simple Revit toposurface.
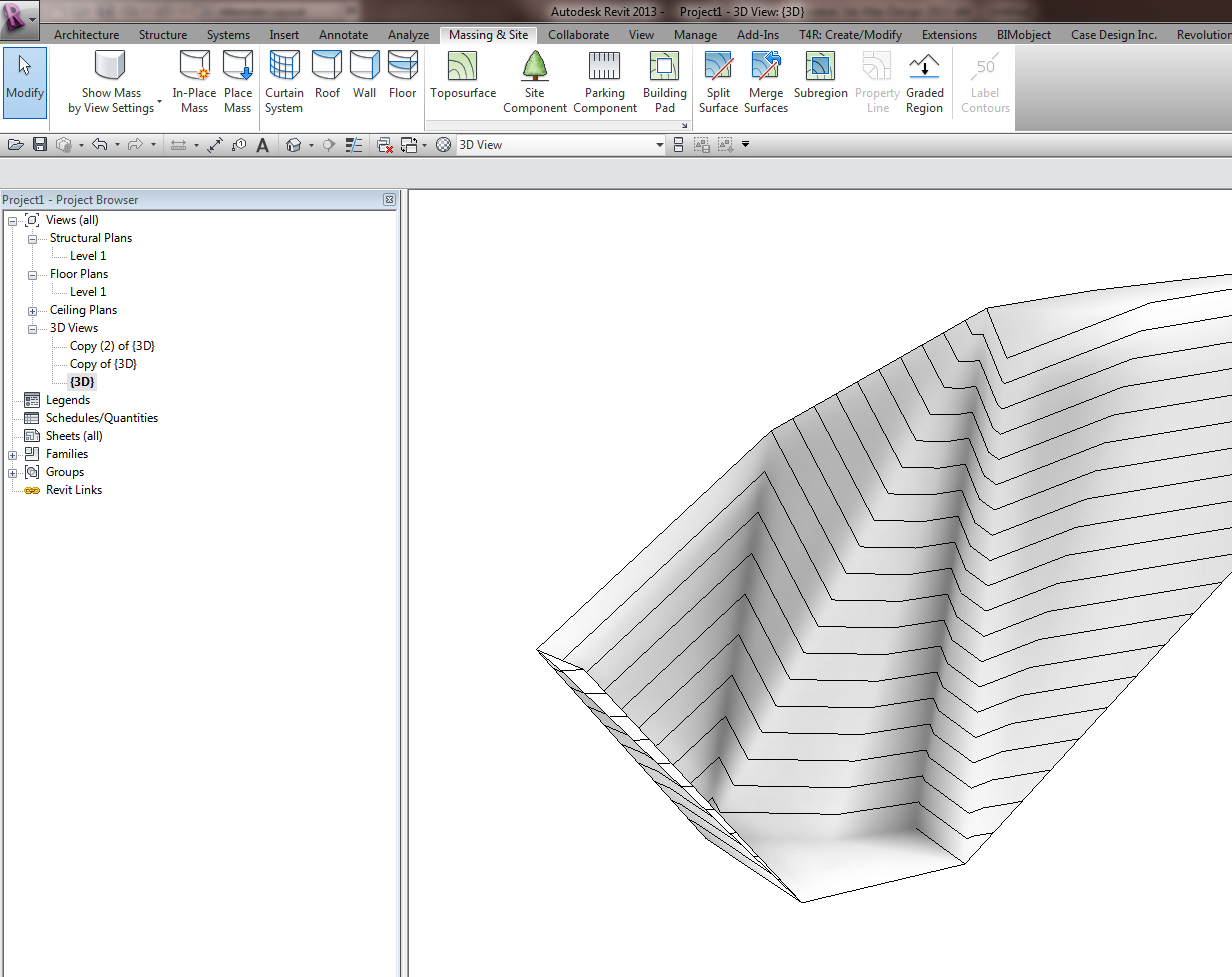
Export to Max by using Suite Workflows – 3ds Max Design Exterior Rendering
Once in Max, export selected (the toposurface) to OBJ using the Mudbox preset.
Open meshmixer (now at version 08). File – Import the OBJ. Start playing around with it, using the brush tools to smooth or warp the site. You may need to ‘scale’ up your active tool by using the middle mouse button to see real results.
I added some body parts to the site:
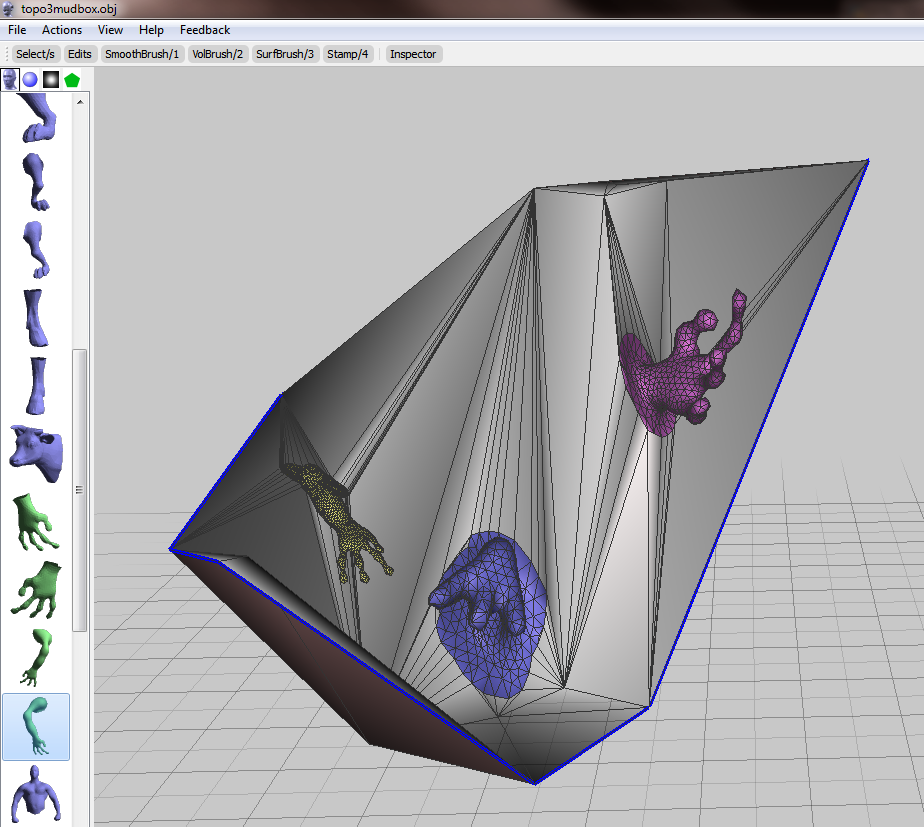
Export to OBJ from meshmixer.
Back in Max, select the previous surface object. Then Import, select the new OBJ you just made.
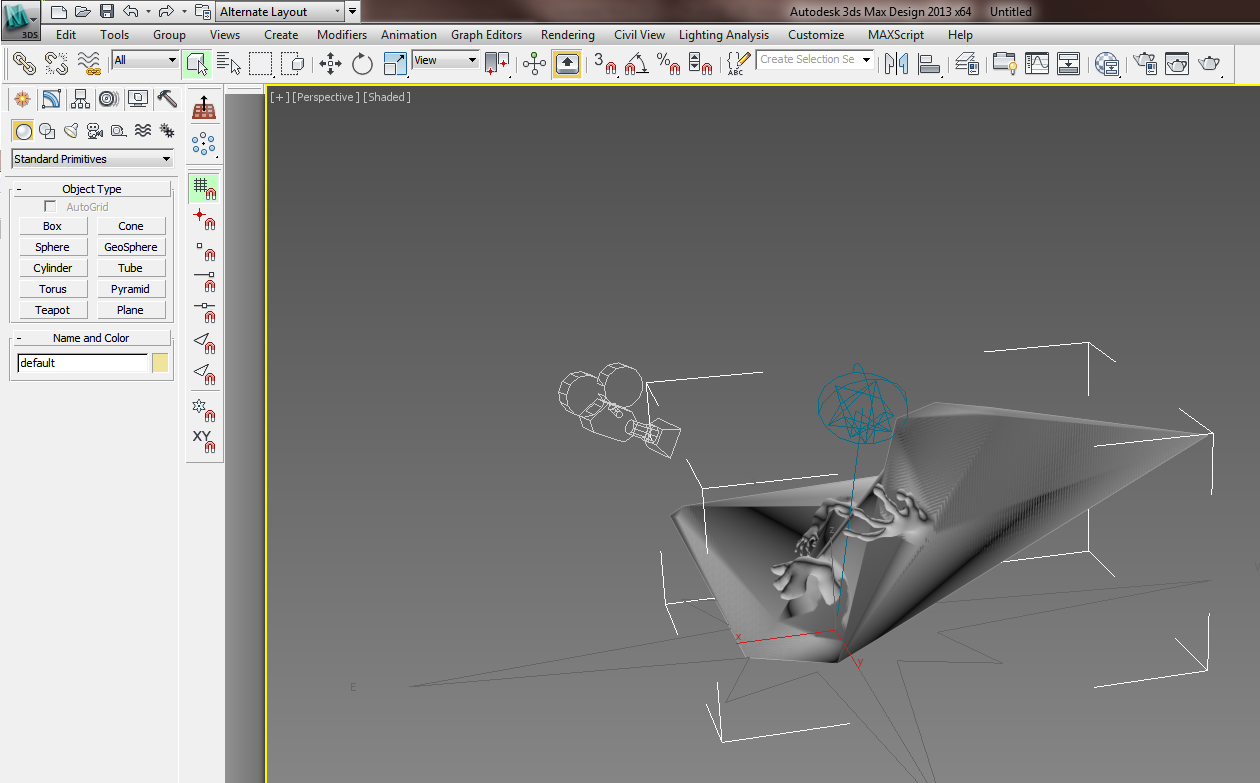
Now, export selected the new OBJ (with morphs) to a DWG file.
Import the DWG in Revit. If you haven’t gone too wild, you should be able to use Auto – Center to Center option effectively.
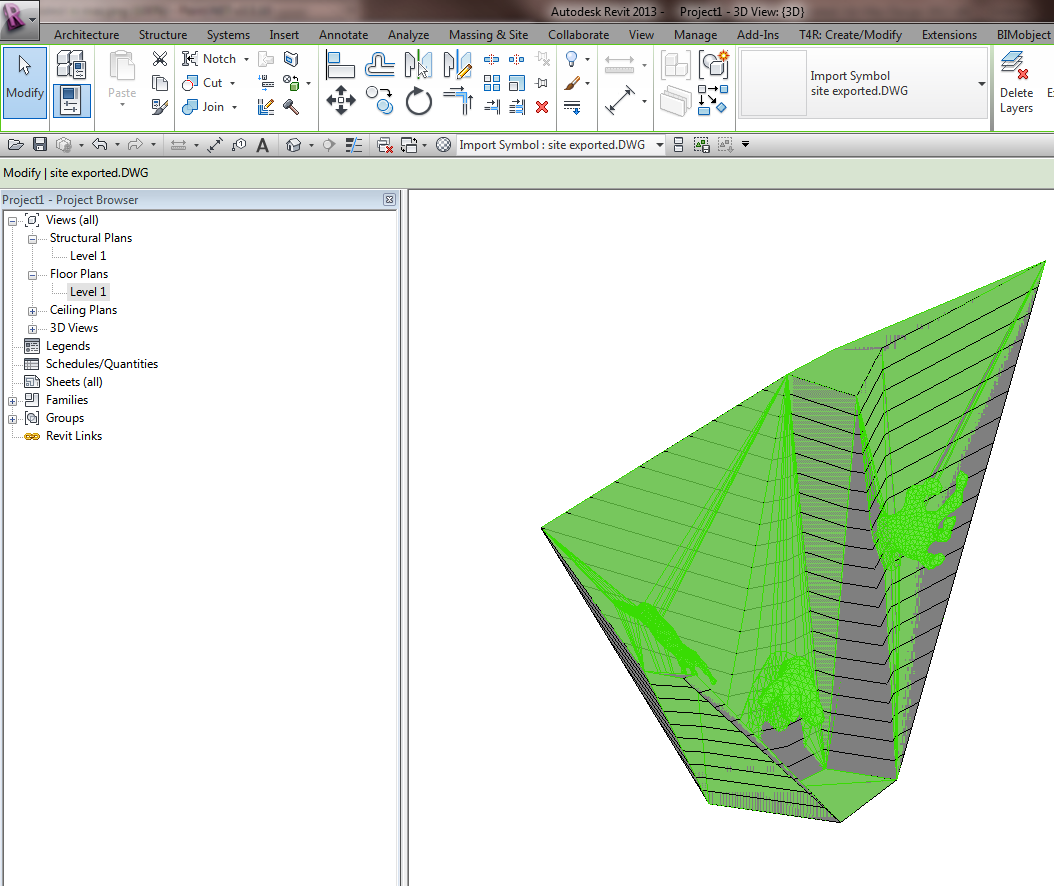
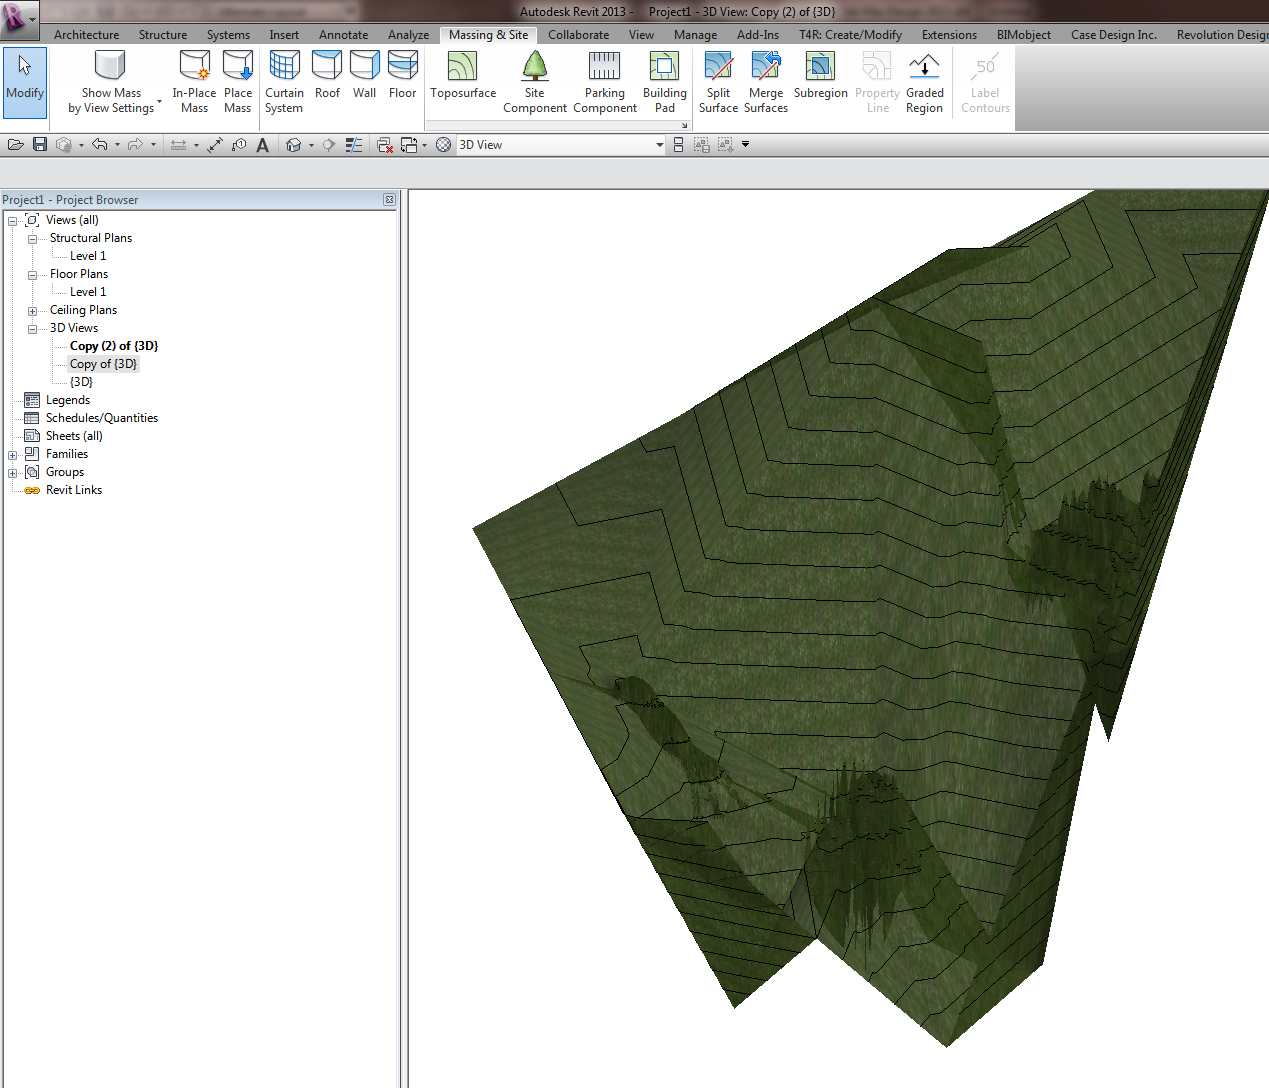
Finally, Revit won’t like this import very much – it probably won’t find points to make a surface. You will need to round-trip this DWG import by exporting out to DWG from Revit and then importing it back in again.
The ’round tripped’ import symbol can be used to generate the Toposurface, now morphed:
You may also be interested in:
Freeform and organic modelling from MeshMixer to 3ds Max to Revit
Check out the list of companies in the following quote:
Trimble Buildings and the Trimble DBO platform will initially combine technology from Trimble’s former Building Construction Division with SketchUp, Tekla, Meridian Systems, WinEst, Plancal and Vico Software. These solutions combine together to provide the broadest and most sophisticated capabilities available within the AEC industry today.

Also more at:
Trimble News Release
EDIT: My post was up before the app I think! Here is some more info:
Itunes App Store link:
https://itunes.apple.com/us/app/autodesk-formit/id575282599?ls=1&mt=8
Autodesk page:
http://autodeskformit.com/
Autodesk RSS feed for Formit:
http://autodeskformit.com/feed/
And some more from Autodesk FormIt & Revit – The Revit Clinic:
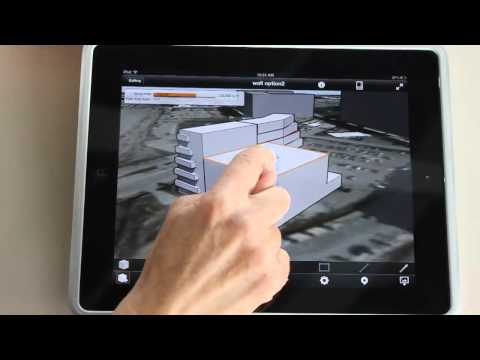
Express design ideas with easy-to-use tools:
Easy access to site information:
Make early design decisions:
Experience a more continuous BIM workflow:
FormIt is an intuitive, easy to use mass modeling application helping designers make informed decisions while accessing site and climate data. The building and site aware app allows designers to sketch proposed design options that can be compared with program requirements and then shared with the project team for continued collaboration through Autodesk® 360.
Available now on the Apple App Store.
(I can’t find it on there, can you?)