Recently, I was involved in the development of a construction animation with my colleague here at Virtual Built. The end result was very good, but I observed quite a few challenges he faced along the way. For example, to get the data in we had to manipulate and modify quite a few things. We had a city model in FBX, but it was difficult to work with. My colleague had to add a lot of content to the animation to make it realistic, and then he also had to do some significant post-processing work to end up with a convincing end result. To achieve this, we used about 4 or 5 different software packages. At the time, I was thinking “surely we could produce something more easily and quickly in Lumion!“.

Right now I am pleased to be able to have a look at Lumion 8 in detail in this review, and I will be thinking about how Lumion could have optimised or assisted in the animation production. As you know, I have written about Lumion before, so let’s focus on a few major headings:

  • What Key Features in Lumion 8 can be used to really enhance and present your design? How could we quickly apply these new features to some existing workflows?
  • More links for Lumion 8 information
  • How to apply the OpenStreetMap patch?
  • Video Tutorials and Webinars
  • Graphics Card Hardware recommendations
  • Release video and first renders in Lumion 8


Key Features of Lumion 8

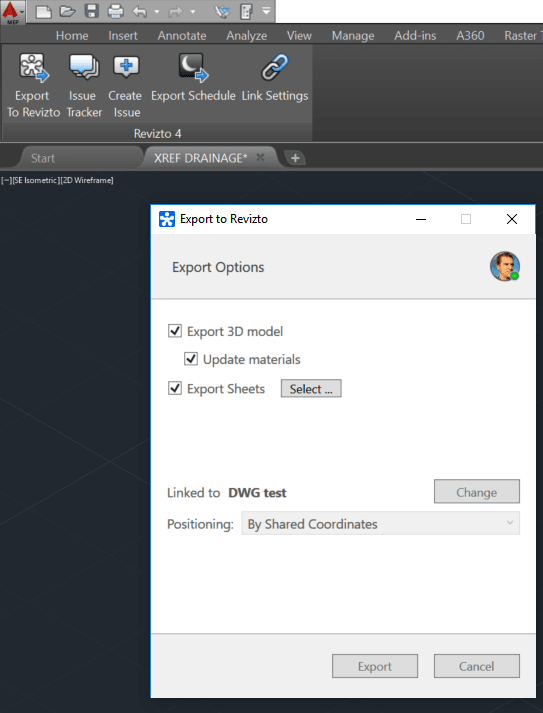
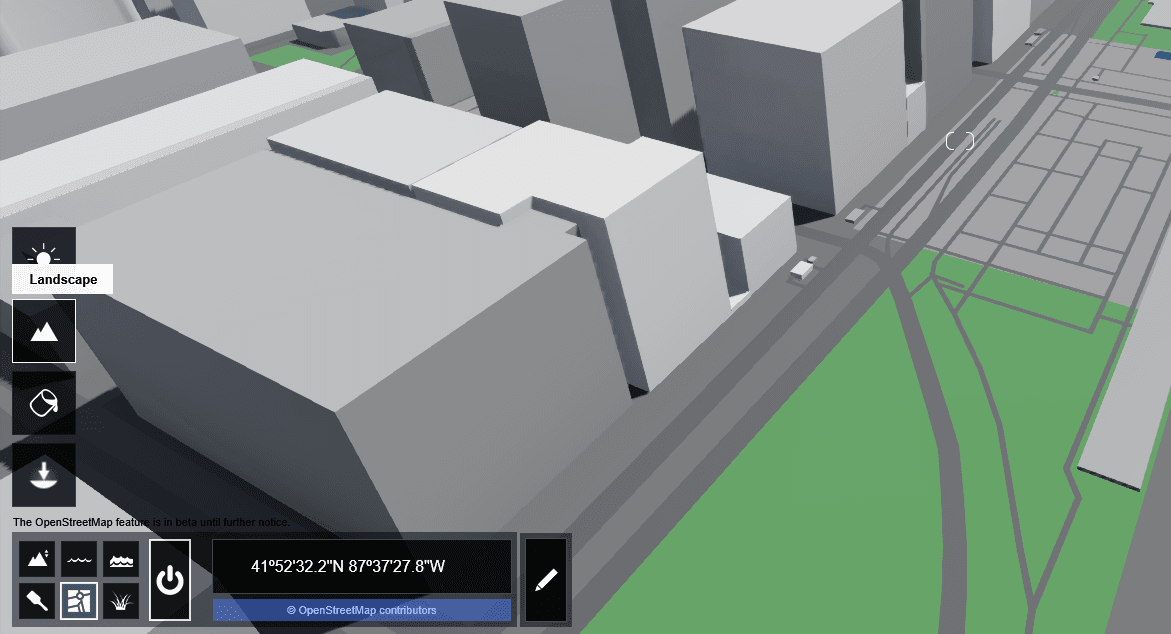
Let’s go through some of the key new features one-by-one. Firstly, I used OpenStreetMap to bring in some city context, then opened a model in Revit 2018 and used the LiveSync addin to bring the model into Lumion 8. This took about 40 seconds on my machine, as the video below shows:

Then I cleaned up the OSM City Model a bit (inside of Lumion) and positioned my model. I hid the Topography in Revit, and it immediately and automatically was hidden in Lumion (nice).

Now it was time to try out some of the new features of Lumion 8!

Styles:

What it means: “No more hunting around for the right effects. Gone are the days of meticulously balancing sliders. Once you dress up your 3D model with Lumion materials and objects, just click the Styles Button and select an interior or exterior style. In an instant your design becomes a beautiful render with a carefully balanced effects combination.”

How I used it: In my case, I used the model I had running in LiveSync. Styles is part of the Photo capability of Lumion, so to use it:

  • click the Photo button
  • click the Style button
  • choose a style
  • be amazed at how quick and easy it was to get something that looks great 🙂

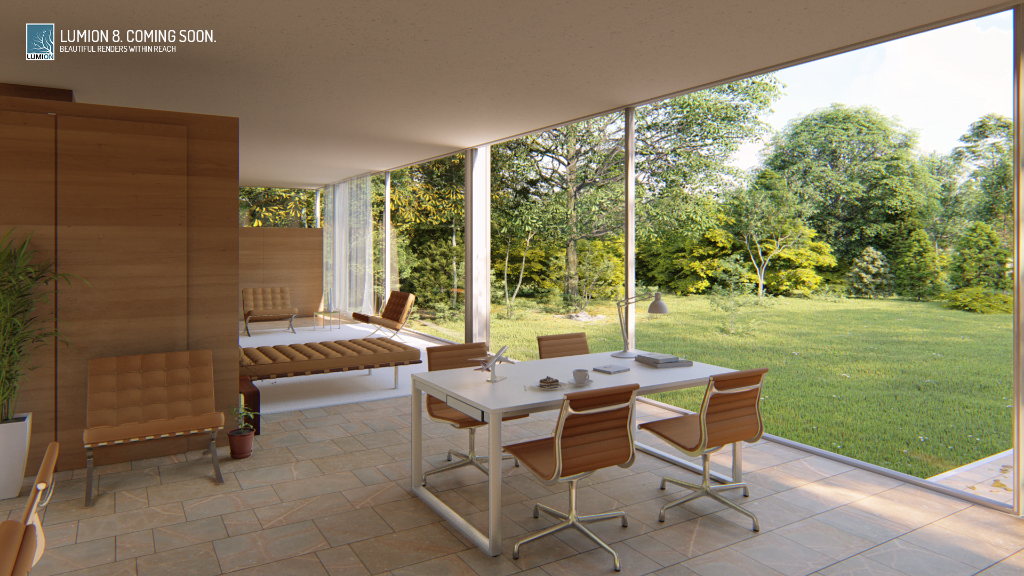
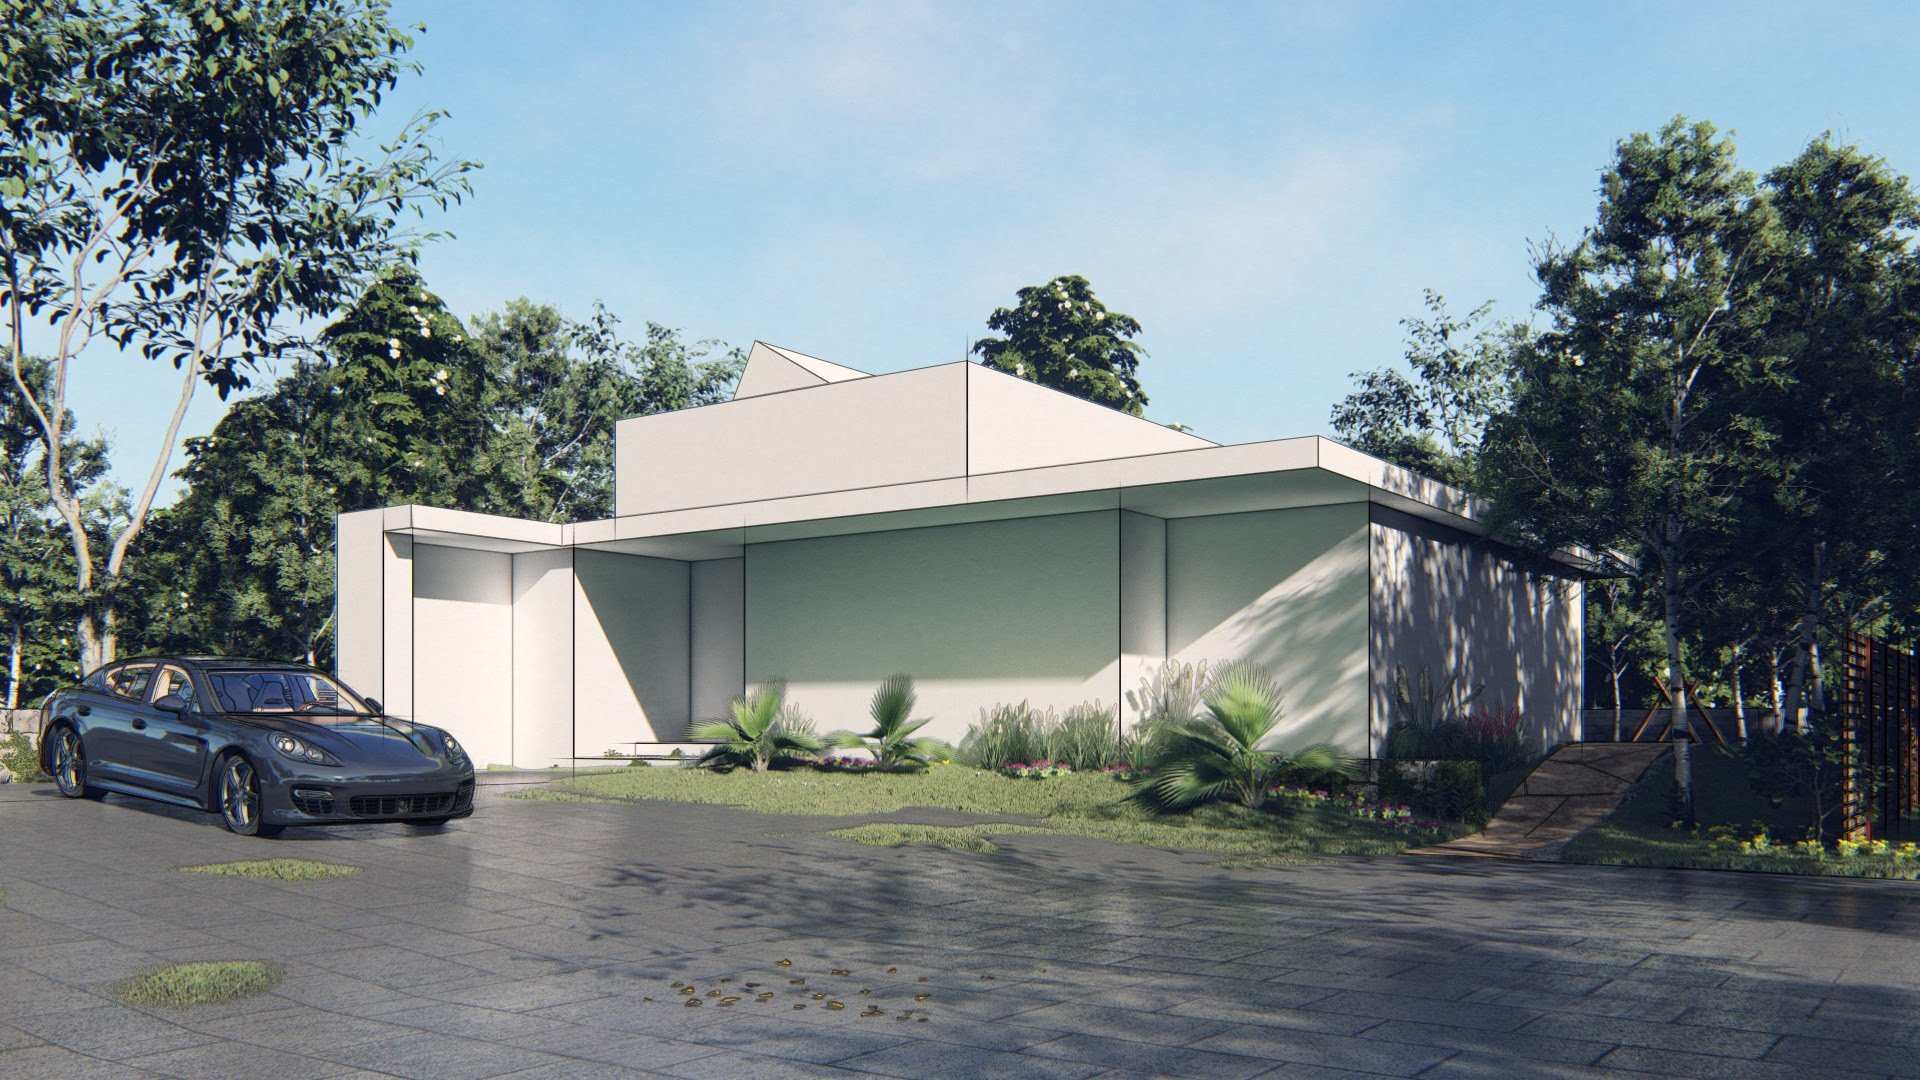
Here is an example of the “Color Sketch” style. It amazed me how this transformed a somewhat bland image into something that had a kind of organic and architectural feel.

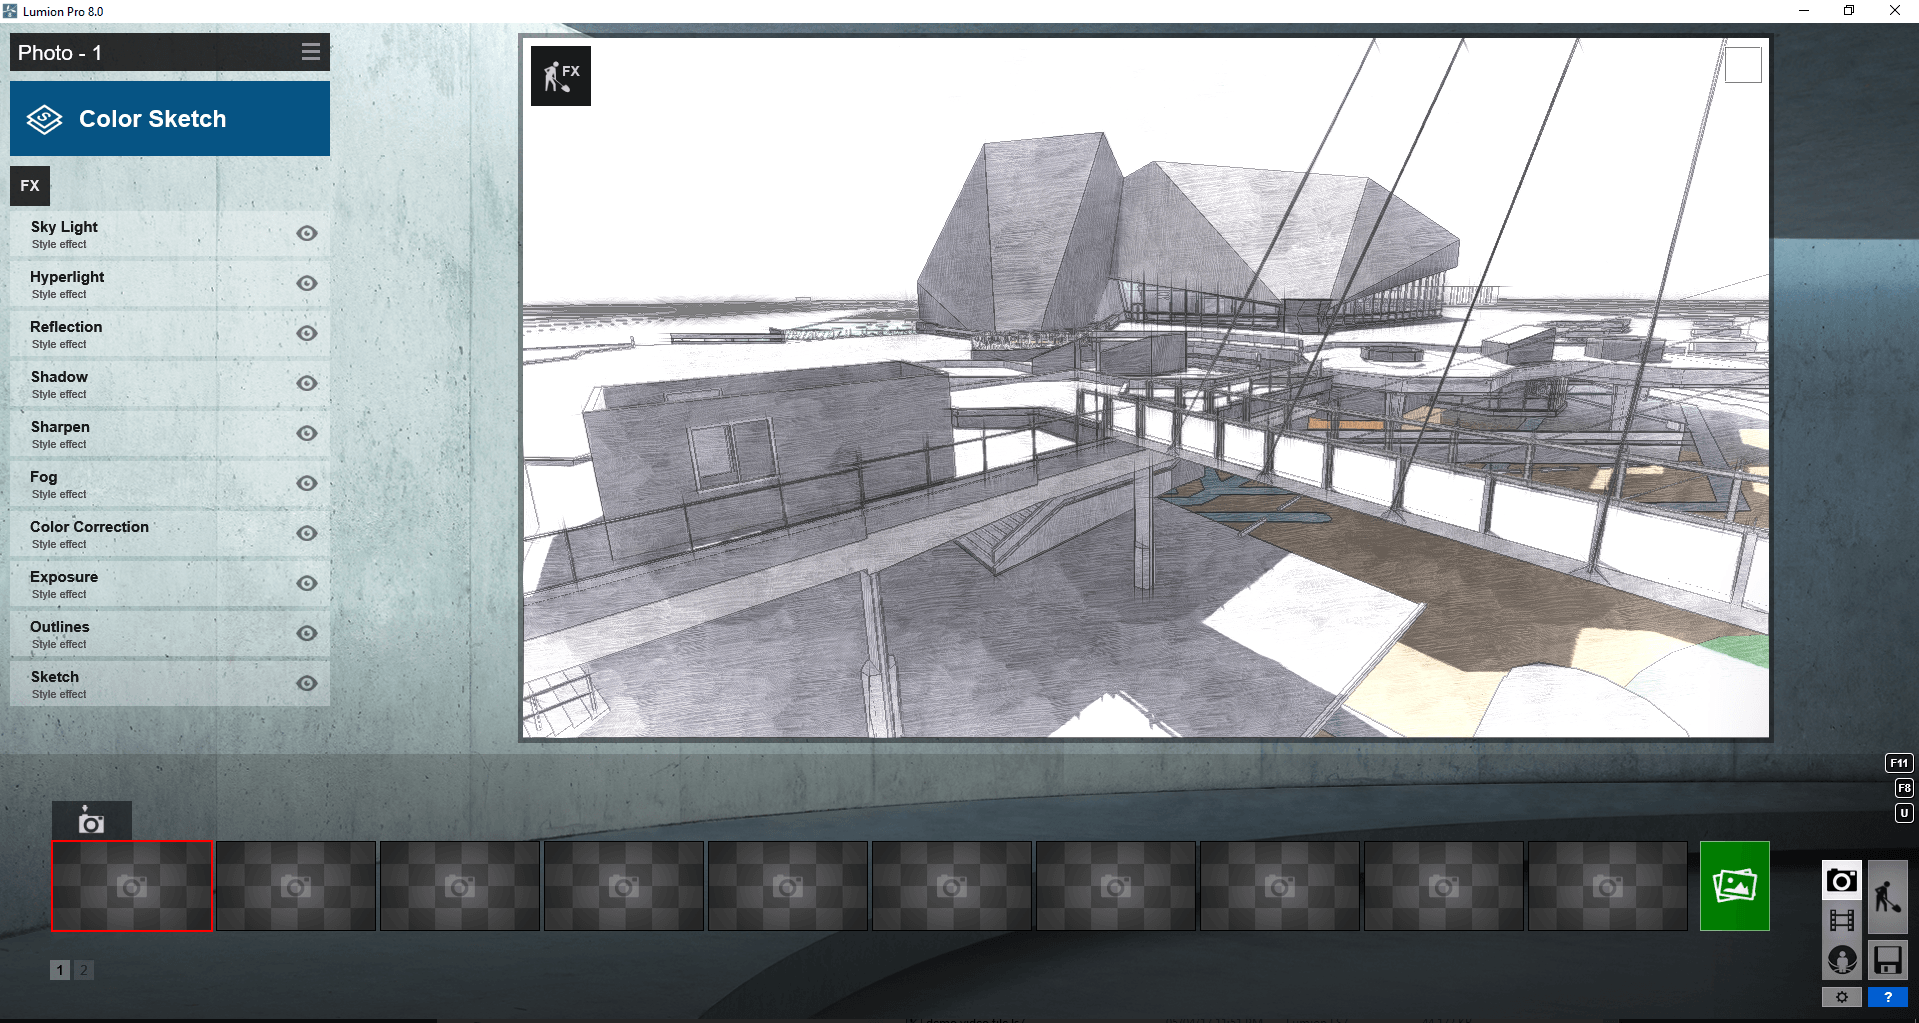
Here is one of the ‘hero’ shots showing the Styles feature:

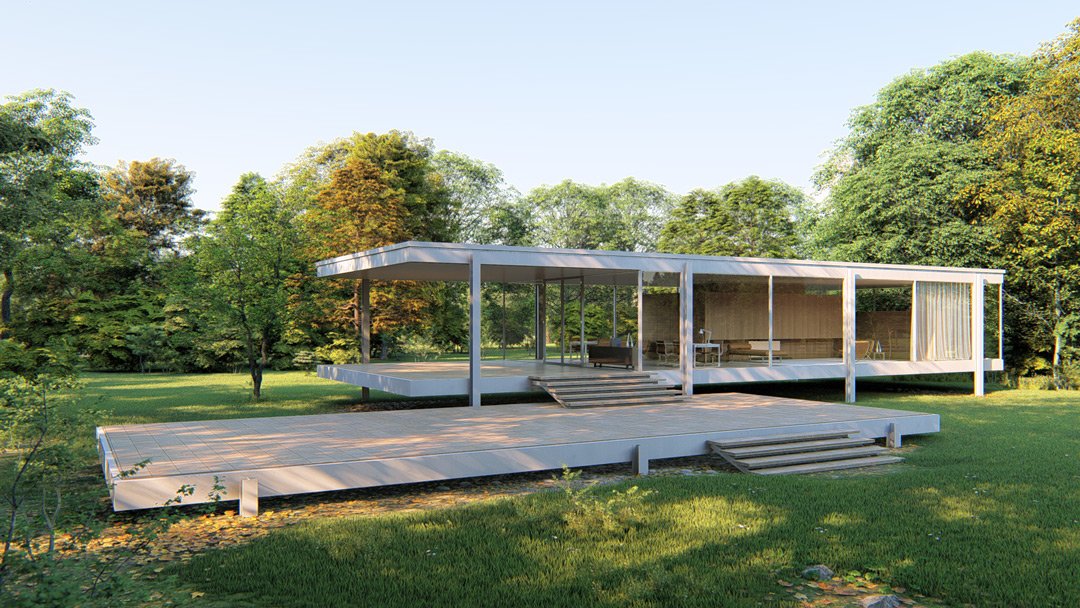
Sky Light daylight simulator
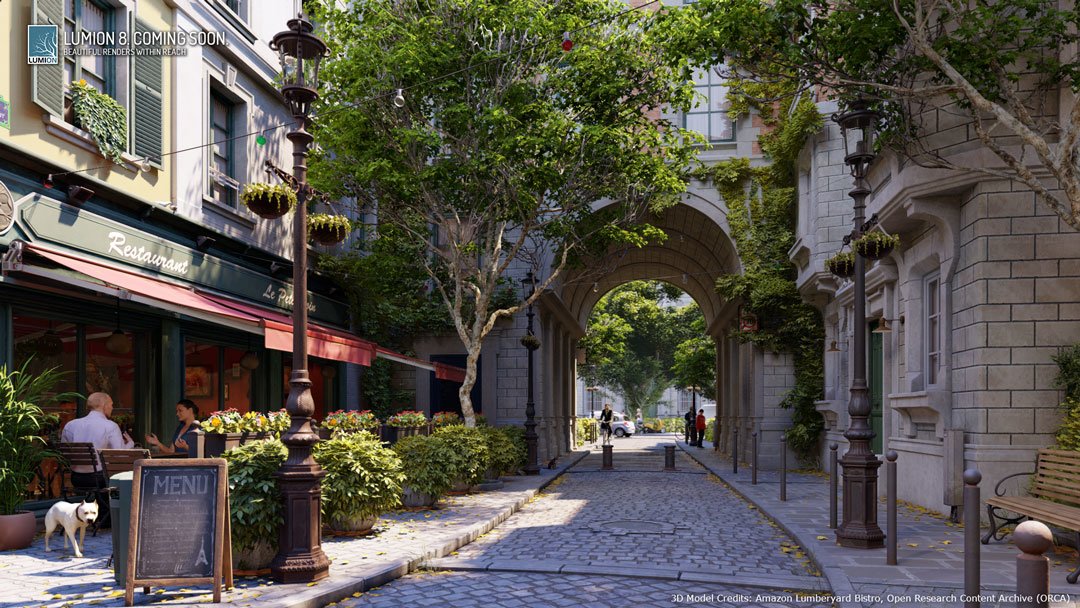
What it is: Ready to render? If you haven’t added the Sky Light effect, then…well…no. Maybe not. Because it’s an impressive technology developed especially for Lumion 8 to heighten your image’s sense of environment, realism and depth. Sky Light is an advanced, daylight simulator for softening and dispersing the scene’s environmental lighting. Used in combination with Soft Shadows and Fine Detail Shadows, it strengthens the real-life interplay of these elements. Watch as the foliage and trees become photorealistic, and discover as people, buildings and landscapes suddenly look like they belong where they are.

How I used it: I tried out turning Sky Light on and off with different Photo Styles. It is one of the FX options, as shown below:

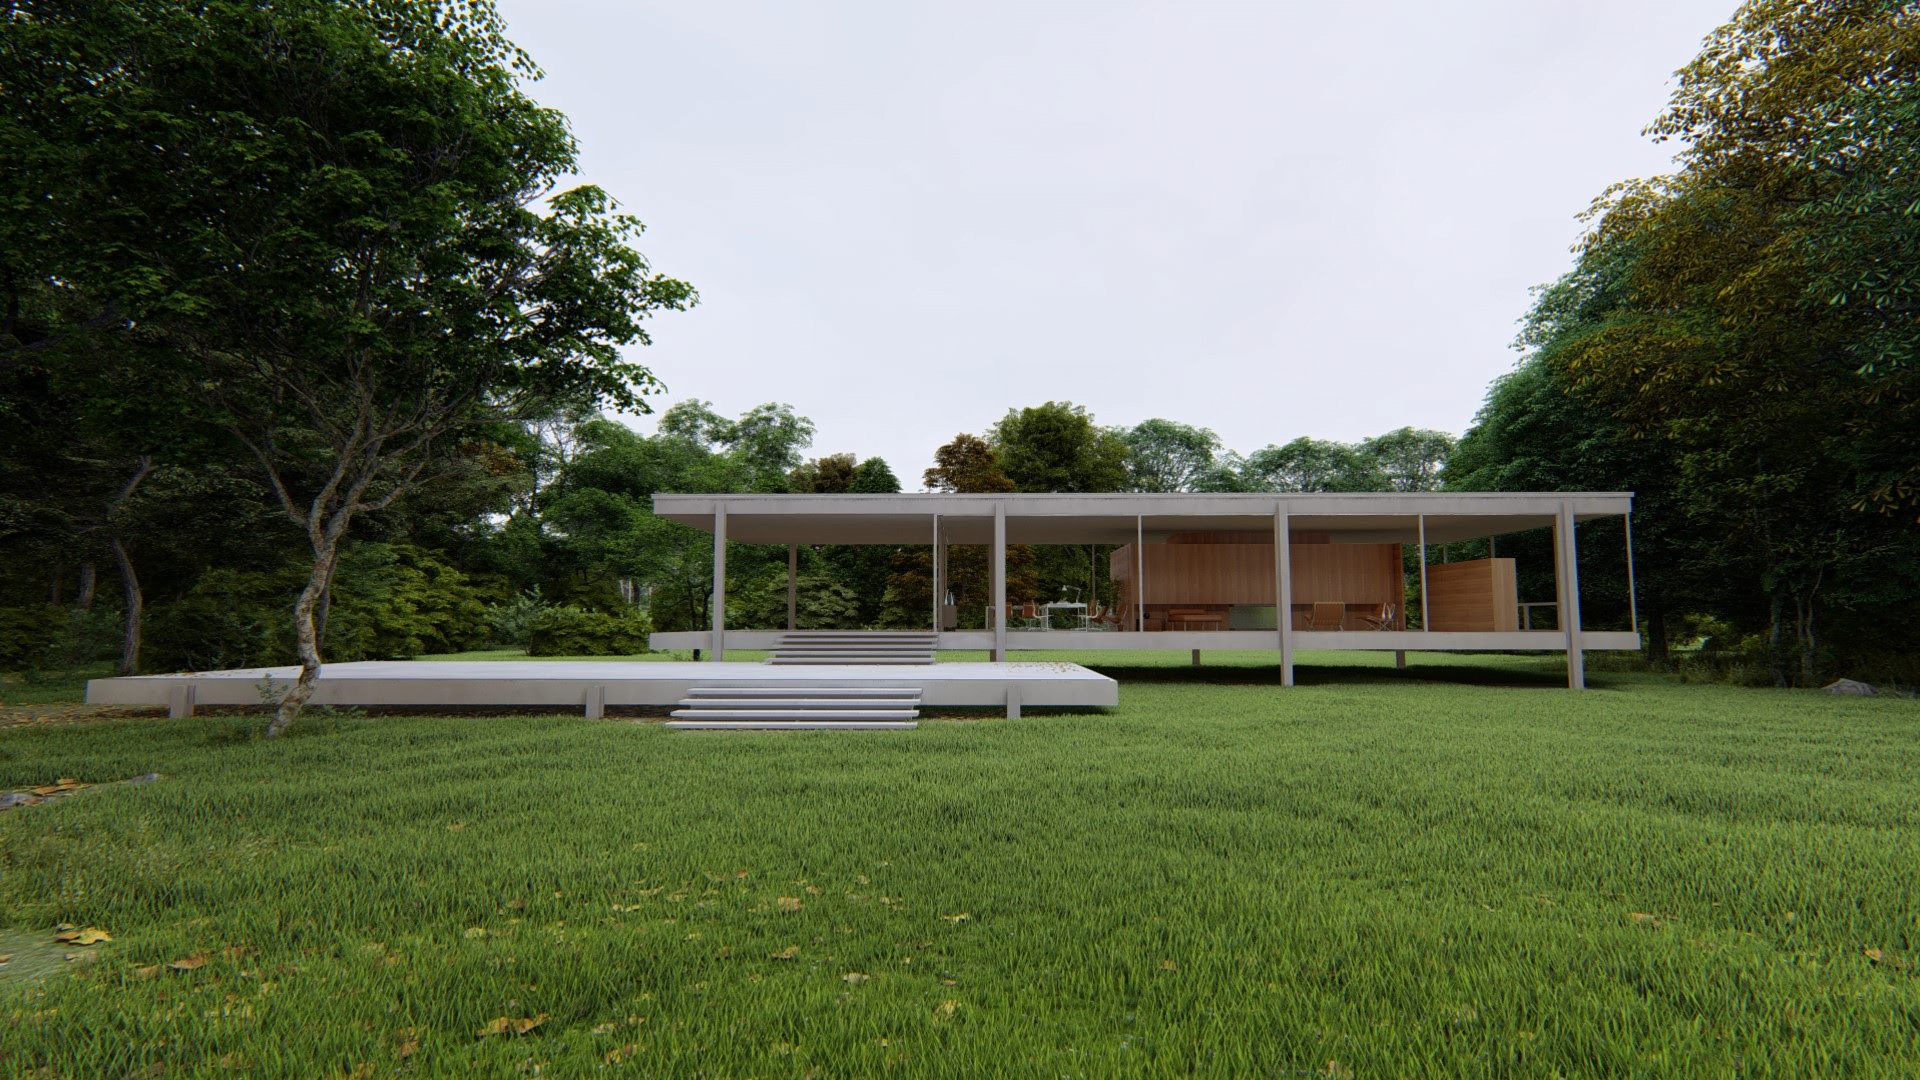
Here is another example of the daylight simulator:

Soft and fine shadows
What it is: Designing realistic shadows, whether from scratch or in a rendering program, may be one of the most difficult things you can do. Until now. In Lumion 8, you can inject realism into your render by turning on the Soft Shadows and the Fine Detail Shadows as part of the Shadow effect. Instantly, the shadows become softer, the penumbras grow. Hundreds of fine detail shadows are enriched and a realistic sense of depth permeates the image. You’ll feel yourself smile as you view your unbuilt design looking uncannily like the real thing.

How I used it:

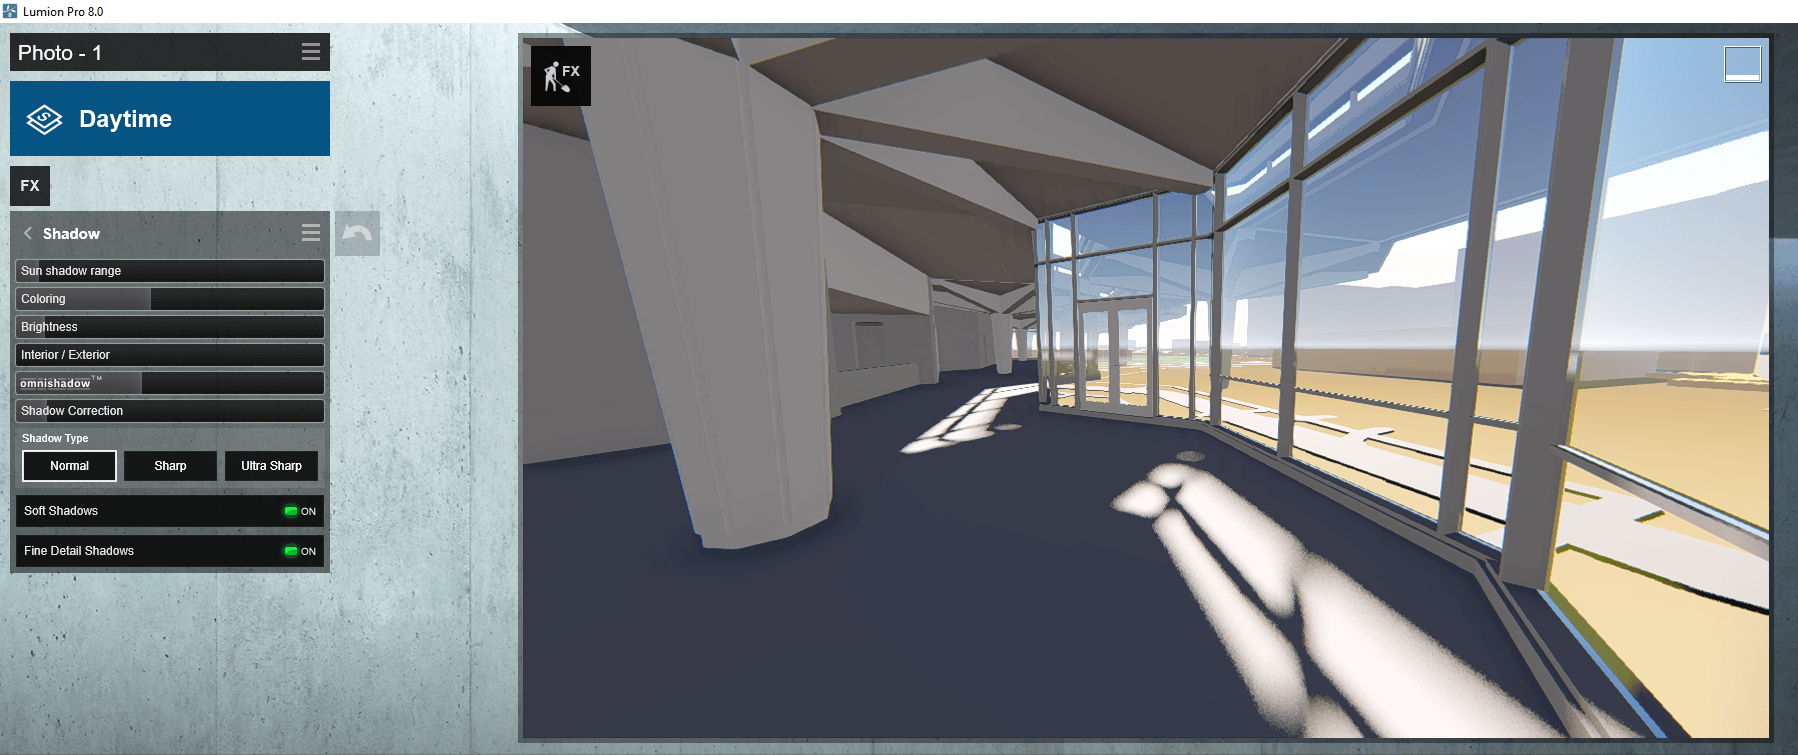
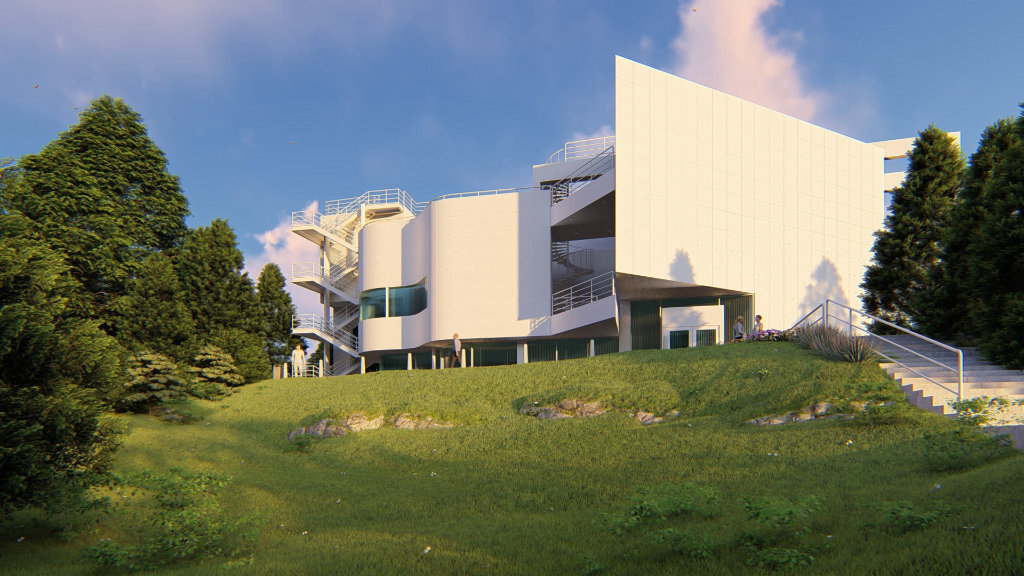
I tried it out on my sample model. You find these options under the Shadow FX of the Photo toolkit. In the image below, the Soft Shadows are shown as the sun hits the floor, while the Fine Detail Shadows are showing the foot path outside the building with more clarity. So in a scene that was more developed, these options can really make the overall visual more clear and appealing.

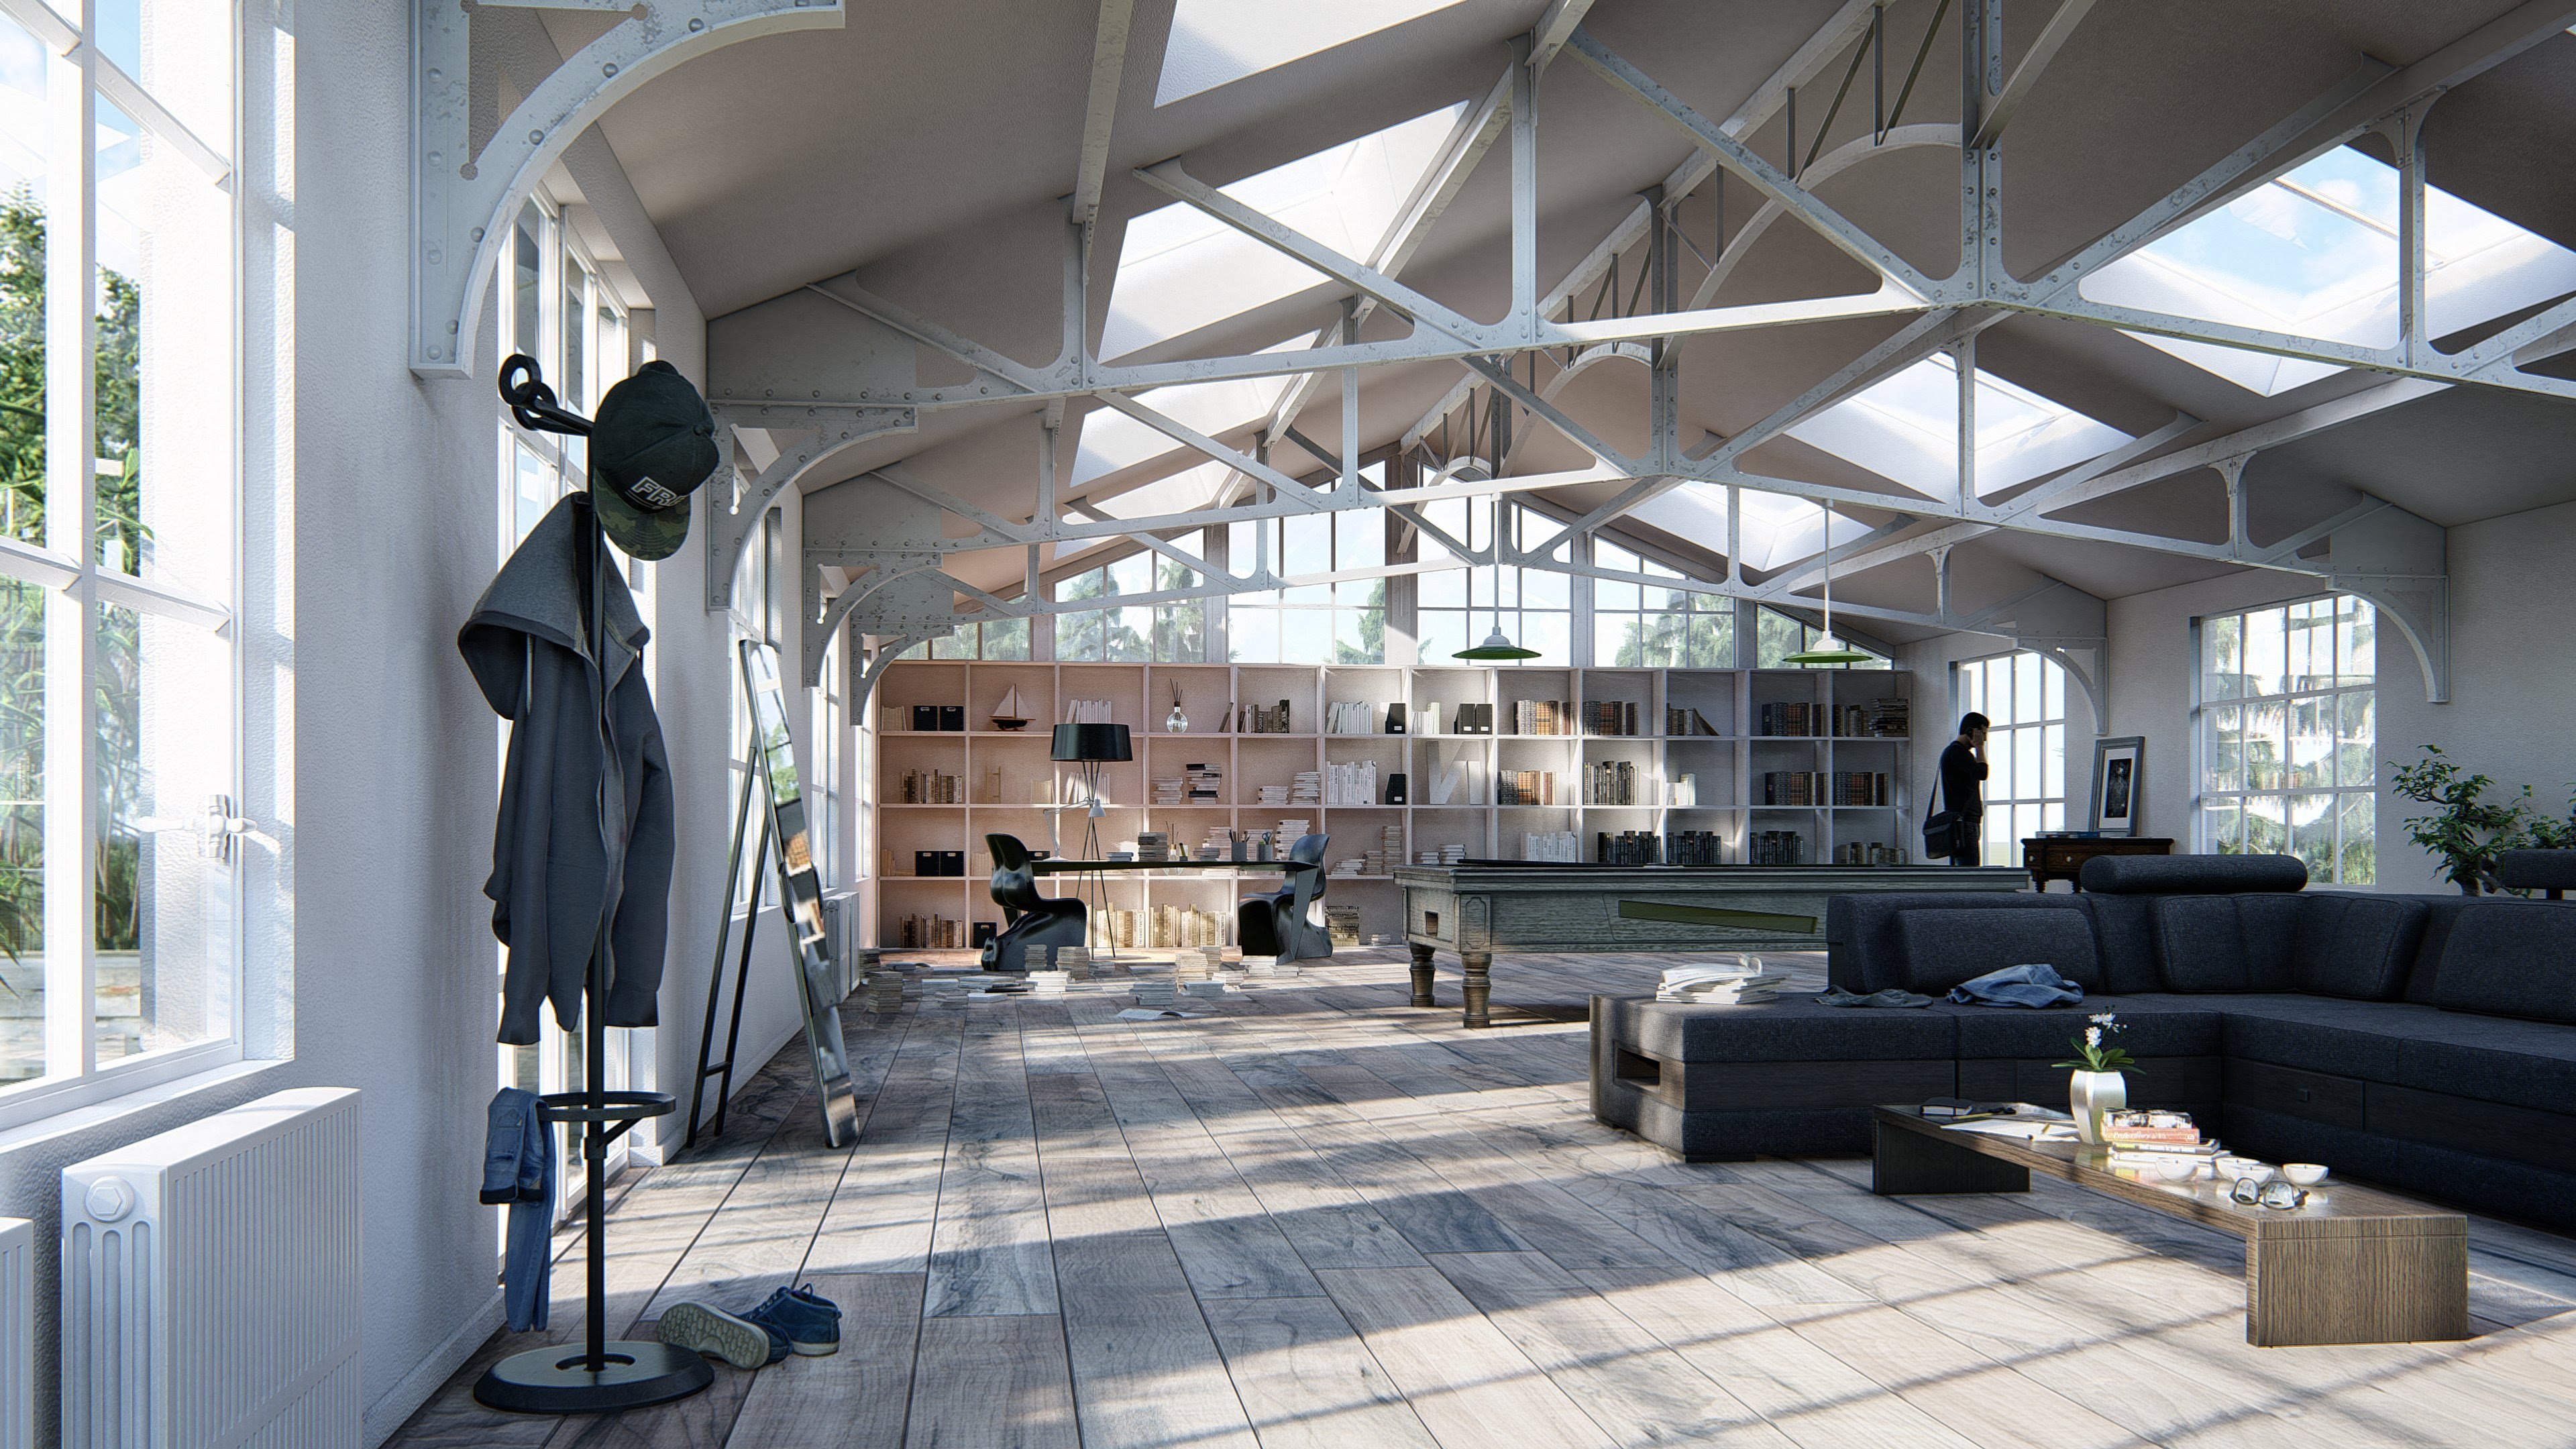
Here is another example of soft and fine shadows:

Hand-drawn outline effect (Pro only)
What it is: Lumion 8 makes it easy to clearly communicate the form of your design with the “hand-drawn” outline effect. Apply it together with photorealistic, sketch or artistic effects to draw a focus to your building’s general shape and form. It’s the bones of your design, rendered beautifully and easily.

How I used it: You can add the Outlines effect from the FX button. Once you have added the effect, you can fine-tune with the 3 sliders. I found that increasing the Outline Density really helped to punch out even very thin elements in the scene.

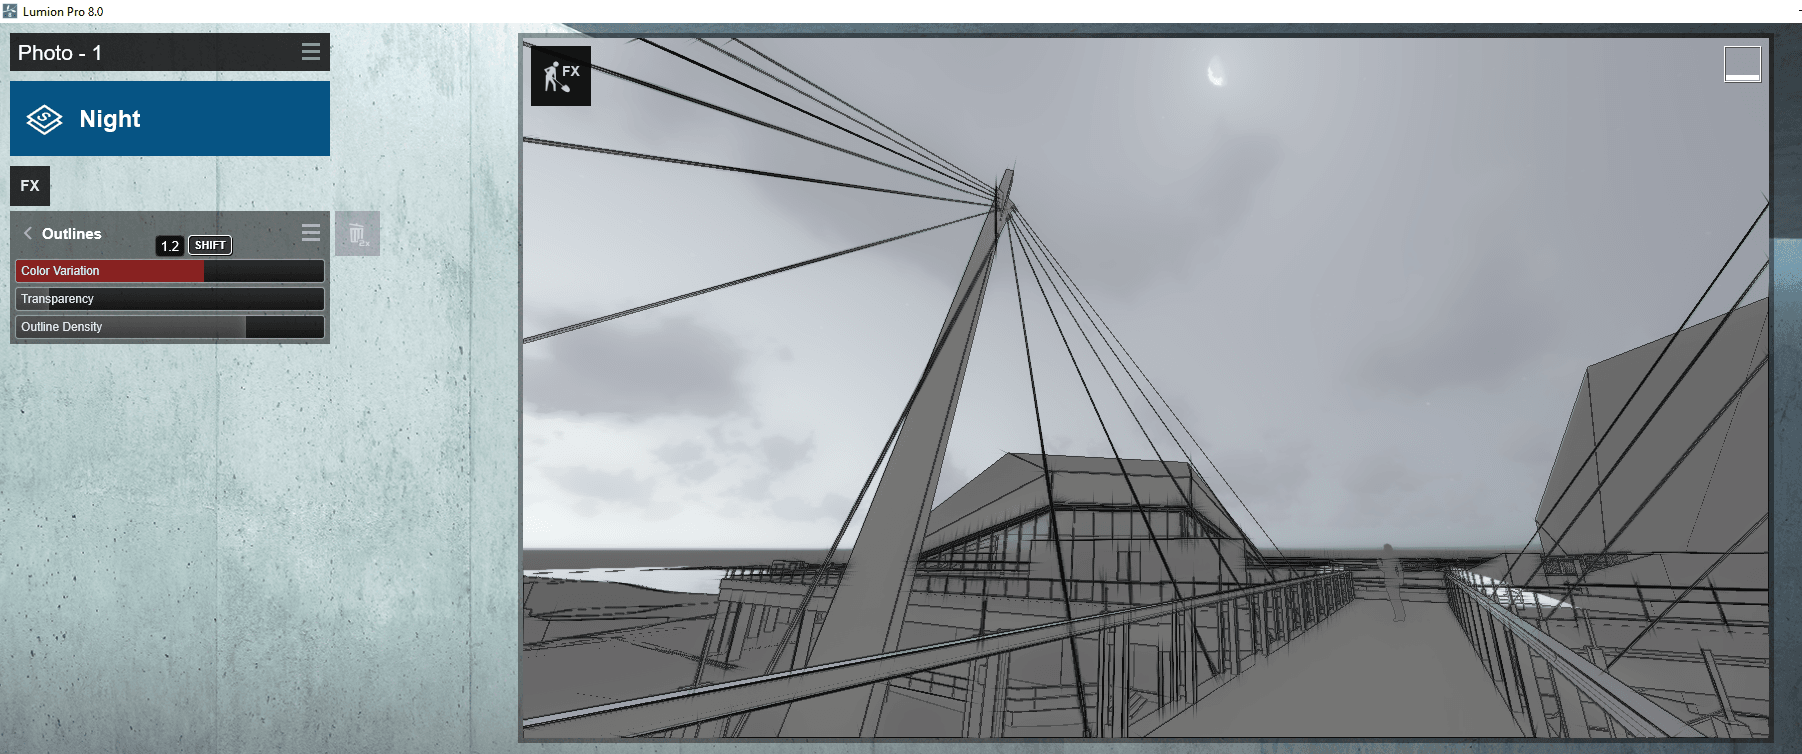
Here is another example of the Outlines effect:

Soften hard edges (Pro only)
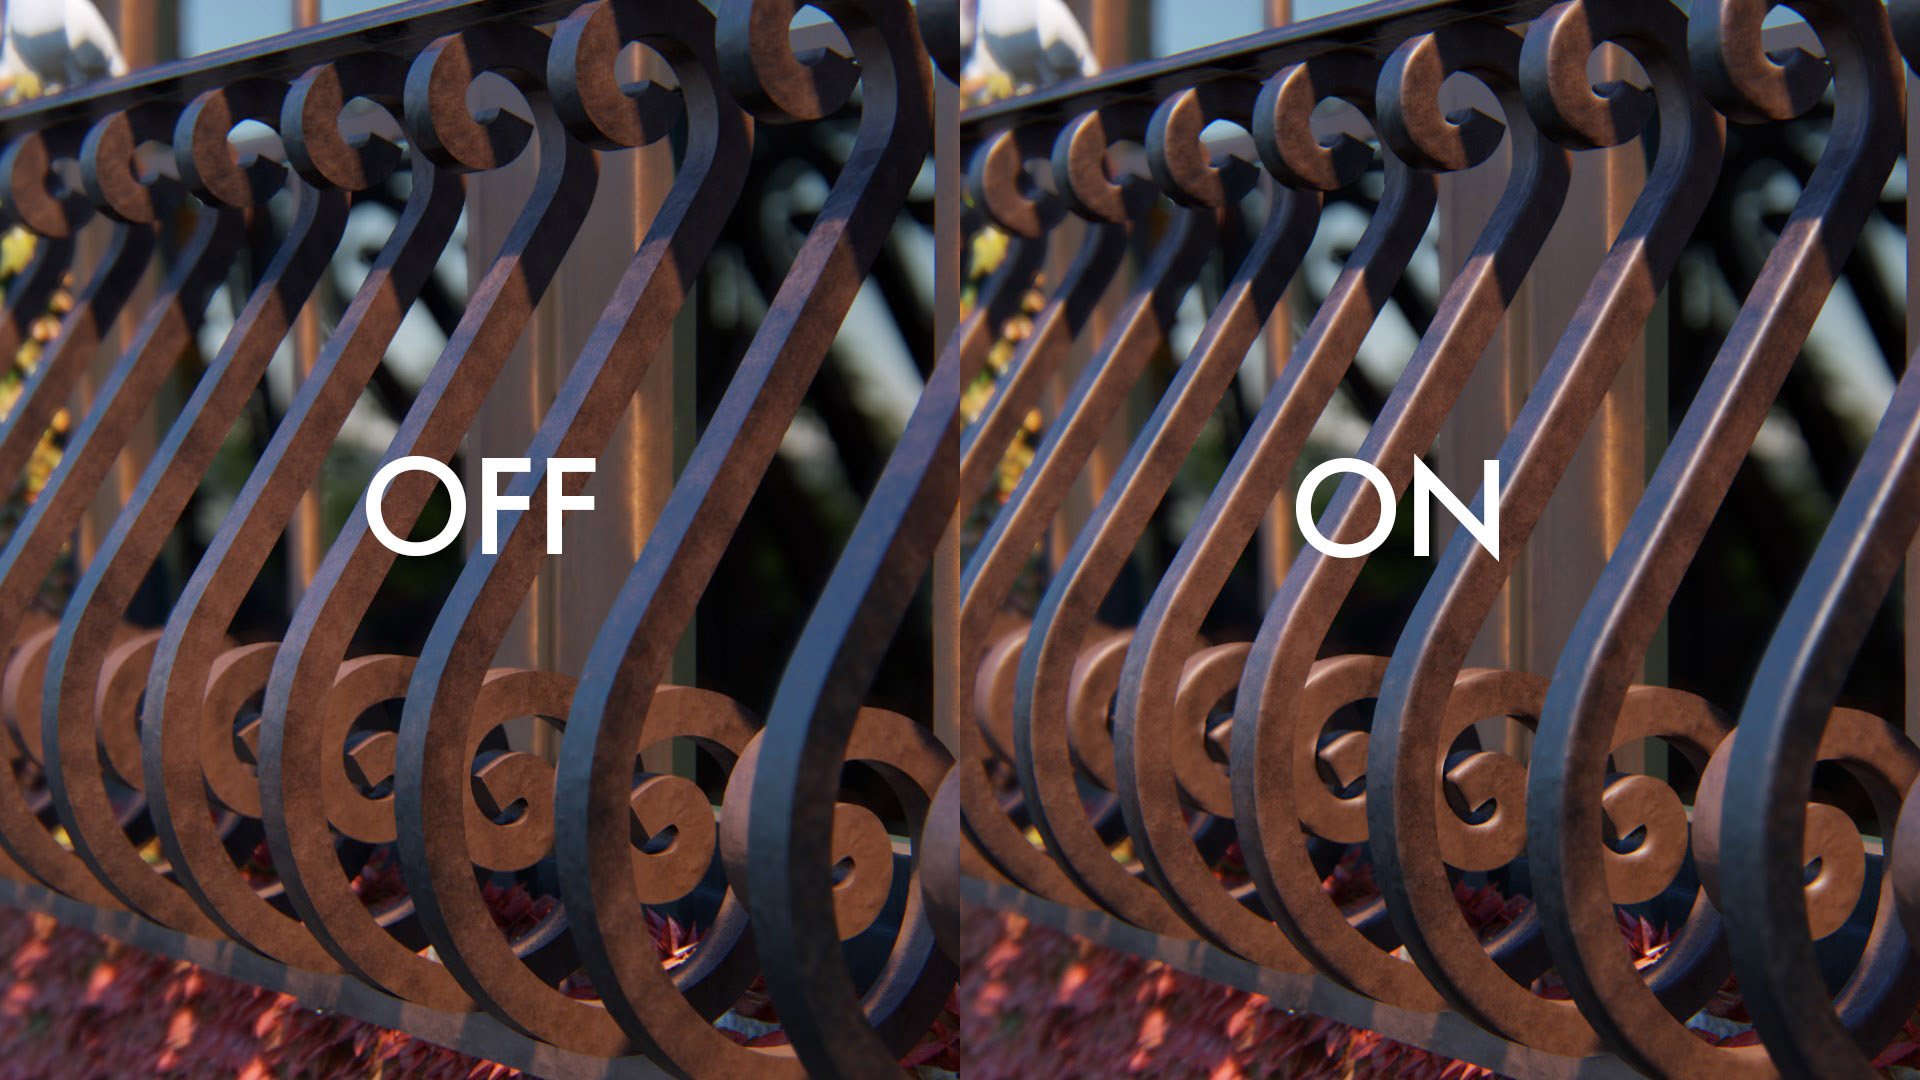
What it is: In real life, the edges of any surfaces generally appear slightly rounded or worn. They are never perfectly sharp. With the new edges slider in Lumion 8, your model will take on a more natural and weathered look, one better representing the real qualities of physical homes and buildings. Impart age and realism by smoothening the edges of adjacent faces. Soften the corners of brick, concrete, wood and other materials. A simple slider movement, a more realistic building. Easy. Effective.

You can check out an tutorial of how to apply this Material modifier here:

Here is a comparison image of the Soften Hard Edges feature:

“Look at fixed point” for the handheld camera effect

What it is: Create an impressive first-person video and never lose sight of the most important parts of your design. As an addition to the handheld camera effect, the new “Look at fixed point” option in Lumion 8 lets you lock the camera onto a single target point.

Check out this video of the ‘Look at fixed point’ feature:

Feature Summary

We have just looked at a few of the key features in Lumion 8, but I think you will agree that yet again, Lumion brings new productivity features that are also artistic and professional. I recommend you give Lumion 8 a try, and keep in mind that some of the more impressive features are available in the Pro version only.

Below I will include some links and more information about Lumion and Lumion 8. You can get it here.

Trial version is available at this link https://lumion.com/free-trial.html (not yet updated to Lumion 8?)

More Links for Lumion 8

New Features

Focus on 5 New Features

Focus on 5 New Tools for Productivity

Styles Feature

Sky Light, Soft Shadows and Fine Detail Shadows

Sketch, tilt and render


Important Changes to OpenStreetMap

With Lumion’s OpenStreetMap (OSM), it became possible to instantly surround a project with context. OSM was also a beta feature still in development and it used a third-party service to import accurate map and building height data.

The third-party service has announced they are closing down, and on February 1st, Lumion will no longer be able to download the map and building height data.

In light of this news, Lumion developed a little tool called the “OSM Patch” to ensure continued map functionality.

  • Click here to download ‘OSM Patch’ for ‘Lumion 7.5 Pro’.
    Click here to download ‘OSM Patch’ for ‘Lumion 8 Pro’.
  • Close Lumion
  • Extract into your relevant \Program Files\Lumion 8.0\ directory and ‘Replace’ files.
  • Start Lumion
  • You should be good to go with OSM

Video Tutorials and Webinars

Expand your rendering capabilities with more video tutorials:

Effects

Build Mode

Materials


Graphics card recommendations:

  • Popular Choice: GeForce GTX 1070 for its mix of optimal performance and accessible price.
  • High-end: GeForce GTX 1080 Ti for its extremely fast GPU and excellent efficiency.
  • Mid-range: GeForce GTX 1060 6GB for its attractive price/performance, quiet operation and quality efficiency.
  • Budget: GeForce GTX 1050 for its affordability and ability to provide a smooth, optimal Lumion operation.


Release Video and First Renders in Lumion 8

Parisian Bistro, rendered with the highest quality enabled in 18 seconds
Graphics card: NVIDIA GeForce GTX 1080

Farnsworth House, rendered with the highest quality enabled in 22 seconds
Graphics card: NVIDIA GeForce GTX 1080

Farnsworth House Interior, rendered with the highest quality enabled in 22 seconds
Graphics card: NVIDIA GeForce GTX 1080

Currently, exporting a flat 2D DWG file from AutoCAD or Navisworks to Revizto will probably yield the following message:

However, you can simply take these steps to work around the issue:

  1. Open the DWG file
  2. Select all objects
  3. Change the Thickness to something small but non-zero (like 0.1)


  4. Export the model to Revizto (either directly or via Navisworks)

  5. Once in Revizto, you may want to change the background of your Scene to all-white or some solid colour. Just click on Edit -> Lighting and Materials

  6. In the Editor, click on Illumination -> Environment Settings and change the Sky Type to Color

  7. Finally, click Save and Quit

In Revizto Viewer, you can now see your DWG file as thin surfaces where there used to be 2D lines. This also means that you can use the measure tool:

You can use a similar method to the above (change Thickness to non-zero) while using a 2D DWG file, to:

  • export from AutoCAD to Navisworks as ‘3D’ elements
  • export an FBX from AutoCAD as 3D

Revizto doesn’t strictly offer an API (yet) for connecting to its data. But you can use the command line to export an Excel file of all of the current issue tracker data. And you could schedule this export as a Windows Task. If you are in the habit of creating custom dashboards and connecting a whole lot of data together (as I am), then this could prove to be a pretty powerful way to access and share issue tracker data with the wider team. Further, it provides an opportunity for accessing model markup information even in a non-cloud-connected state

Here’s how to export from Revizto using the command line tool, called ReviztoConsole :

Get the Revizto Project ID by hovering over the project name in the Viewer:


The command line syntax is like this (notice the project ID):

C:\Program Files\Vizerra LLC\Revizto4\Service>ReviztoConsole issues --project 12845 --export xlsx --outfile E:\temp\12845_issue_export.xlsx

Which looks like this in Explorer:

And the Excel file looks like this:

As you can see, a lot of the issue tracker fields are available here. The Snapshot and Comment fields also may include hyperlinks to a web-hosted version of the issue snapshot as well.

Note: you can use the command ReviztoConsole projects to show a list of your current project IDs and their parent folder name on your system.

Here is a list of the main Revizto Keyboard Shortcuts:

(Shortcut) – Action

(2) – 2D

(3) – 3D

(4) – Issue Tracker

(ctrl+O) – Open project gallery

(ctrl+shift+O) – Import project

(ctrl+R) – Rooms

(ctrl+X) – Section Cut

(ctrl+B) – Objects

(ctrl+I) – Issue Tracker

(ctrl+M) – Ruler

(Home or ctrl+H) – Home

(ctrl+T) – Create video track

(ctrl+E) – Sheets

(ctrl+shift+I) – Create a new issue

(ctrl+W) – Viewpoints

(M) – Opens a map

(ctrl+click) – multiple objects selection

(alt+click) – teleport

(+) – Increases a field of view

(-) – Decreases a field of view

(0) “zero” – Restores a default field of view

(tab) – hides the right vertical tool bar menu in the Issue Tracker, objects, rooms, viewpoints, camera share

(Esc) – Exit

Navigation modes:

(F5) – Sets navigation mode to Like in Video Game

(F6) – Sets navigation mode to Like in Revit

(F7) – Sets navigation mode to Like in SketchUp

(F8) – Sets navigation mode to Hybrid

(F9) – Sets navigation mode to Navisworks Walk

(R) – Toggles the Fly/Walk modes (if available)

Markup mode:

(P) – Pen

(Q) – Callout

(T) – Text

(L) – Line

(A) – Arrow

(E) – Ellipse

(shift+P) – Polyline

(R) – Rectangle

(space) or (V) – Edit Mode

From here
——————————————————————————-
You can also read about the different navigation modes at:
Navigation

Also this information on 3dconnexion:

Here’s how:

The following command should successfully silent deploy Unifi 3.1.1 to your network.

msiexec /I Unifi-admin.msi /qn

Download the Unifi .msi at:

http://installer.discoverunifi.com/Unifi-admin.msi


Below is a GPO:

Install:
wusa.exe Windows6.1-KB2819745-x64-MultiPkg.msu /quiet /norestart

Detection Clause:
File Exists C:\Windows\System32\WindowsPowerShell\v1.0\Powershell.exe
Version = 6.3.9600.16406

(via email)

Revizto works by maintaining a local copy of cloud models, that are synced periodically with the cloud. The Issue Tracker will always try and automatically remain in-sync if an internet connection is available. This allows you to do things like download all current models and sheets to an iPad, head out on site (where you may have no internet) and do some work, come back to the office and then sync the changes.

However, from time to time you may want to clear the cache of a particular project. Typically, this is so you can confirm you are running an identical version to the current cloud model. To do that, you have to clear your local cache of that particular model. Here is how you do it:

1. Sync the model if you have any recent local changes (this is to upload all of your local work)
2. Close Revizto.
3. Open Revizto. While in the project gallery, click on “Edit” button in the top right corner. Then click on that project and choose “Clear cache” option.


4. Open Revizto project. Your project will re-sync with the latest cloud version.

What if you want to completely remove all local project data at once? Or possibly, you are running out of disk space in the normal ‘working folder’ location (yourUser\Documents\Revizto4). In that case, you want to move the working folder. Then Revizto will download the latest cloud data for every project. As above, ensure you have synced all your local models first… Then take these steps:

  1. Open Revizto
  2. Click Preferences
  3. Click General tab
  4. Select ‘Change’ next to ‘Working folder’ and choose a new, empty folder. It should have sufficient disk space to download all the project data:

You probably should close and re-open Revizto, and then go ahead and open your project. Again, it will sync all data from the cloud for you.

There is a nice little addin in the works from Emanuel Favreau … he is working on a Revit to Unity exporter that includes all materials and textures. You can open a sample model in WebGL here (probably should use Chrome).

There is obviously a lot of development in the industry at the moment to create the best experience in moving BIM models into gaming environments for various reasons, and there are a lot of solutions that are doing this in various ways.  Typically, these offer real time rendering and visualization, and the side benefit of allowing models to be viewed in VR. Which method do you recommend?

Sample of Emanuel’s addin in action:

via Twitter at this link


I have posted about other game engine software for BIM previously, such as:

Export VR

Also on the app store, you can also find Walk-Through-3D™ for Autodesk ® Revit® by AMC Bridge. This is another Unity export plugin with the following features:

The add-in supports export of 3D model geometry from Revit to Unity allowing users to have the first person 3D shooter game like experience while using Revit created model as the 3D environment.

The main features of the add-in includes:

  • Export of 3D model geometry with materials and textures from Revit to Walk-Through-3D.
  • Manipulation of the resulting 3D model in a similar fashion to a 3D first-person shooter game.
  • Support of textures along with an ability to apply weather effects.
  • Generation of a standalone executable package to view the exported Revit model in a three-dimensional representation that requires neither Autodesk Revit nor Unity installations.
  • Support of HTC® Vive virtual reality headset and controllers.
  • Support for Intel® RealSense™ camera

The video below demonstrates the add-in’s basic functionalities:

https://youtu.be/UIsoyBVWPOM

Next video demonstrates the add-in control via HTC Vive:

https://youtu.be/kaO_0CzA4Xs

Next video demonstrates the add-in control via Intel® RealSense™:

https://youtu.be/RWZE7KWvKAs

Walk-Through-3D is compatible with Revit 2016-2018.

Read Help Document

Whenever you are looking to implement a new technology in your firm, you typically go through a few steps:

  1. Figure out what is out there in the marketplace – What products are available?
  2. Collect data about all of the technologies that may suit your use case
  3. Rigorously compare and analyse all the data
  4. Make a decision and go for it

There are some excellent content management tools out there for Revit now, so how can you choose? I went through a very comprehensive research analysis of a number of Revit CMS platforms, and I posted about the process here.

Then I caught up with Steve Germano over at Unifi to talk about the results. You can view (or just listen) to it here:

Feel free to comment here with your thoughts and we can keep the conversation going!

In this webinar, LHB’s Dan Stine walks through a proven workflow for collaboration and client engagement using Revizto. This presentation simulates a client meeting, highlighting ways Revitzo can be used to explore the model and capture client comments and requested changes. You can see how several Revizto features can be used collectively to demonstrate the design intent and react to client questions with minimal effort.

You can view it at:

Slightly over 6 months ago, I was approached by one of my associates over at Unifi with an idea. They wanted to engage in a detailed competitive research project focused on content management systems for Revit. I was pleased that they approached me, because I obviously love Revit and I also love helping people to improve the whole ecosystem of software tools that surround Revit and BIM. In fact, I often provide too many suggestions to software companies I think 🙂

In this case, I was particularly interested in the topic as well. Having used Revit now for around 10 years, I had started to observe a trend in how Revit gets implemented into firms. Typically, they:

  1. Buy some Revit licenses
  2. Teach their people to use Revit
  3. Look at ways to standardize their use of Revit, perhaps through standards and template files
  4. Try to maximize the impact and benefit of BIM through some vertical products, such as Enscape
  5. Start thinking about how to deal with the many gigabytes of ‘content’ they have now gathered and that is sitting on the file server in their office…

Having seen this over and over again, I knew that evaluating, choosing, and setting up a Revit content management system is no easy task, yet it is a hugely important one. It is something that often gets neglected for too long, and results in many wasted hours as people go blindly looking for ‘that family’. As you know, I willingly share time-saving knowledge, tips and workflows here and via Twitter, so this competitive research project really ticked a lot of boxes for me. I would be able to:

  • do a deep analysis of content management products for Revit
  • observe the strengths and weaknesses of each
  • be better informed and able to assist people who often ask me about Revit content management
  • provide some feedback to Unifi about how their product and offering could perhaps be improved (and as I said above, this is something I often do for free)

In this particular case, I knew that there would be a lot of time involved. I was going to have to obtain, install, test, benchmark, and document a whole lot of information about various Revit content management systems. As a father of three, a technology blogger, and someone who works almost daily for different companies delivering various projects, time is extremely hard to come by. So I felt it was quite appropriate in this instance to be commissioned by Unifi to perform this research task. I had never been part of a commissioned, competitive research project before, so I knew there may be some challenges. However, given the amount of time that would be involved, I would only be able to do a proper and thorough job if I was reimbursed for the time I would need to dedicate to it.

You might say that being commissioned for the task introduced some bias, but I’ll tell you why that cannot be true. Unifi wanted to know how to improve their product, they basically wanted to know what could be improved so that they could remain competitive with their competitors. For me to somehow do a biased job would have been way off-base. I needed to be honest, and brutally so. I had to show the Unifi people if and how their competitors were stronger than they were. I admire the fact that Unifi undertook this whole project. Evidently, they wanted to make sure their product was the best it could be. Personally, I would have an avid listener, someone who would be happy to hear all of those software ideas that I come up with!

So I accepted this project as a commissioned, competitive research task. I would record my results and provide a number of comprehensive deliverables back to Unifi. How would I go about this job? There were a few logical steps:

  • establish the list of products that would be researched
  • obtain the products
  • install them onto a test workstation
  • evaluate the features available in the product and fill out a detailed comparison matrix
  • perform benchmarks to establish speed, performance, and capability of each product
  • use some large sample content datasets to really put the products through an intensive test to check for problems that may occur with huge content libraries

Looking at the above steps, you can see how much time would be involved. But I also thought it would be a good idea to involve the developers of the competing products in the research. I thought that if I could be better informed about the other products, my research output would be more complete and accurate. And I still think that this was the right approach. I spoke to some of the competing companies and described the fact that that I was doing a detailed research project and would like to discuss their product with them. Most of them knew me as a blogger and technology professional, and so they were pleased to meet and discuss their content management product.

And then I made a mistake.

I should have started those meetings by saying that I had been commissioned by Unifi to do the research project. But I did not mention that fact. We had informative meetings each time, that helped me to get a better understanding of each product. But I can see now that I should have simply told them how the research project came about. I actually don’t think it would really have influenced the discussion a whole lot, because I still think it was in their interest to assist me in understanding their product. However, I do feel like I should have been transparent at the time. I would like to publicly apologize to those competing companies for not initially disclosing that I was commissioned to do the research.

This was a lesson learned for me, and one I won’t make again if I undertake a similar research project in the future.

I do not apologize for taking on the research project, because it was simply the best way that a task like this could be handled, and I do believe I was the right guy for the job. I understand that it is quite common for companies to engage 3rd party professionals to perform market research, but for me it was my first time. As stated above, my thought process was basically that:

  • I would receive some reimbursement for my research time, that
  • I knew the research output had to be complete and accurate and honest, and that
  • It would be beneficial to speak to the individual developers about their product.

Following the consultation phase and data gathering phase of the project, I had quite a substantial amount of data to work with! How would I filter through all of this and truly make it comparative?

To begin with I put a lot of information and notes into a detailed OneNote notebook. I then started an Excel document where I would store most of the comparative results. I had a few key worksheets where most of the raw data was stored:

The Matrix worksheet contained a whole lot of data, over 150 rows and 15 columns. I broke the testing and comparison up into some major categories:

Note: the UX2 value above refers to things like bugs or user interface problems, and in that case a higher score would be worse (more bugs).

For feature comparison, I used a weighting value and a formula. Here is a sample of some of those weighting values:

So, in the case above, I viewed Parameter Searching as more important (5) than Uniformat Filtering (2). These weighting values are based on my experience and my association with other BIM professionals.

From this point, I reviewed the capability of each product and used a Yes / No value to determine if a given product would ‘score’ for that feature:

If a product achieved a Yes value here, it would also obtain the Score for that Feature.

I used a set of PivotTables and Charts to break down and review that feature data.

I also performed some performance and speed benchmarks, and stored these in another worksheet:

Ultimately, this data was all collected and provided in combined form along with some Powerpoint slides. The slides cover topics like:

  • What is BIM Content?
  • What is Revit Content?
  • Why Content Management?
  • How is Content Managed?
  • How do I choose?

Along the way, we had to do a few interesting things. We were finding that the Australia internet speed was not really a good place to start with cloud benchmarking. So we obtained a cloud based virtual workstation that more closely reflected the type of internet speed you would experience in the USA, and I then had two sets of ‘cloud speed’ benchmark data, the Australian and the US versions.

An example of how some of my research was used may be seen in the recent new offering by Unifi. The research identified some differences in the pricing models of the various products, and this information assisted Unifi in the creation of an additional pricing model.

Where can you learn more about this research? A couple of weeks back I mentioned that the details and results of the competitive research project will be shared in a global webinar.

You can register to attend the webinar here.

In summary, I really enjoyed doing this research project and I think the results will be useful to Revit users and BIM Managers who are trying to evaluate different content management tools. It is true that they each do have certain strengths, so which will you choose?


PS. It is interesting to look back, to where almost a year ago I asked you all:

Update:

Link to webinar here