Recently I undertook a very detailed and intensive research project focused on BIM and Revit Content Management Systems. The results of that research will eventually become fully available… In fact it will be discussed in detail at an upcoming webinar (register here).
The research covered a range of product categories including Revit Integration and Management features. However, it also considered the cost and ROI of various content management systems. On a related note, I was very happy to hear that Unifi have now released UNIFI Standard, a content management solution for firms with less than 30 design staff, offered at the very attractive $14/month. Basically, as a smaller firm you can still afford to access a lot of the awesome Unifi Content Management features, but there are service level differences that mean it makes more sense for larger firms to stick with UNIFI Enterprise.
For more information about the UNIFI solutions, check out the media release here, and to learn more about the webinar have a look at this page.
Key details on the new offering:
name: UNIFI Standard
for firms with less than 30 design staff.
licensing model is named user – each person is assigned a license
price is $14/user/month
there are service level differences between Standard and Enterprise (level of support, customer/account management, onboarding services, SSO integration) although both products have access to the same content management features.
UNIFI Enterprise remains for firms who need more than 30 licenses and it will have two licensing models – active users or open/concurrent licenses. The pricing will be dependent on what type of license and how many are needed.
We live in an age of robotics, drones and automation. And those things can be interesting in their own right. But when it comes to Architecture, some technologies seem to replace warmth and light with cold industrialism. Happily, Enscape is not one of those technologies. Whenever I use Enscape, I feel this effortless artistry at my fingertips. It takes the most basic of ideas and makes them more real, adding depth and light and excitement. Yes, I know that Enscape is essentially an addin, a piece of software that consumes models and renders them in real time. But it is executed so well, that it makes it seem like so much more. And in fact, it really does legitimately enhance the quality of work that you can produce rapidly within your own office.
I have posted about Enscape before in this full review, and in this post about Enscape 1.9. The question is: What does Enscape version 2.0 bring to the table?
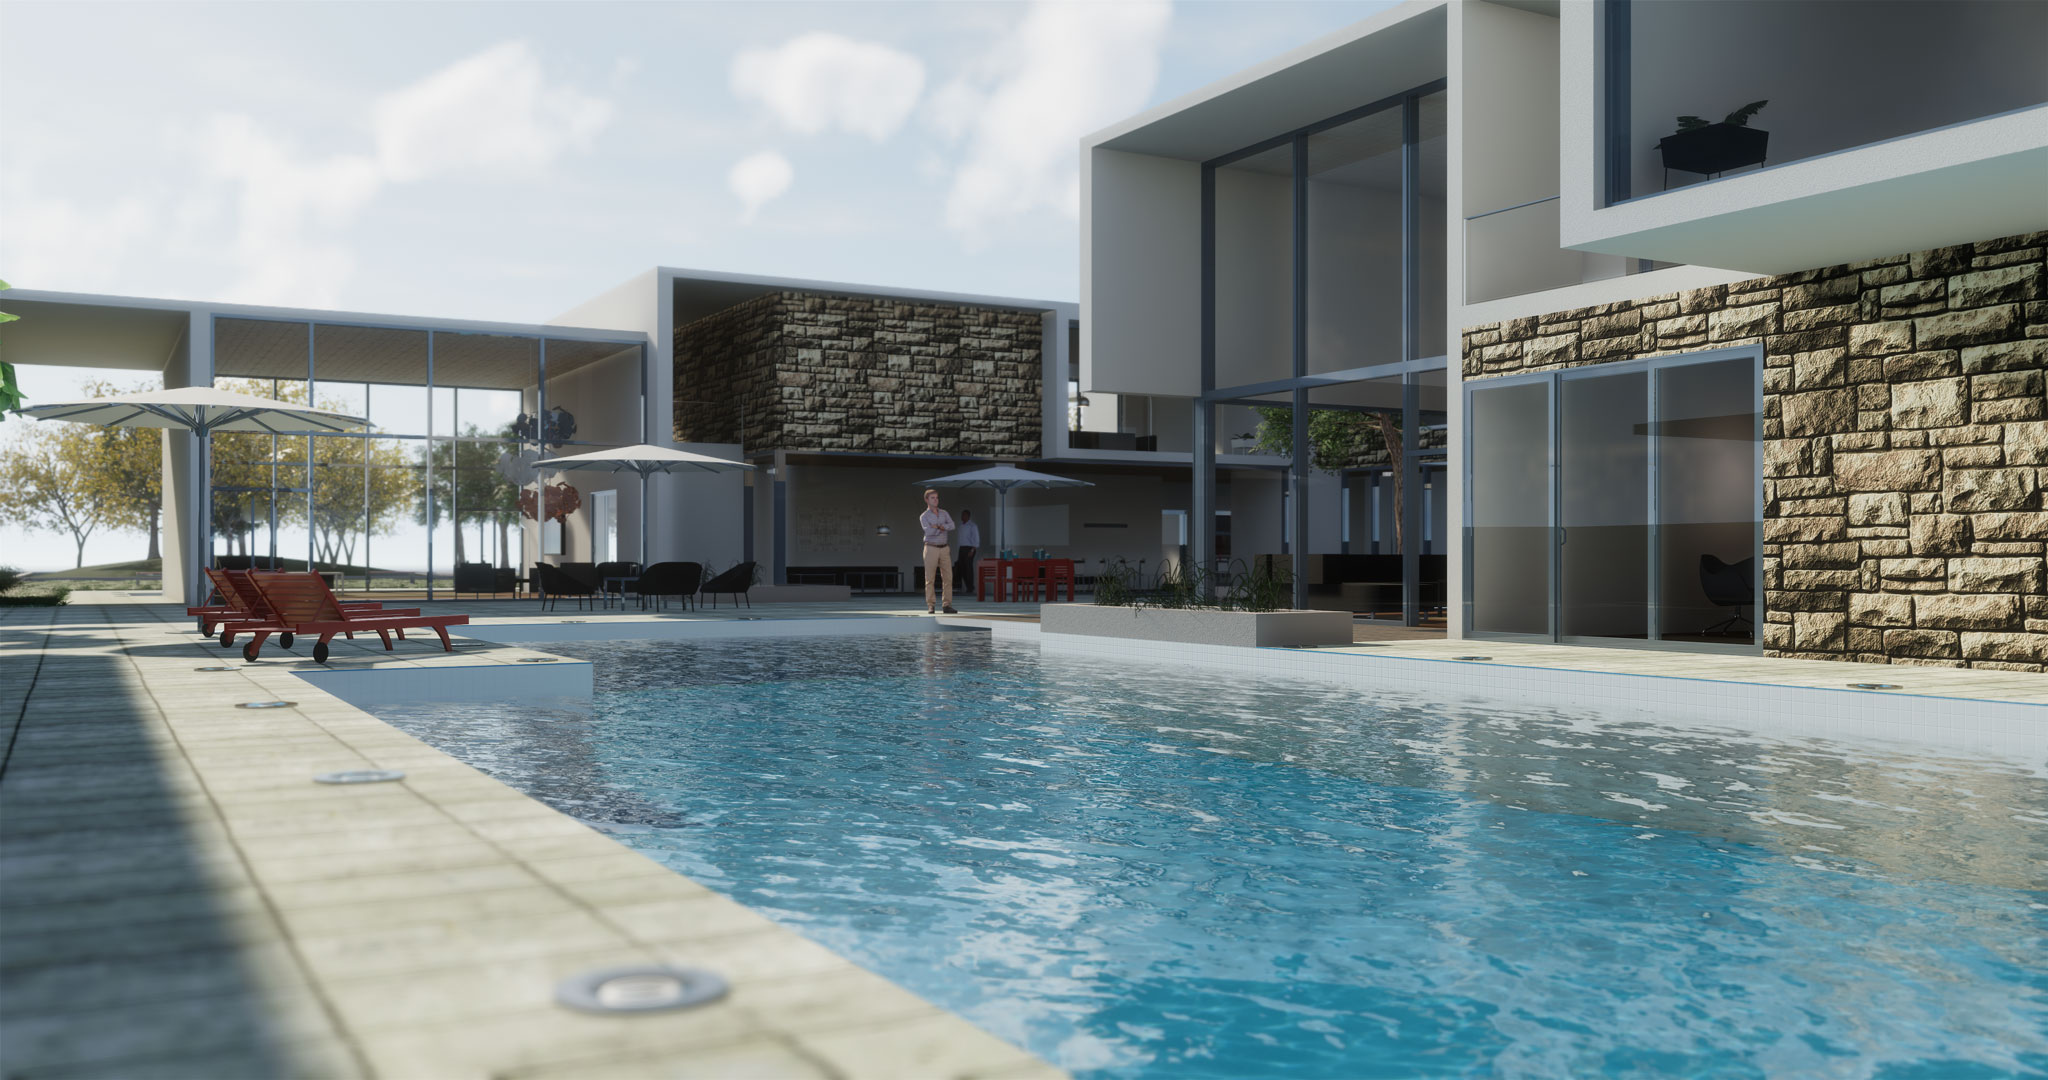
One of the most significant enhancements in Enscape 2.0 is an improvement to the lighting engine, a feature that results in more Realistic Lighting. There has been additional thought and development work given to things like indirect lighting, behaviour of reflections, and overall realism. You will likely notice this difference if you open a model you used on previous versions of Enscape and try it with Enscape 2.0.
Realistic Lighting
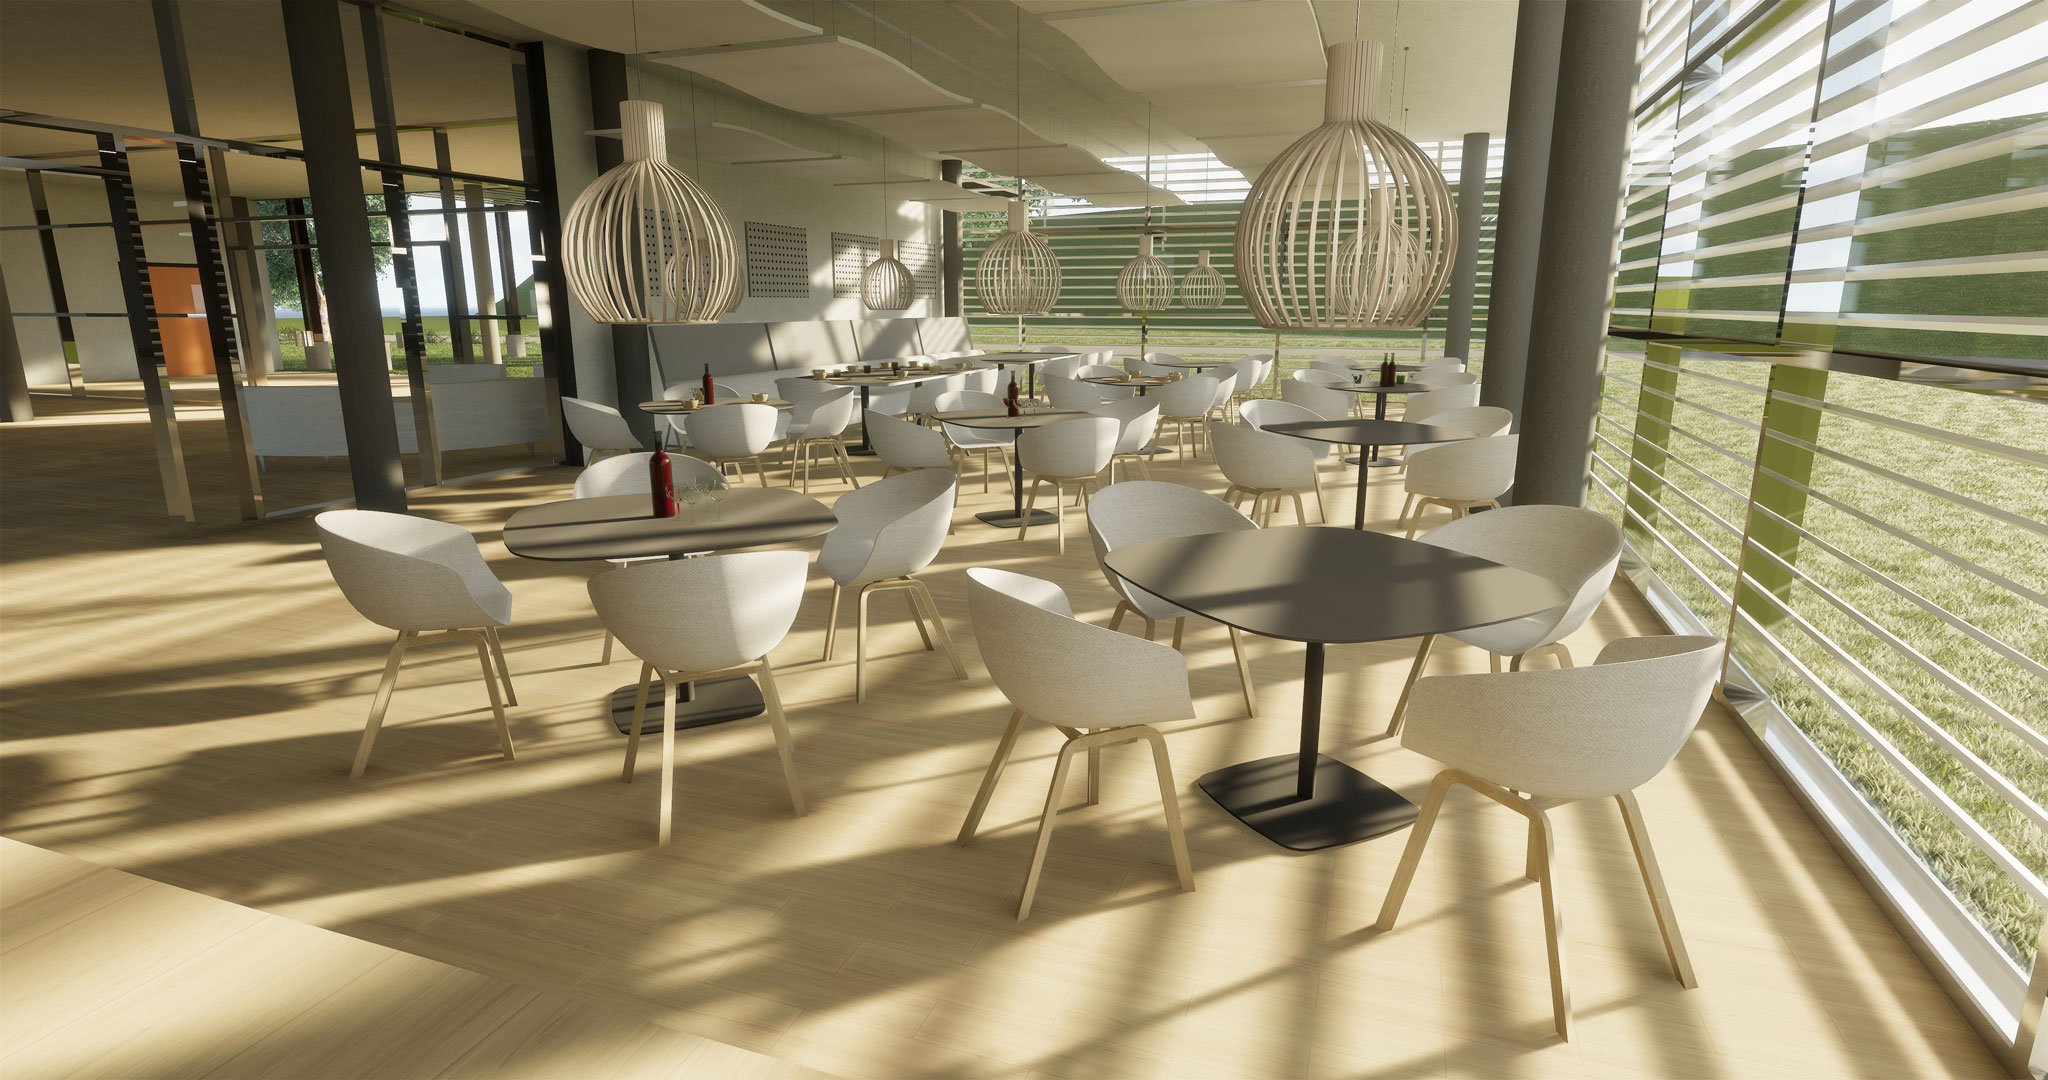
There is also a really nice new Grass material that looks great and is very easy to use. Along with this, better trees, plants, and other improved RPC replacements have been added.
Improved Navigation Methods:
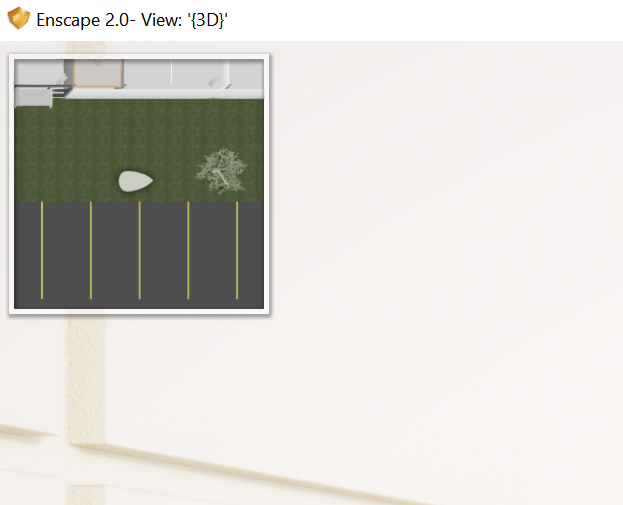
Hit the M key at any time to activate a mini map:
Also, you can now Right-click on element to orbit around that element.
Performance and Hardware
I was warned that Enscape 2.0 introduce a higher demand on GPU performance due to better visual quality. This may make it necessary to go one step left on the performance slider (e.g. high instead of Ultra) to get the same result and speed than in an older version. Lighting calculation starts at medium and will be quite demanding. “LOW” should be renamed to draft mode because that is what it is. If there are no artificial lights in the project, this is good for a quick walkthrough. My main workstation is a Metabox with a 980GTX graphics card, and I did notice some slowdown when setting Rendering Quality to Ultra. You may have to experiment with your own machine, depending on how good your graphics card is. Just turn the quality slider down a bit to get to the performance that you need.
Also, I have it on good authority that better Performance will be available in a hotfix soon.
Complete List of New Features in Enscape 2.0 for Revit and Sketchup
Here is a complete list of new features and changes made in development of version 2:
Design tweaks for SketchUp lights window
Option to disable grass
Replace the ugliest trees
Change light icon for Sketchup
Implement better realtime DOF (depth of field) method
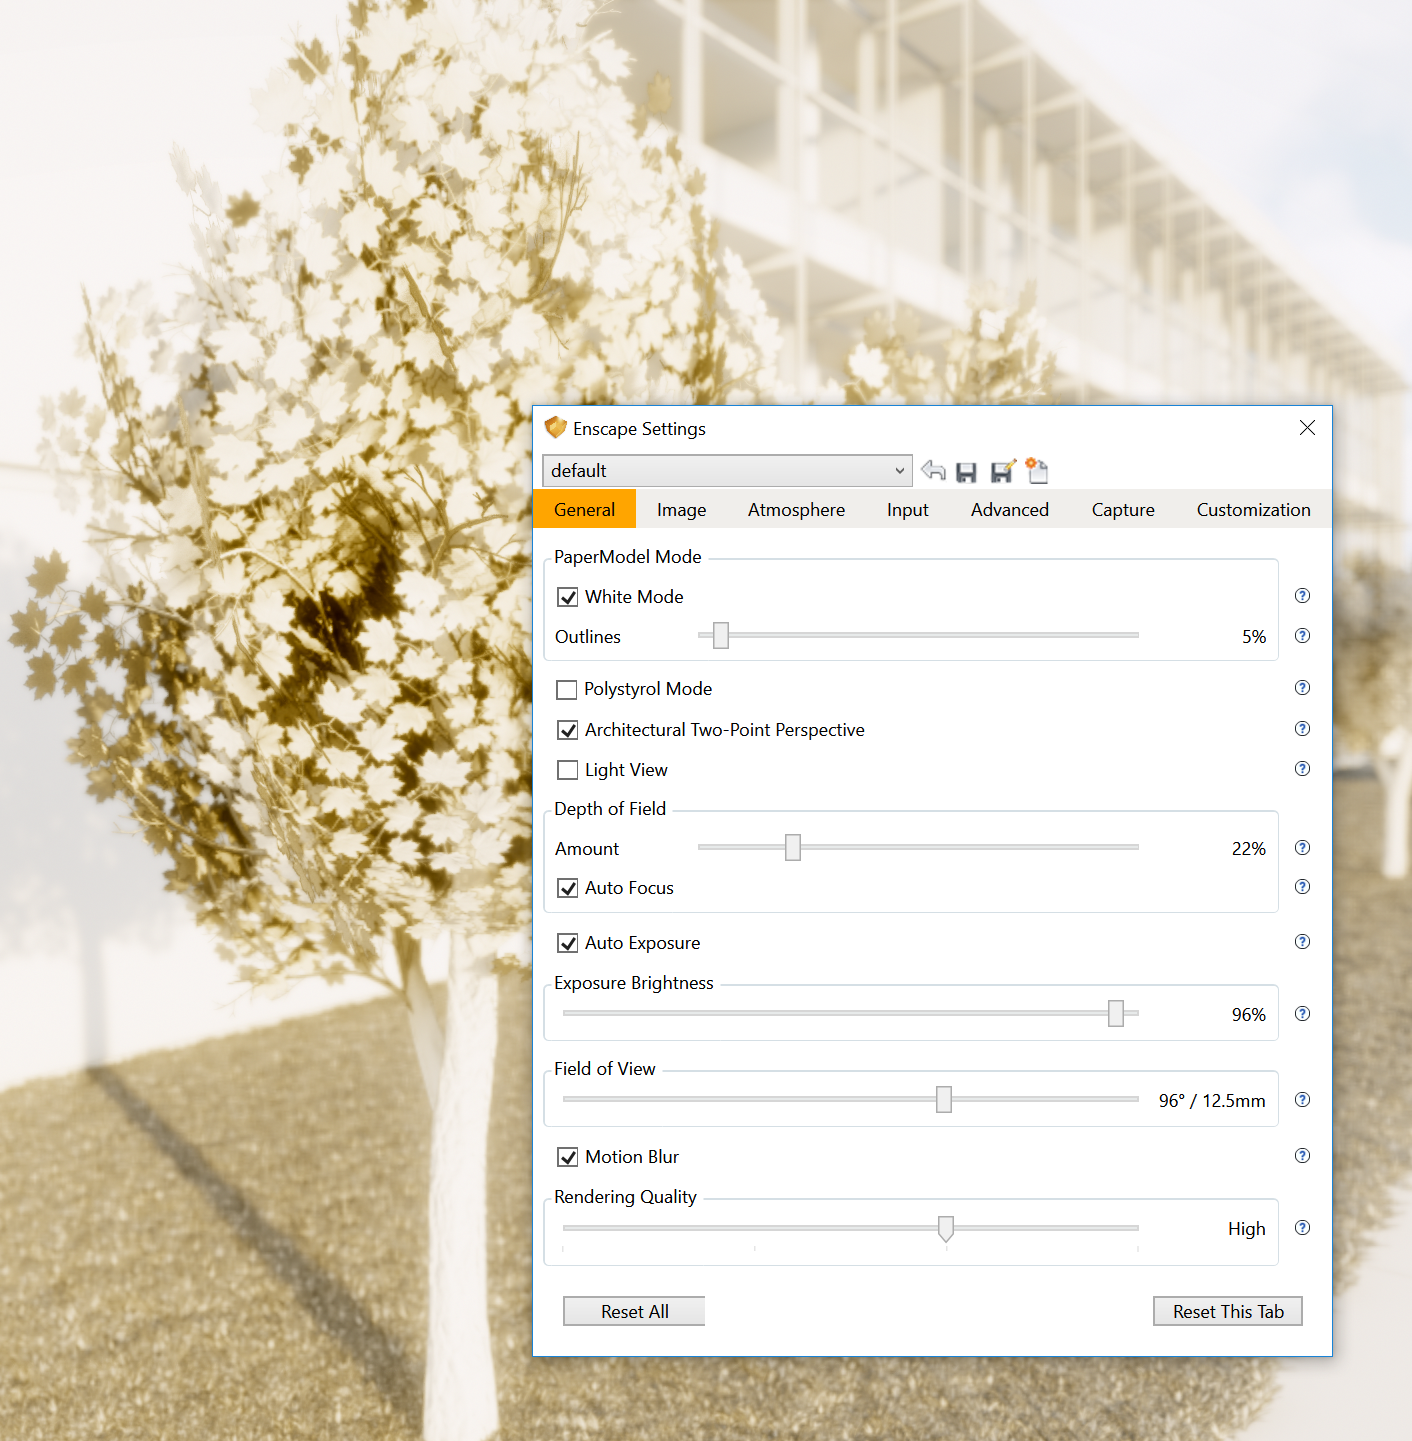
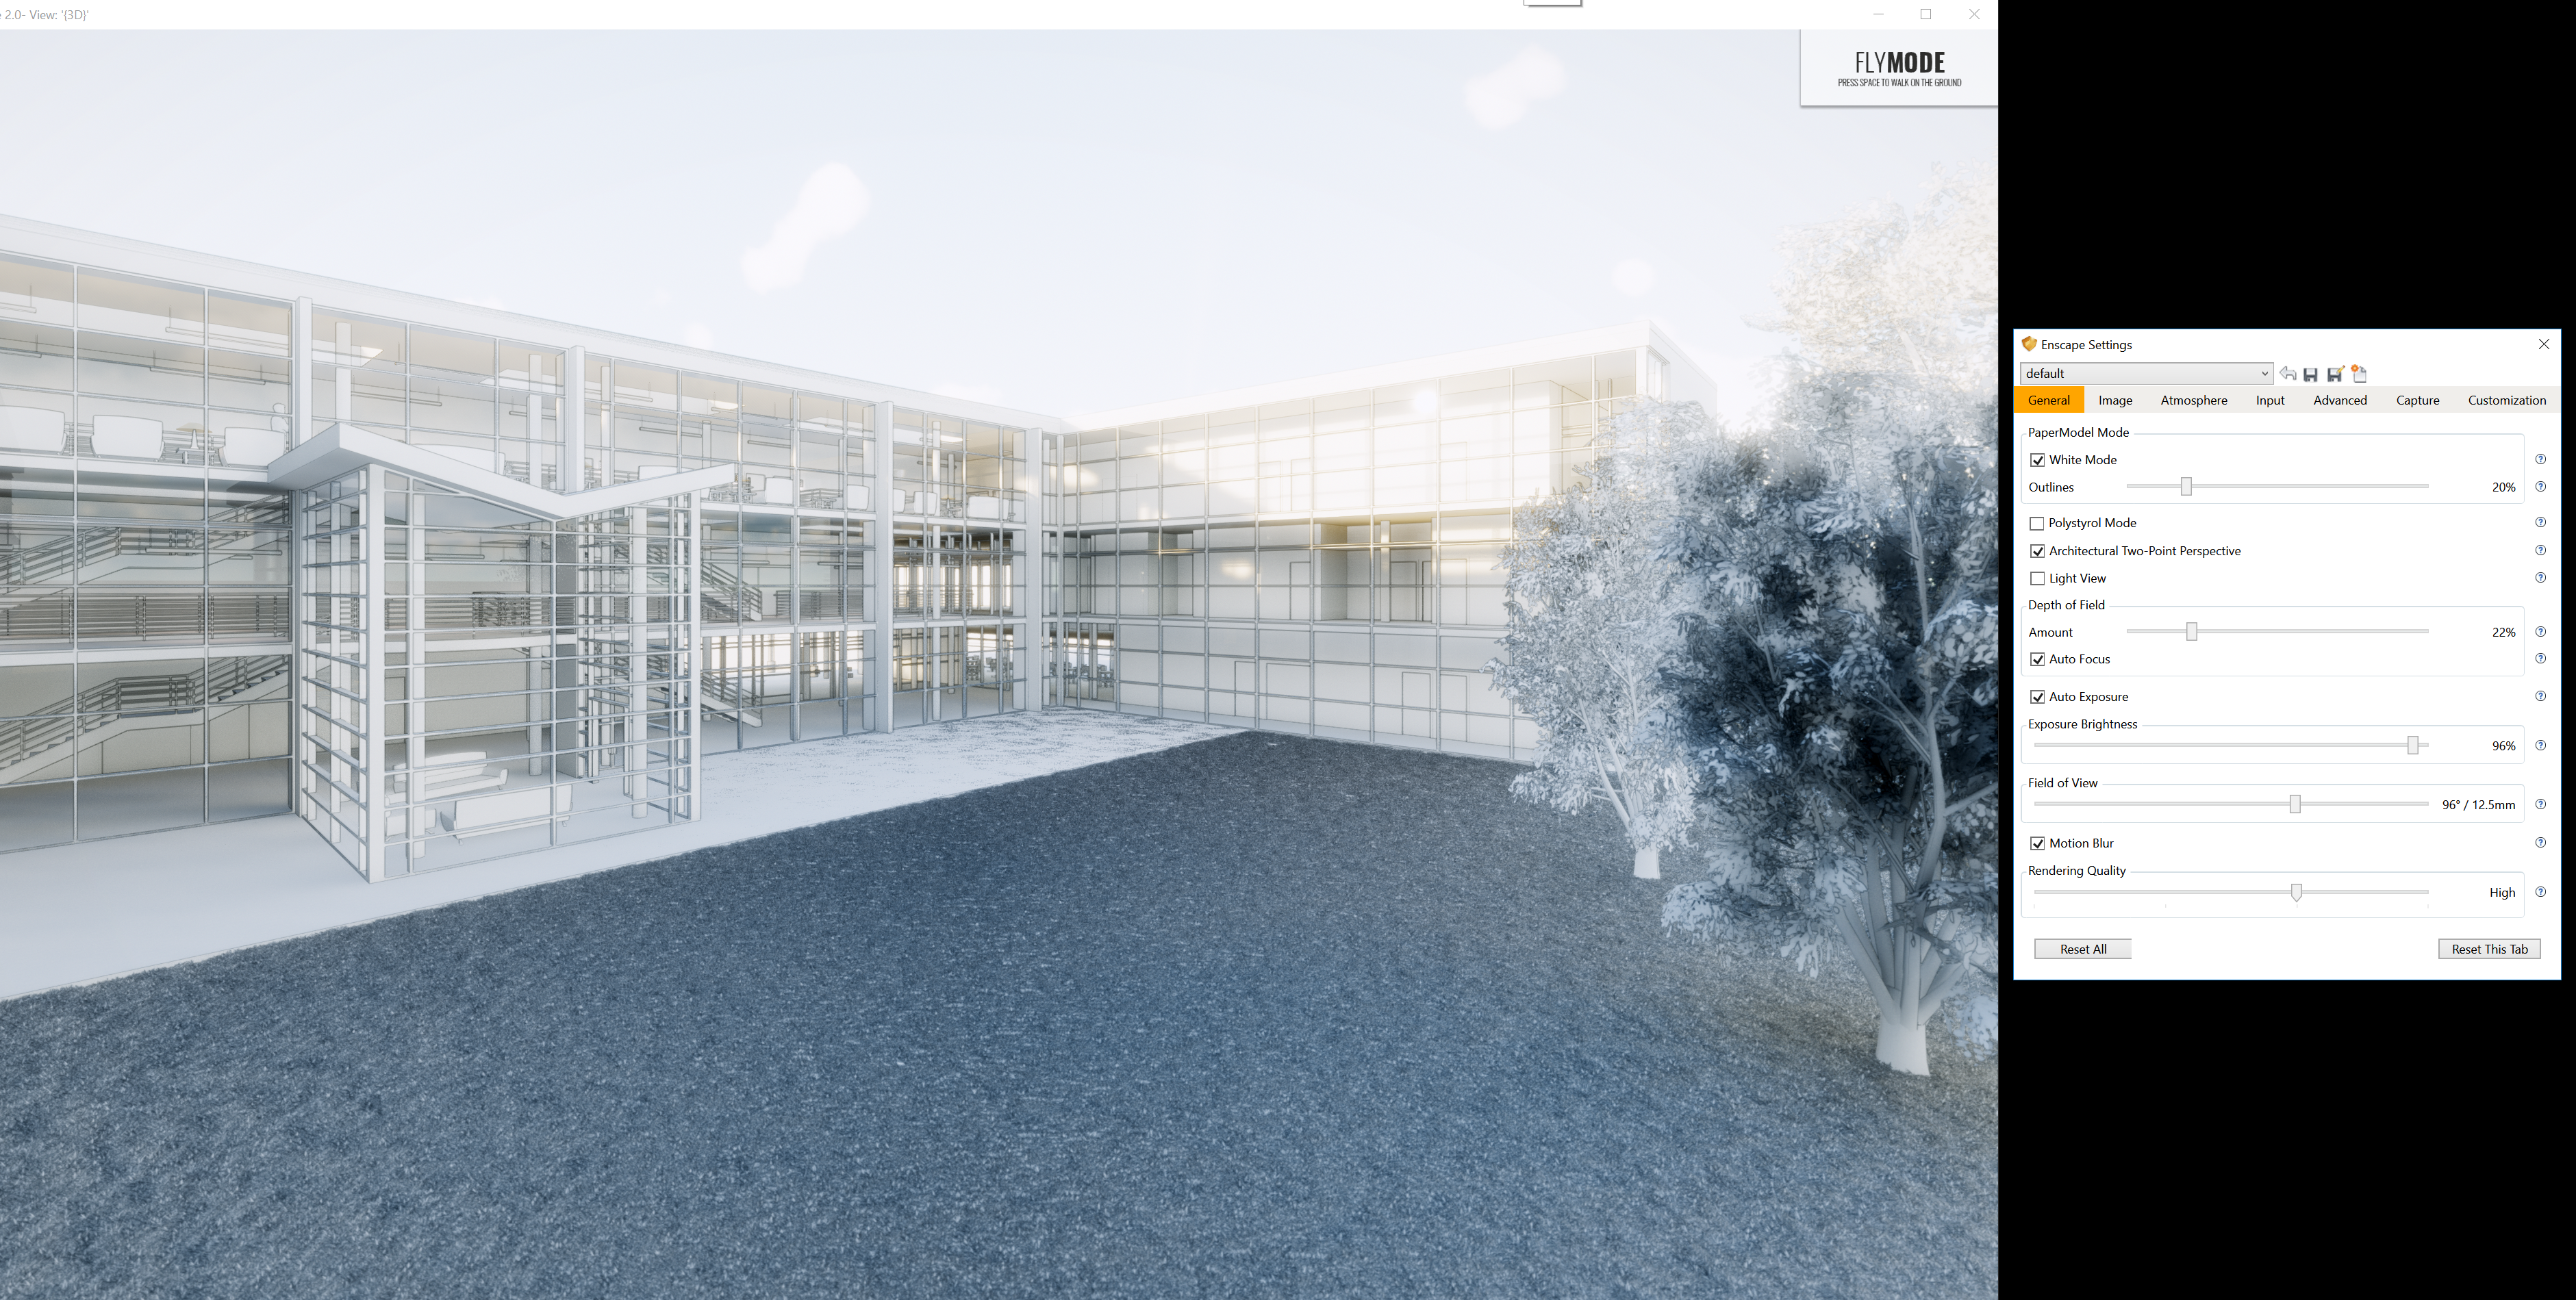
Try using White Mode with Outlines and Architectural Two-Point Perspective
Also try only using about 5% of Outline slider to see how it makes detail stand out
A Story
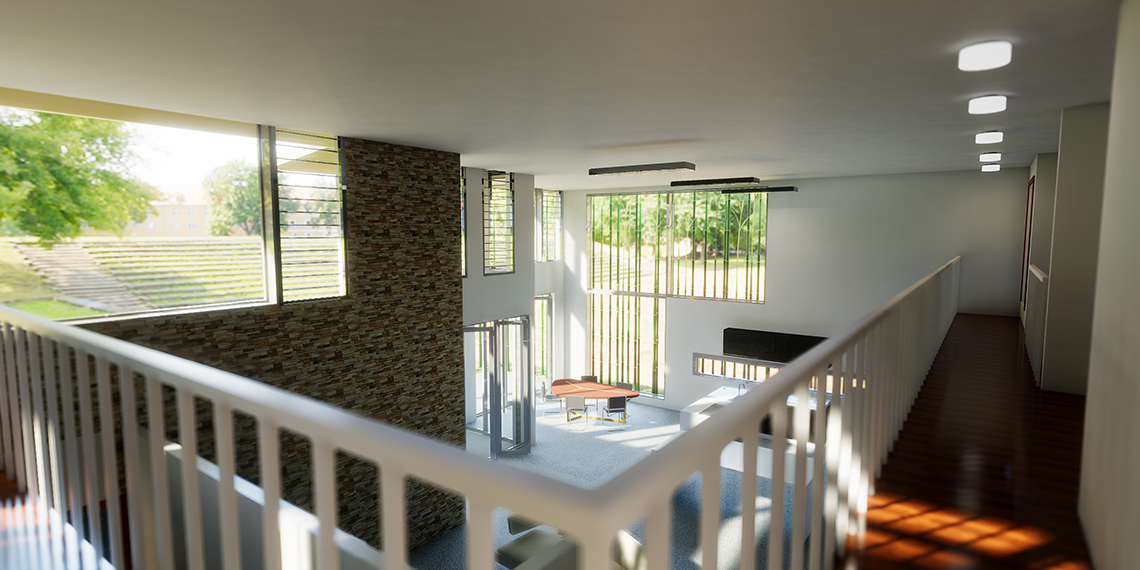
Recently, I was working as Construction BIM Manager on a significant health project. We worked on the coordination of a very complicated operating theatre fitout with very limited area for services. Architectural elements had been modeled for coordination purposes only, but definitely not for presentation. I was asked to try and quickly produce some images for a media release, and I immediately thought of Enscape. Would it be able to produce something convincing, even though we had no real entourage or materials applied? Below is the result achieved in just a few minutes:
Theatre
Scrub Room
I enjoyed using the white mode as it meant I did not have to spend a lot of time putting materials into the model. To see how this looks with grass and trees, I used similar settings on the sample commercial Architectural Revit project. The image has so much life and range, and it required almost no work at all to produce:
Conclusion
With Version 2.0, Enscape has taken a big step towards exceptional visual quality and realism. Both the Revit and SketchUp versions are updated so no matter which program you currently use, the new features are now available. I hope you enjoy trying out the new version!
I’m excited to share this release with you, because it has some amazing improvements. Here are my top 3 new features:
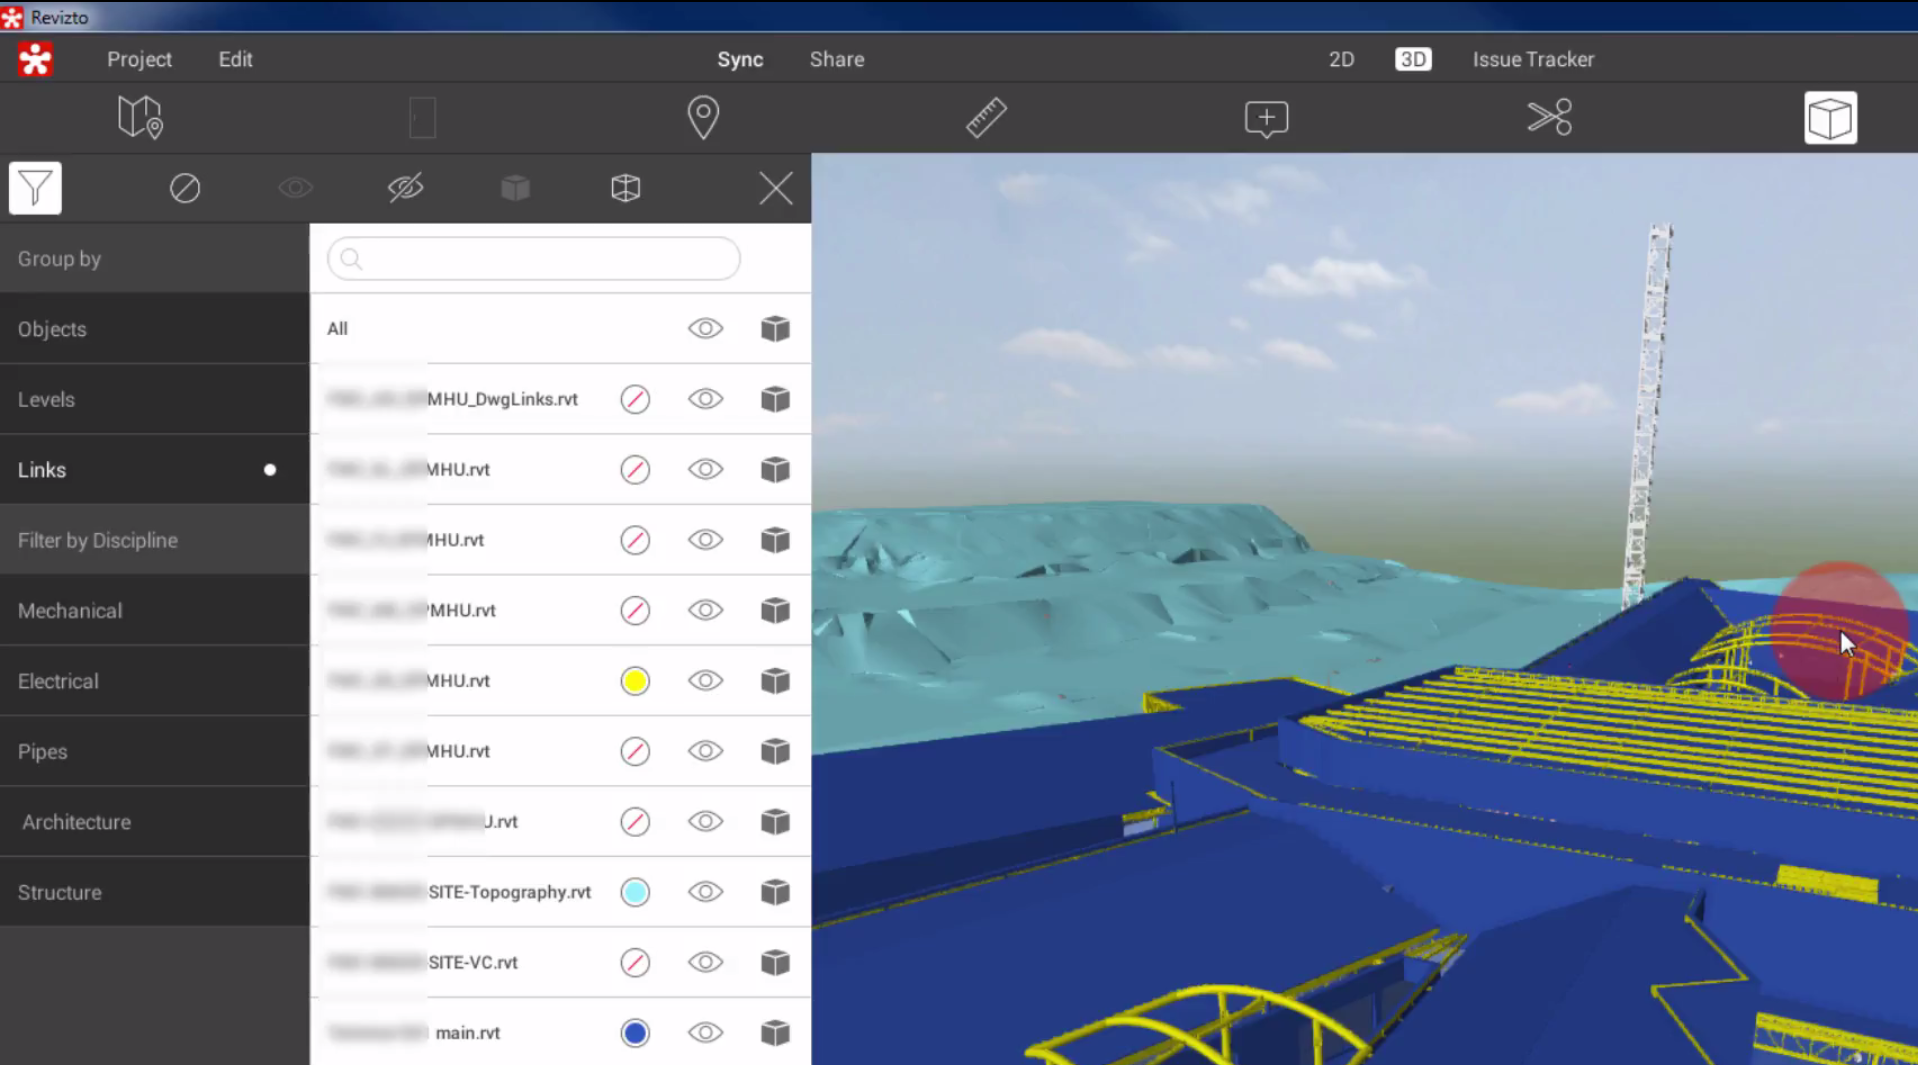
Visibility control of Linked Models. Basically, you can now turn individual models on and off like you would in Glue or Navisworks, and you can override colours! Those colour overrides can be saved into a viewpoint or issue. This is a massive enhancement.
Phases Support like Revit. There are some really nice visual effects possible, now that Revizto can show you Existing and subsequent phases, along with various phase filters. This opens up a range of new possibilities for sharing and discussing work in and around existing buildings. You can now ‘markup’ a demolition phase directly in the model, and assign issues to get items resolved quicker.
Clickable Links on Sheets. For sheets you export from Revit, you can now immediately jump to the related views by using the view symbol hyperlink, just like you would in Revit.
As you can see, the integration with Revit is getting tighter. This means Revizto is now even stronger for fully in-house review workflows, like model review and drawing markup within an Architectural firm. Of course, Revizto remains my favourite way to handle coordination for large multi-discipline teams, whether that be design coordination or services coordination tasks.
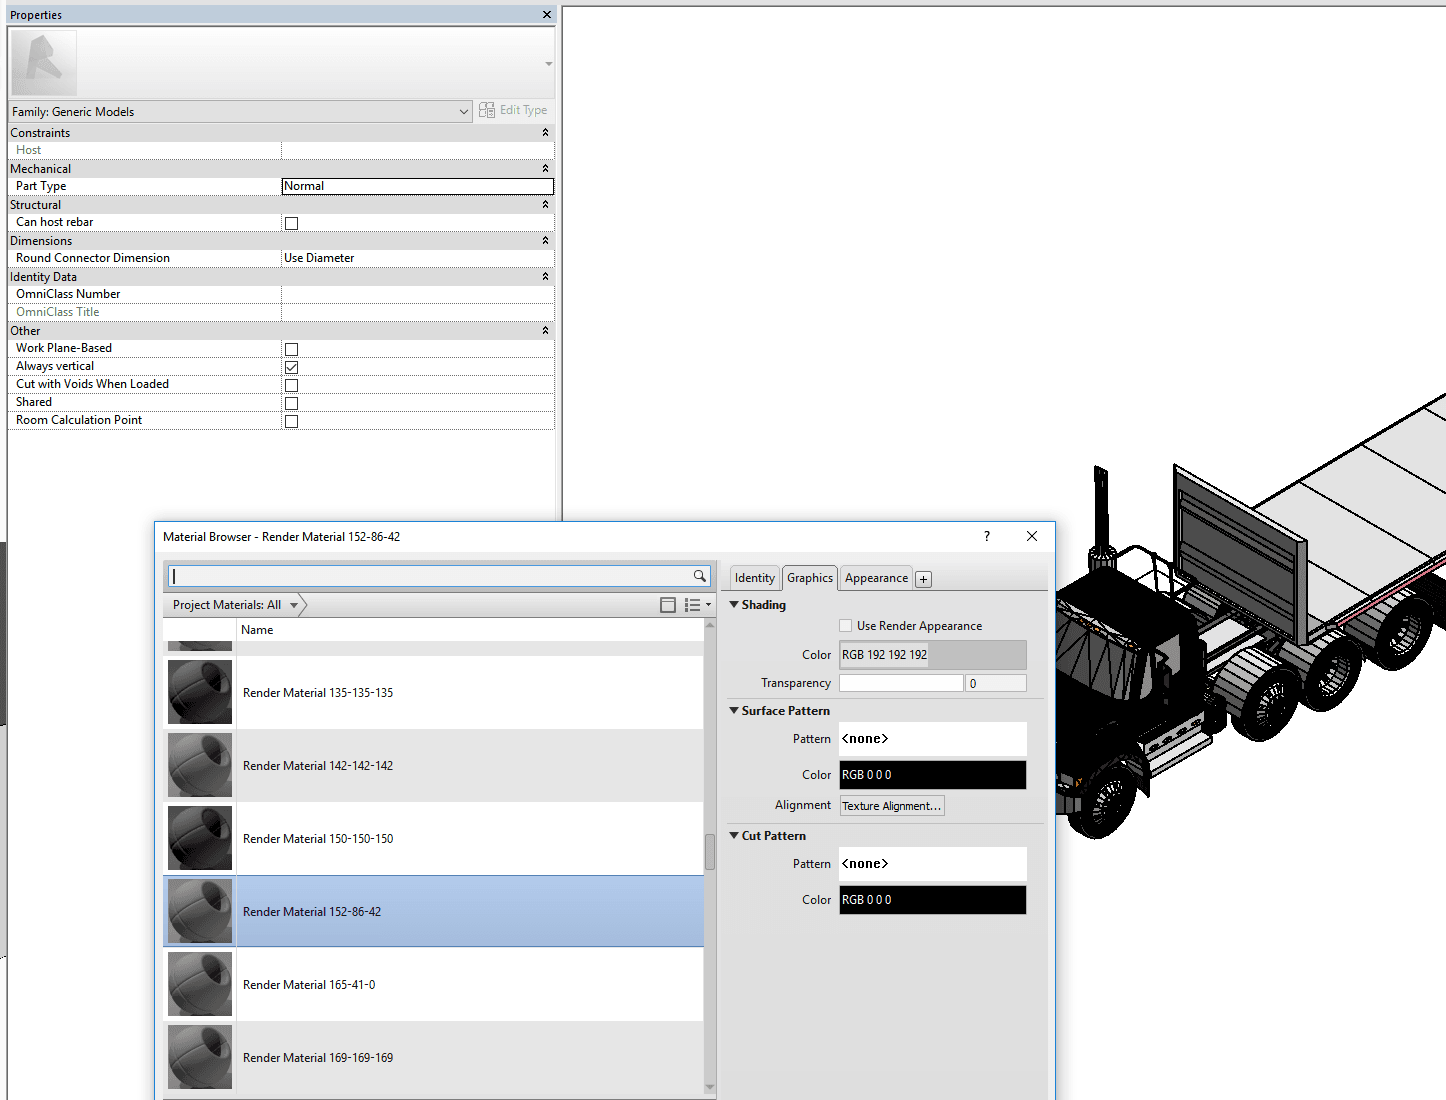
This image shows how you use the new Objects dialog to select ‘Links’ and then override the colours and visibility of each linked model:
What’s new in Revizto 4.4 release:
– Ability to color code links, categories and levels. New “Objects” dialog.
– Visibility control of linked models and individual objects.
– Phases support from Revit.
– Tag management system for the Issue Tracker.
– Clickable links on sheets.
– Console app for getting XLS reports from the Issue Tracker.
– Ability to attach new file formats to issues. The complete list of supported formats: pdf, txt, csv, xls, xlsx, doc, docx, jpg, png.
– Interface improvement. 3D tab: reconfigured toolbar.
– Brand new installer. Minor updates will come through as patches, containing only the differences and therefore being much less in size.
– Rhino support (direct plugin in Rhino).
Here is a direct link to the release build, or you can download from here:
Good Revit Content management does not come immediately or without forethought. Unifi are giving you another chance to review some best-practice content management principles at an upcoming webinar. It should be very interesting to hear about some of the productivity and functionality improvements that are becoming available to allow you to manage your BIM content more effectively.
Sometimes you will want to duplicate a Revizto project, perhaps for archive or testing purposes, or to re-share it with a new team. This post shows you how to do it quickly and properly.
Here’s how:
Start Revizto
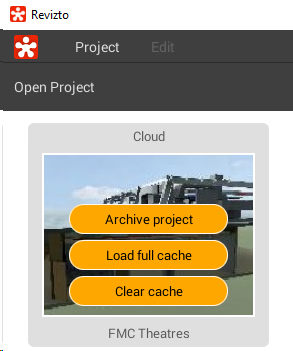
Load Full Cache by clicking Edit, then the yellow hamburger:
Double-click to Open the Project
Click Project and Save As
Give it a new name
If you want it to be a cloud project, you now need to Sync it to the cloud now. Currently it is just stored on your machine and the issue ids will not have populated. Just press Share, and then hit the Upload button at the bottom of that screen
That’s it, you now have a full copy of all 2D, 3D and issue information from the original Revizto project. You will have to invite new users to this project if you want them to be able to collaborate. Your existing project and users will be unaffected.
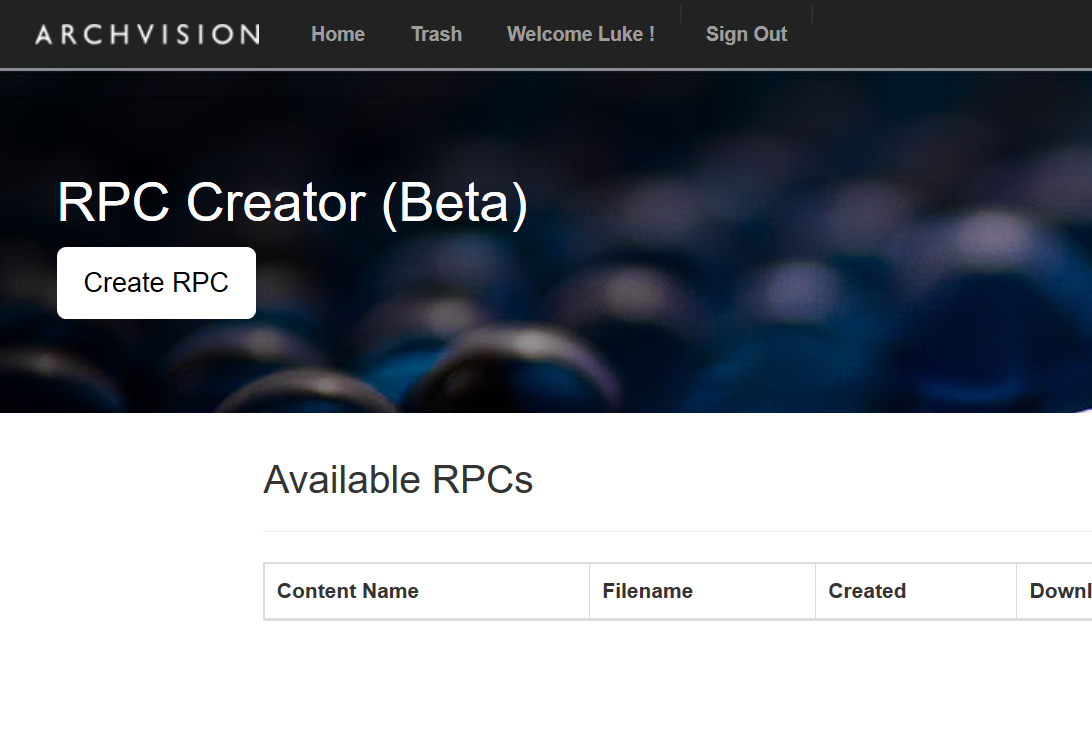
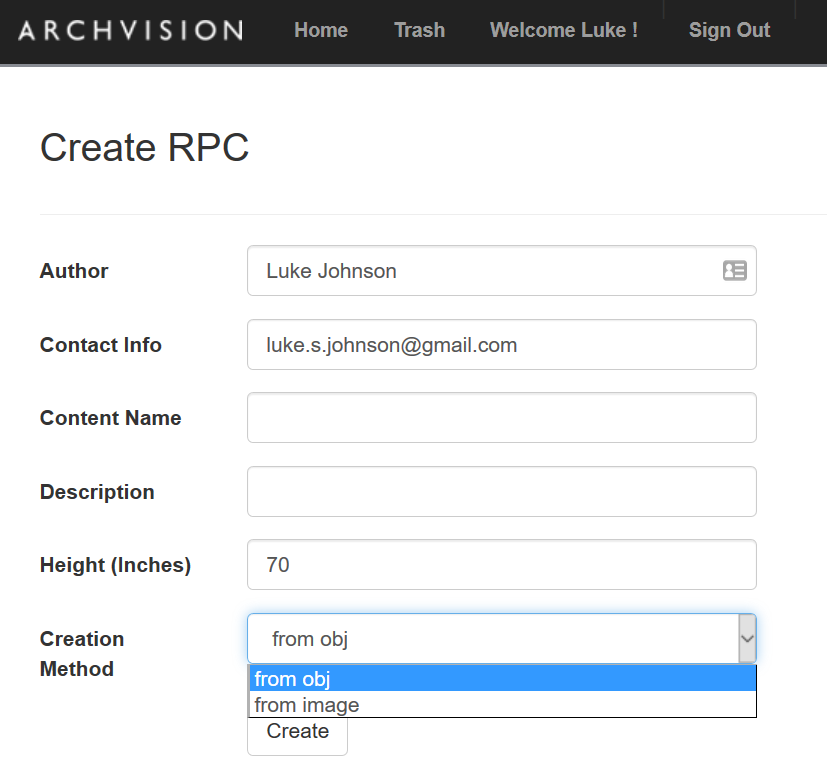
Archvision have a new beta 3D RPC creator service available. You can upload a 3D file and the service will generate a 3D RPC. Place this in the correct location, and you can use that RPC directly in Revit.
There are a few more steps from here, but I will refer you to this page that will give you more details.
Basically, you will need to consider the detail and quality of your content, as well as its purpose. Do I have highly detailed content that I want to render? The above will likely be quicker than modelling in vanilla Revit family geometry, and the result will be lightweight. However, aside from overall size it will be more difficult to handle any kind of parametric modification of the content.
BIM is supposed to make things easier and more efficient, right? Then why do we often have to re-do work in different platforms, simply to get the result we want? Surely, we can do better… especially when it comes to high quality rendering and presentation workflows.
One common scenario is that you might export a Revit model to some 3D editing and animation software, perhaps like 3dsMax. Then, you will do some work, modify materials, tweak some lighting perhaps, and then render an image. That image might go into Photoshop where additional Entourage and effects are added. And you do get a kind-of good result. But, what if you change the model? Well, you have to go through multiple steps just to update things. Or, what if you want to take the nice material from Photoshop and bring it back to Revit? That can be a real pain. However, now there is a better way…
I have written about Lumion a few times before. It is a incredibly powerful tool for Architects to present and share designs. However, it may still have suffered a little from the ‘endpoint syndrome’ described above. But that is no longer the case! Now, Lumion offers a Live Link to the Revit model, meaning that work does not have be done over and over again.
Getting started
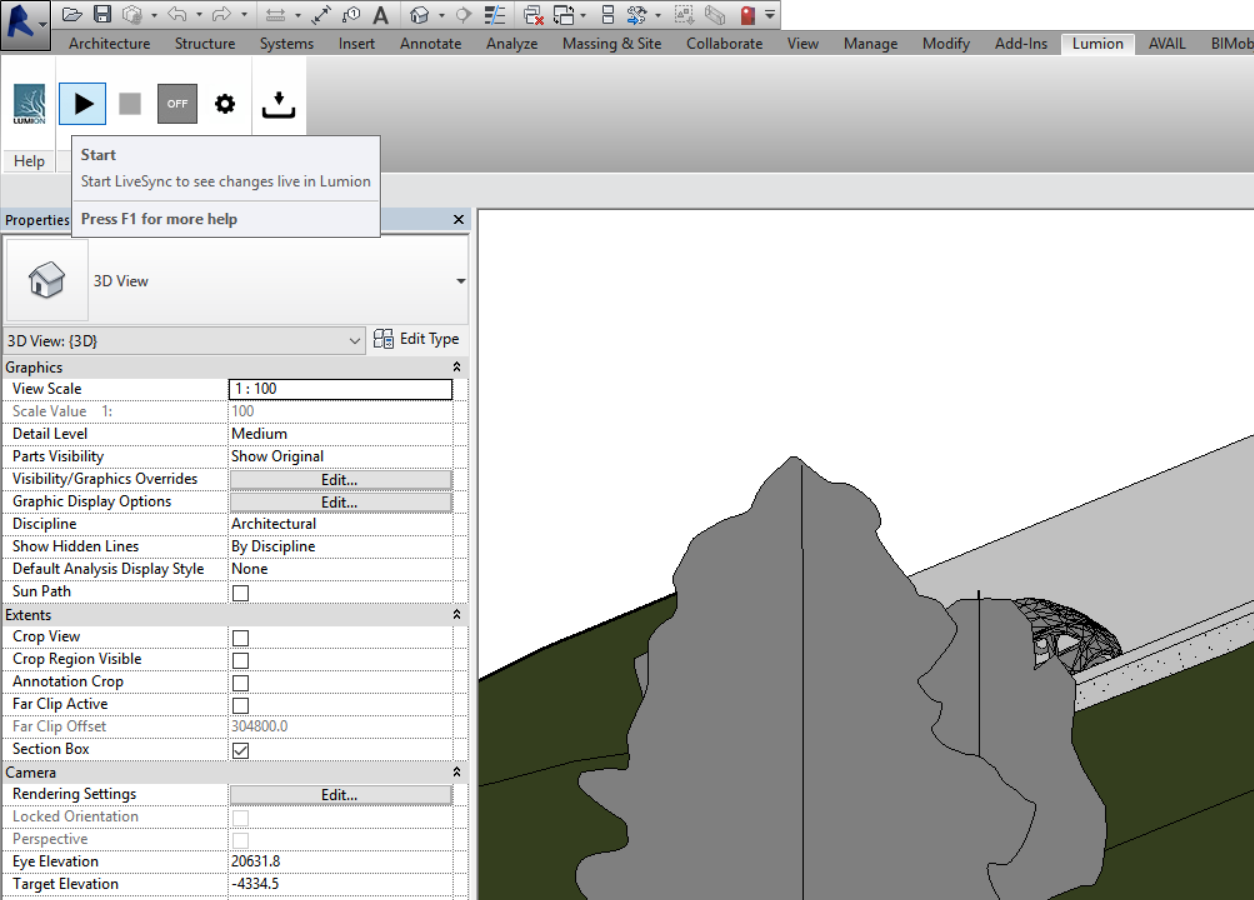
To get started, install a trial of Lumion 7.3, and install the Lumion plugin 2.01 for Revit. Open up a Revit project. Then, simply go to the Lumion ribbon and press the ‘Play’ button.
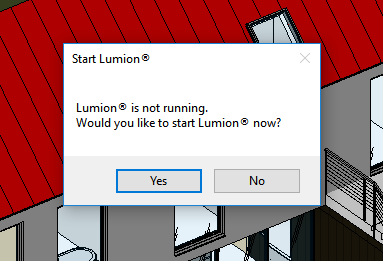
You will be prompted to launch Lumion. Press Yes.
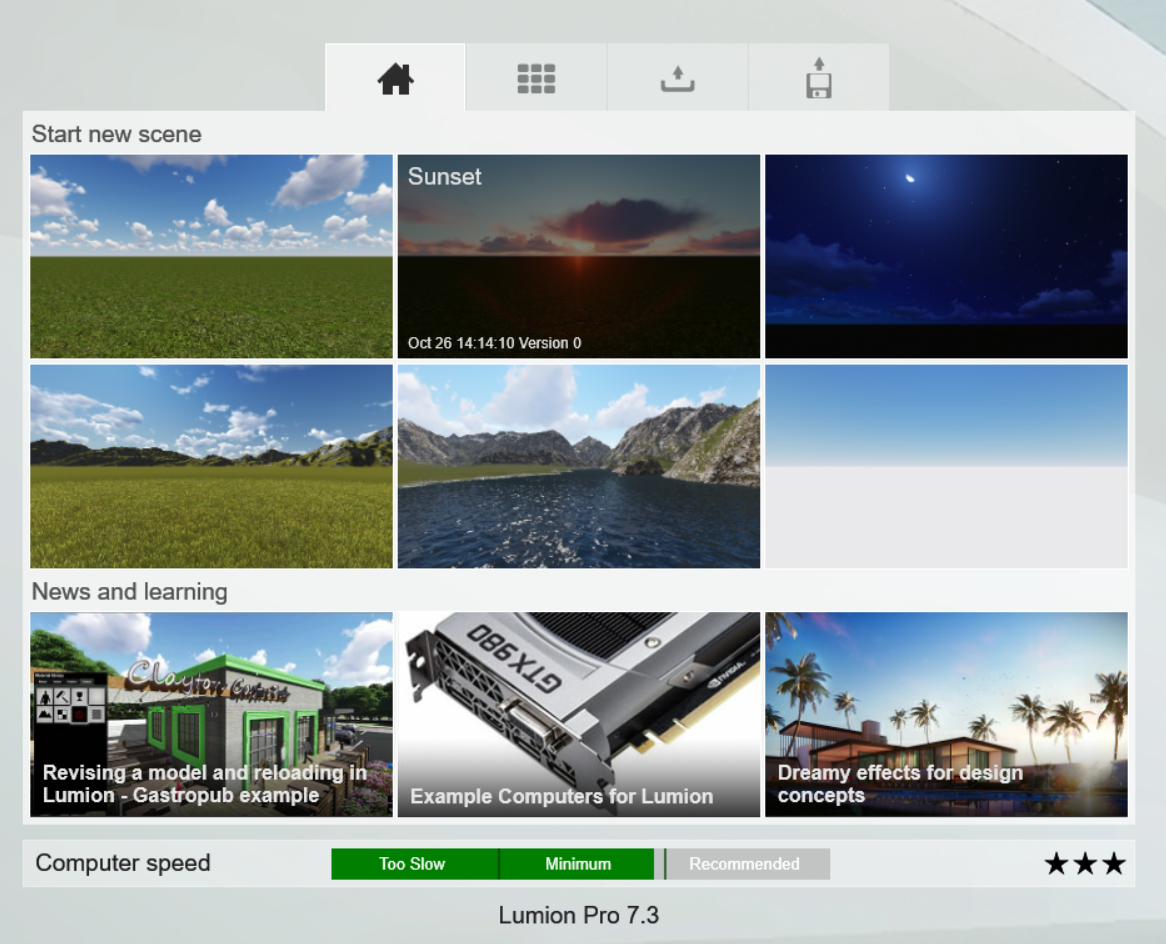
After Lumion starts, you will be prompted to start a new scene from the scene templates:
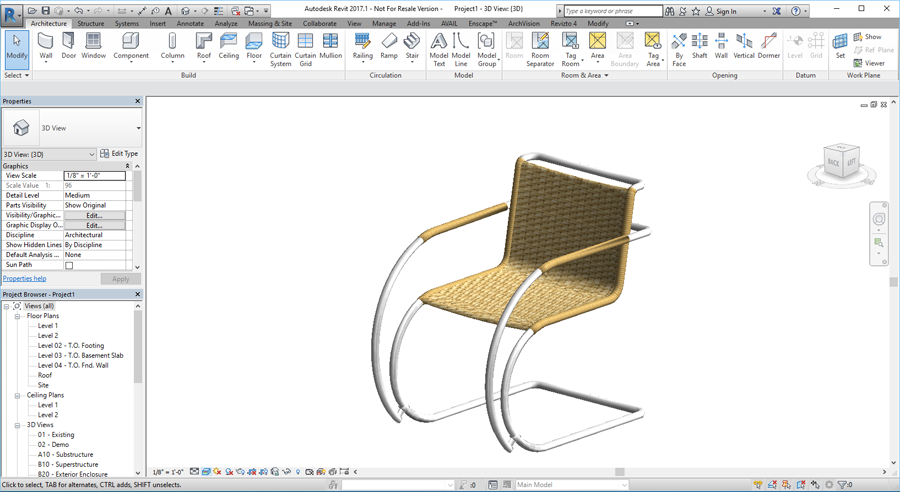
In just a few seconds, it launches showing your Revit model. Seriously, it is really fast! This workflow is so much quicker than an export – import method, and will be familiar to users some of the other popular realtime visualisation solutions out there. You can immediately start navigating in this rendered environment. And of course, you can start building your Lumion scene by adding content from the immense library. However, we really want to focus on LiveSync. How does it work?
Here is a list of some things that work really nicely:
you can move objects in Revit, and they immediately move in Lumion
you can add new objects to Revit, and they will show up in Lumion
you can edit Revit materials, and they will update in Lumion
delete an object in Revit and it disappears from Lumion immediately
you can use terrain tools in Lumion to merge in with your Revit topography
I have created a short video that describes how to get up and running with Lumion 7.3 and LiveSync for Revit. Check it out here:
Further, this new Exporter provides a much tighter integration between Revit materials and Lumion materials:
Workflow Tip
After you have completed an editing and model building session with LiveSync, what happens next? Well, you can close Revit and Lumion, and Lumion will prompt you to save. It does actually save the embedded LiveSync object. So, later, you can open Lumion and do some scene development work without using Revit.
How smart is this connection? To test it out, I did this:
closed everything
opened Lumion 7.3
opened a scene that included a LiveSync model
then, I opened Revit with the appropriate Revit model
for some reason, it didn’t update… until I realised that the LiveSync model uses the File Name and Path to determine which model it came from. Because I had used ‘Save As’ on that Revit model and put it somewhere different, the link was broken. I then used a Revit model in the correct location, and Lumion immediately updated the import
This means that using a Revit model in a consistent location will allow easy updating of the Lumion model. You can work independently in Revit or Lumion, and then at any time restart LiveSync to updated the model in Lumion with the changes from Revit. Nice!
Demo
LiveSync in action
Video – Moving Objects
Video – Editing Materials
Video – Settings
Further Considerations
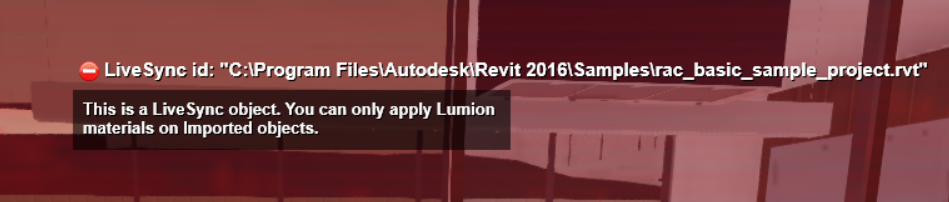
It is interesting to note that Lumion materials are essentially ‘disabled’ for LiveSync Revit objects.
This makes sense of course, because we are trying to keep as much intelligence as possible in Revit, and leverage the strengths of Lumion for high quality outputs.
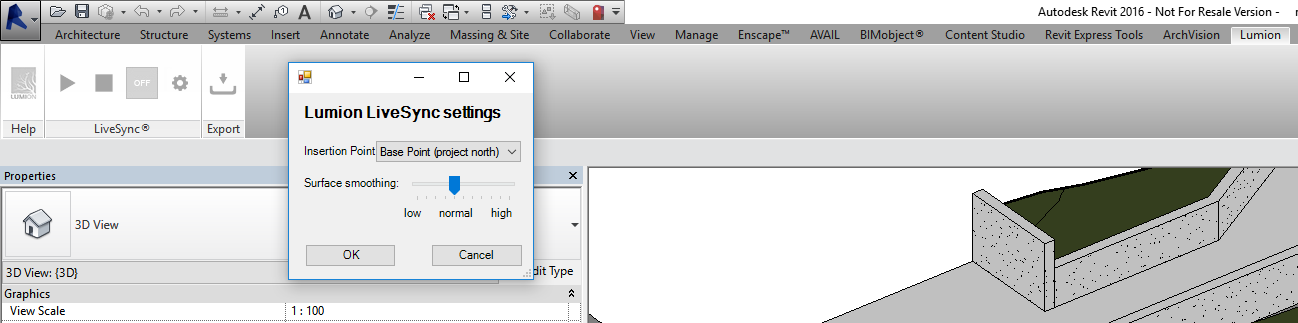
If you find that your Revit model is ‘too low’ and embedded into the Lumion terrain, you can globally move it, just as you would with other Imports:
Items in worksets that are closed or invisible by default will not show. What this basically means is that the Lumion LiveSync addin does not work on the specific objects you can see in the current Revit view, but rather it works in a more ‘complete’ sense, showing all objects that would typically be visible in any view.
Summary
If you are already using Revit and Lumion, these new additions will make designing much easier and more efficient. If you haven’t used Lumion before, now is definitely time to try it out! This improved connection to Revit, along with the already powerful content creation capability of Lumion, will truly allow design and present in ways you have never even imagined!
To try LiveSync for Revit for free, go to this page on the Lumion.com website were you can download the trial based on Lumion 7.3 PRO. This trial includes the LiveSync for Revit.
From the Press Release: Make changes in Revit® and immediately see them appear live in Lumion!
Lumion LiveSync® provides a real-time high quality 3D view of your Revit® design. This plugin for Revit® creates a live connection with Lumion, so that changes in Revit® can be previewed in real-time in Lumion.
Live synchronization can help you work faster, for example in the early stages of design, when you are making frequent adjustments to your Revit® model.
Lumion 7.3 is a FREE update for Lumion 7 users and the Lumion® plugin 2.0 for Revit® is FREE of charge to anyone.
How does it work?
● You need a Lumion 7.3 license
● Download the FREE Lumion® Plugin 2.0 for Revit® from the Lumion website or Autodesk® App store (LumionPluginForRevit_2.0.exe)
Lumion Lumion® is easy-to-use, fast, high quality visualization software for architects. It is compatible with almost all 3D CAD software packages such as Revit®, SketchUp®, ArchiCAD®, Allplan® and many others. It offers a full package. With a CAD program plus Lumion you have all you need to make great presentations. It includes sky, water, an extensive library of materials, people, plants, cars and furniture and loads of special effects.
Before Lumion®, rendering used to be really hard. Setting up and completing a render used to take days. With Lumion® you can do it in hours. You can even make last minute changes before a meeting and update your renders in minutes. Anyone can sit down with Lumion® and within 15 minutes learn how to create videos, images and 360 degree panoramas. Lumion.com
For more information contact Linda van Wijk, Director Marketing Communications Lumion.Linda@Lumion.com
Enscape is continuing to develop new and amazing ways to quickly visualise and present your Revit model… and now, your Sketchup models too. I will cover both of these below…
1) A quick look at the Enscape Sketchup Extension
Sketchup is still a solid workhorse in a lot of firms, as it is almost too easy to use. Some architects immediately feel comfortable using Sketchup, where Revit has a bit of a steeper learning curve. Personally, I hope to see more designers moving into Revit for early concept design with massing or adaptive components or Dynamo, but in the meantime there are plenty of people out there building really nice models in Sketchup. Which is why Enscape is releasing this Extension, I suppose!
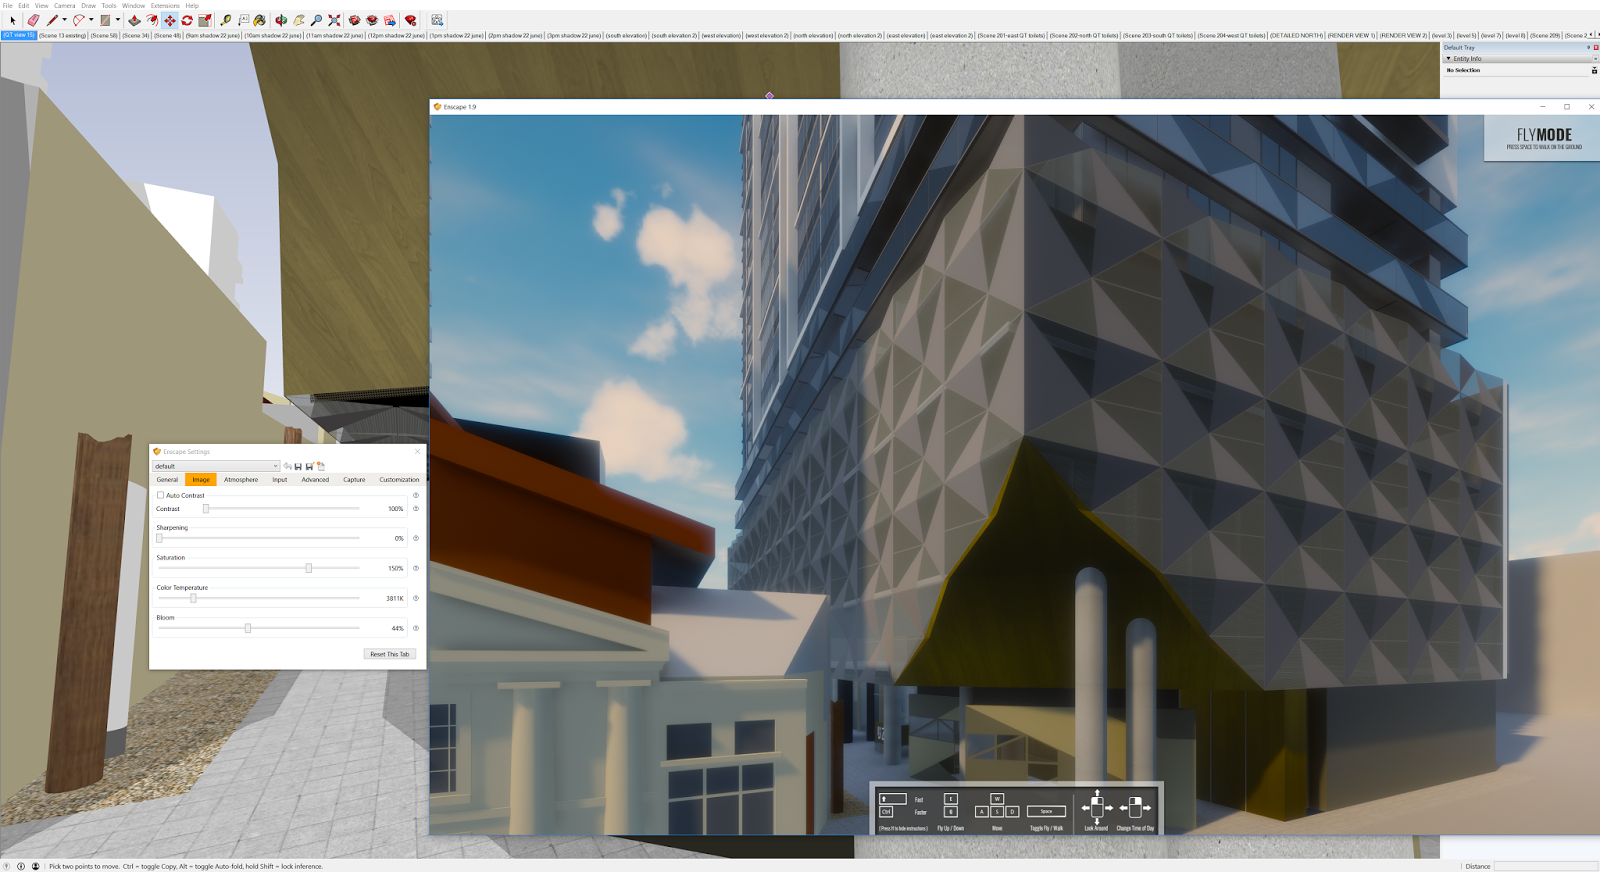
After installing the Enscape extension for Sketchup (you can see some tips on how to do this at the end of the post), you will probably want to immediately start tweaking settings. As with Revit, you can have the Sketchup window, Enscape window, and Enscape settings all open and ‘live’ at the same time. For some reason, Enscape started with maximum bloom and extremely warm colour temperature, but after tweaking that a bit it started to look really nice as usual:
As Sketchup models are quite light compared to Revit, I was able to run on Ultra settings and the experience was smooth (helps to have a Metabox in this situation of course). Overall, the Experience of using the Extension for Sketchup is almost identical to the Revit plugin implementation, which is great.
You can achieve a really interesting result just by playing with the time of day and the sky orb brightness:
Which leads me to the new features..
2) Enscape 1.9 Platform Updates and Updates for Revit
One of the biggest updates in this latest version is that now Revit Decals are supported. As you probably know, a Revit Decal is basically a flat item that gets stuck onto a flat surface like a Wall. From there, you can pick an image and set the size. Now that Enscape supports this, it is much easier to do things like customised signage, and it can be done very quickly and photorealistically. Previously, I had a challenging workaround through custom RPC, but the support of Decals should make this process much easier for flat elements.
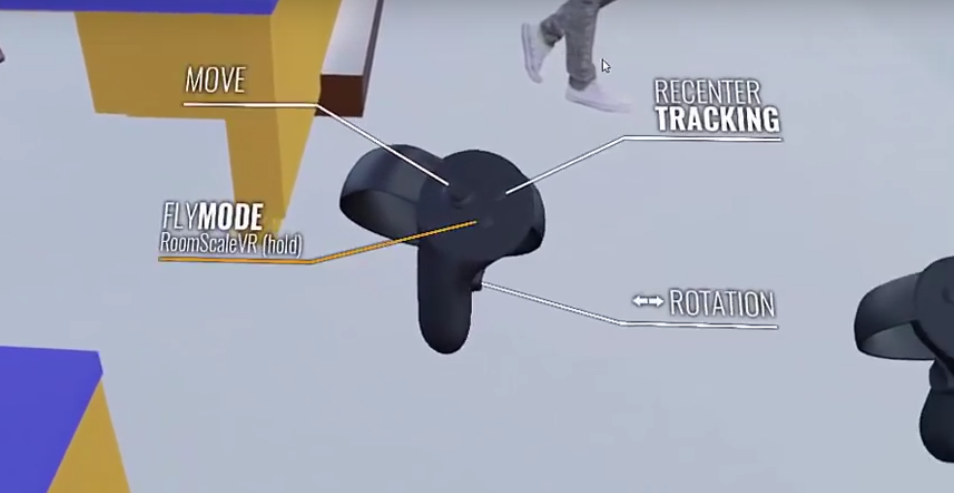
Enscape now also has Oculus Touch support, along with a handy heads-up display when you look at the controls in VR:
Further, more support for Glass and Glazing materials has been added. Essentially, Enscape is working to support every applicable material property from Revit, which is great.
A couple of other things:
you can set the frames per second on exported video
you can ‘move’ the clouds to really get your scene looking just right
you can modify the brightness of Sun, Moon and Stars. It is seriously impressive to set the time to night, and then boost the stars right up. It is quite beautiful 🙂
Here is a video that summarises the updates in 1.9:
Check out this video of the Sketchup plugin in action:
Sketchup Installation
Here is how you can manually the install Enscape Plugin for Sketchup:
1) Download the .rbz file (currently from the Preview / Alpha page). I’m currently using enscape-1.9.0.403-g355786d.rbz
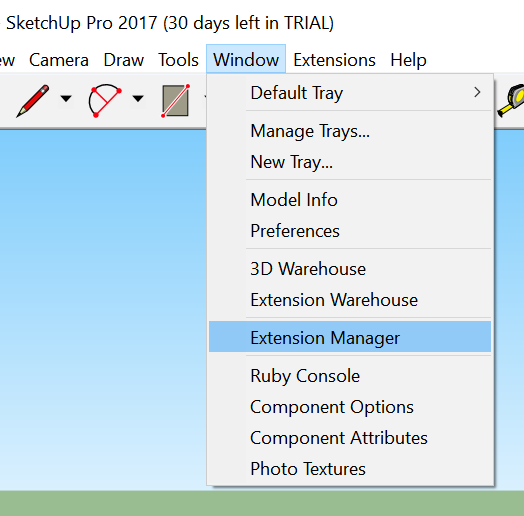
2) Go to the Extension Manager in Sketchup
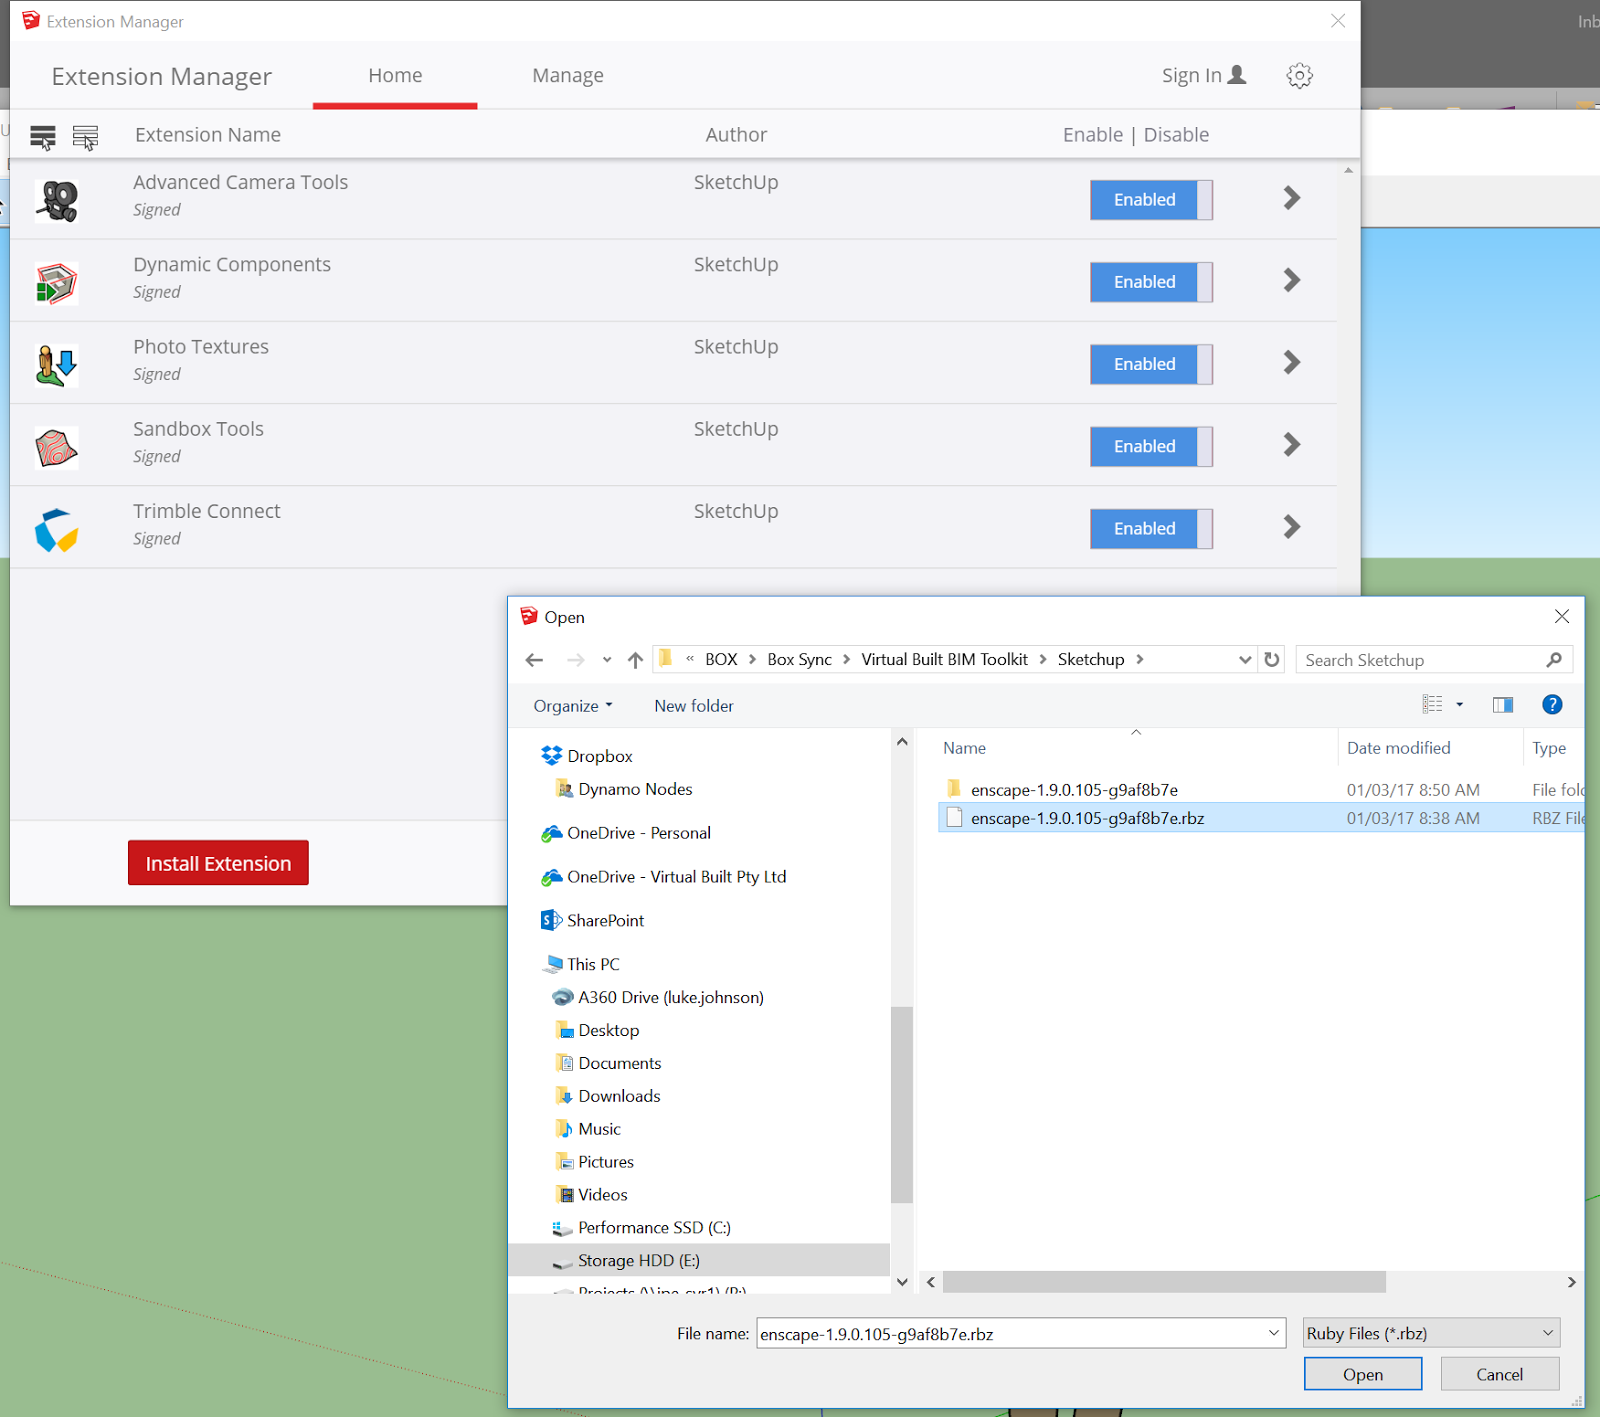
3) Choose Install Extension and pick the rbz file
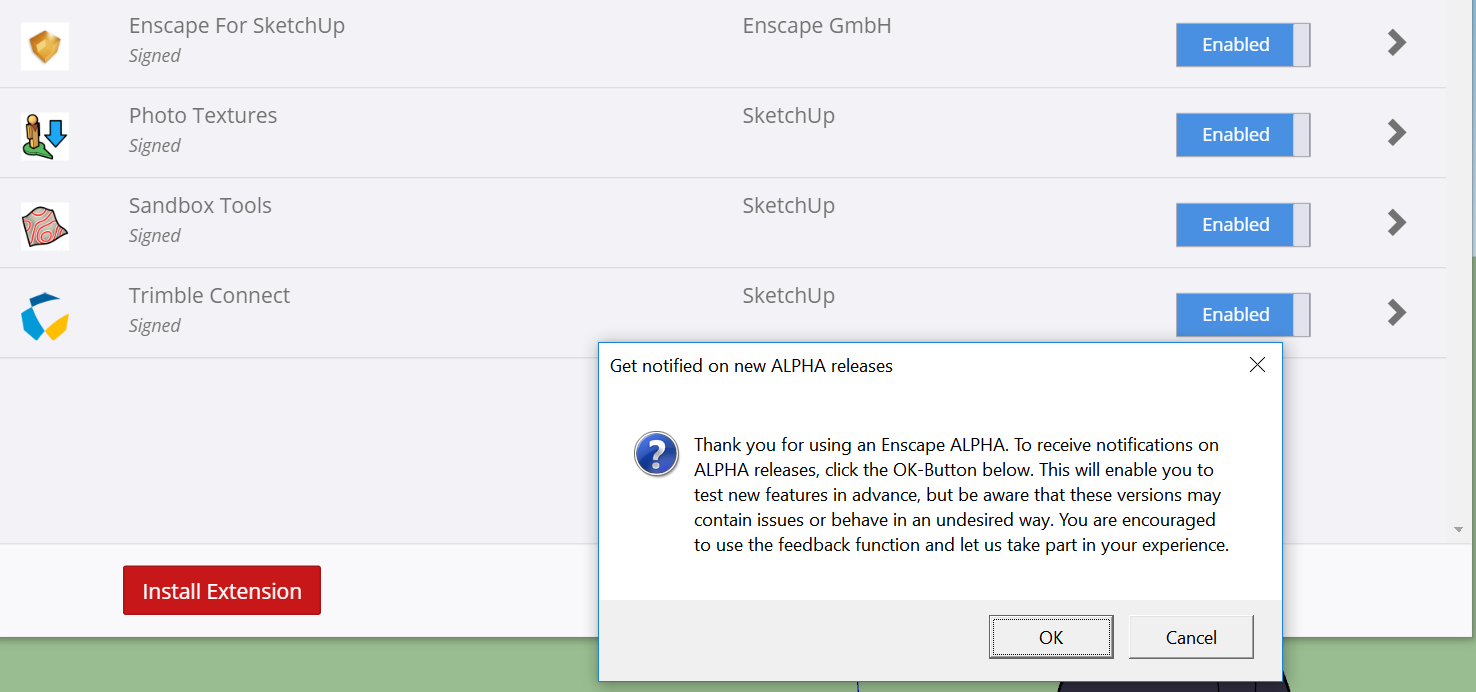
4) Accept the prompts
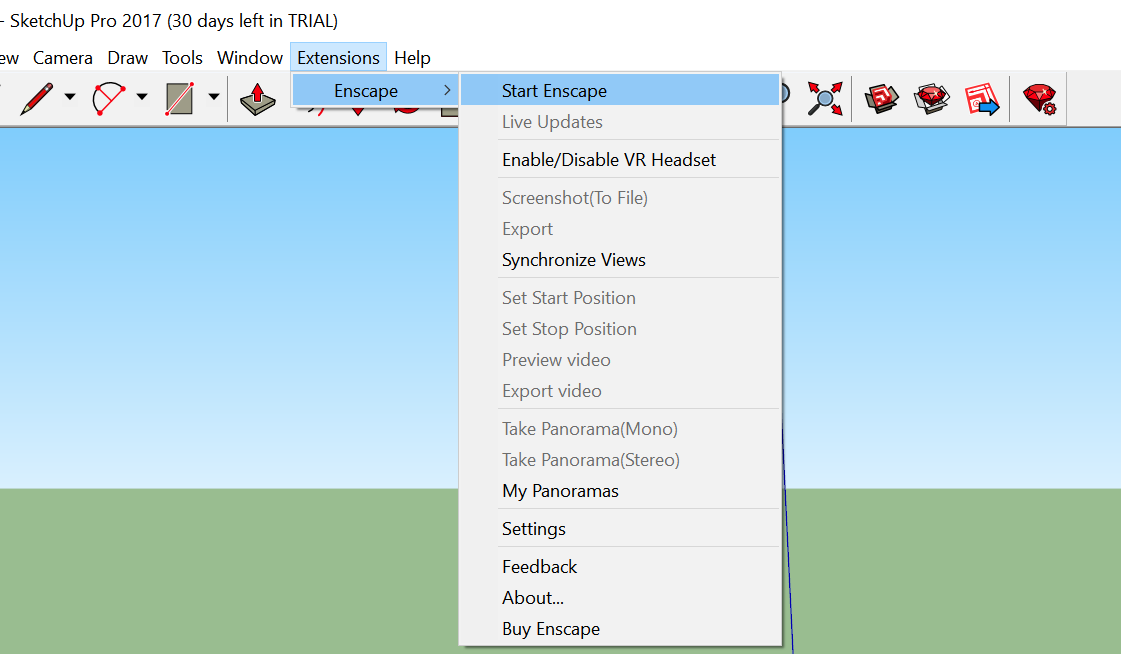
5) You might have to restart Sketchup. Then you should be able to start Enscape from the Extensions menu:
Revit natively supports importing Sketchup up to version 8. If you want to import ‘new’ Trimble Sketchup files, like some nice content you have download from 3D Warehouse, you have at least 2 different options:
Open the file in a new version of Sketchup and save down to version 8, then import to Revit
Import to AutoCAD first (IMPORTSKP), then save as DWG, and then bring it into Revit. You may need to install the Sketchup Import addin for AutoCAD to import 2016 and newer versions of Sketchup.
Based on some preliminary testing, I think option 1 is probably the better / easier way to go at the current time.
Revizto completely transformed the way we manage and coordinate BIM projects, and I have posted about it several times before. I’m really pleased to share a very comprehensive PDF help document put together by the team at Revizto.
It goes through all the steps needed to get up and running with Revizto, including setting up your environment, creating and sharing projects, navigating your model, and collaborating in the Issue Tracker.
I’ve been using Revizto for years, but even I learned some things… like this tip about using FBX to get models from Revit LT into Revizto: Revizto supports all versions of Revit starting from 2014 except Revit LT. For Revit LT you can
load models into Revizto via FBX format.
Throughout the document you can click on links to immediately watch videos:
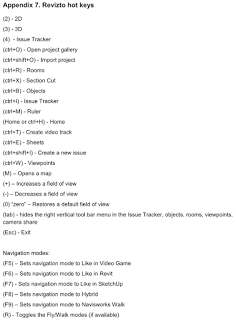
It has fully detailed descriptions of the various control schemes, including controllers for VR, and the general hotkeys:
If you are interested you can download and try out Revizto here.