In response to my post about Using RDB Link to Tag Wall Volume, Julien Benoit has posted a few helpful comments.  He also referred to his post on RFO.

I previously posted about WhiteFeet tools here.  Basically, the Revit Parameter Tools allow you to drive Shared Parameters with object information that is normally concealed from tags, such as Volume.  There is a lot more to the WhiteFeet package than this, but certainly this is easier than having to go out to RDBLink / Access and back again every time…

Check out screencast embedded below.  Thanks Julien!

Revit doesn’t let you tag Wall Volume by default, so Avisotskiy puts RDBLink to good use – he uses Microsoft Access to update a Shared Parameter with the wall Volume data, and then simply uses a tag to grab the manually updated and manually created Volume data.

This is not a ‘live’ link, but it shouldn’t take too long to round trip the project to update the Volume information prior to document transmission or printing.

From his blog:
Revit does not allow to directly make a mark in the volume of the object.

4. Unload in Access, using the Query Designer update the “_Obem”, taking data from the parameter “Volume”.

Image from http://avisotskiy.blogspot.com.au/


via
Google Translate
of
http://avisotskiy.blogspot.com.au/2012/03/revit-db-link.html

I have previously posted about accessing and modifying the Revit Database in a number of posts over the past couple of years, including:
Database and Excel Linking tools for Revit 2012
Exposing the Revit Database (RDB Link method)
Link Excel spreadsheet data into Revit

Now, from revit-pl.typepad.com we get a review of how to use DB Link to get a Revit model into access, then modify and update the database using Excel.

… the task of directing the attitude of these parameters that all poles have become a consistent shape, eg by one by one appropriately “shrunk” towards the top, according to a chart linear function.

First Saving the model into a format read by MS Access ®.
Second Modifying the parameters using the formulas family excelowskich and update the model.

There are a few videos at the original post.

via
Google Translate
of
Morze nowych możliwości. Revit MS Access MS Excel = BIM – My Blog

Check out the following link:
WhiteFeet public downloads

Among other things, you will find documentation that covers the following tools:
Revit Element Tools
Revit Family Tools
Revit Parameter Tools
Revit Database Link
Revit Sheet Manager

The License Agreement can be found at:
http://www.whitefeet.com/License.htm

Here are some summaries of the individual tools (taken from the documentation):
Sheet Manager
Links to an Excel file or (less commonly) an Access database.  Based on this
data, it creates or updates sheets in Revit as a bulk editing process.  The tool
can also be used to export data, renumber sheets, and place views on sheets. 
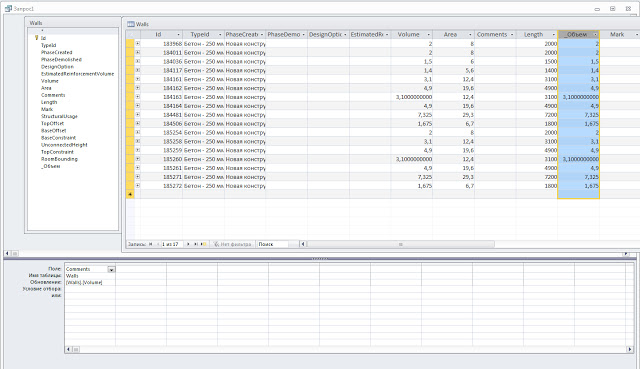


Revit-Database Link
A relatively complex and highly developed program that can be the basis of a wide range of workflows.  It can connect to either an Access or a SQL Server database and synchronize data in both directions. 


Element Tools
This collection of smaller tools has been grouped together for convenience, but they serve different kinds of purposes.  These include:
Placing unplaced areas and rooms.
Creating views, adding tags, and exporting images.
Managing links.

Family Tools
These tools support working with families and working with Excel:
Exporting detailed information about families to Excel.
Importing parameter values from Excel to control families in support of a computational design
process.

Some cool ideas from the June 2011 issue of AUGIWorld, article entitled ‘Revit, in a Database’ by Paul Crickard:

Once a Revit model has been exported to a database, the things
that can now be done with it are limited only by your imagination.
Build web-based or stand-alone front ends to access and modify
your model—without knowledge of the Revit API. Bring existing
data into a database and join it with the Revit model.

In this article he discusses some of the potential connections between MS Access and MS Excel, and the benefits of such interoperability.

I have posted numerous times about how to view the Revit database using various methods.  To start with, perhaps you would be interested in this post:
What Revit Wants: HOW-TO View the Revit Database (2011 Secret #14)

And, yeah, I twisted the title of this post a little bit 🙂

The RDBLink method establishes a bi-directional database which can be edited and updated. Be careful when using this. I would recommend trying it on a test project before actually putting it into use.

The basic steps to set this up and use it are:

  1. Download the RDB Link Tool and install it.
  2. Setup a DSN source in Windows.
  3. Export your Revit file to the appropriate database.
  4. View and edit the database.
  5. Update the project with the edited database.

For example, lets export a Revit project to an Access database:

  1. Setup the DSN. Go into Control Panel – Administrative Tools – Data Sources
  2. Click the System DSN tab.
  3. Click Add…
  4. Select ‘Microsoft Access Driver (*.mdb) and Finish
  5. Put a name in the Data Source Name (revit1 for instance). Put a description.
  6. Under the Database: section, click ‘Create:’
  7. Put the mdb in an appropriate location (C:REVIT-DBrevit1.mdb for instance)
  8. Click OK.
  9. Click OK until you are out of the ODBC Data Source Adminstrator.
  10. Back in Revit, on the Add-Ins tab:
  11. Click External Tools – RDB Link
  12. Click ‘Export into ODBC database…’
  13. Click the appropriate Data Source tab, and locate the Data Source Name you created, which is set up to connect to an existing Access or SQL Server database.
    If you selected an Access database DSN, a Login screen asks for a name and password. Leave it blank if you have not specified a user name and password for your database.
    A progress meter appears while outputting the Revit project data to your database.
    (this point 13 from Labs)
  14. Open the database in Microsoft Access and have a play. Modify a wall height or something and save your changes.
  15. Back in the project, use the RDB Link tool to import the data from the same database you exported to.
  16. Have a look at the change in your model!

Note – if you are running Windows Vista x64, ensure that you run the right version of the Data Sources tool. See this site for the difference. I had success using SQL on Vista x64, but I couldn’t get the RDB Link tool to find my Access source.I used SQL Manager Lite for SQL Server to modify the SQL source on our server. It seemed to be quite good.Feel free to comment on this post and let me know how you go with the RDB Link tool.Below from the Labs site on how to setup the DSN:

  • To create an ODBC connection (DSN, Data Source Name):
    1. Launch the Windows Data Sources (ODBC) screen from the Start menu>Programs>Administrative Tools section.
    2. In the ODBC Data Source Administrator, select either User DSN or System DSN to create a new data source name for your database to use with RDB Link.
    3. Click the Add button to display the Create New Data Source screen, and select one of the following:
  • Microsoft Access Driver (*.mdb) if you want to work with a Microsoft® Access database
  • Specify the Data Source Name of your choosing.
  • Click the Select button to select an existing Access database or the Create button to create a new one.
  • SQL Server or SQL Native Client if you want to work with Microsoft® SQL Server™ 2008 (either a full installation or the Express version)
  • Fill out the information appropriate to your version of SQL Server.