Over the years I have posted a lot of workflows for PDF creation and management, including the use of CutePDF Writer and PDF Creator. I’m also a regular user of RTV Xporter Pro, as it is the quickest and easiest way to generate PDFs from Revit, and its pretty affordable too.

To automatically create PDFs with automatic naming from RTV Xporter, you need a PDF print driver that supports automatic naming. Adobe PDF can do this with the correct settings, but you can also do it with the correct version of the free PDF Creator print driver. CutePDF does not support automatic naming. You need a PDFCreator version equal to or older than 2.5.3.

What you need:

Below I will describe:

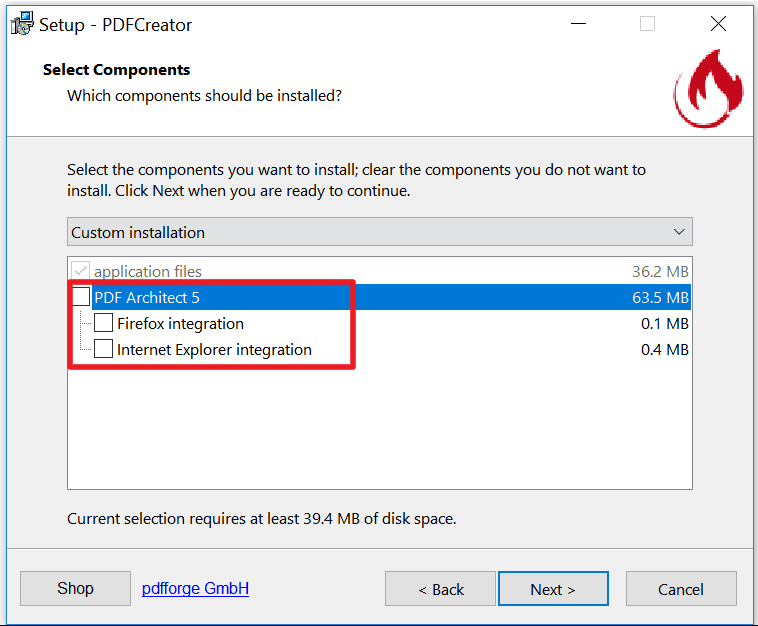
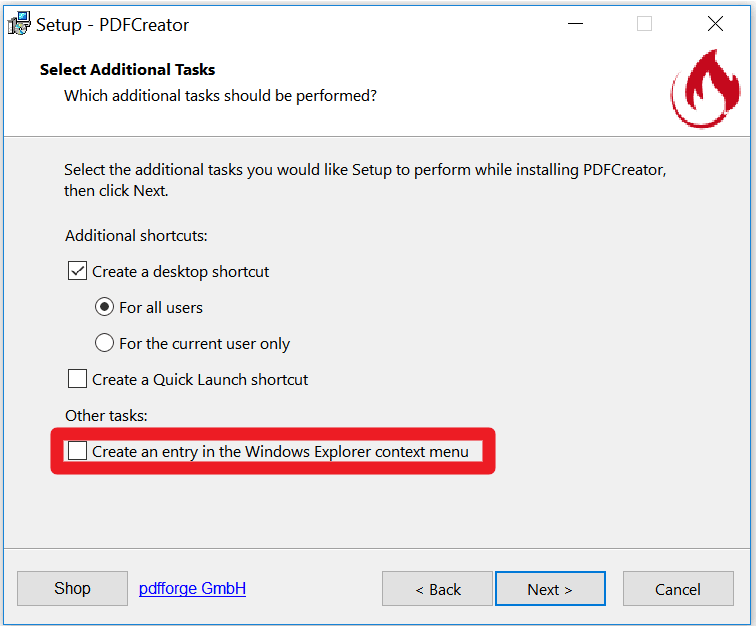
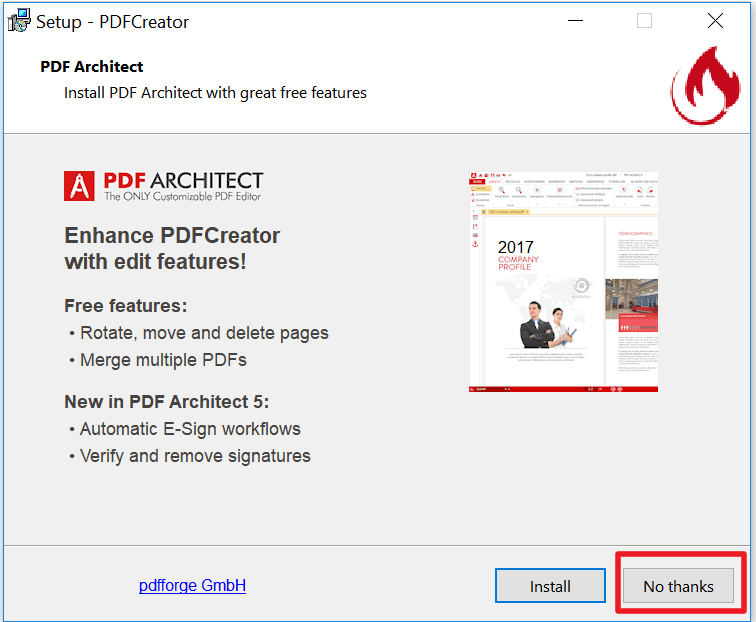
  • How to install PDF Creator without the bloatware
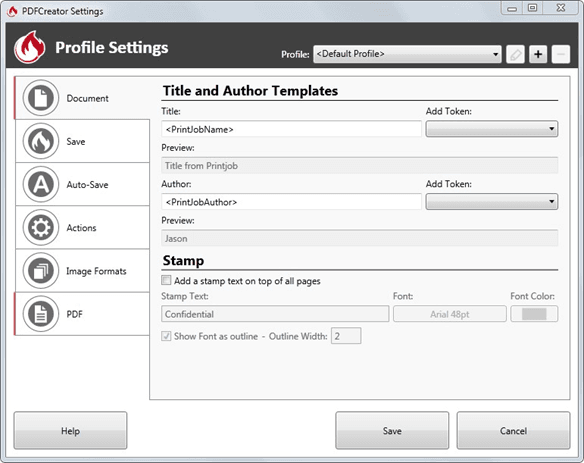
  • How to configure PDF Creator (thanks to Jason Howden at RTV for these slides)
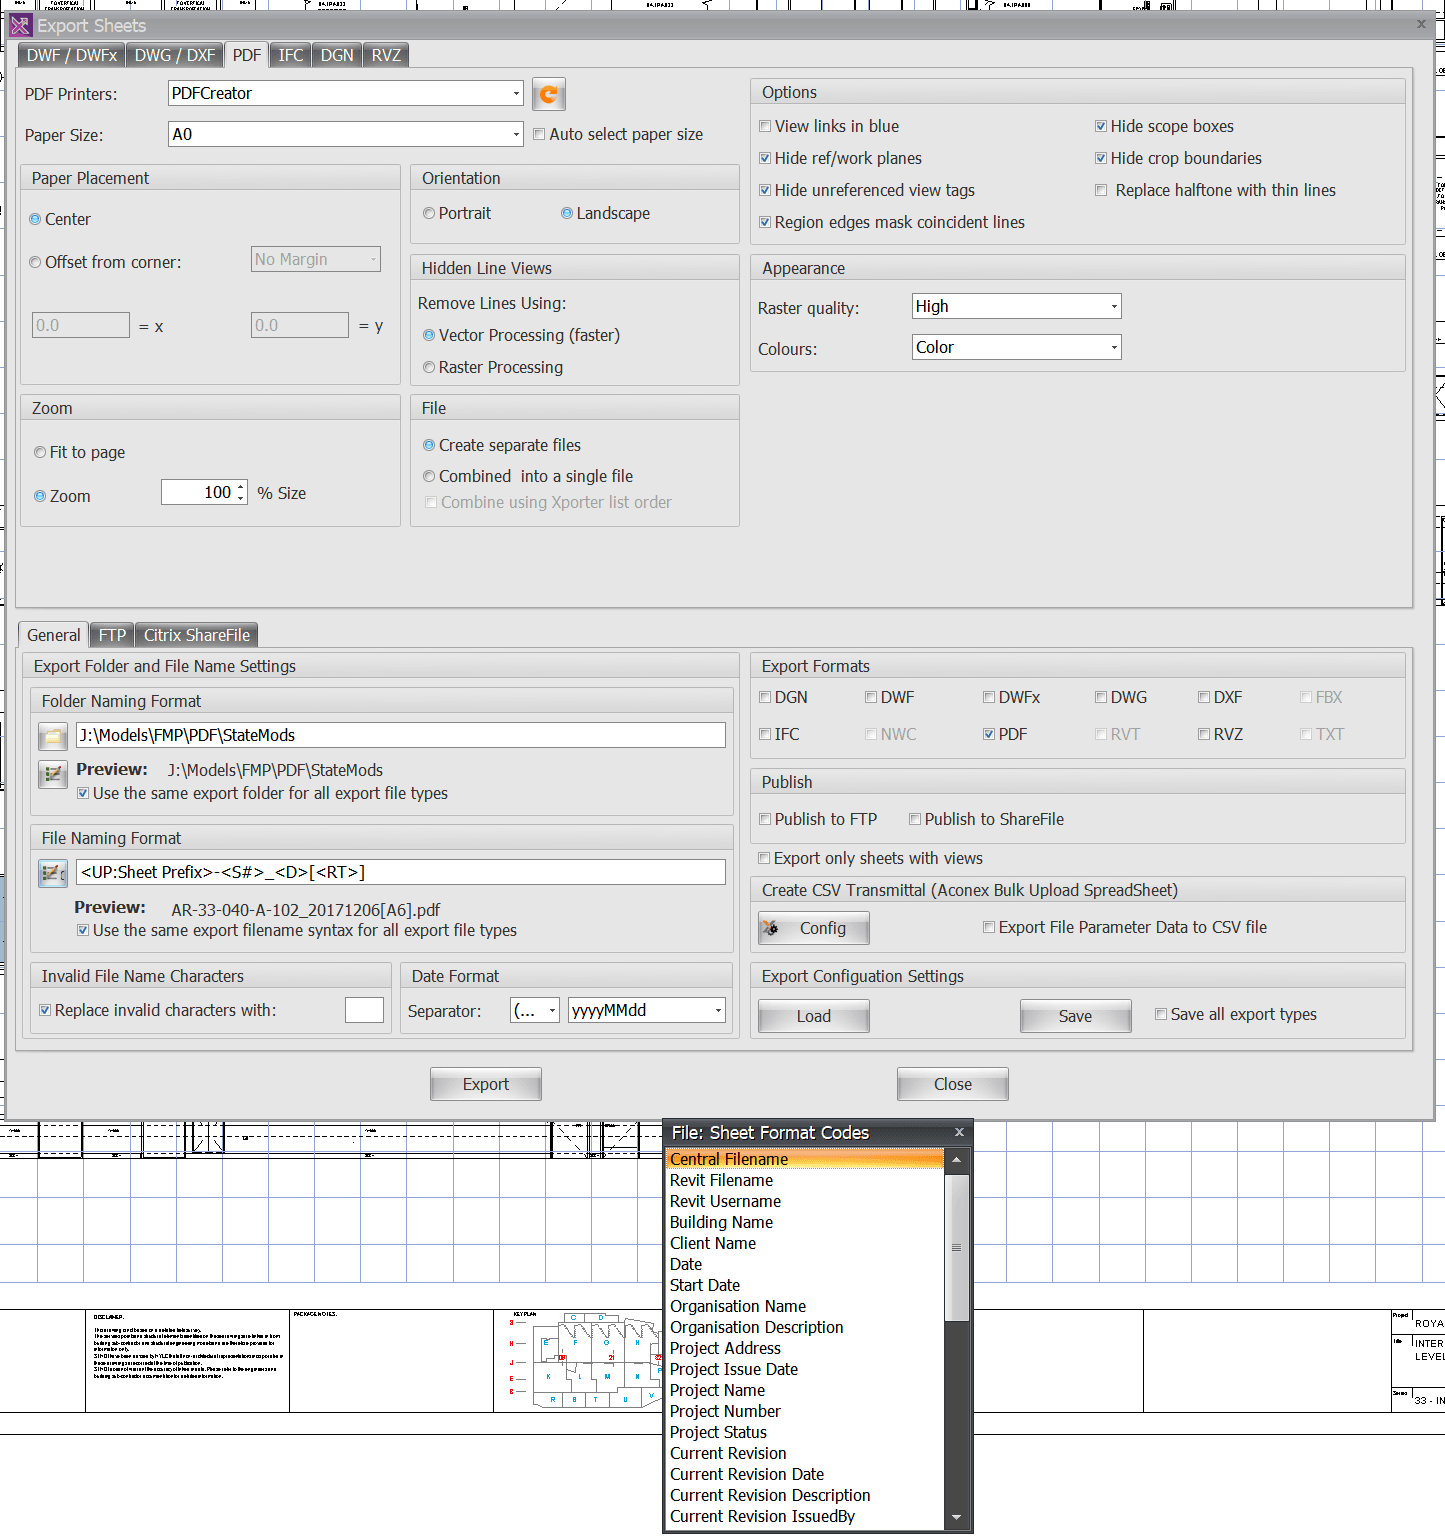
  • Some basic settings of RTV Xporter for batch PDF printing

Installing PDF Creator:

Screenshots below show some suggested options to avoid getting things installed that you don’t want.

Accessing the Settings:

  1. Launch PDF Creator
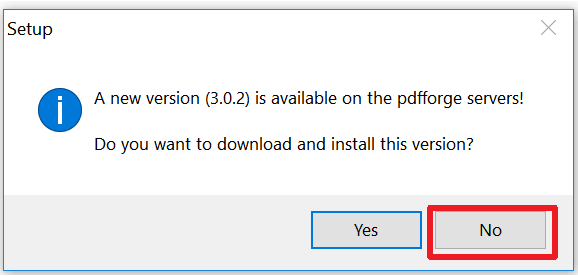
  2. Skip any update prompts
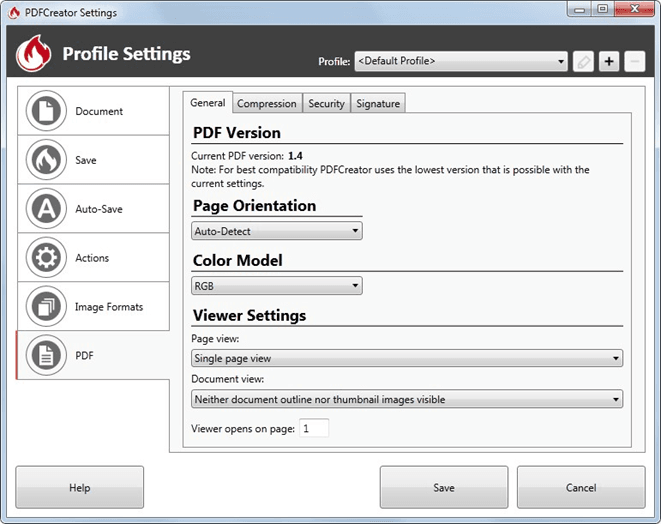
  3. Click Profile Settings

RTV Tools PDF Creator 2.2 Configuration/Profile Settings

Printing to PDF automatically from Autodesk Revit with RTV Tools (Xporter/Xporter PRO/Drawing Manager) and PDF Creator (versions 2.5.3 and prior) can be enabled with the below settings.

Document (Tab) Settings

No changes required (optional)

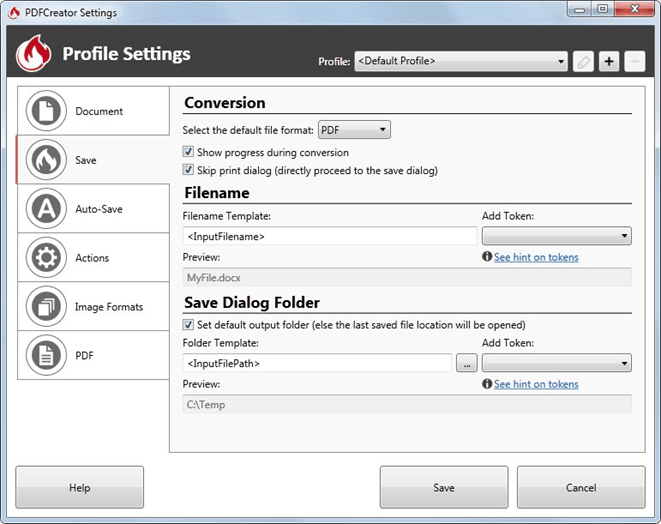
Save (Tab) Settings

  • Tick Show progress during conversion
  • Tick Skip print dialog (directly proceed to the save dialog)
  • Add Token <InputFilename>
  • Tick Set default output folder (else the last saved location will be opened)
  • Add Token <InputFilePath>

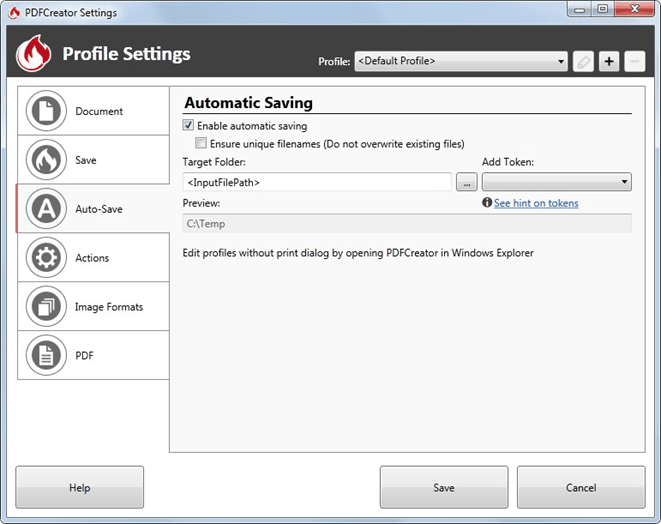
Auto-Save (Tab) Settings

  • Tick Enable automatic saving
  • Un-Tick Ensure unique filenames (Do not overwrite existing files)
  • Add Token <InputFilePath>

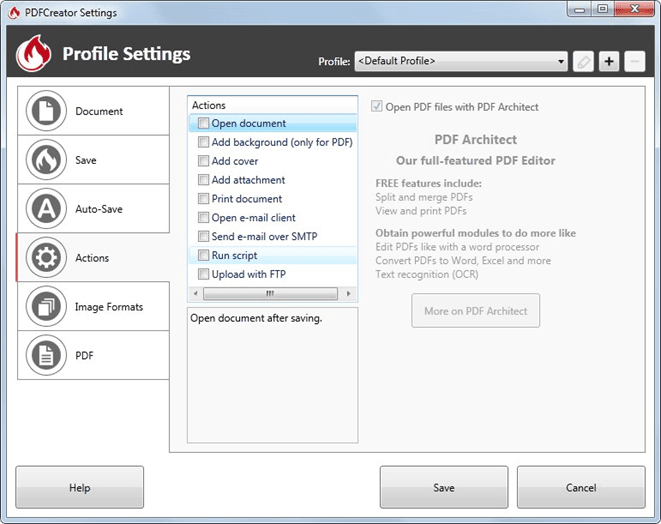
Actions (Tab) Settings

  • Un-Tick Open Document

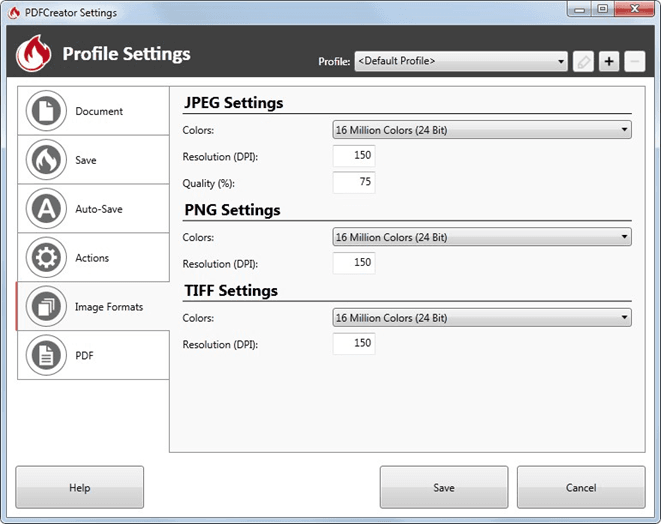
Image Formats (Tab) Settings

No changes required (optional)

PDF (Tab) Settings

No changes required (optional)

For more help and assistance with RTV Tools: http://help.rtvtools.com/


RTV Xporter Pro Settings:

The screenshot below shows the settings I use.
Sometimes you will want to produce a large set of PDFs where each drawing sheet is in its own PDF file. You also want the PDFs to be automatically named and created. There are a number of ways to accomplish this – here is the simple way that I use.

  1. Download and install PDFCreator ( if you don’t have it already)
  2. Download the following ini file: pdfcreator settings
  3. Open the PDFCreator application
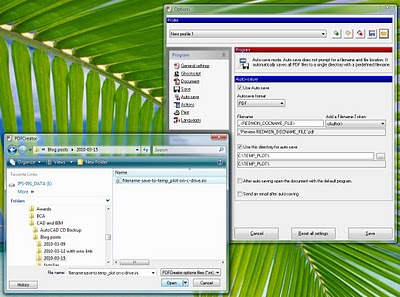
  4. Go to Printer – Options, and then ‘load’ the settings from the ini file you downloaded (use the little folder at the top of the window to load settings), then hit ‘Save’ at the bottom of the window.
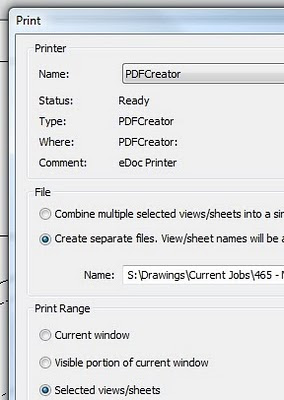
  5. Now, when you print from Revit, be sure to choose the options to ‘Create separate files…’
  6. When you click ‘Print’ in Revit, each sheet will be sent individually to PDFCreator. PDFCreator will then use the View or Sheet name (as per the REDMON_DOCNAME_FILE setting) to Autosave the PDFs to a specified folder – the above ini file uses C:TEMP_PLOT by default.

You can tweak these settings to your own individual taste – you may want to change the Autosave folder, for example.
Revit wants you to work efficiently, and it wants you to maximise the value of the data inherent to the BIM model. In this case, we leverage the View/Sheet name to automatically name the PDF files.
But what if you want to modify the filenames – perhaps adding a prefix or suffix to all PDF filenames? Well, you will just have to subscribe and wait for the next post…

Go to Part 2

After trying many free PDF Writers over the years, I have found CutePDF Writer to be the best.

In order to ensure you are producing the best PDF files you can (high quality while still keeping file size relatively small), please follow the steps below (when you have a chance, no hurry 🙂

Install the updated CutePDF Writer from here

Change the setting in the printer properties (Preferences and Printing Defaults) for ‘PostScript Output Option’ to ‘Optimize for Portability’ as a default.

Change the setting in the printer properties (Preferences and Printing Defaults) for ‘TrueType Font’ to ‘Download as Softfont’ as a default.

Navigate to C:Program FilesAcro SoftwareCutePDF Writer and open the file PDFWrite.rsp in Notepad. Change the line FROM
-dPDFSETTINGS=/prepress TO
-dPDFSETTINGS=/printer

(The path is C:Program Files (x86)Acro SoftwareCutePDF Writer for 64 bit machines)

Enjoy producing high quality PDF’s for free everyone!

Autodesk is getting very, very serious about DWFs. They will not replace PDFs overnight, but it is looking like DWF will become the exchange format of choice in the future. Particularly in the BIM / building delivery industry anyway.

Revit wants you to adopt this technology. Well, Autodesk does 🙂

So, why not try the DWF printer driver from Autodesk? Check it out at:
http://www.autodesk.com/dwfwriter

Without breaching confidentiality, I can’t tell you much…but…there are some very exciting developments in the PDF vs DWF war coming up soon!

Thanks to Shaan Hurley

If you are on Subscription with Autodesk, you HAVE to try the new Subscription Bonus Pack, which includes advanced PDF tools for use with AutoCAD.

You can import, clip and even SNAP to PDF files (if they contain vector data).

And the new PDF printer driver is excellent – far better than the previous one, and it rivals CutePDF for file size. You can also include layer information with PDFs.

Get onto the Subscription site and download the Bonus Packs now!