Often, it is. But if Project Base Point has ever moved in the life of the Revit project, then it probably won’t be. Revit Zero (sometimes called the Internal Origin) affects things like FBX and NWC export (IFC too) when using Project Coordinates.
One way to find it is to make a DWG file with a couple of lines at 0,0,0 and link in Auto – Origin to Origin. Another way is to make a Spot Coordinate that reports based on the “Relative” option.
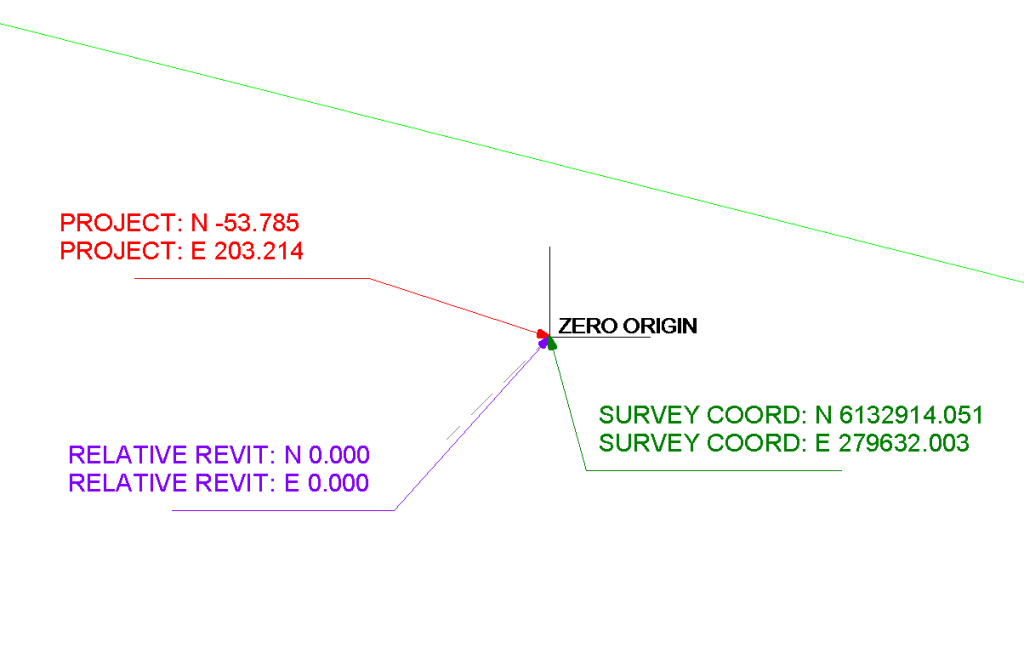
You can theoretically have 3 different coordinate records for a single geometric point, as this image shows:
You can read a bit about this at Revit Landscape.