We know that each Revit project has a Unit setting (Manage – Project Units). This dictates the default entry units (while typing the Length of a wall, for example.)
However, what if you want to enter a different type of unit without changing the Project Units all the time?
Revit natively understands a number of different unit types, and it will transparently convert them into the appropriate Project Units for you. All you have to do is type xxx SUFFIX, where xxx is the unit you want to convert, and SUFFIX is the type of unit it is.
Here is a list of the natively supported units of Length (that I know of):
mm
cm
m
” (Shift+apostrophe)
in
Note – you can also use 2 apostrophes (foot marks) for inches –”– (via @DBCdoug on Twitter)
How do you insert feet? Use the apostrophe (next to Enter key):
‘
What about a combined feet-and-inches unit? Yes, you can! You can use a dash to divide the two (but you don’t have to). Here are some possible combinations that work:
2′-7in
2′-7″
2’7in
2’7″
These can all be entered WITH or WITHOUT a space. For example:
12cm
12 cm
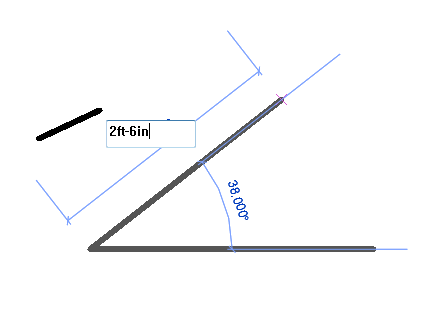
Interestingly, the ft suffix does not work for feet UNLESS you have it combined with inches, at least on Revit 2011 / 2012. For instance:
2ft DOES NOT WORK
2ft-0in DOES WORK
Crazy! Even:
2ft0 DOES WORK
Where in Revit can you use these inbuilt conversions? You will most likely use them in direct entry locations (while drawing a wall, for instance), or in the Options Bar:
 |
| Direct entry |
 |
| Options Bar |
If you have any other tips on Unit entry, feel free to comment.