A few years back, everyone was excited about the 3D and visualisation aspect of BIM. It seems that more and more, people are getting excited about BIM Data. Many companies are building and adapting business intelligence solutions that somehow connect to or wrap-around the BIM world. One of the most popular tools at the moment is Power BI. It is extremely flexible and easy to set up and use for data analytics.
When you connect the Power BI web service to your own database, you also have to provide some mechanism for Power BI to periodically update the base dataset. The common answer to this question is the “On-premises data gateway”.
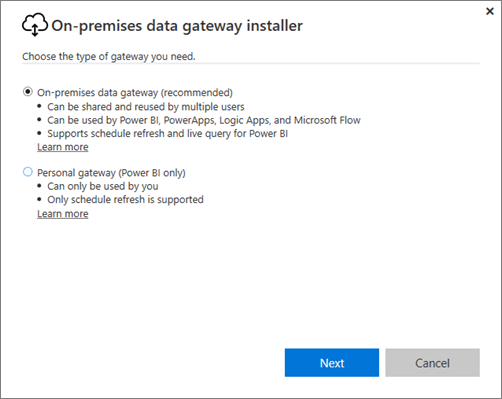
When you install the gateway on your own hardware, there are two types of gateway to choose from:
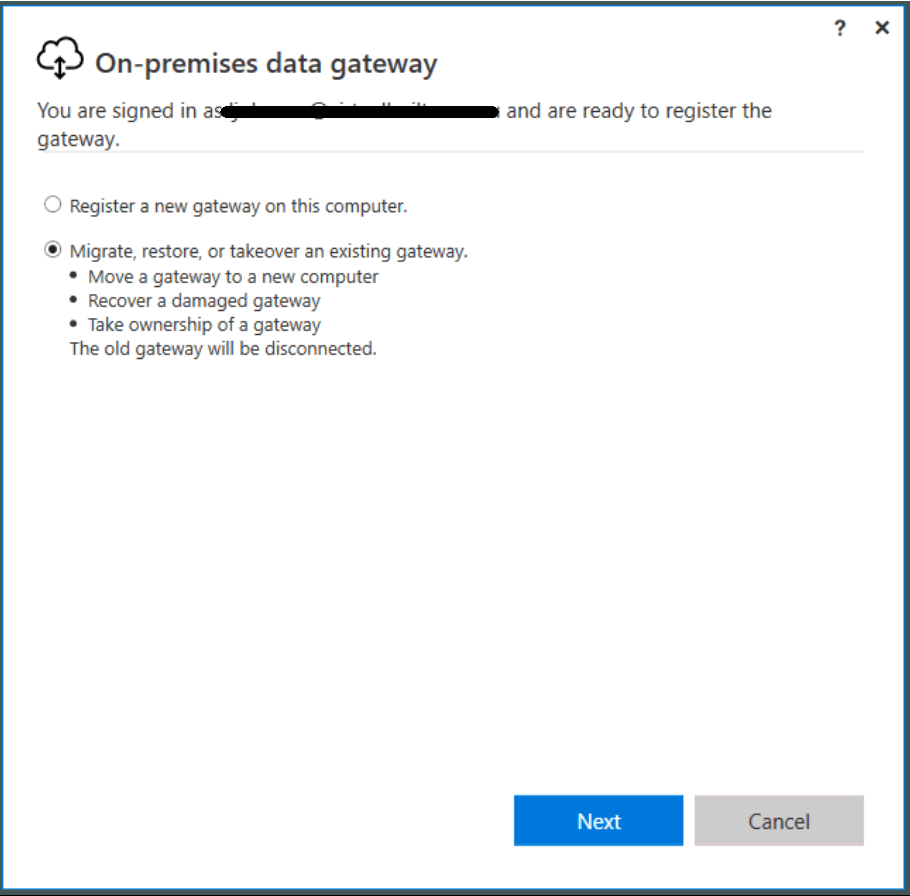
If you are already running a data gateway for Power BI, what happens if you want to transition the ‘gateway’ role to a new machine? Well, you need one key piece of information: the Recovery Key from the gateway when you set it up originally. If you do have this, you can simply ‘take over’ the role from an old machine and apply it to a new machine:
Download the PowerBIGatewayInstaller.exe gateway installer from this page
Choose your gateway type
Choose to “Migrate, restore or takeover an existing gateway”
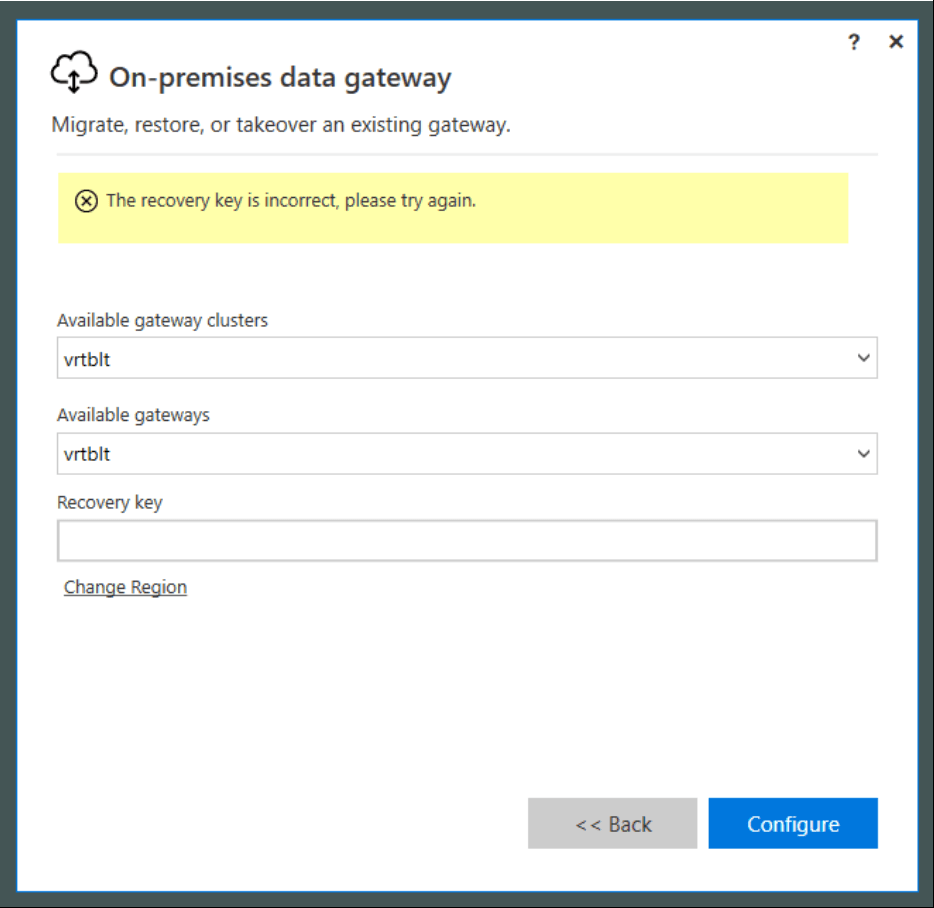
Enter the information, including the recovery key
Done
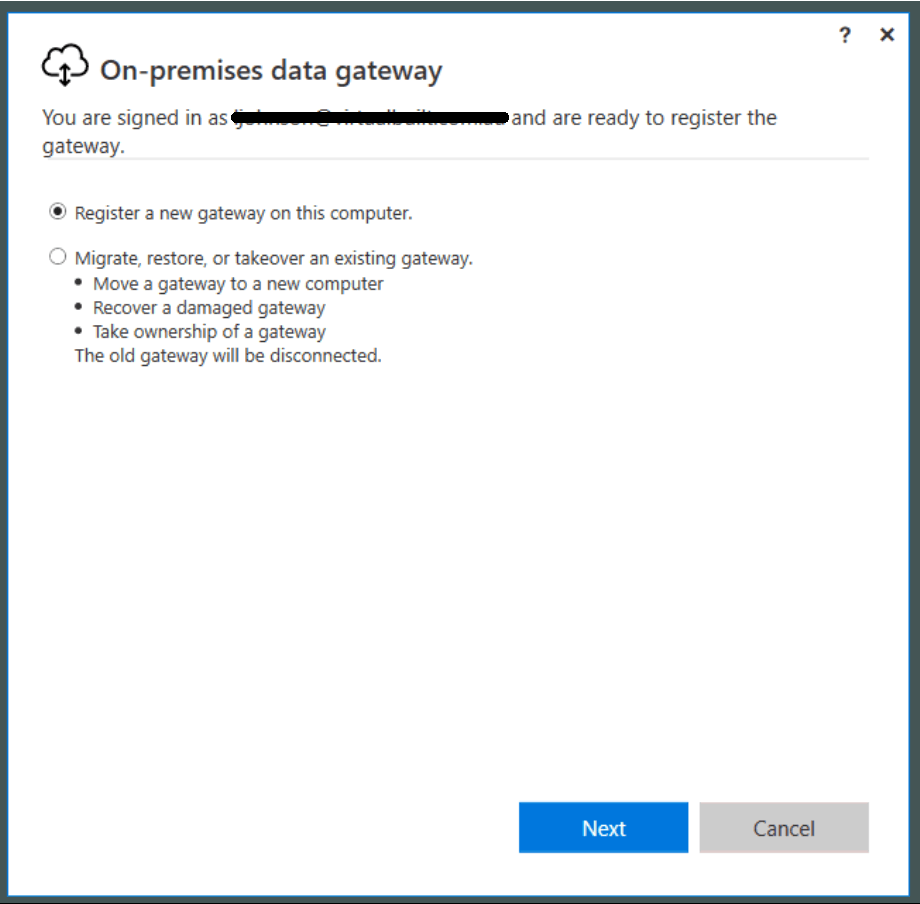
If you don’t have a recovery key, you will have to:
Install a completely new gateway:
Switch the gateway used on the web app side (Scheduled Refresh page). You will probably have to do this for every dataset.
Feel free to reply with any of your cool BIM data workflows 🙂
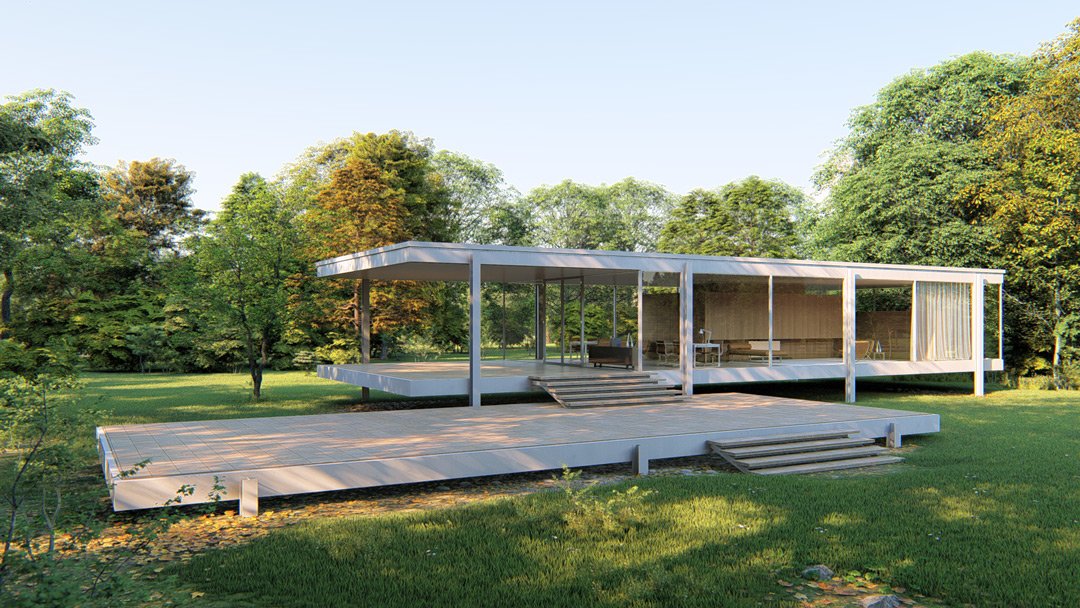
Aerial imagery and 3D models are extremely powerful visual tools. Often, these are used primarily in early design and master planning. Some software tools connect directly to aerial imagery and 3D data providers. Unfortunately, Google has not really opened up the connection to their base 3D data. But we can capture imagery from it, and then rebuild in another photo-to-mesh tool, like Recap Photo. Keep in mind that you will be creating a 3D mesh, from an isometric 3D world view, which was created only from aerial images. Basically, your output will vary, and will probably not be high quality. But for the intended use in early design and master planning, the below workflow may be useful…
Note: Please investigate the license and copyright of this data for such use.
Here’s how:
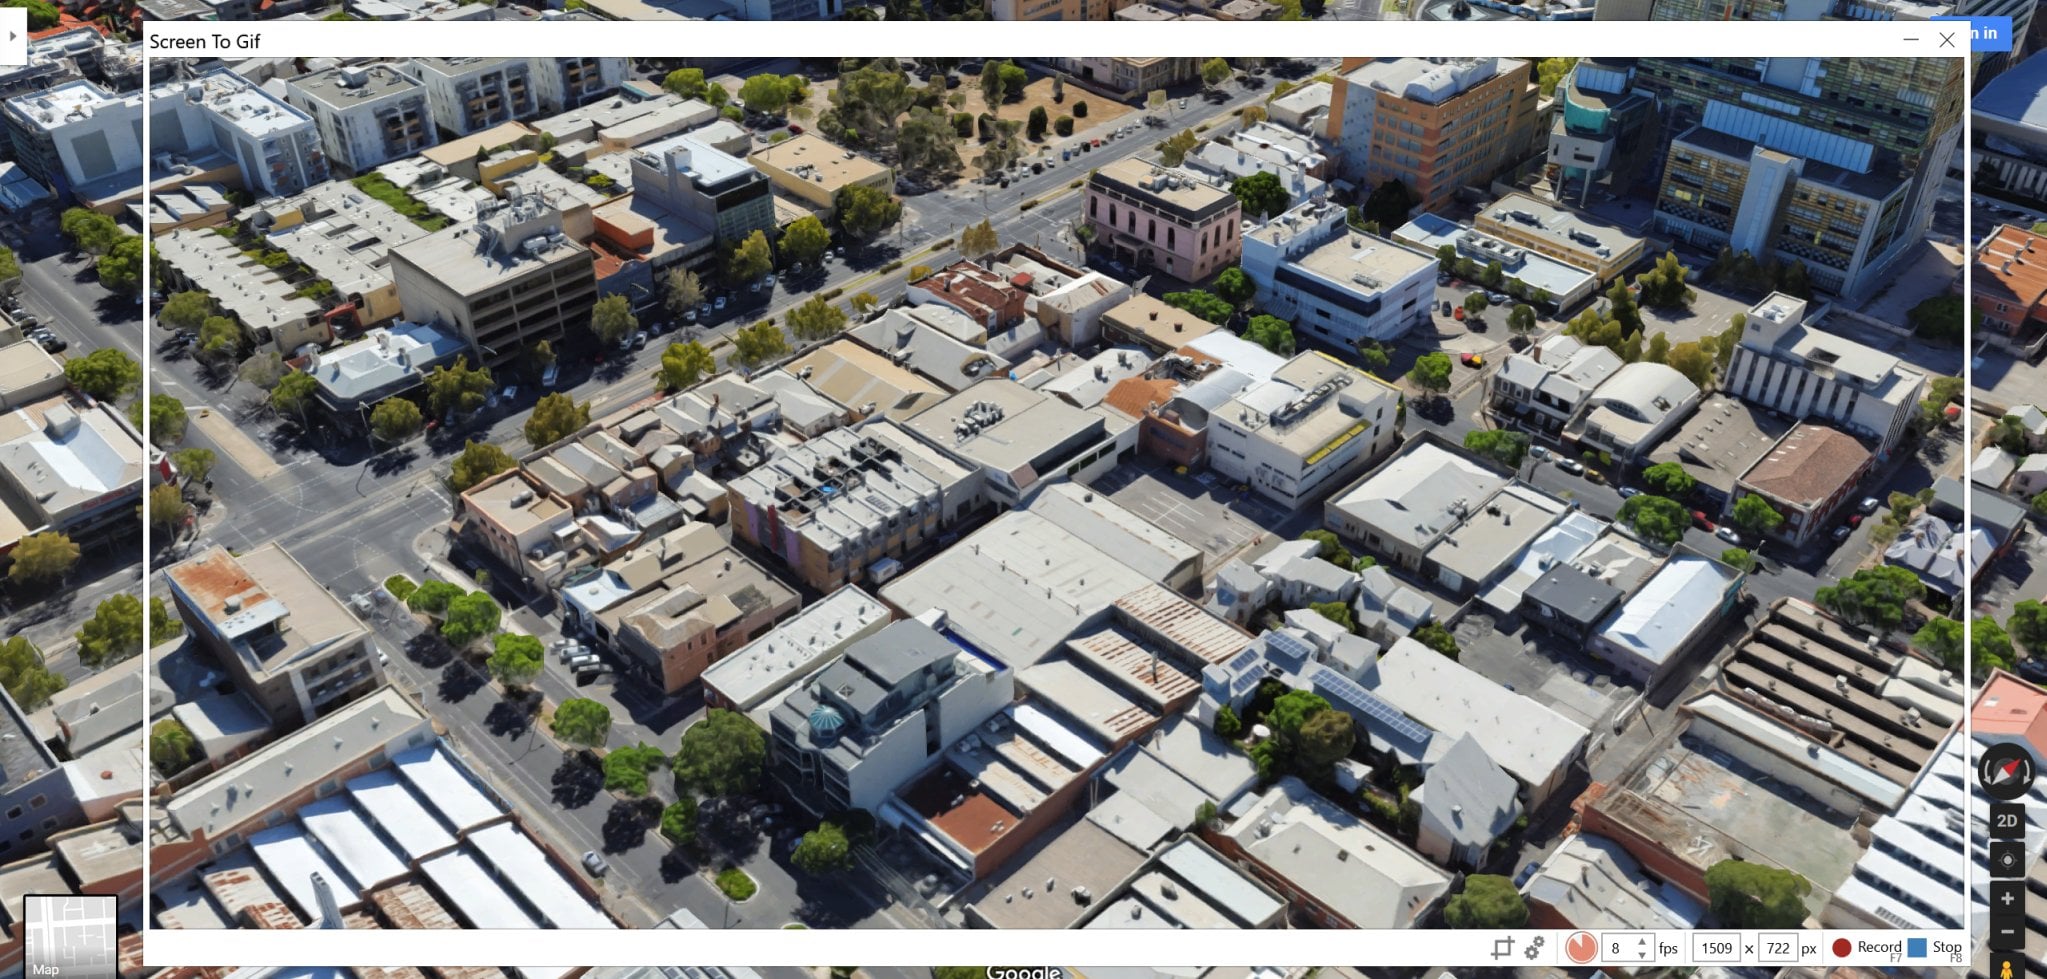
Open your desired 3D isometric aerial imagery in desired application (such as Google Earth, Google Maps or similar)
*Note: User to be aware of relevant copyright restrictions
Open ScreenToGif (downloads here). This is used to create snapshot images of the screen very quickly.
Setup the scene, so that you have the ScreenToGif window appropriately overlaid onto your actual imagery
Start recording, and slowly orbit at least 360 degrees as shown
here
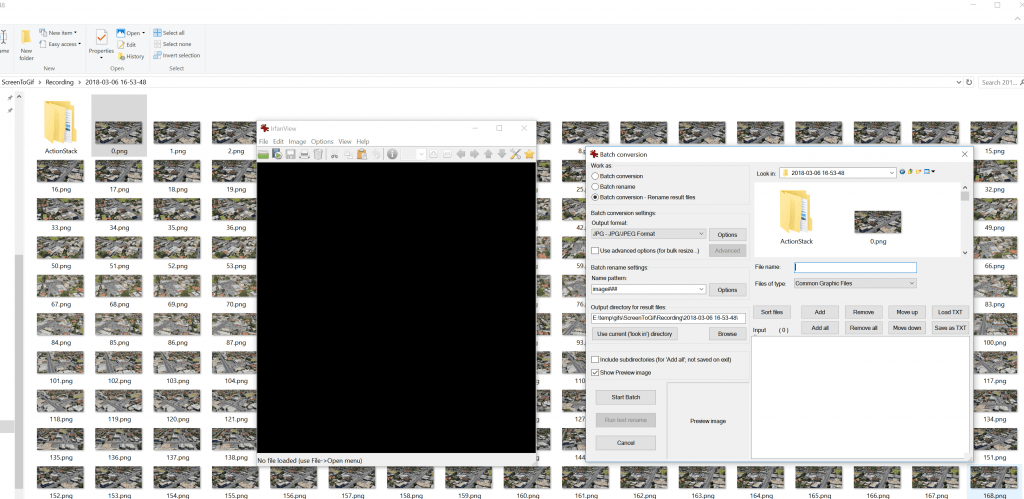
In ScreenToGif, open the image folder
Convert the images from PNG to JPG (I used Irfanview Batch Convert)
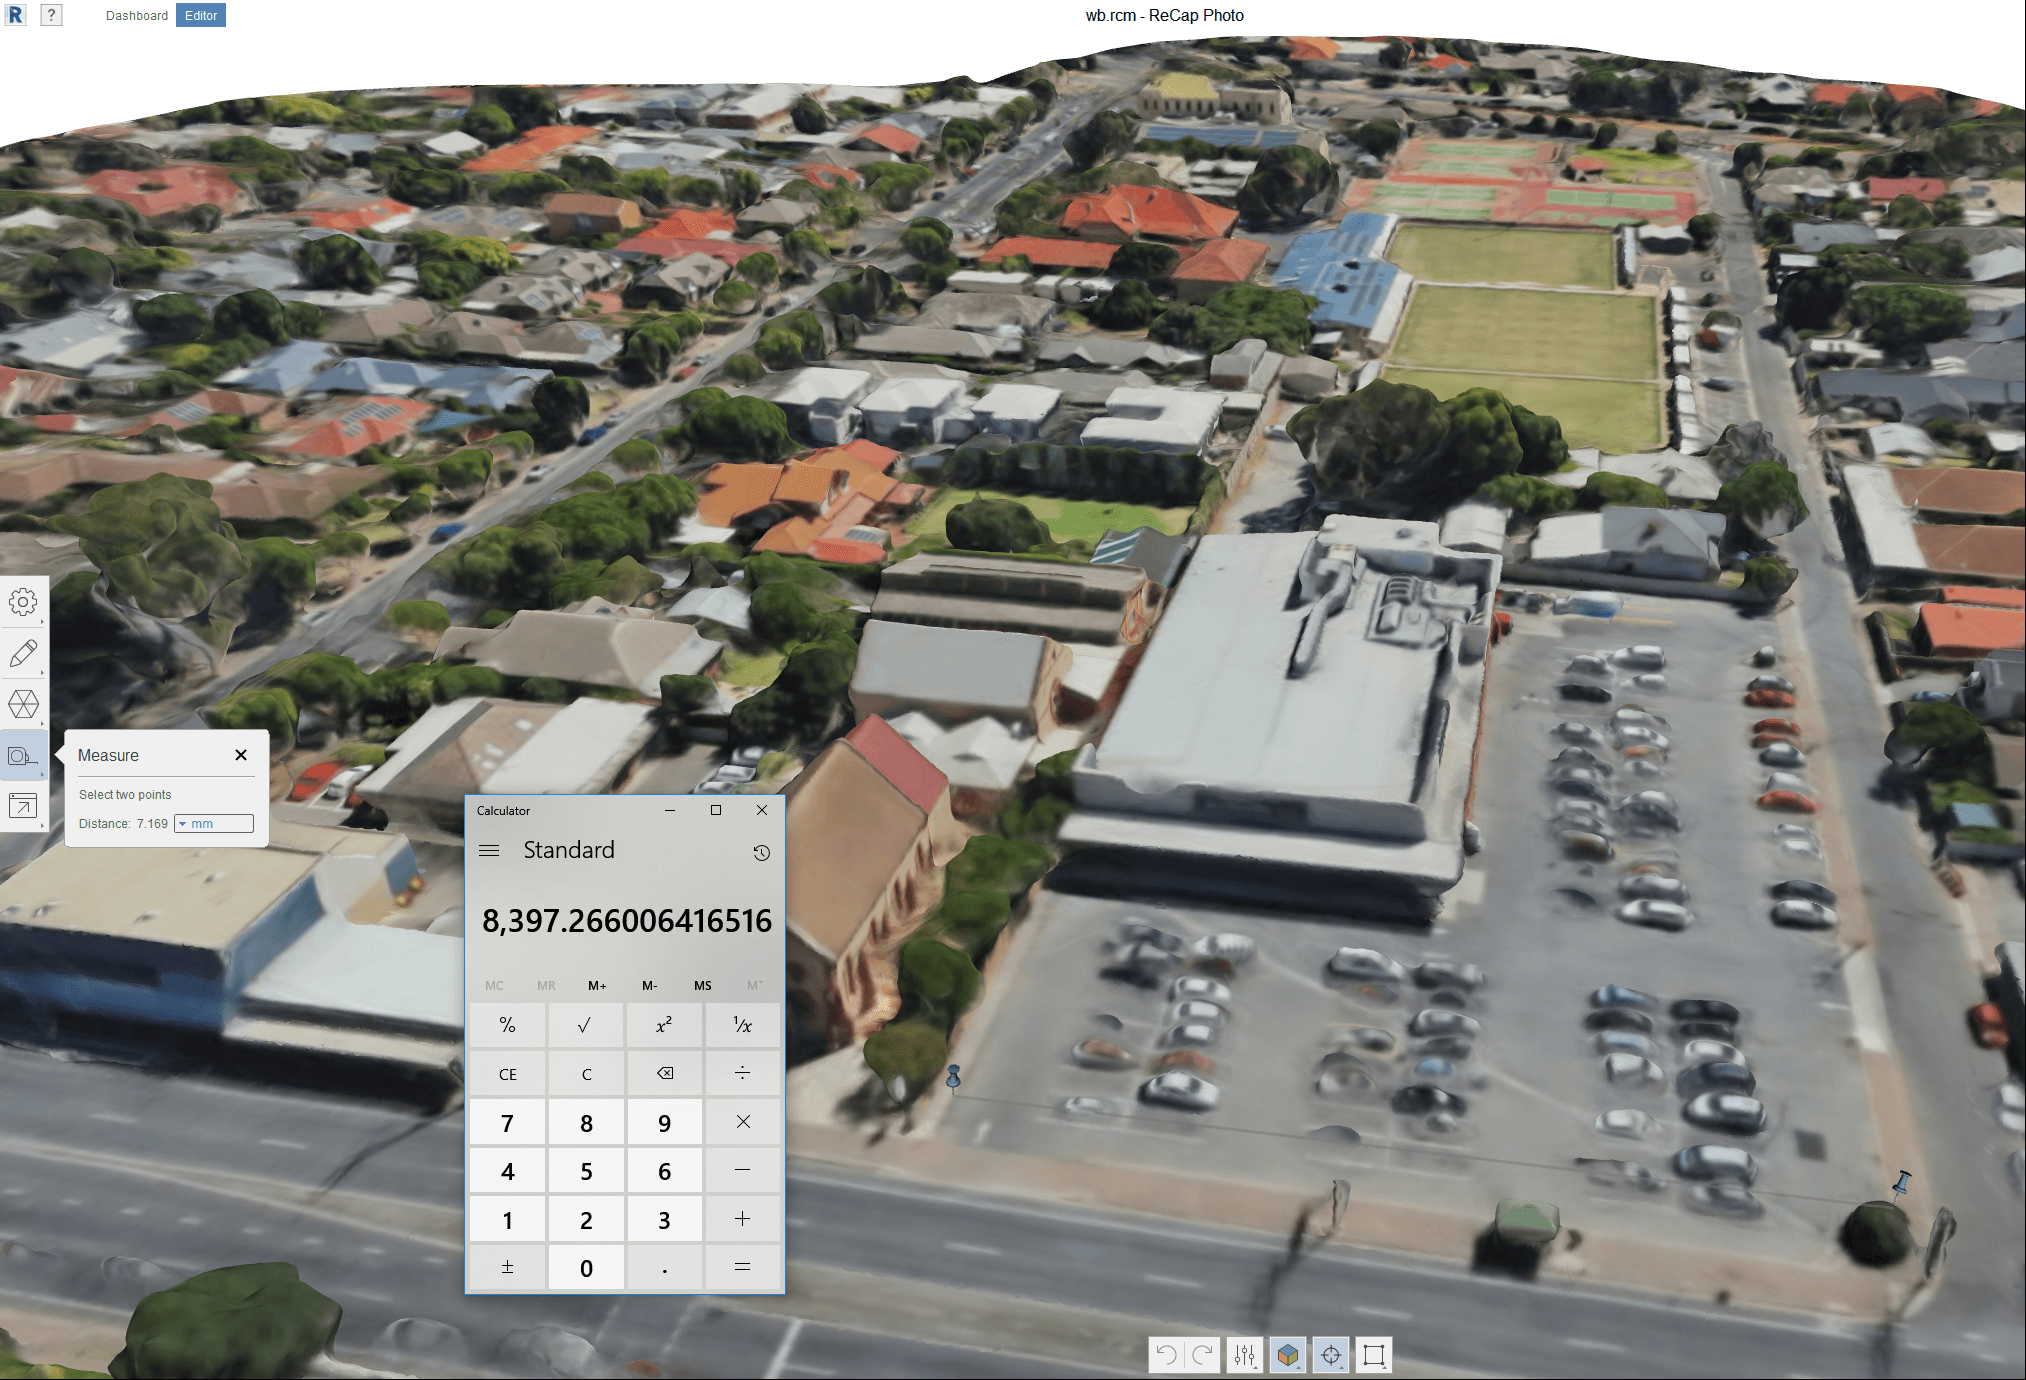
Load into Recap Photo, make new Object project, spend 12 cloud credits and start the mesh creation
After meshing, in Recap use the measurement scale tool to scale the model based on the distance between two known points
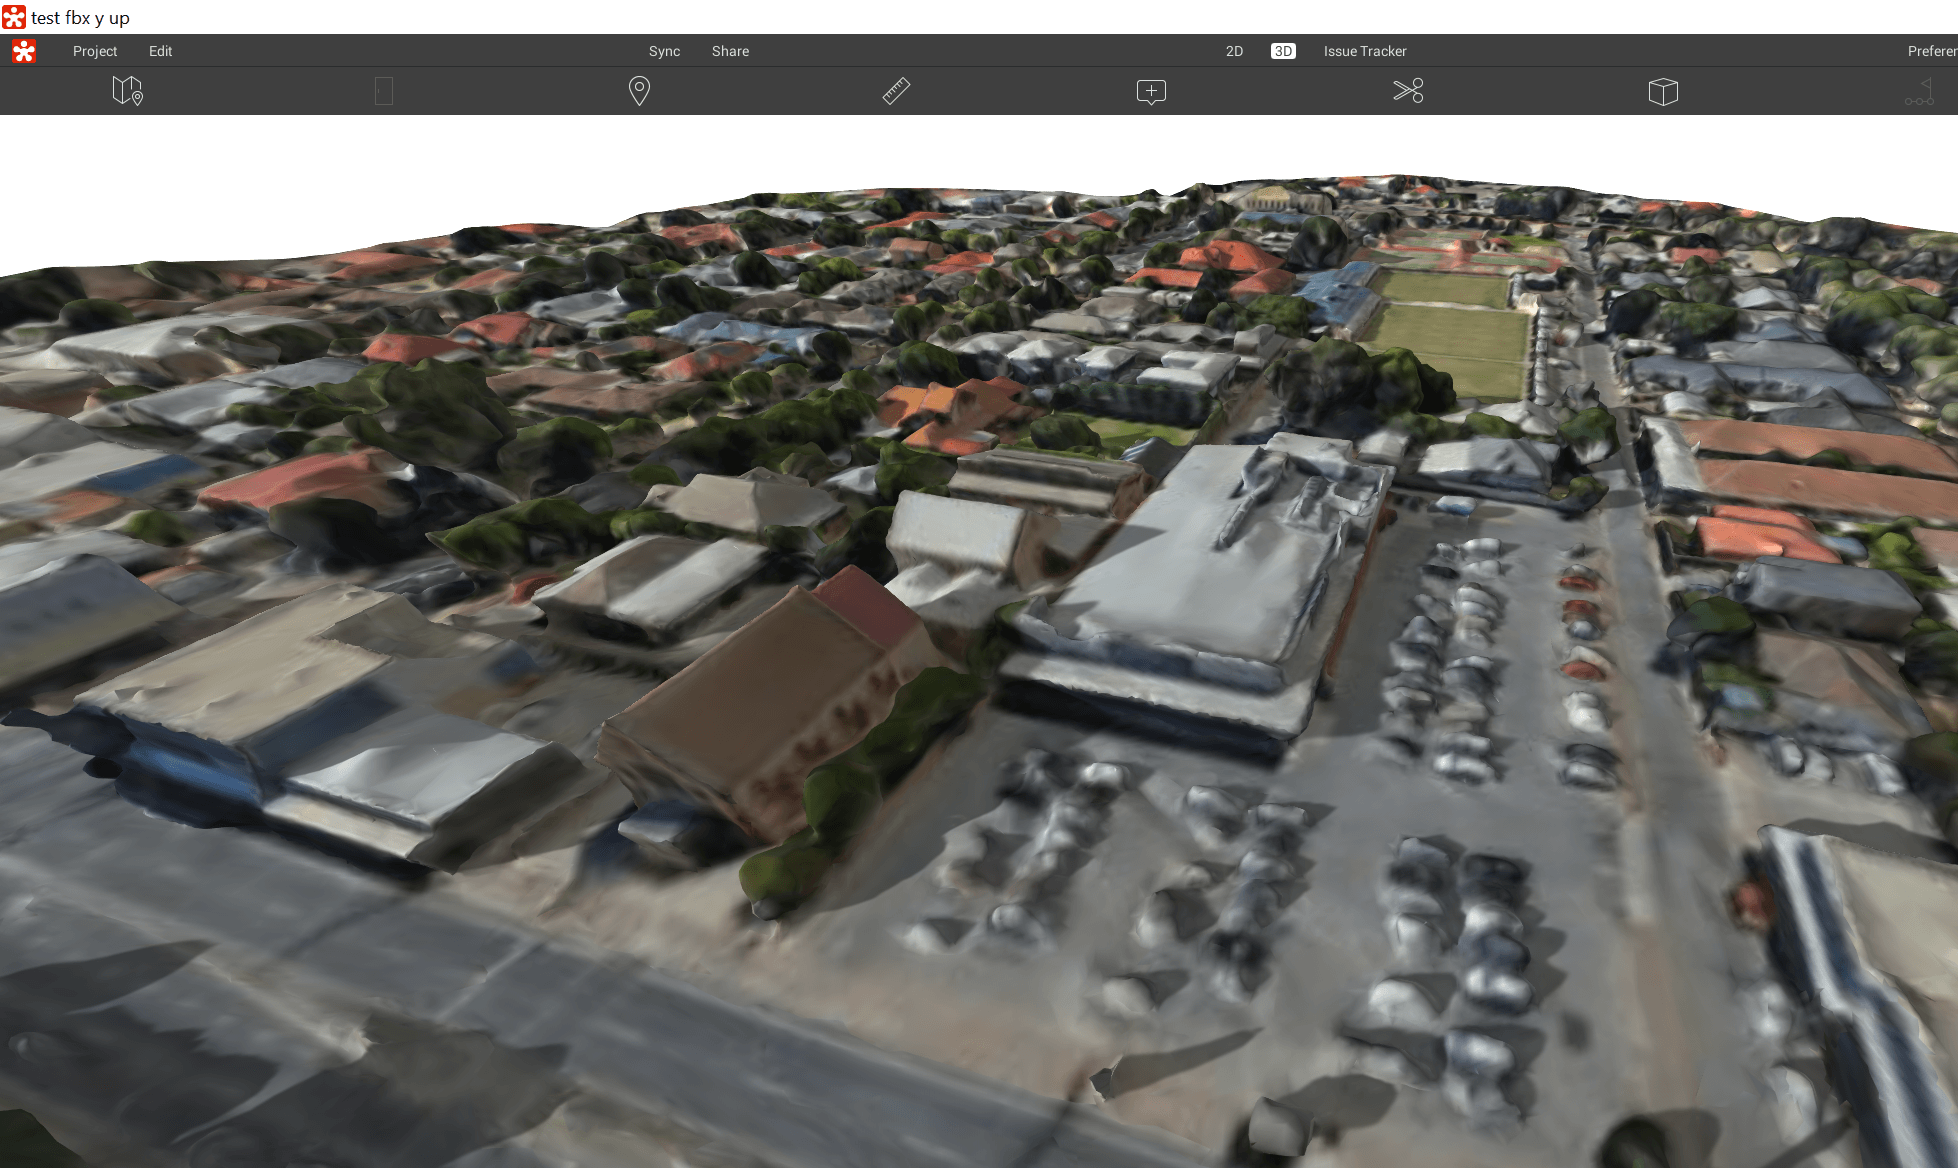
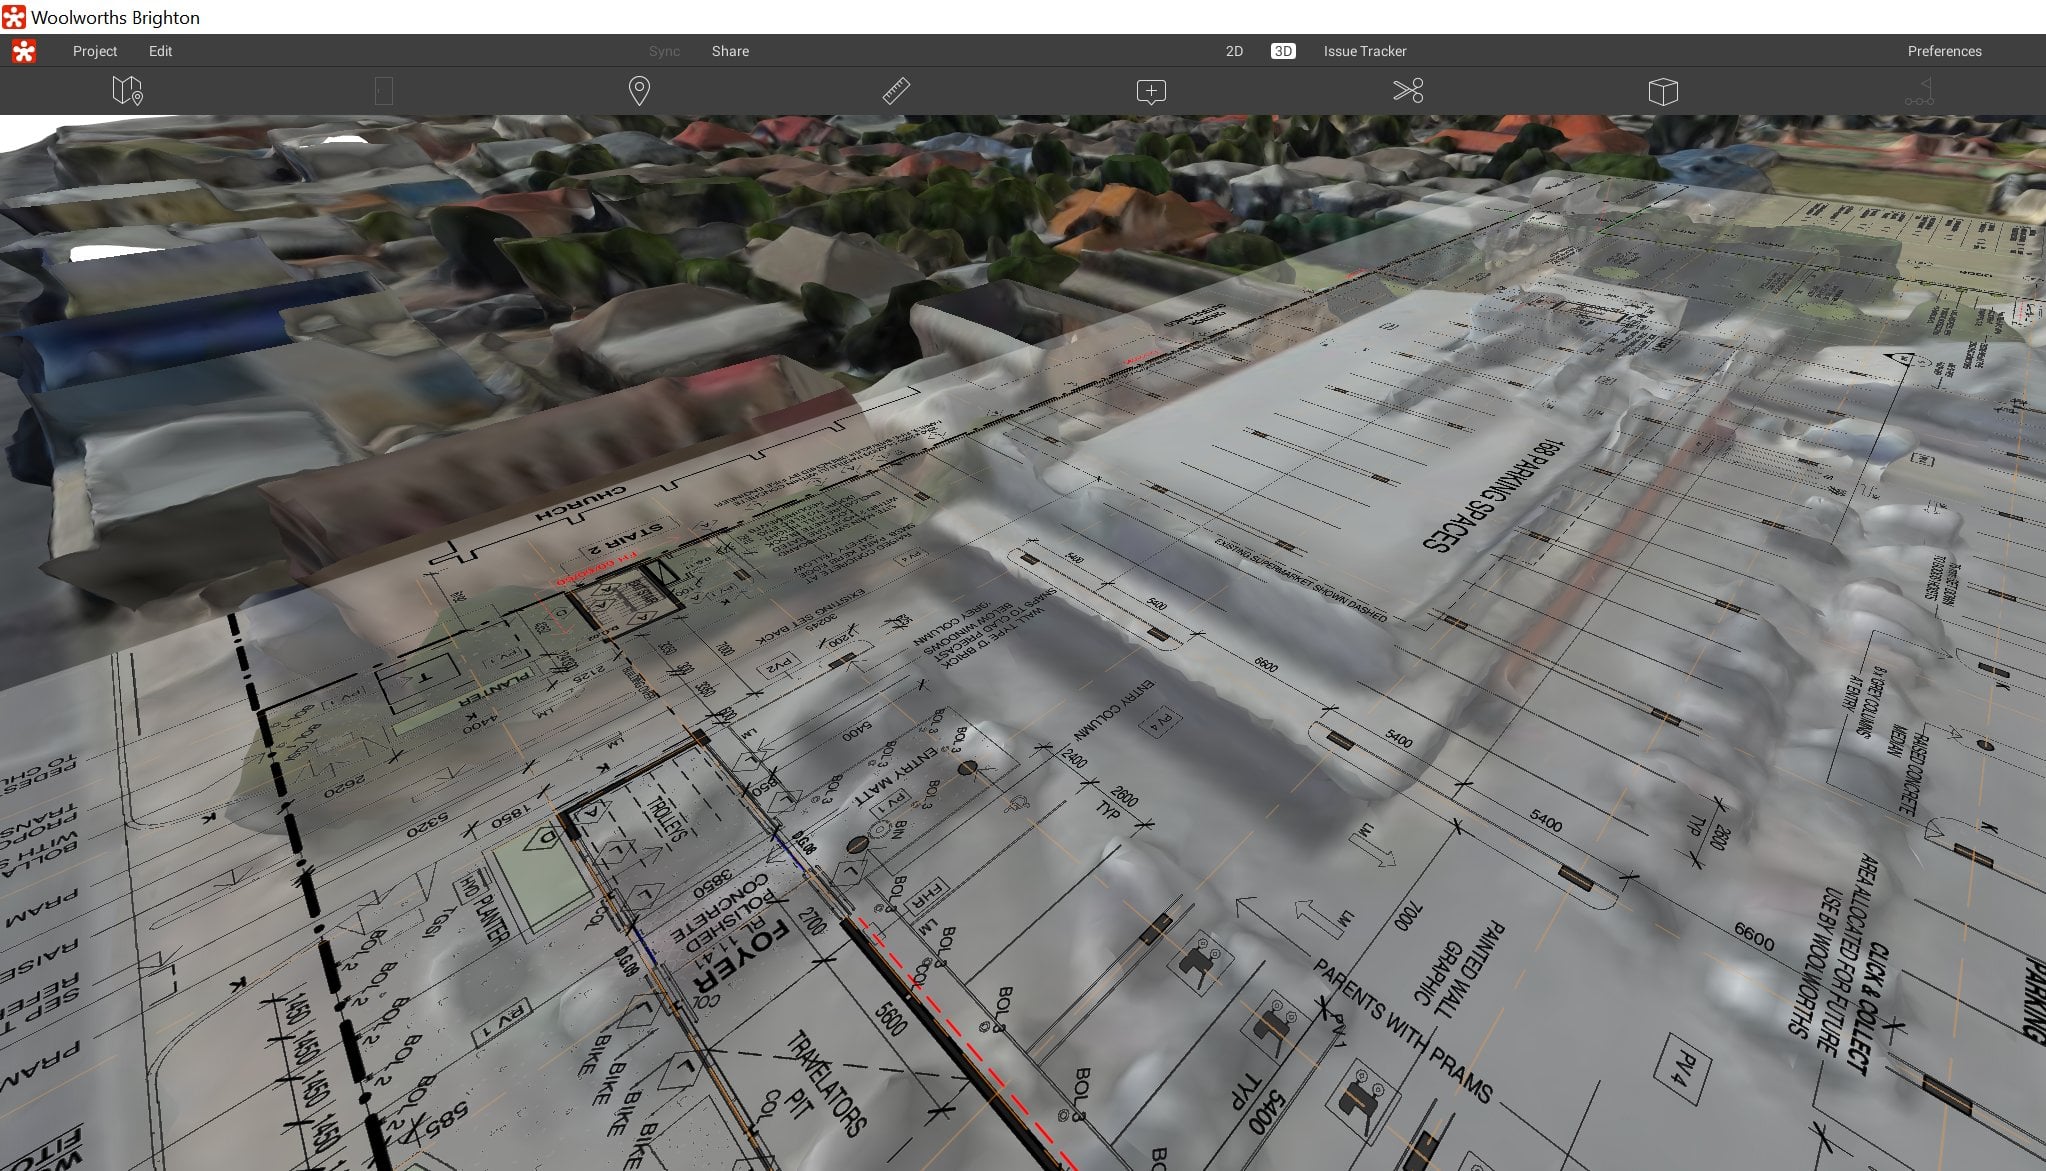
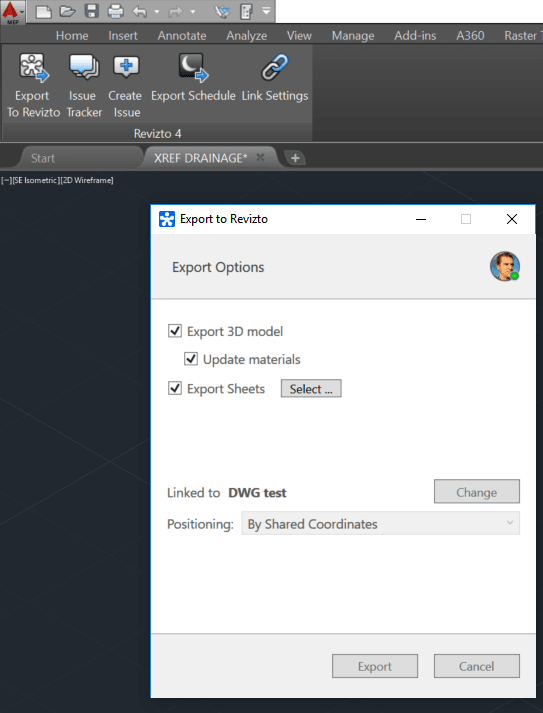
Export the 3D Model from Recap. Various formats are available. In this case, I exported directly to FBX with Y-Up and imported straight to Revizto. You could also import FBX to AutoCAD and then to Revit, or you could bring it into Meshmixer first to delete some parts of the model via OBJ.
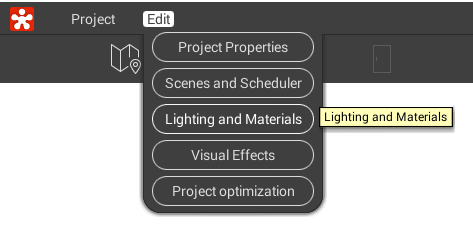
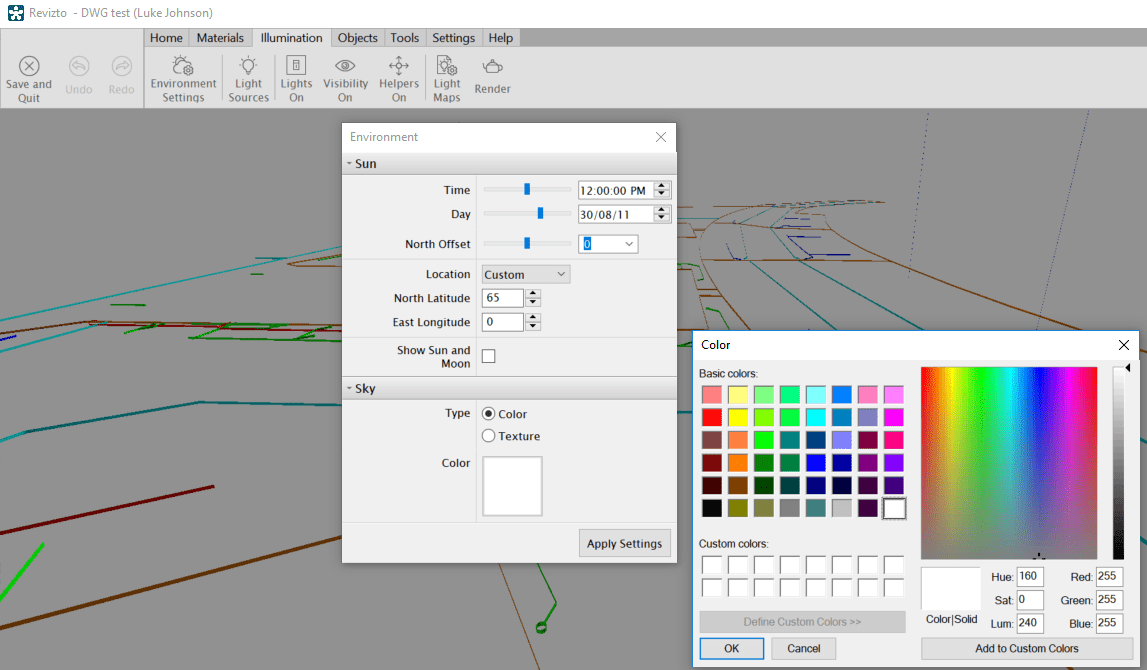
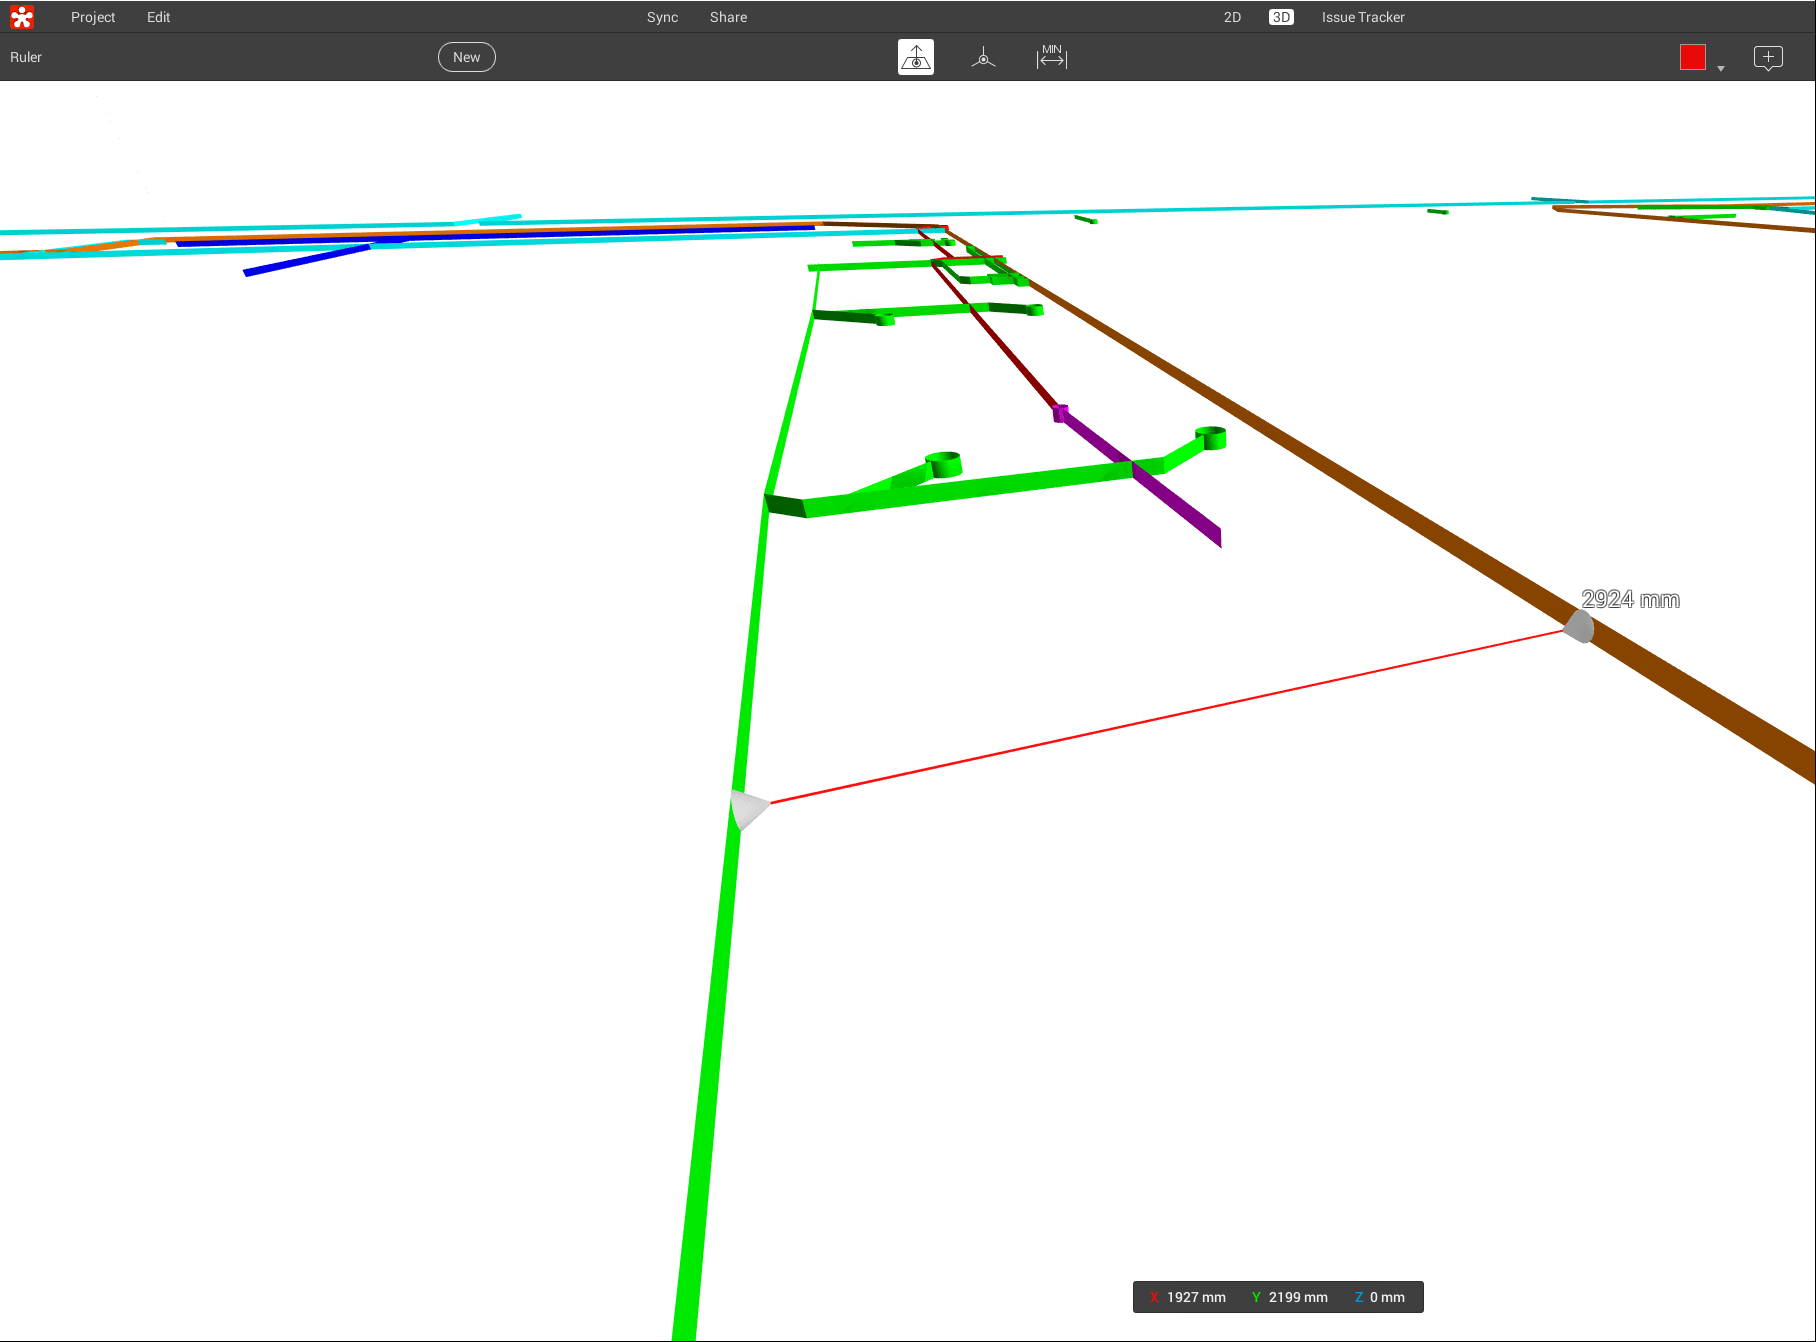
In Revizto, the direct FBX import looks like this:
Sheet overlay in Revizto. Simply with a PDF and some freely available aerial imagery, we now have a 3D collaboration workspace ready to go:
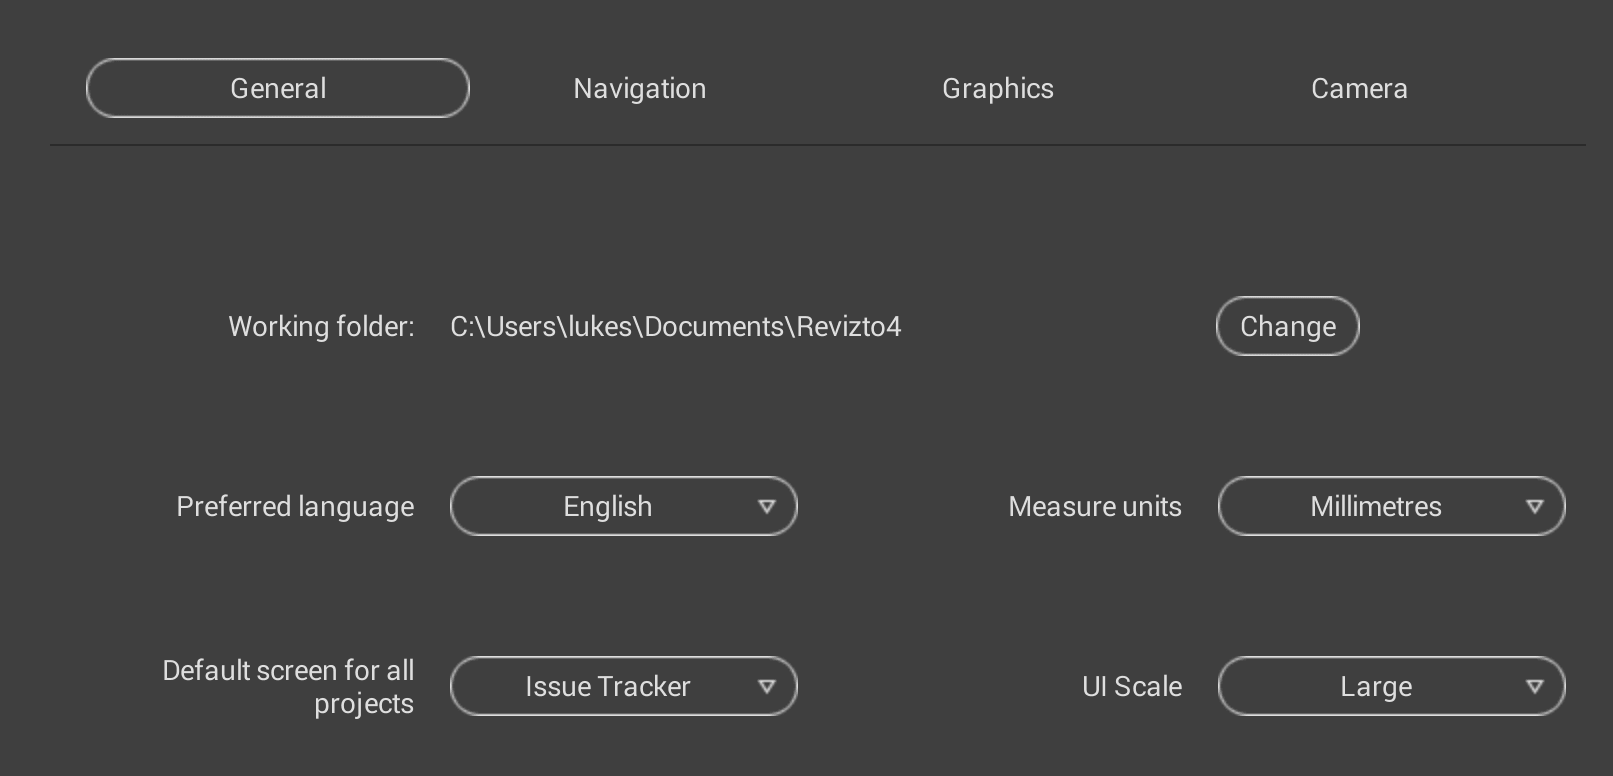
In the latest Revizto update (version 4.6.3, build 41736) you are able to change the UI scale in the General settings. This is very useful for 4K screen resolutions:
You can also set the Default Launch Screen as shown above.
The ability to update existing viewpoints is also present. You navigate to a Viewpoint, then as you move away from it a update icon will appear next to the viewpoint name. Just click that icon to update the Viewpoint. The video below shows this in action:
Recently, I was involved in the development of a construction animation with my colleague here at Virtual Built. The end result was very good, but I observed quite a few challenges he faced along the way. For example, to get the data in we had to manipulate and modify quite a few things. We had a city model in FBX, but it was difficult to work with. My colleague had to add a lot of content to the animation to make it realistic, and then he also had to do some significant post-processing work to end up with a convincing end result. To achieve this, we used about 4 or 5 different software packages. At the time, I was thinking “surely we could produce something more easily and quickly in Lumion!“.
Right now I am pleased to be able to have a look at Lumion 8 in detail in this review, and I will be thinking about how Lumion could have optimised or assisted in the animation production. As you know, I have written about Lumion before, so let’s focus on a few major headings:
What Key Features in Lumion 8 can be used to really enhance and present your design? How could we quickly apply these new features to some existing workflows?
More links for Lumion 8 information
How to apply the OpenStreetMap patch?
Video Tutorials and Webinars
Graphics Card Hardware recommendations
Release video and first renders in Lumion 8
Key Features of Lumion 8
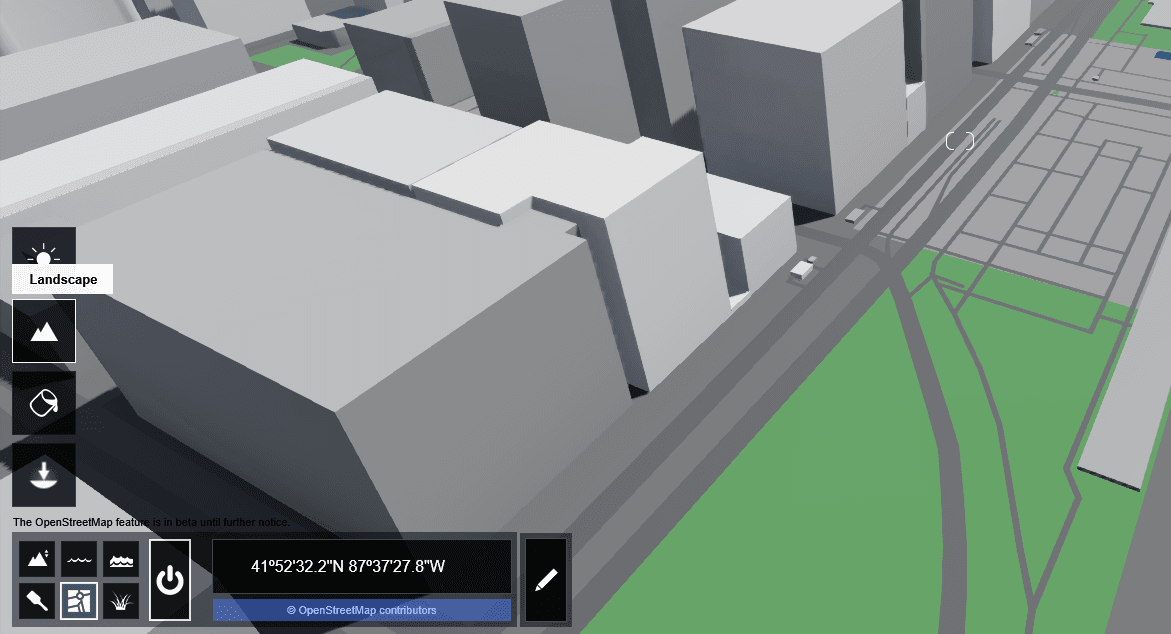
Let’s go through some of the key new features one-by-one. Firstly, I used OpenStreetMap to bring in some city context, then opened a model in Revit 2018 and used the LiveSync addin to bring the model into Lumion 8. This took about 40 seconds on my machine, as the video below shows:
Then I cleaned up the OSM City Model a bit (inside of Lumion) and positioned my model. I hid the Topography in Revit, and it immediately and automatically was hidden in Lumion (nice).
Now it was time to try out some of the new features of Lumion 8!
Styles:
What it means: “No more hunting around for the right effects. Gone are the days of meticulously balancing sliders. Once you dress up your 3D model with Lumion materials and objects, just click the Styles Button and select an interior or exterior style. In an instant your design becomes a beautiful render with a carefully balanced effects combination.”
How I used it: In my case, I used the model I had running in LiveSync. Styles is part of the Photo capability of Lumion, so to use it:
click the Photo button
click the Style button
choose a style
be amazed at how quick and easy it was to get something that looks great 🙂
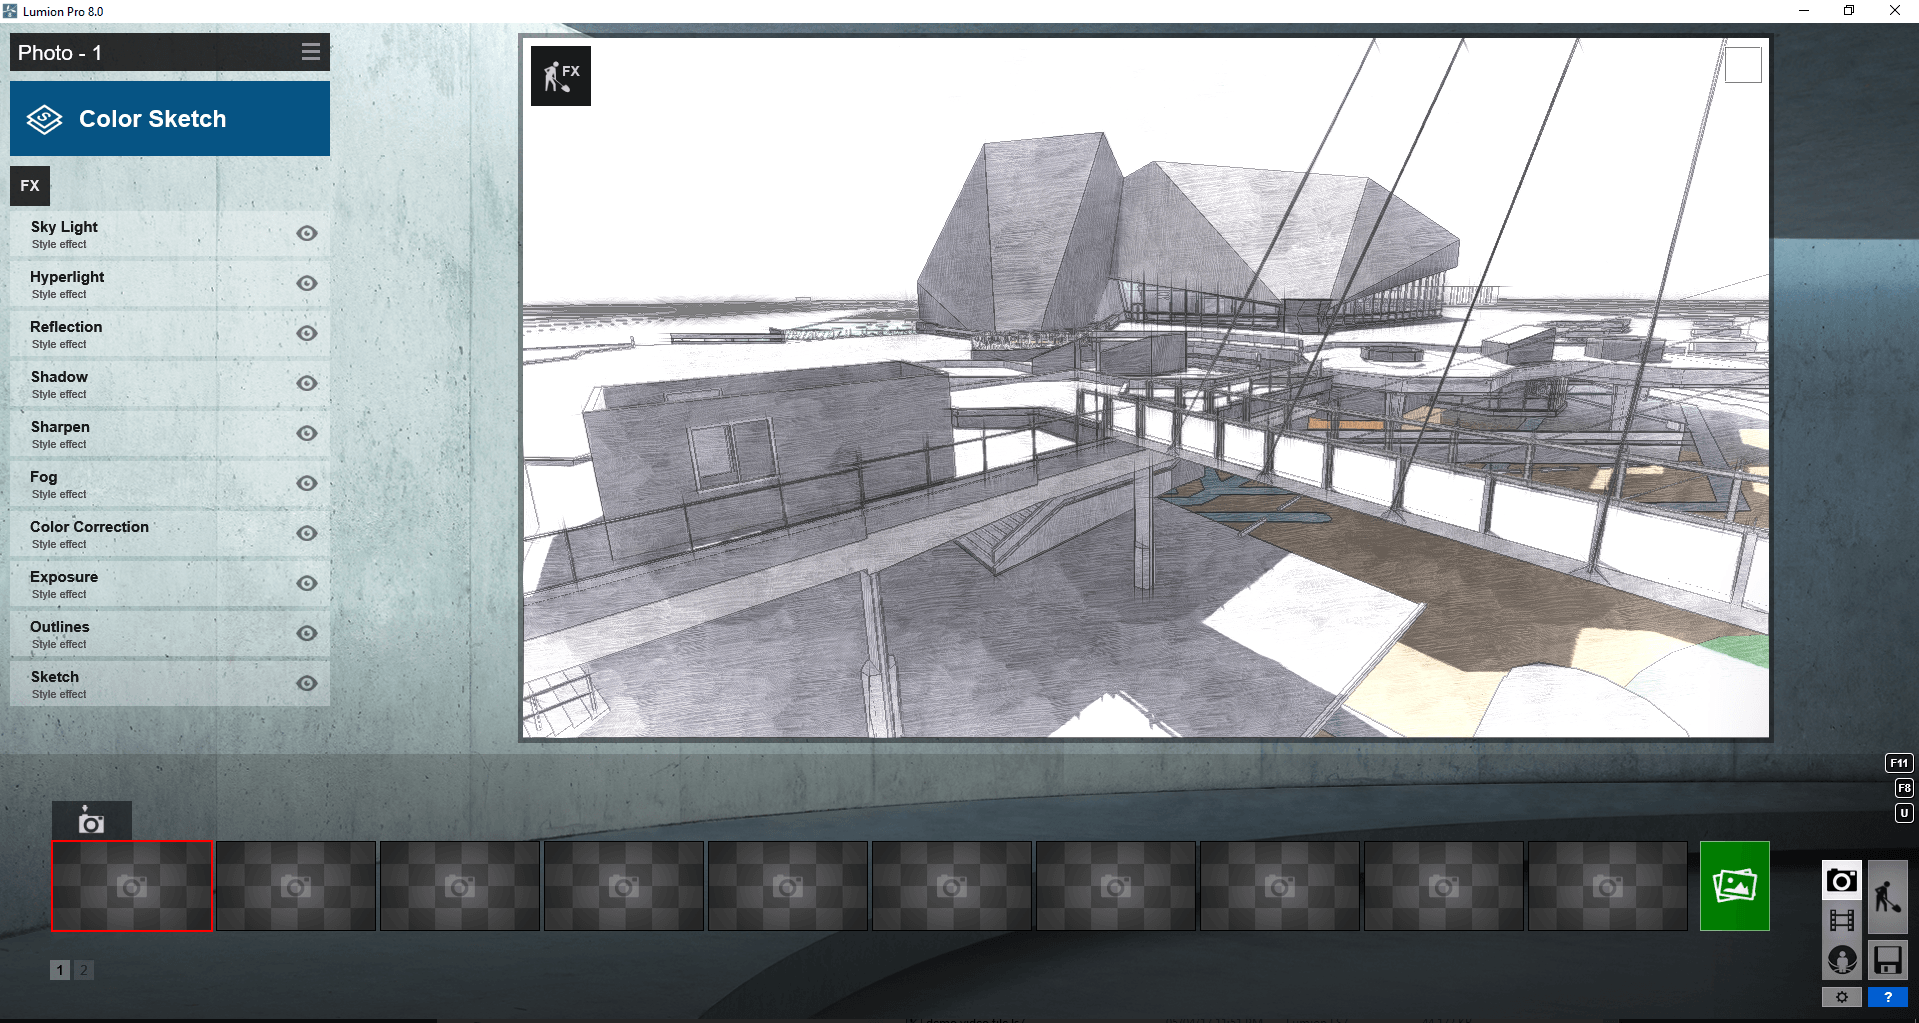
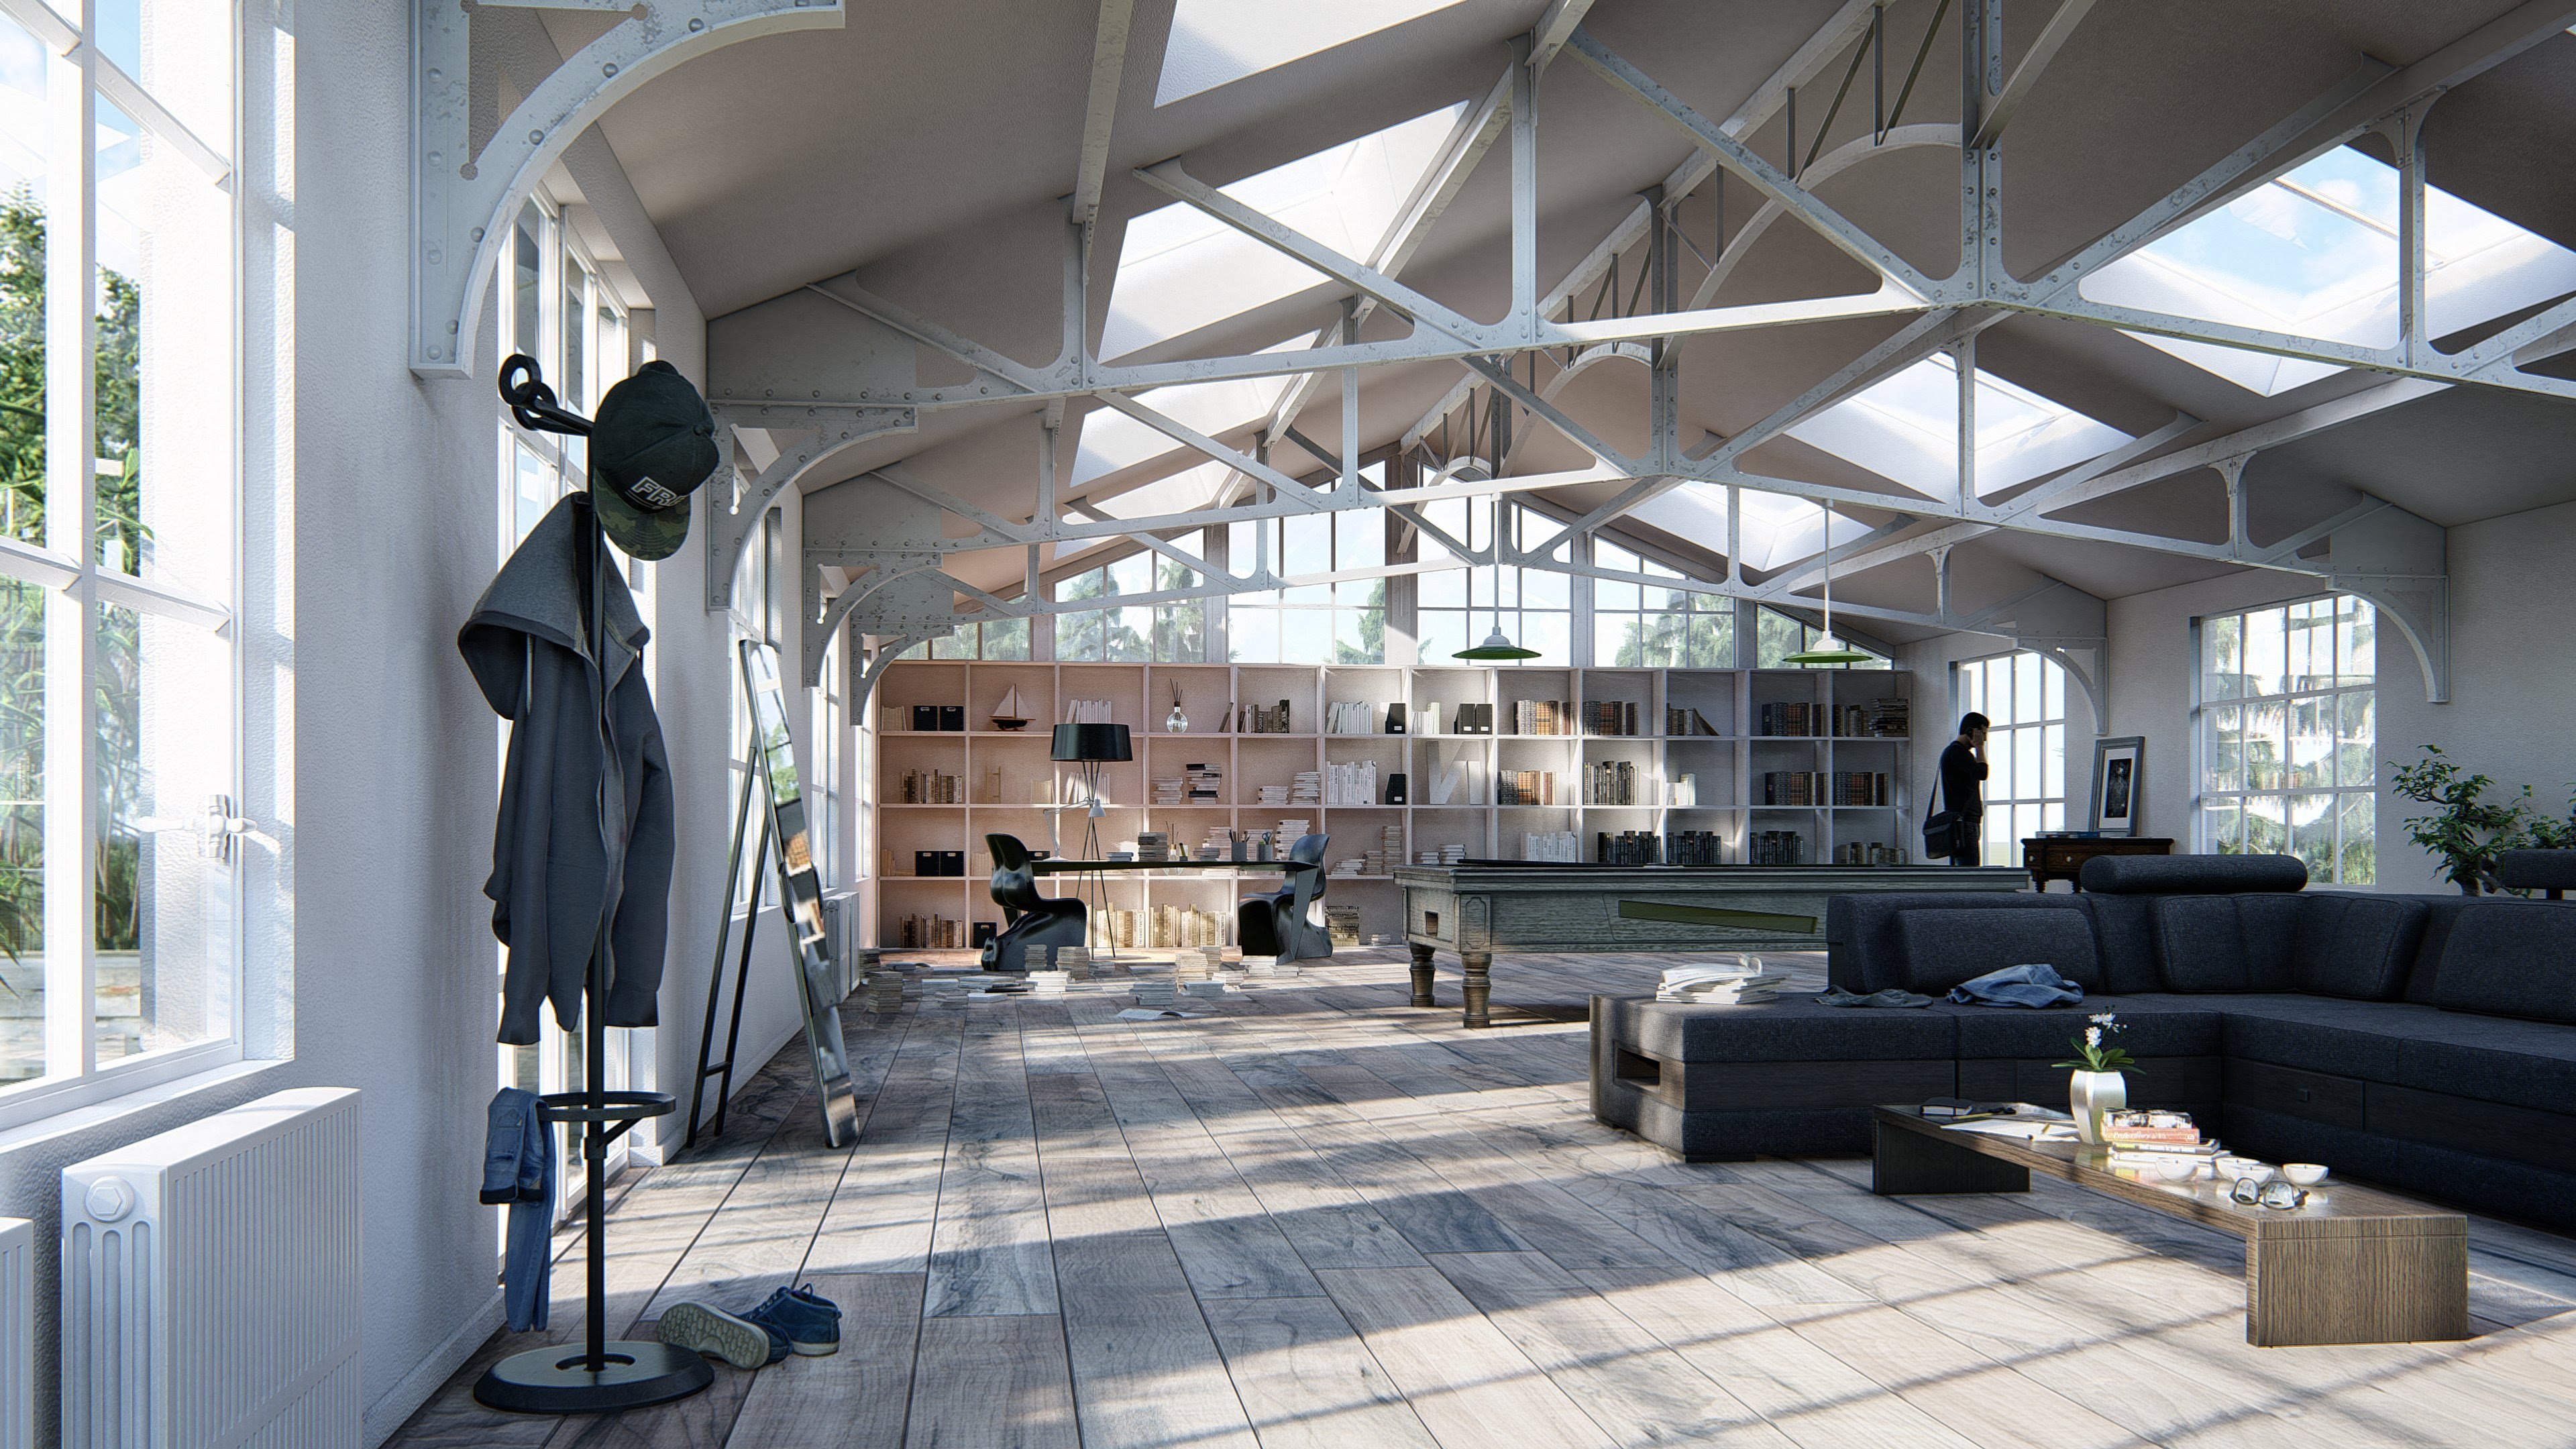
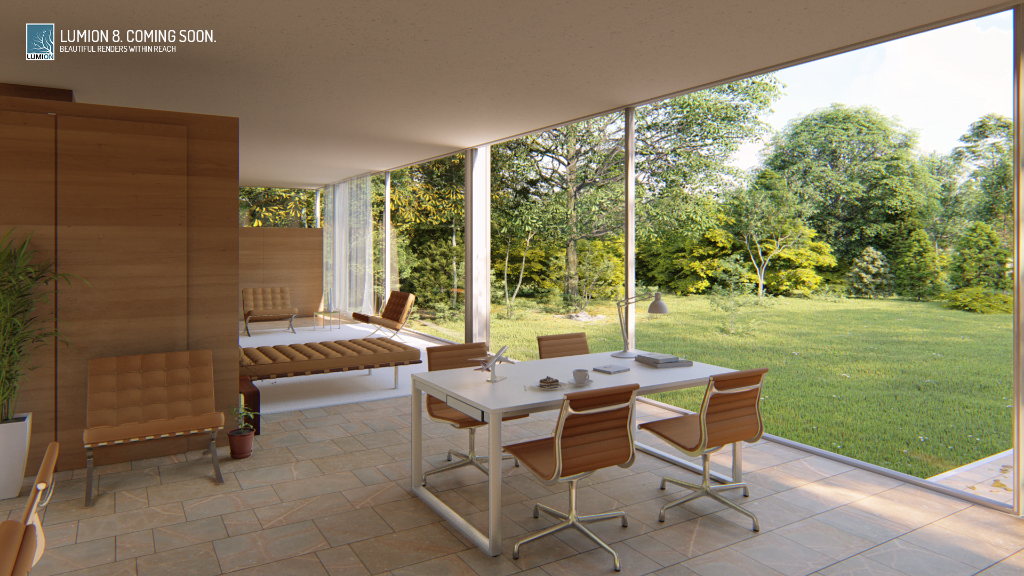
Here is an example of the “Color Sketch” style. It amazed me how this transformed a somewhat bland image into something that had a kind of organic and architectural feel.
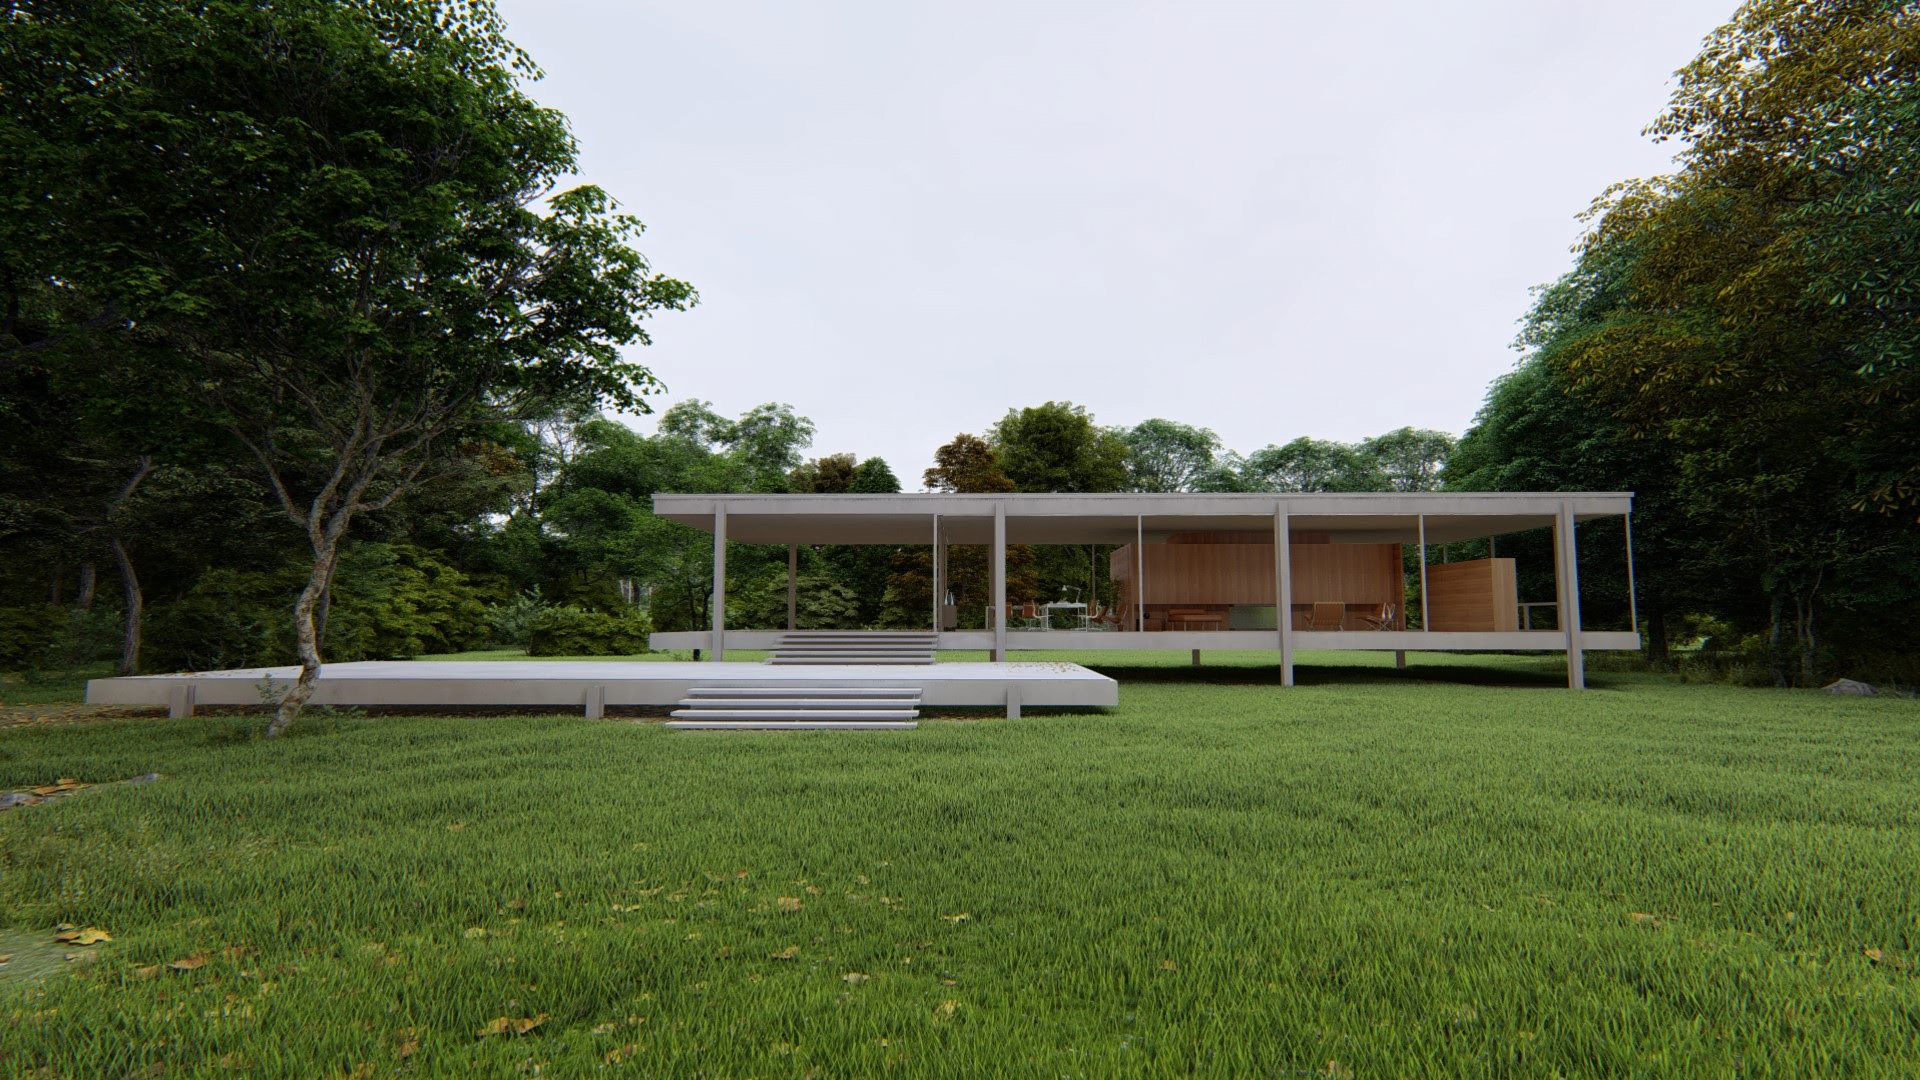
Here is one of the ‘hero’ shots showing the Styles feature:
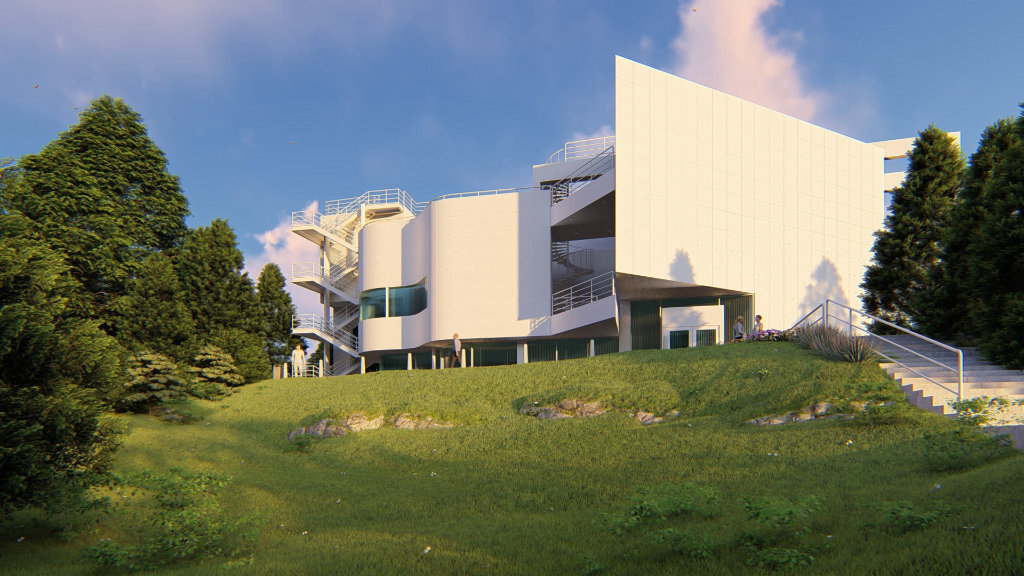
Sky Light daylight simulator What it is: Ready to render? If you haven’t added the Sky Light effect, then…well…no. Maybe not. Because it’s an impressive technology developed especially for Lumion 8 to heighten your image’s sense of environment, realism and depth. Sky Light is an advanced, daylight simulator for softening and dispersing the scene’s environmental lighting. Used in combination with Soft Shadows and Fine Detail Shadows, it strengthens the real-life interplay of these elements. Watch as the foliage and trees become photorealistic, and discover as people, buildings and landscapes suddenly look like they belong where they are.
How I used it: I tried out turning Sky Light on and off with different Photo Styles. It is one of the FX options, as shown below:
Here is another example of the daylight simulator:
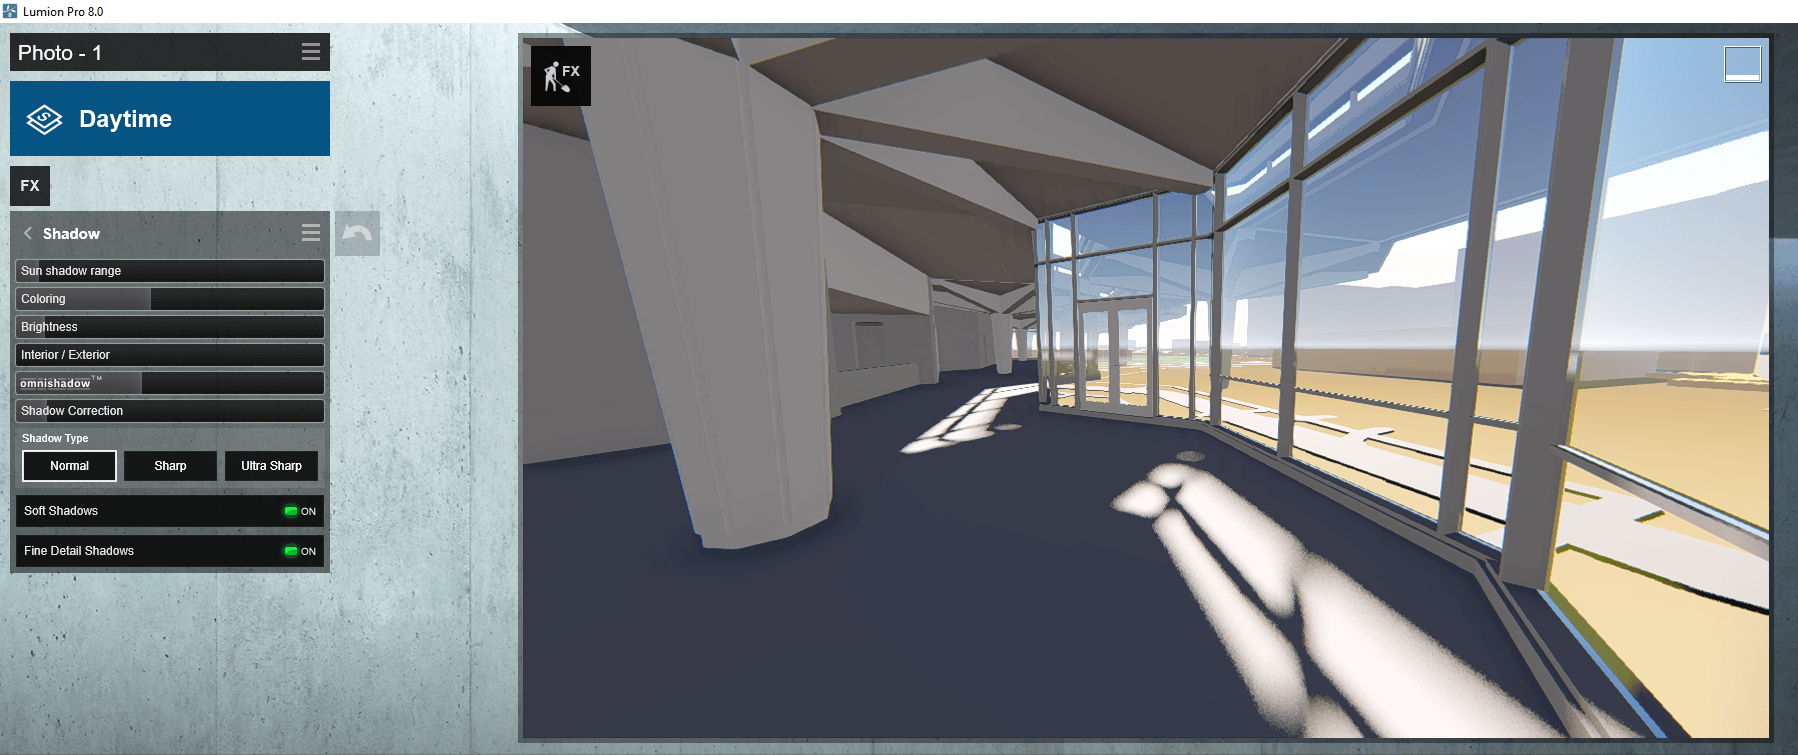
Soft and fine shadows What it is: Designing realistic shadows, whether from scratch or in a rendering program, may be one of the most difficult things you can do. Until now. In Lumion 8, you can inject realism into your render by turning on the Soft Shadows and the Fine Detail Shadows as part of the Shadow effect. Instantly, the shadows become softer, the penumbras grow. Hundreds of fine detail shadows are enriched and a realistic sense of depth permeates the image. You’ll feel yourself smile as you view your unbuilt design looking uncannily like the real thing.
How I used it:
I tried it out on my sample model. You find these options under the Shadow FX of the Photo toolkit. In the image below, the Soft Shadows are shown as the sun hits the floor, while the Fine Detail Shadows are showing the foot path outside the building with more clarity. So in a scene that was more developed, these options can really make the overall visual more clear and appealing.
Here is another example of soft and fine shadows:
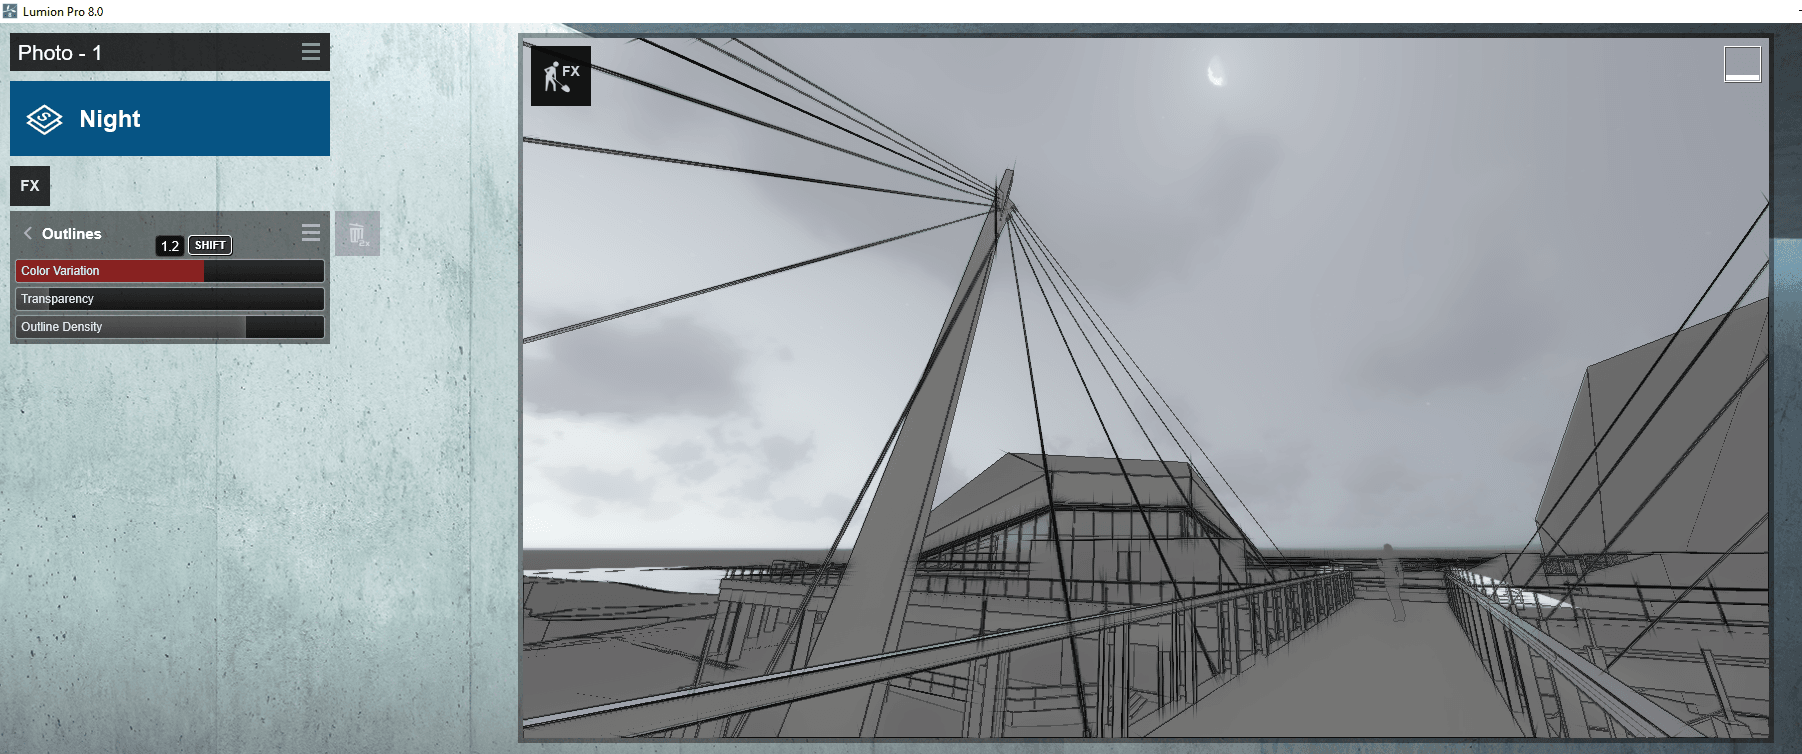
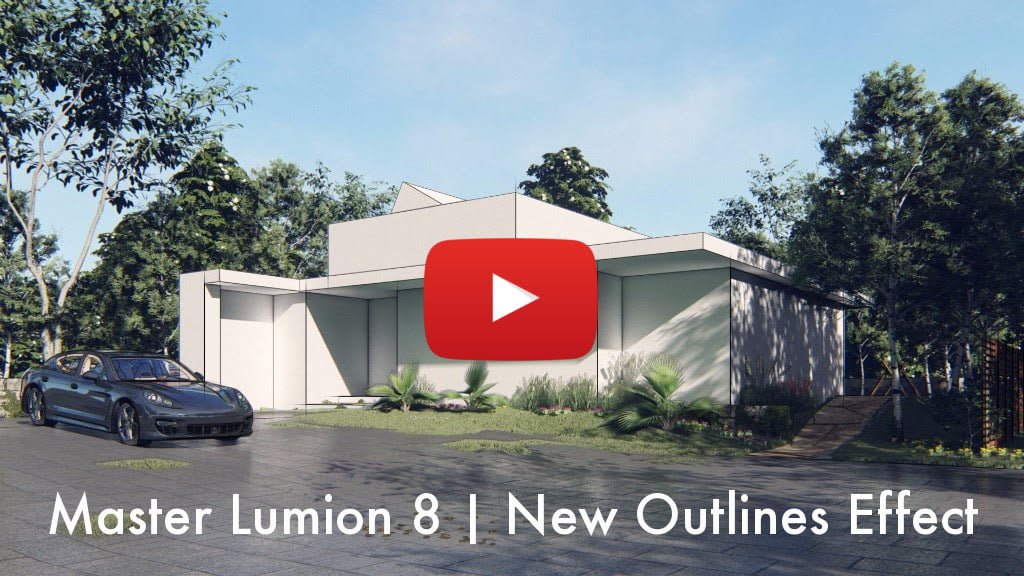
Hand-drawn outline effect (Pro only) What it is: Lumion 8 makes it easy to clearly communicate the form of your design with the “hand-drawn” outline effect. Apply it together with photorealistic, sketch or artistic effects to draw a focus to your building’s general shape and form. It’s the bones of your design, rendered beautifully and easily.
How I used it: You can add the Outlines effect from the FX button. Once you have added the effect, you can fine-tune with the 3 sliders. I found that increasing the Outline Density really helped to punch out even very thin elements in the scene.
Here is another example of the Outlines effect:
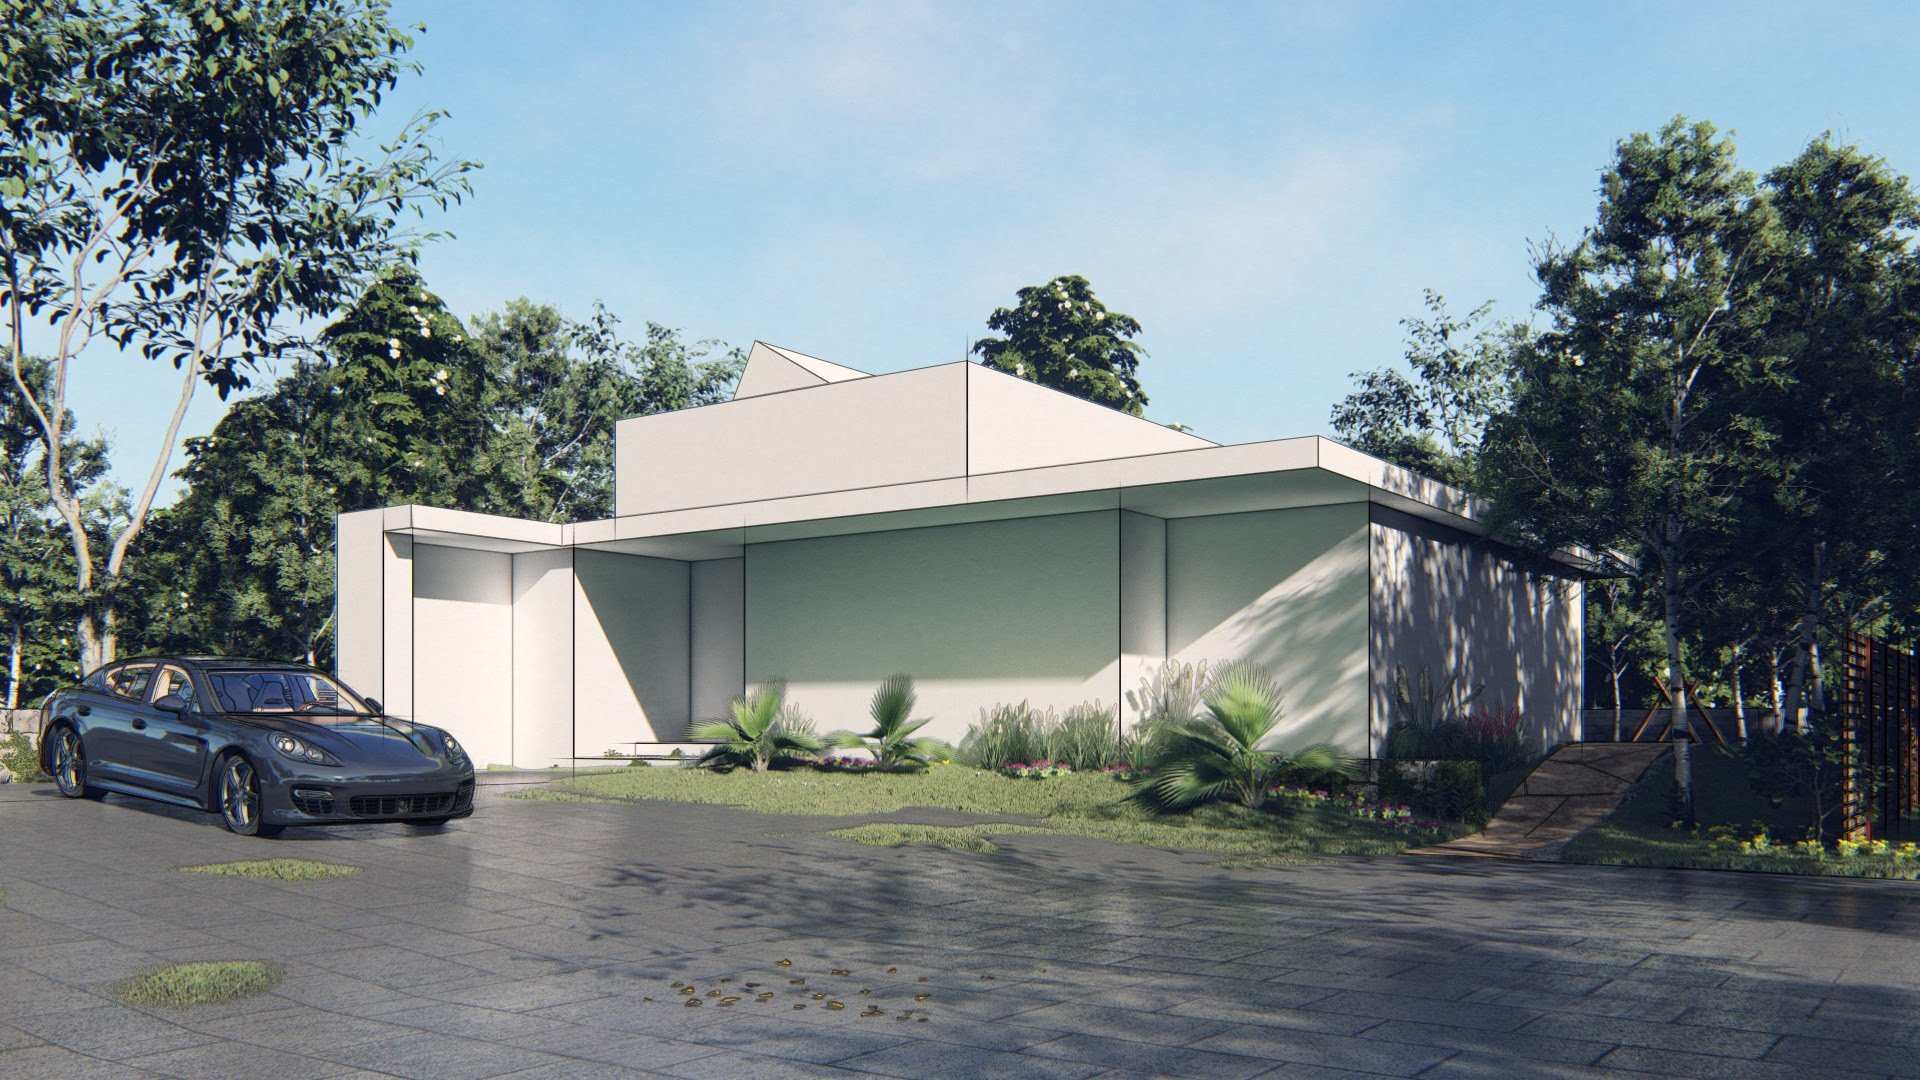
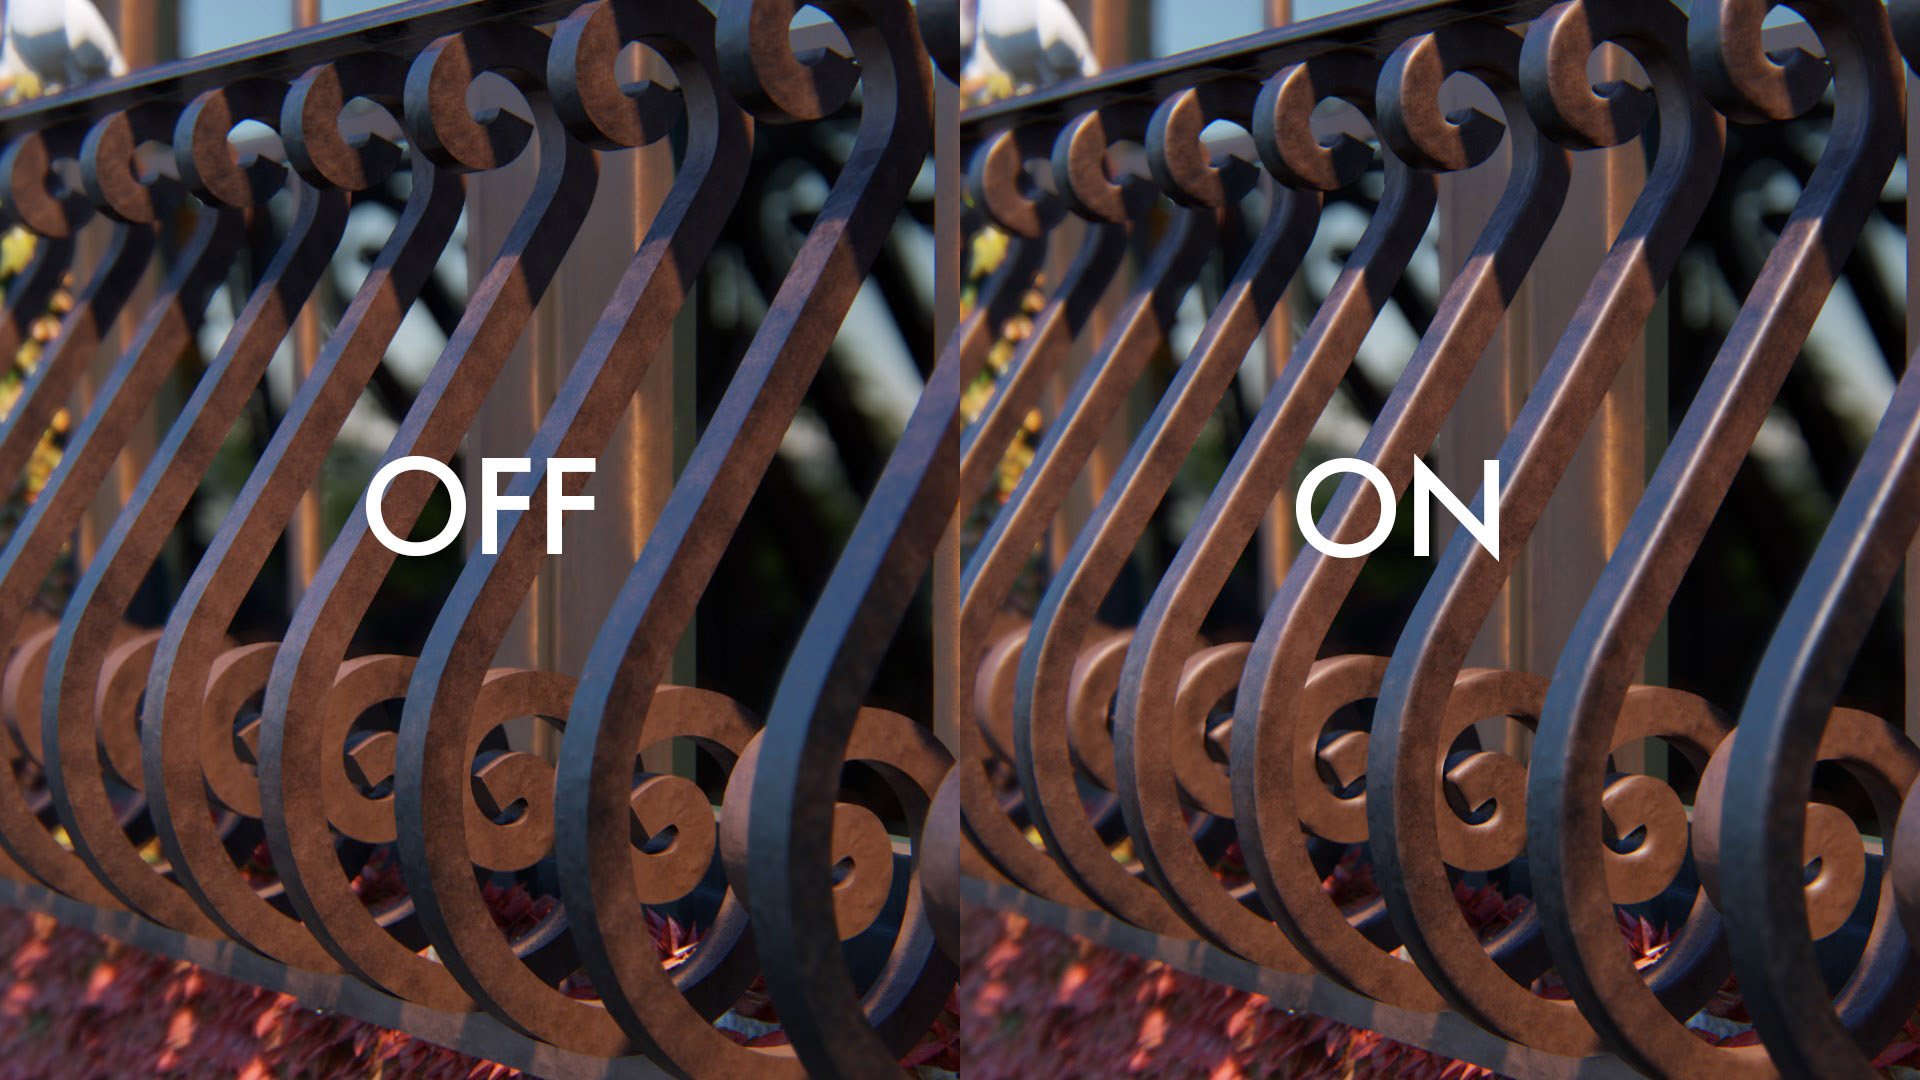
Soften hard edges (Pro only) What it is: In real life, the edges of any surfaces generally appear slightly rounded or worn. They are never perfectly sharp. With the new edges slider in Lumion 8, your model will take on a more natural and weathered look, one better representing the real qualities of physical homes and buildings. Impart age and realism by smoothening the edges of adjacent faces. Soften the corners of brick, concrete, wood and other materials. A simple slider movement, a more realistic building. Easy. Effective.
You can check out an tutorial of how to apply this Material modifier here:
Here is a comparison image of the Soften Hard Edges feature:
“Look at fixed point” for the handheld camera effect
What it is: Create an impressive first-person video and never lose sight of the most important parts of your design. As an addition to the handheld camera effect, the new “Look at fixed point” option in Lumion 8 lets you lock the camera onto a single target point.
Check out this video of the ‘Look at fixed point’ feature:
Feature Summary
We have just looked at a few of the key features in Lumion 8, but I think you will agree that yet again, Lumion brings new productivity features that are also artistic and professional. I recommend you give Lumion 8 a try, and keep in mind that some of the more impressive features are available in the Pro version only.
Below I will include some links and more information about Lumion and Lumion 8. You can get it here.
With Lumion’s OpenStreetMap (OSM), it became possible to instantly surround a project with context. OSM was also a beta feature still in development and it used a third-party service to import accurate map and building height data.
The third-party service has announced they are closing down, and on February 1st, Lumion will no longer be able to download the map and building height data.
In light of this news, Lumion developed a little tool called the “OSM Patch” to ensure continued map functionality.
Click here to download ‘OSM Patch’ for ‘Lumion 7.5 Pro’. Click here to download ‘OSM Patch’ for ‘Lumion 8 Pro’.
Close Lumion
Extract into your relevant \Program Files\Lumion 8.0\ directory and ‘Replace’ files.
Start Lumion
You should be good to go with OSM
Video Tutorials and Webinars
Expand your rendering capabilities with more video tutorials:
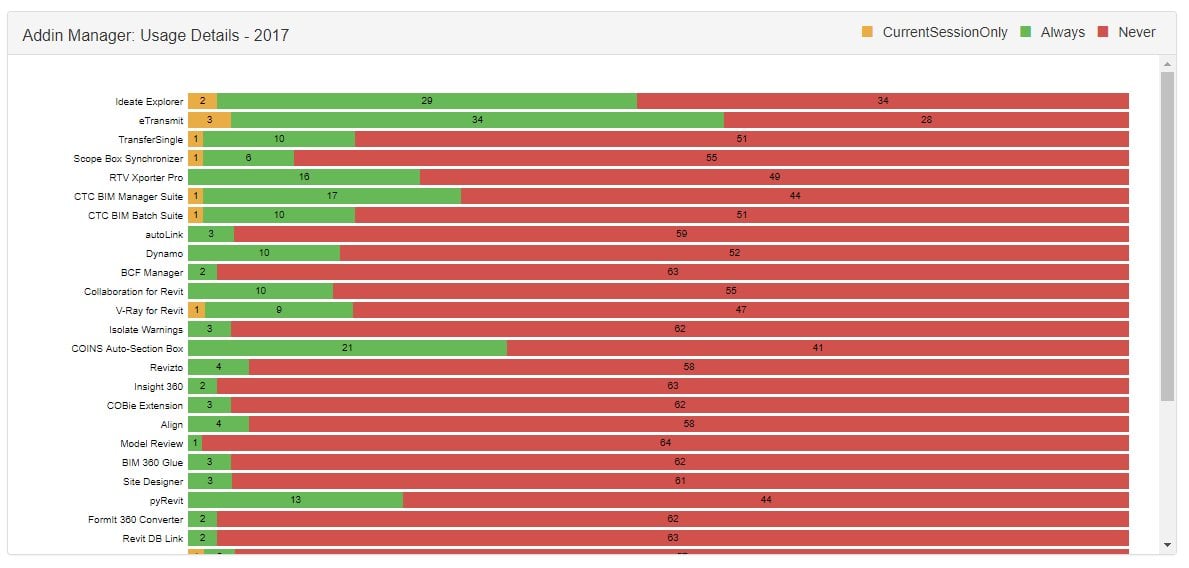
Starting at this tweet, Konrad Sobon triggered quite a discussion around Revit addins and how to manage users, deploy addins, and track their usage. He has worked on coding a tool called Mission Control for HOK that has a MongoDB backend and evidently harvests data from Revit sessions across the company. This is just one of many tools we are seeing recently related to project data, project intelligence, and similar analytics.
Based on this little exchange with @gschleusner , @arch_laboratory is hard at work making sure we will all have access to this soon 🙂
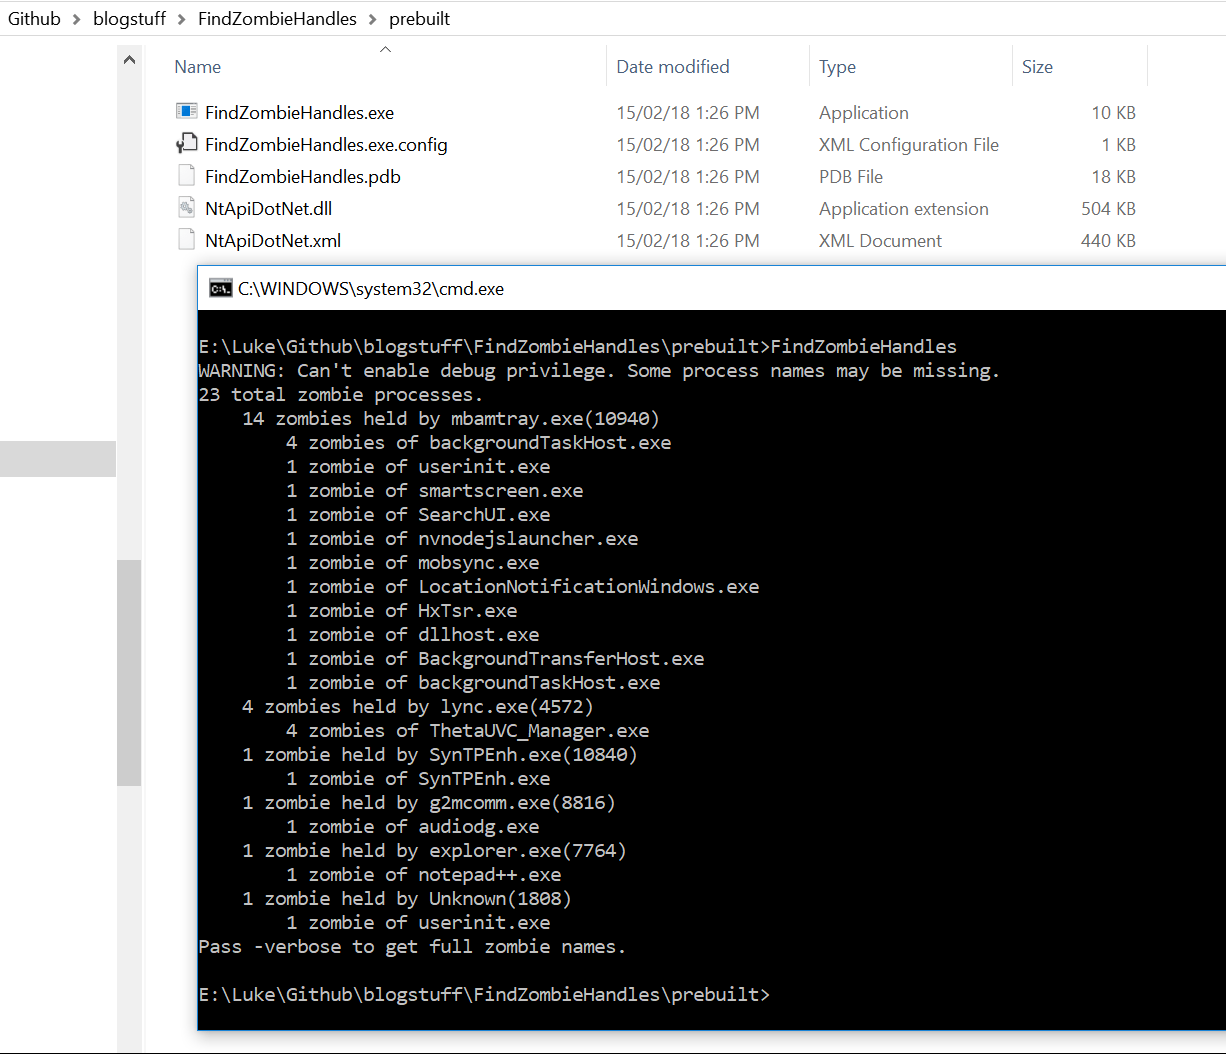
When working with serious hardware and big 3D models, computer memory management is an important thing. You want every byte of RAM to be doing a job for your system. So I was very interested to read this detailed write-up by randomascii where he describes ‘zombie handles’ that can hold or consume memory on your system. His post is very detailed, but I will go ahead and over-simplify it for you:
I have been chatting with one or two industry insiders over at Autodesk recently, and there are some pretty big changes coming to the BIM360 fraternity of products. For the most part, it seems like these will be very welcome improvements. However, it may have an impact on how you run projects through BIM360, and so it might be advisable to check out the upcoming BIM360 webinar (link). Details below:
Stay up to date with everything new in BIM 360. Each month, join us and the BIM 360 Product Team to find out how you can take advantage of the most recent and upcoming product updates. • Learn how BIM 360 can help you improve project delivery • Stay up to date with the newest features • Get early insights into what’s coming in the next updates • Participate in Q&A with the BIM 360 Product Team • Get the resources you need to be successful
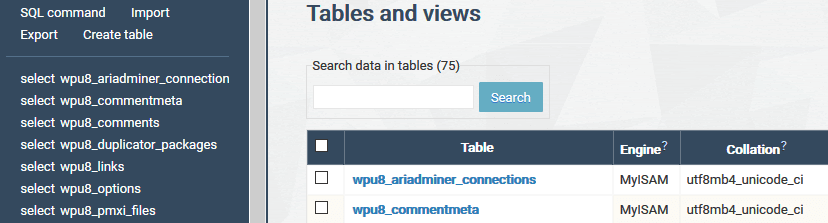
If your domain host happens to crash and they go ahead and restore MySQL data that is a few days old, which database tables are likely to be most important to incrementally rebuilding your WordPress data?
Here’s what I discovered recently when I had to do that – these are the key tables for posts, media, comments, categories and tags:
I found it quite easy to use the ARI Adminer plugin from WordPress for this. You could also use phpmyadmin or mySQL Workbench or similar:
Note to self: Remember to keep regular backups of your entire database (export via phpmyadmin or similar) and your content (FTP the /public_html/wp-content/uploads/ folder, or ZIP it via cPanel and then download)