What’s so good about FBX? Geometry, materials, lights and camera assets are all contained in the file. It also supports animation.
What formats can FBX Review handle? .fbx, .3ds, .obj, .dxf, .dae, .bvh, .htr, .trc, .asf, .amc, .c3d, .aoa, .mcd.
From the App description: Features * Import and review 3D files without using full commercial 3D animation software. * DirectX 11 enabled viewport for high-fidelity asset review. * Toggle shading modes, animations, cameras, and scene lights. * Familiar and intuitive playback controls to review animations. * Formats supported: .fbx, .3ds, .obj, .dxf, .dae, .bvh, .htr, .trc, .asf, .amc, .c3d, .aoa, .mcd.
The coordinate scheduling tool, developed by Excitech for the Revit Platform will allow accurate and simple scheduling of X,Y and Z coordinates from Revit model elements. This is suitable for a whole range of applications but particularly the easy production of Piling schedules.
It is part of the free Excitech Revit Toolkit. It has also been around for a long time, as Revit add-ins go. The other key function of this tookit is the Element Renumber tool.
Download by clicking on appropriate version link at the bottom of this page. You will need to register / login.
From Hagerman & Company Blog: This video tutorial explains how to do a rolling offset using Revit or Revit MEP. The concepts are shown in Revit 2014, but can be performed on 2013. The rolling offset can be done using duct, pipe of conduit.
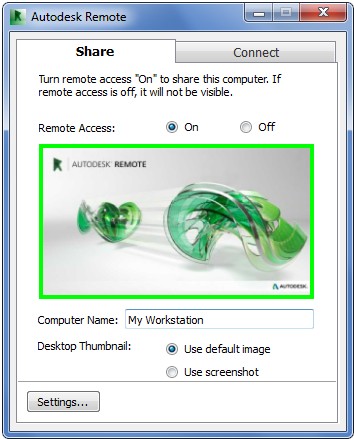
What is it? Let’s call it in VNC for Autodesk software… It lets you drive Autodesk software installed on your primary computer from a remote computer or iPad for fast access to native design data over standard networks. To use it, simply install Autodesk Remote on the PC you want to share. Install it again on the machine you want to connect from and start your connection. Autodesk Remote currently works in North-America only. Click here for a FAQ.
via Gordon Price. Check out his great Revit deployment course on Udemy here.
“with WU1 for 2014 out, and odd, I thought I would let you know I have tested it using the standard WU recipe, and it works fine. It requires access to the initial deployment to run silently, which is different from previous Revit web updates. And so far as I can tell there is no command line switch to tell it where to find the deployment. We shall see if this is the new (and bad!) way of doing things, or just a one time anomaly.”
Remove paint from all walls in project: 3D view, Wireframe, Isolate Walls, Remove Paint tool, hover mouse – *only* Painted walls highlight. — Luke Johnson (@lukeyjohnson) July 12, 2013
It *may* be more reliable to replace Materials and Appearances by using #Revit Material Libraries (rather than Transfer Project Standards) — Luke Johnson (@lukeyjohnson) July 23, 2013
To find location of hosting plane if #Revit says ‘not associated’, select the Extrusion and click Edit Workplane – it is the blue line/plane — Luke Johnson (@lukeyjohnson) July 11, 2013
You can use a Formula in a Family to drive data into the Type Comments of many Types at once (use “text here” in formula column) — Luke Johnson (@lukeyjohnson) July 10, 2013
Using Join Geometry on collinear walls can also allow a door to span their end to end join (not only for parallel finish walls) #revit — Luke Johnson (@lukeyjohnson) July 9, 2013
Want to make a “worm’s eye, orthographic plan at the cut plane, editable and dynamic” in #Revit? Check out http://t.co/b12DSCdaVz — Luke Johnson (@lukeyjohnson) July 22, 2013
Where to find Service Packs for Autodesk products (that is, until they release an all-in-one Suite Update Utility 🙂 http://t.co/o8S6x0zuda — Luke Johnson (@lukeyjohnson) July 19, 2013
Finally:
#BIM collaboration is like riding a bus – if you have a common destination in mind, its easier to initiate a meaningful dialogue. — Luke Johnson (@lukeyjohnson) June 26, 2013
and
#BIM is easy to practice, but harder in practise. — Luke Johnson (@lukeyjohnson) July 22, 2013
Drag and drop RevitLookup.csproj to the Projects panel on the left
Compile Revitlookup. Make sure to Add Reference Path (project / properties) to your Revit 2013 Program folder. Then click Build, Build Solution. I received a bunch of Warnings about obsolete classes and properties, but no errors.
Open Revit and any project
External Tools – Add-in Manager (automatic)
Load the compiled RevitLookup.dll and then use the Save to Add-ins folder option
Restart Revit
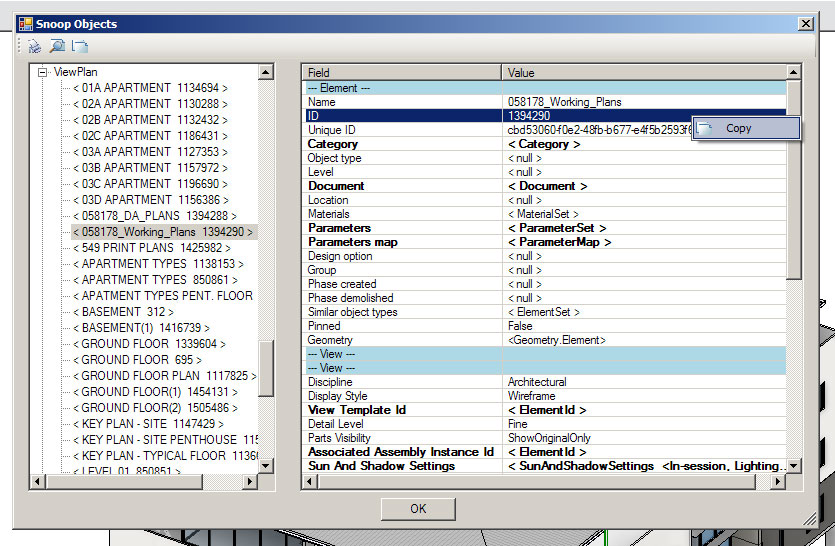
Now, to use RevitLookup to find the Element ID of a View Template and copy it to another project:
Open a Project
Add-Ins, Revit Lookup, Snoop DB…
Scroll down and select the appropriate View reference, ie. ViewPlan for a Template that was created from / for a Plan View
When you select it, the Element ID will be shown on the right and you can copy it to Clipboard