When working with Revit, Excel and even coding, sometimes we want to paste text without formatting.  There are various ways to do this, but I think this is the easiest…

Download and unzip the appropriate version:
PureText 3.0 [32-bit] (Windows 95 – Windows 8) [13k]

PureText 3.0 [64-bit] (Windows XP – Windows 8) [14k]

Run PureText.exe

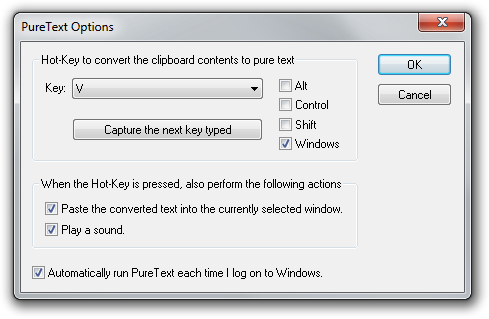
Next time you have something in the Clipboard and you want to paste without formatting, just use WindowsKey+V

More info:
PureText Home Page

In some ways, vanilla Revit is like the base model option package of a new vehicle – no shiny wheels, 20 speaker sound system, or sports handling package.  But some add-ins can make you feel like you are driving the top of the range, fully optioned model …

Here are just a few of the things the KiwiCodes Bonus Tools lets you do:

  • determine the “source” file path to RFAs of loaded Families and re-path family files
  • replace Groups with Families
  • create Floor elements from Room boundaries
  • duplicate Sheets and the Views that reside on them
  • add points to a Topo from a selected Family
  • create an outline edge of a Topo element (these can be 2D or 3D lines!)
  • Export Template and Import Room Data from Excel (including adding Room Placeholders) – bit timesaver
  • Convert a Navisworks XML report into clash points and 3D views placed on sheet(s)
  • and there is much, much more…

For the sheer amount of timesaving and productivity tools included, the low price represents good value for money.

To download a trial of KiwiCodes Bonus Tools, go to:
http://www.kiwicodes.com/30-bonus-tools.html

For more details on the tools included:
Bonus Tools Details

Revit Keyboard Shortcuts don’t work too well in Schedules, because Revit thinks you are trying to input data.

However, you can use the alternative key entry method – basically, it starts by pressing Alt, then following the onscreen text options that show up.

In some cases, this will be all you need.  But I wanted to make a quick way to Insert Data Row in a Room Schedule, and unfortunately it is buried under a drop down list on the contextual ribbon.

Here is part of the solution – add the Insert dropdown to the Quick Access Toolbar.  Now, when you press Alt, Revit will assign a shortcut to that position.  In my case, to trigger the insert data row command, I had to press this key sequence:
Alt
0
2
downarrow
downarrow
downarrow
Enter

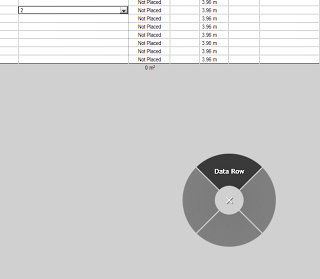
So, still a pain.  But what if we could assign this as a macro to some smart shortcut system.  That’s where the new Radial Menus on the SpacePilot Pro come in.  I created the above key sequence and added it to a Radial Menu.  Now I just press a button on my 3D mouse, select the Data Row shortcut that I created, and there it is…

See the top right banner on this page for an affordable way to enter the 3D mouse world…

It can be difficult to stop Demolished items from occluding New items in Revit.  There is no easy way to say “make everything Demolished wireframe, but leave other elements as-is” in a Hidden Line view.

However, you can use a normal Filter to “override” the Phase Filter.  This works because normal VG Filters operate at a higher level than Phase Filters.  Just create a Saved Selection Set, add it to a View or applicable View Template as a Filter, and set the Transparency for that Filter to be 100%.

You could do this by making a Filter that operates on a Shared Parameter that is added to all Categories likely to include Demolished items – meaning you would have to set this property manually.  However, it may be easier to manage if you just graphically create the Saved Selection Set and use that instead:

  1. Make a new Phase Filter that shows only Demolished items (all the rest “Not Shown”)
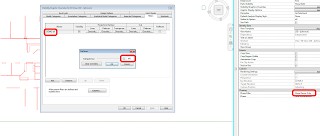
  2. Go to a 3D view, enable this Phase Filter, select all the Demo items and Save them as a New Selection Set (Manage tab — Selection)
  3. Add the filter to a View or applicable View Template as Filter, and set the Transparency for that Filter to be 100%.

If you need to add or remove items to the Demo set:
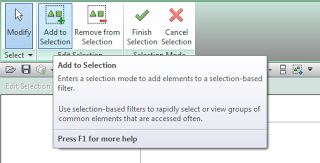
You can use the Edit option under Selection on the Manage tab to enter a Selection Edit mode, where new items can easily be added.  Or you can just select the whole lot again, use the same Selection Set name, and you will be prompted to overwrite the existing DEMO set.

Had a pretty persistent error which wouldn’t allow Recap to install SP1.  In hindsight, it was probably related to the error at this post:
http://upandready.typepad.com/up_and_ready/2013/07/autodesk-recap-10-error-installing-sp-1.html

Basically, the program thinks it needs an update when really it doesn’t, and you might have to do a registry edit to fix it.

If you want to know more about MSP files generally:
http://msiworld.blogspot.com.au/2008/09/installation-of-msp-file-in-silent-mode.html

http://www.windowswiki.info/2009/02/19/how-to-extract-msumspmsiexe-files-from-the-command-line/

http://www.msigeek.com/647/command-line-switches-for-msi-and-msp-installations

Also – UniExtract can be used to extract MSP files.

Links:
UniExtract Installer (5.3 MB) – This is the recommended download. The installer will automatically install the application and optionally integrate with the Windows Explorer context menu. This package does not contain source code.

UniExtract Binary Archive (4.95 MB) – This archive contains the binaries. Download this if you want portable version or just prefer not to use the installer.

EDIT:
You can also use the command line.  See below for workflow related to Autodesk 360 update 3:

  1. Download Autodesk 360 Update 3:
    http://usa.autodesk.com/getdoc/id=DL21520422
  2. Open a Windows command line:
    Click Windows Start menu  > Search > type cmd and press Enter.
  3. Change the working directory to the folder where you downloaded Autodesk 360 Update 3.
    Example: cd c:a360u3
  4. Run the following command to extract the msp file:
    c:a360u3> Autodesk360_x64_Release_update3.exe /e a360u3.msp
  5. Install Update 3:
    c:a360u3> msiexec /update a360u3.msp /passive /norestart

If you want to submit Revit API code and macros for public review and use, check out:
https://bitbucket.org/BoostYourBIM/revit_api_public

Now, we just need someone to make an API add-in that hooks into BitBucket (somehow), and downloads and installs macros automatically into the Revit session 🙂  We would essentially have an unlimited store of easily accessible plugins in an open source repository … cool, huh?

To submit code, you should login or register for Bitbucket, then send a message to:
https://bitbucket.org/BoostYourBIM

Harry can give you write access.

Associated post:
A public Git repository for sharing Revit Macros at BitBucket | Boost Your BIM – making Revit even better

If you want to learn more about it and code sharing generally, check out
What is version control, and why should you care? | Boost Your BIM – making Revit even better