I have been finetuning my office-at-home recently, and it turns out I have lots of computer screens available. However, it is not always easy to connect multiple (like 4) screens to one computer or laptop. What if you could use a piece of software to extend your available screens onto another computer entirely?
That’s where spacedesk comes in…
Ensure both computers or laptops are on the same LAN
Install the server software on your main PC (the one you actually want to work on)
Windows 10 64 bit or 32 bit or Others
Install the client software on the machine that has spare monitors (you are just going to use these as slaves to the main pc) Windows or Others including Apple etc
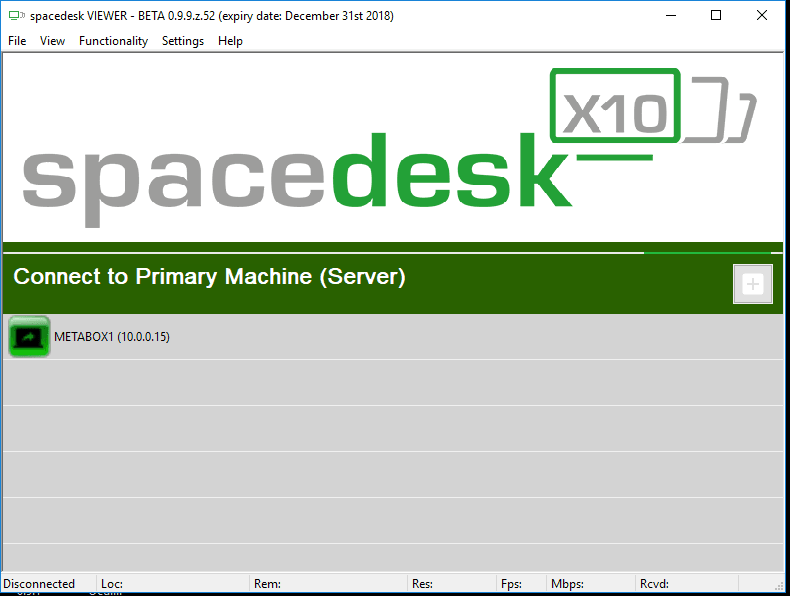
Launch the client software
Click on the server PC
A window launches, you can use View – Full Screen
Repeat steps 4-6 for each secondary monitor you want to add from other pcs
These show up in Windows and you can adjust resolution:
Basically this is screen extension or mirroring technology, so you will still be bound to network speed and may experience some compression, because your main pc is actually sending frames over the network to the other pc. Overall, it seems to work quite well.
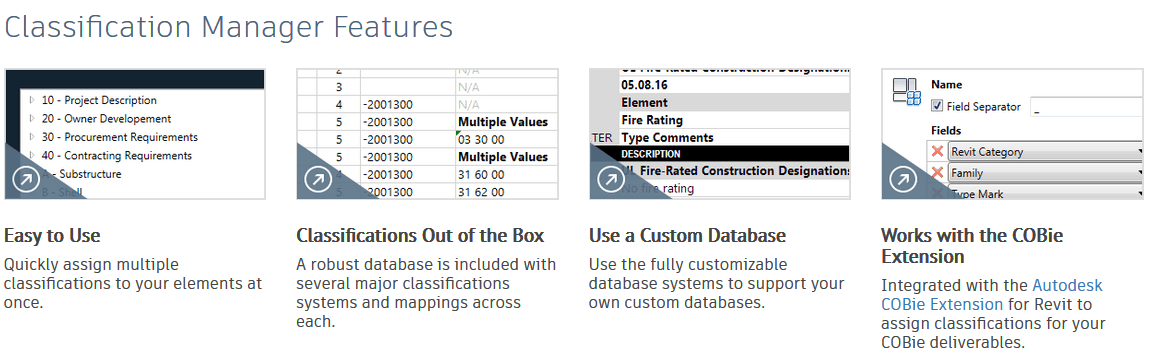
If you have moved your project onto BIM 360 Docs, it might make sense to store related project resources (Shared Parameter files and Classification resources like Uniformat) in the same cloud as well.
Ensure you can see the BIM 360 (Preview) item in Windows Explorer
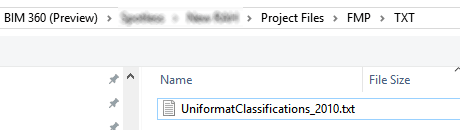
Using BIM 360, create a suitable folder under the Project Files area, and upload your resource file, such as UniformatClassifications_2010.txt
Browse to that folder in Windows Explorer:
Open Revit
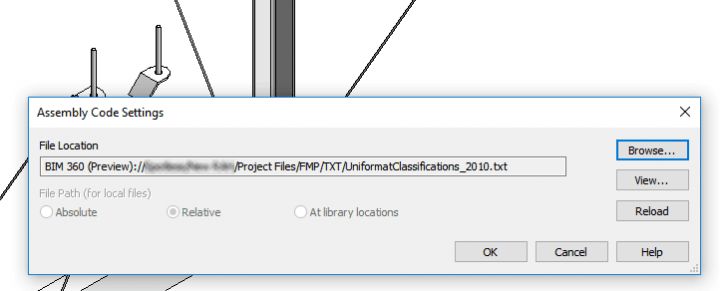
Navigate to Manage – Additional Settings – Assembly Code Settings
Click Browse
Copy and Paste the folder address from Windows Explorer (which actually shows the local sync location for BIM 360 data, typically C:\Users\YourUserName\BIM 360\YourBIM360License\YourBIM360Project\Project Files\
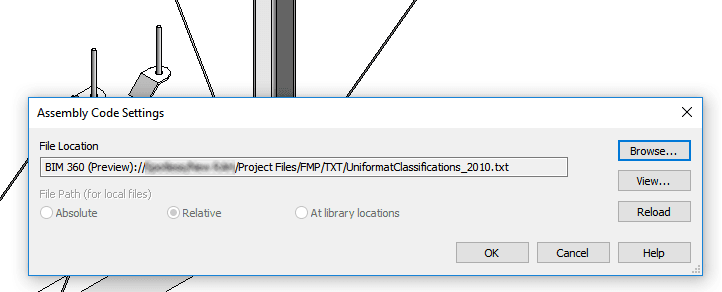
Back in Revit, after navigating to the correct BIM 360 folder, select the text file resource and click Open
Revit detects that this resource is stored on BIM 360 Docs and you can proceed…
Sync your model to save the settings
You should be able to use the same process to save other files like Keynote references and Shared Parameter files in the cloud. Keep in mind that you will still have to manage BIM 360 access control, as you probably don’t want multiple people actually be able to edit these files.
If you are still running a relatively small SSD (like 512gb), you might see that your C drive fills up pretty quickly while working on a large BIM 360 Design Revit cloud worksharing project. See below image, where the CollaborationCache folder is using almost 50gb of space on my machine:
While I realise that the SSD is the best place to have that data in terms of performance, if you don’t have the space available you may consider moving your CollaborationCache folder to a secondary, larger hard drive. I used a symbolic link to do this, with the script below:
if exist "%localappdata%\Autodesk\Revit\Autodesk Revit 2018\CollaborationCache" rename "%localappdata%\Autodesk\Revit\Autodesk Revit 2018\CollaborationCache" CollaborationCache.old
mklink /d "%localappdata%\Autodesk\Revit\Autodesk Revit 2018\CollaborationCache" E:\C4R
if not exist E:\C4R MD E:\C4R
robocopy /mir "%localappdata%\Autodesk\Revit\Autodesk Revit 2018\CollaborationCache.old" E:\C4R
This creates a folder called C4R on your E drive, copies the CollaborationCache over, and sets up the symbolic link. To use it:
Sync all Revit instances and shut down Revit completely
Make a CMD from the code above and run it as Administrator (elevated privileges required for mklink )
In Explorer, confirm you have the symlink and delete the .old folder :
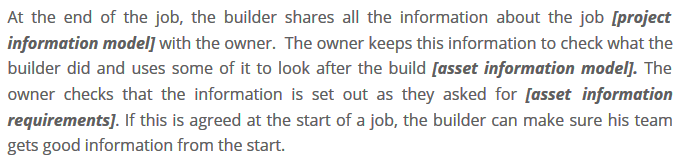
A while back on the There’s no BIM like home, there was a very interesting post that aimed to use simple language to describe BIM projects and process. According to the author, the XKCD Simple Writer Tool was used to develop the text. Some of the ideas are somewhat UK centric, but the overall concept is great. Here is just one paragraph:
After a builder wins the job, they plan with their team what parts of the job they will do [responsibility matrix], what information is needed and by when [master information delivery plan], as well as how information needs to be set out [standards, methods, and procedures]; writing all of this into a single agreed plan for everyone to follow [post contract-award BIM execution plan]. To make sure everyone can follow the plan, the builders check their team’s skills [supply chain assessments] before starting the job.
In BIM world, we can certainly get carried away with terminology and abbreviations and acronyms. But this is a good reminder that much of our work can actually be described in easy-to-understand language. Check out the full post by author Dan Rossiter at this link.
I previously posted about how to quickly repath links based on some control mechanisms. Enter BIM 360, and the wild world of Revit cloud worksharing… I expect that it will be commonplace now for existing projects and datasets to move across to BIM360 ‘mid project’. But that creates some interesting problems, like creating folders, dealing with the initiation process, and replacing local Revit Links with their cloud versions.
This post is focused on that process of changing all of the Revit link paths to link to the BIM 360 models. Unfortunately, the previous method I used (TransmissionData, like eTransmit) is not available for cloud hosted models. So how do we automate this process?
We went about it this way:
Initiate all Revit models on the BIM 360 Document Management cloud (manually, for now)
Create one federated model on the BIM 360 cloud that links in all the other cloud hosted Revit models. You might do this one manually, using Reload From in the Manage Links dialog box.
Once you have that one ‘super host model’, use a batch process to harvest all of the cloud model data
Using the harvested data, create a script that implements a Reload From method to batch reload local models from their cloud counterpart
On the journey to solving step 3, I experimented with a few different methods. I discovered that you need to use the ExternalResource class to get information about BIM 360 cloud models (not ExternalReference).
I also realised that I had to deal with Reference Information, which appears to be a .NET dictionary per link that stores some funky Forge IDs and so on. But I want to store all this data in our VirtualBuiltApp BIM Management system, so I had to serialise the Reference Information to a string that could be stored in a database VARCHAR field (or push to Excel if you are still doing things the old way). Dimitar Venkov gave me a few tips about using JSON with IronPython in Dynamo (thanks mate!), so after that all the harvesting pieces were in place!
Here is some of the harvesting and JSON code. Notice that I played around with using a container class to pass data between Dynamo nodes. In the end, JSON string was the answer:
 data = []
for u in unwraps:
    data.append(u.GetExternalResourceReference(linkresource))

class dummy(object):
    def ToString(self):
        return 'container'
container = dummy()

sdicts = []

for y in data:
    dictinfo = ExternalResourceReference.GetReferenceInformation(y)
    container.dictinfo = dictinfo
    infos.append(container)
    shortnames.append(ExternalResourceReference.GetResourceShortDisplayName(y))
    versionstatus.append(ExternalResourceReference.GetResourceVersionStatus(y))
    insessionpaths.append(y.InSessionPath)
    serverids.append(y.ServerId)
    versions.append(y.Version)
    sdicts.append(json.dumps(dict(dictinfo)))
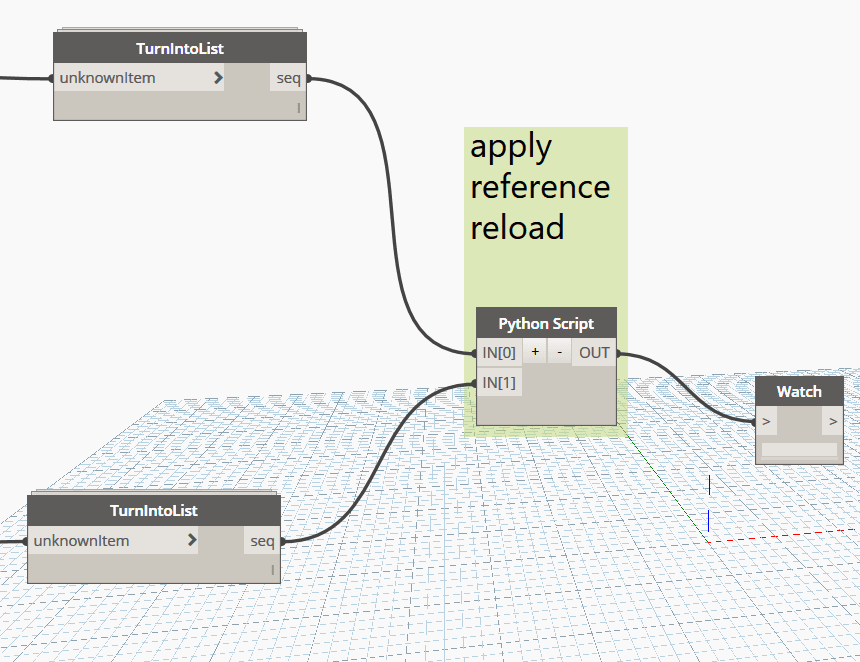
The next step was to create the ‘batch reload from’ tool. Now that we had the necessary data, we just had to use it to grab the matching cloud path information (from our database) and apply it to each Revit link.
I created a node that essentially built a new reference path from the JSON and other data that we had harvested. Here is some of that code:
 des = []
for x in referencesInfo:
    des.append(json.loads((x)))
newdicts = []
for y in des:
    newdicts.append(Dictionary[str, str](y))

serverGuids = []
for g in serverIdsIn:
    tempguid = Guid(g)
    serverGuids.append(tempguid)

newrefs = []
for z in range(len(referencesInfo)):
    serverIdIn = serverGuids[z]
    referenceInfo = newdicts[z]
    versionInfo = versionsInfo[z]
    sessionPathIn = sessionsPathIn[z]
    tempRef = ExternalResourceReference(serverIdIn, referenceInfo, versionInfo, sessionPathIn)
    newrefs.append(tempRef)

OUT = newrefs
The final step was to get a RevitLinkType and a matching ReferenceInformation and apply them to each other. I stored the data in our cloud based BIM Management Application, VirtualBuiltApp. Then I could easily just pull the data into Dynamo with a suitable database connector, and match up the RevitLinkType in the current file with its associated cloud identity. For that genuine 90s feel, you could use Excel to store the data as it is just a JSON string and some other strings:
Here is the key bit of code that actually changes the link path (without all of my other error checking bits and pieces):
     try:
        newCloudPath = newCloudPaths[l]
        reloaded = fileToChange.LoadFrom(newCloudPath, defaultconfig)
        successlist.append(reloaded.LoadResult)
        TransactionManager.Instance.ForceCloseTransaction()
    except:
        successlist.append("Failure, not top level link or workset closed")
To actually implement the script and get productive, I opened 4 instances of Revit, and then used this process in each instance:
Open the Revit file from BIM 360, with Specify… all worksets closed
Unload all links
Open all worksets
Run the Reloader Script
Confirm link status in Manage Links
Optional: Add ‘bim 360 links loaded’ text to Start View (just for tracking purposes)
Optional: Add comment to VirtualBuiltApp (optional, for tracking purposes)
Close and Sync
In this way I can have 4 or more sessions operating concurrently, fixing all the link paths automatically, and I just need to gently monitor the process.
One nice thing is that I set the script up to immediately Unload a link after it had obtained and applied the new Path information. This means that the Revit instance does not get bogged down with many gigs of link data in memory, and in fact this is way faster than trying to use Manage Links for a similar process.
Ideally I would like to fully automate this, to the point where it opens each file, runs the script, and syncs. Unfortunately, time didn’t allow me to get all the code together for that (for now).
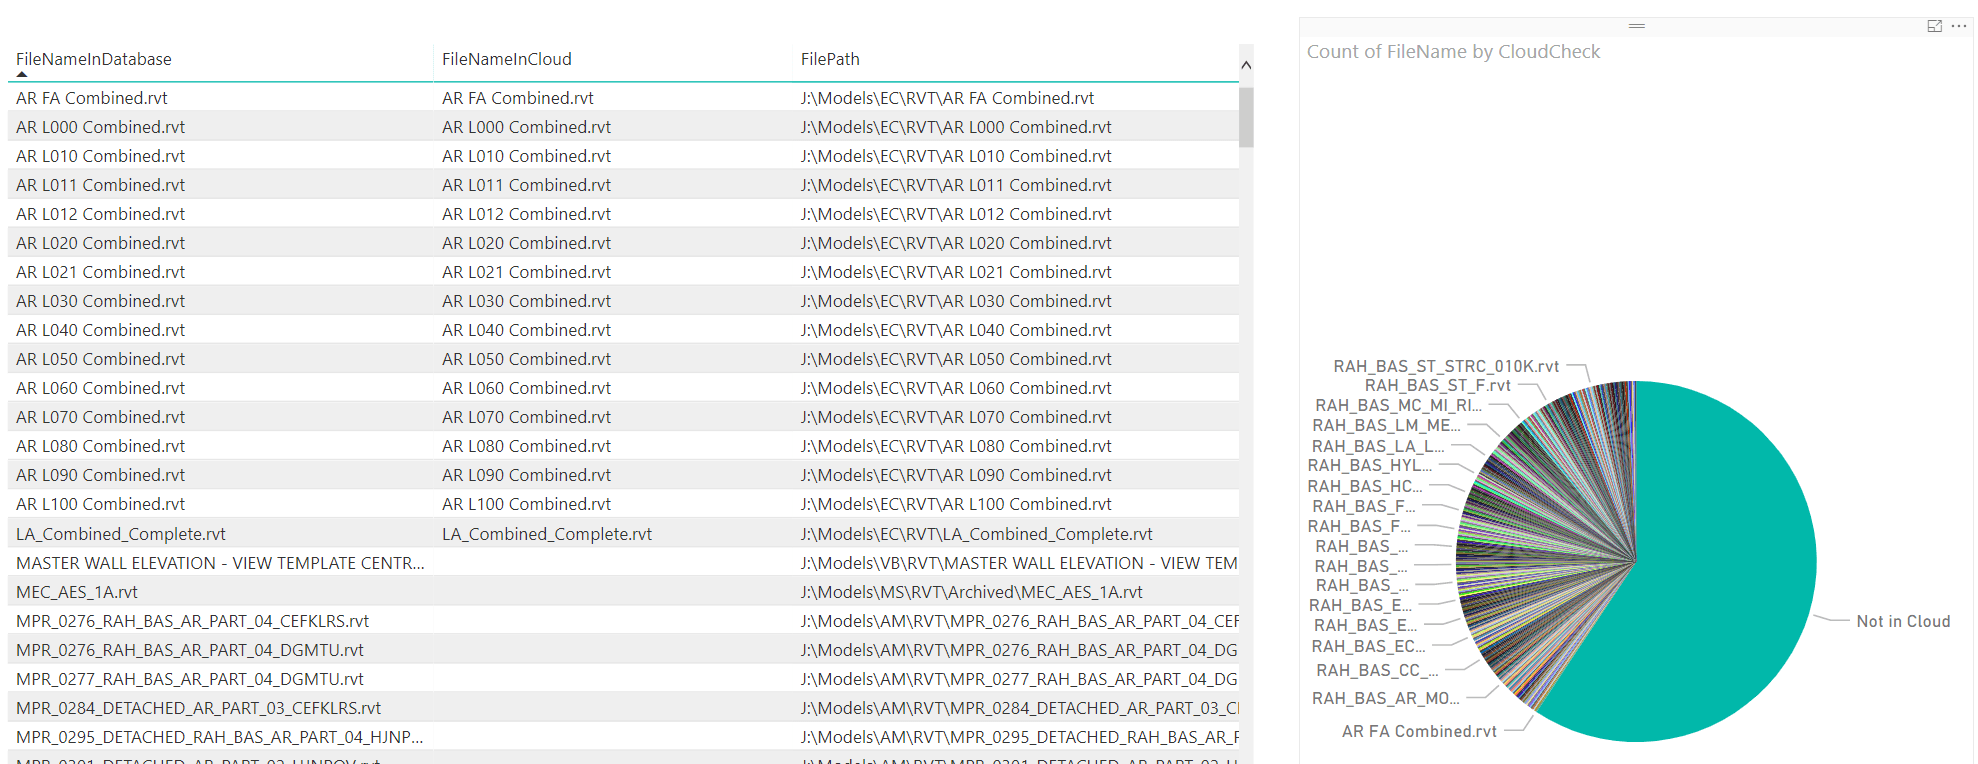
Finally, because we are using our custom built schema and validation tools, we can easily create visuals like this:
Modified versions of the Dynamo graphs can be found on the Bakery Github here:
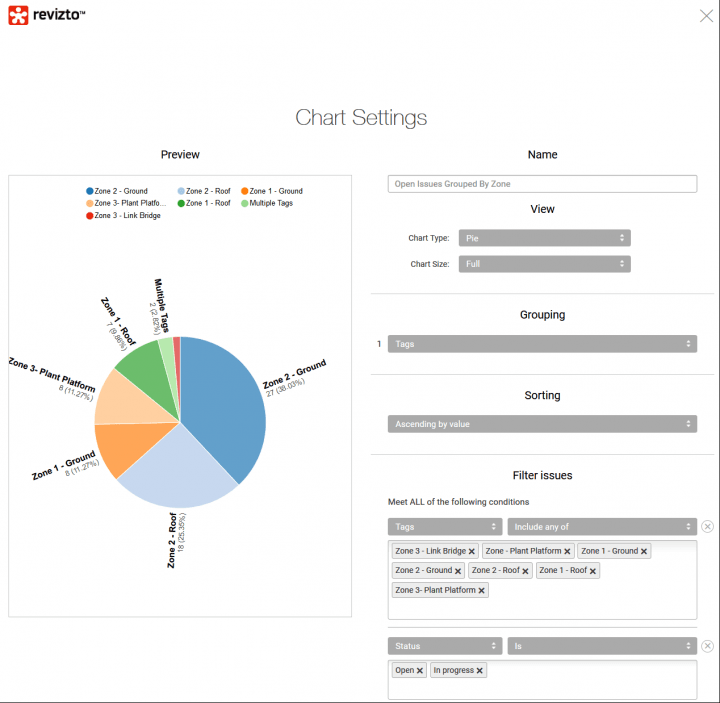
Revizto continues to improve its very powerful web Dashboard features. The web Dashboard gives a live view of issues for your team, and can be completely customised to give the most focused overview of your current project Status.
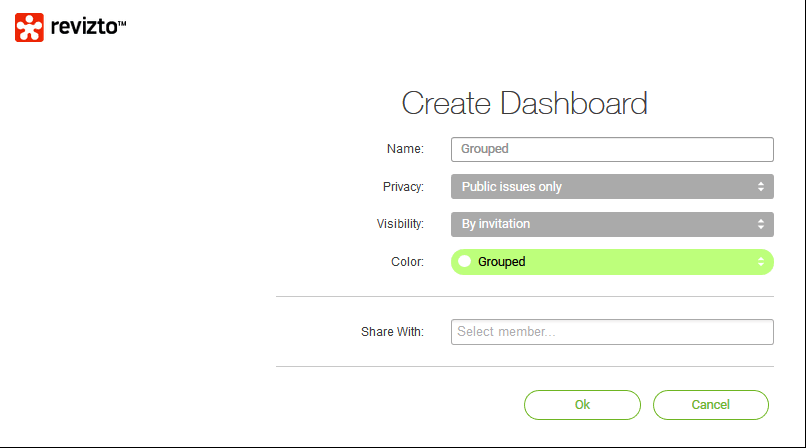
To create a web Dashboard and Group by Tag, just follow these easy steps:
Customise the chart to include only certain tags, and enable the Grouping by Tags function. Below is an example:
In the above example, you can see how I included only the high level tags that are used (on this project) to keep track of the construction zone of specific issues. Then, the Grouping function slices those issues and gives us quick insight into the Zones requiring immediate action by the project management team.
I’m sure you can see how easy it is to setup powerful and focused dashboards to successfully manage your BIM and Construction team with these new web features in Revizto.
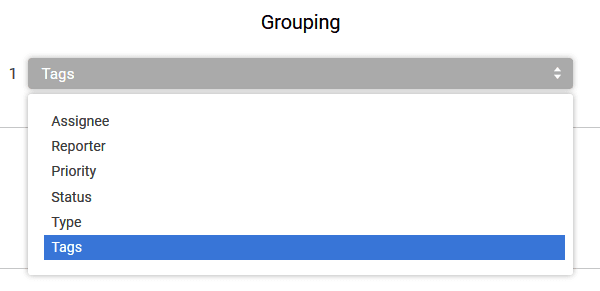
Here are the other currently supported Grouping categories in Revizto:
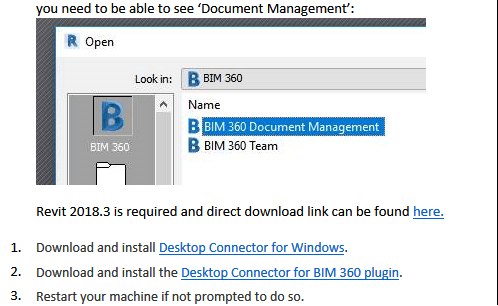
To be able to use the new BIM360 Design or BIM 360 Document Management in Revit you need to be able to see ‘Document Management’ after clicking the BIM 360 link in the Revit Open Dialog box:
Revit 2018.3 (or newer) is required and a direct download link can be found here.
Check out this page from Autodesk Knowledge base. Notice how it describes three different ways of linking for BIM 360 Design projects that involve Revit worksharing:
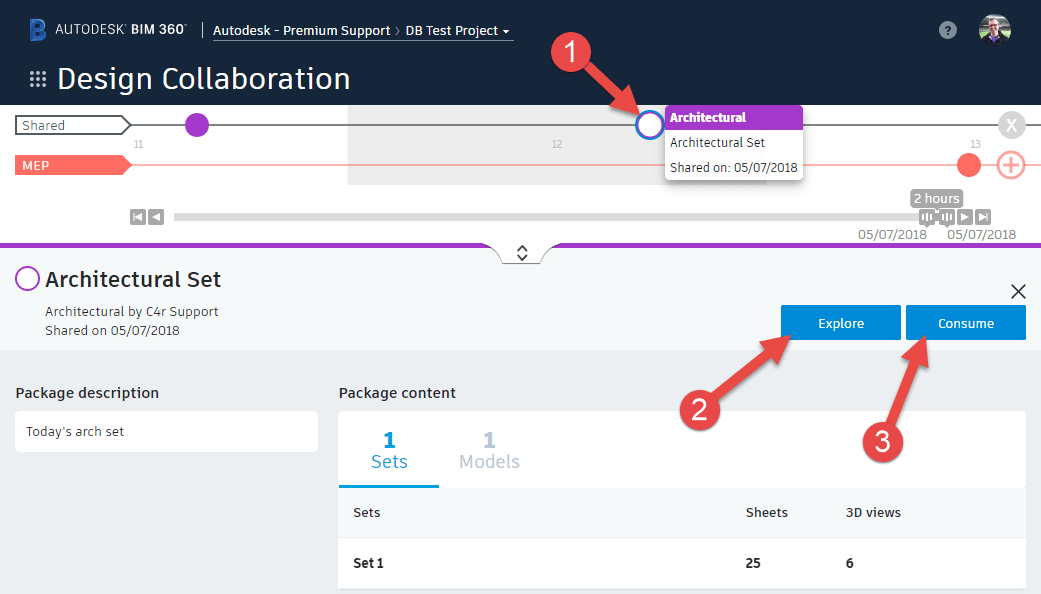
Method 1 – Controlled Sharing – ‘Consume’ Published Models from Packages
Method 2 – Controlled Sharing – Link from the Shared Folder
Method 3 – Live Linking
Each method requires fundamentally different sharing standards, and varying degrees of prior BIM 360 permissions and team setup.
Notice that Method 1 includes the concept of ‘packages’. The overall intention here is to try to emulate some existing workflows. While BIM files continuously change during project development, in traditional workflows a ‘team’ only interacts with a snapshot of the available BIM data from other teams (a package).
At this point, it is key to keep in mind that these different methods exist, and if you are a BIM Manager on a BIM 360 Design with Revit project, you will need to discuss and agree on the linking Method for managing the Revit data throughout the BIM creation phase of the project.
It is something to think about as we move forward with reliance on cloud services – how important is 100% uptime with collaboration cloud products in the BIM world? Is 100% uptime even possible with current technology services, and the stacks (like Autodesk cloud) that rely on other stacks (like AWS cloud)?