The whole C4R thing with link files is a bit of a challenge at the moment. It will get better, but for now, there are at least two things that don’t match typical desired project delivery:

  • We essentially have a ‘high trust’ environment, which applies to everyone who is invited to a C4R project. High trust in this context means anyone can edit anything, if they have Editor permissions for the project.
  • Also, we don’t have folder structures for Revit files that have been initiated on C4R – they are all in the root folder. However, we can store Revit files in subfolders as a kind of dumb link file (not a collaborative model).

So, until it does get better… how do we use the Desktop Connector to link files from a non-C4R folder structure, into a C4R initiated file?

Basically, you take these steps:

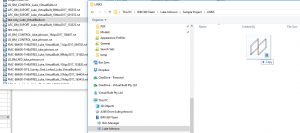
  1. Use Windows Explorer and the Autodesk Desktop Connector to manage your files and folder structure. Navigate to your BIM 360 Team project, add folders, and drag and drop Revit files into those folders.
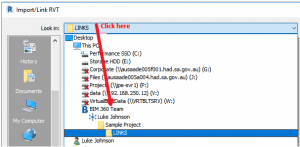
  2. Then, in Revit, in the Import / Link dialog, you can select the ‘BIM 360 Team’ link from the drop down list. You will notice some special things happening after you link one of these files.
  3. Finally, you can observe the new ‘cloud’ pathed Revit models in the Manage Links dialog box. The saved path should start with Autodesk Drive:// and the Path Type is Cloud.

What does this all mean? Really, it just means the workarounds are getting slightly better. We don’t need to maintain a separate cloud storage repository for Revit models (like Box) just for the link files. And we shouldn’t need to go through too much pain to update the link models. Just drag-and-drop the new Revit link model into the correct folder in the Desktop Connector to update the link for everyone in the team.


This feature also works with things other than Revit files. So you can use the same process to store DWG files on BIM 360 Team and link them into your Revit model.

And the same process can be used for things like:

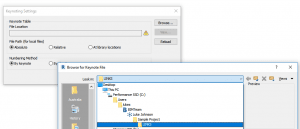
  • Keynoting Settings
  • Shared Parameter files
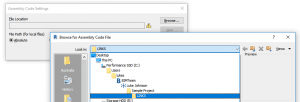
  • Assembly Code Settings
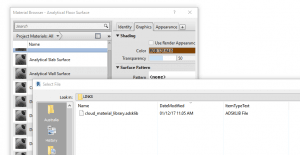
  • Material Libraries

Pretty much any project-linked resource can now be stored in the cloud, shared with a team, and linked into Revit.

The Preview Image Generator (PIG) is a new Revit addin produced by Parley Burnett, a guy that has been in and around Revit and BIM for a long time.

Out-of-the-box Revit has been producing family preview images of varying degrees of quality for some time now. I think you would agree that a good preview image can assist in selecting the right family, right? Also, the preview image shows up with ‘vanilla’ Revit right in the Load Family dialog, so it can be immediately useful for your team – if the image is good. This app aims to automate that process and give you better preview images everytime.

Through this new free app, you can not only save your family with a better image in a single click, but control the appearance settings automatically by category every time. You can get the free version here:
Preview Image Generator (P.I.G.) Free Version

There is also a paid version called PIG Batch that allows you to batch process your entire library with a single click and it runs automatically every time you save a family.
Preview Image Generator (P.I.G.) Batch

Here is a link to download the current version of P.I.G. Batch. You will need a purchased license key to activate.

www.thepig.io/Preview Image Generator.zip


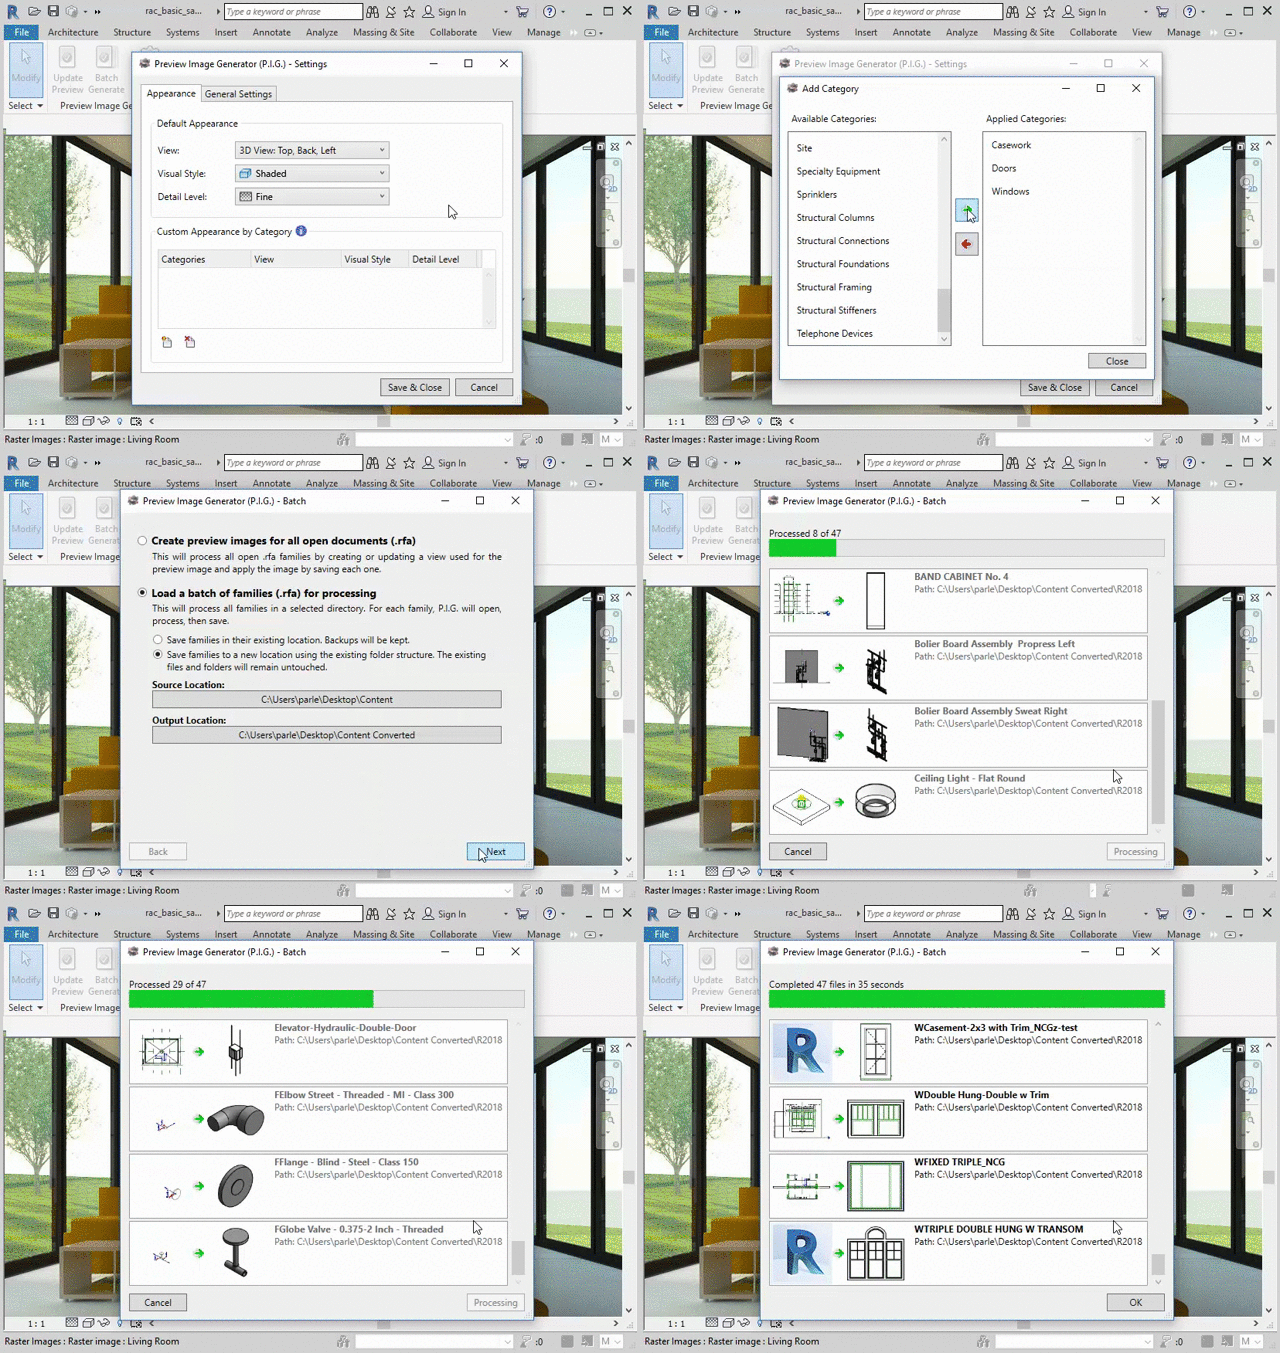
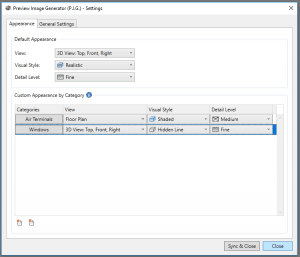
You can create some custom rules for how you want each category to look:


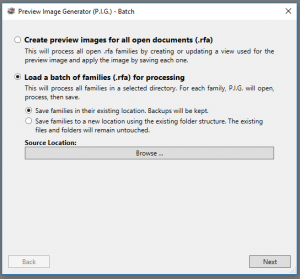
And you can batch process using those rules:


Feature Overview and Comparison:

With one click, P.I.G. Free will create a consistent & clear preview image for your open Revit family. This free version offers limited functionality compared to the more fully featured app. See below for a comparison.

Free Version Features:

  • Choose your own default appearance settings & Revit category specific settings.
  • Options to hide connectors, host elements, reference planes and more!
  • Your settings are automatically synchronized with your cloud account.  Activate on up to two computers.
  • Very simple licensing system
  • Automatic notification of new feature updates


P.I.G. Batch Features:

  • **All users at your company can be set up to use the same settings.
  • **Automatically regenerates the preview image every time families are saved!
  • Batch process new preview images for thousands of families at a time!
  • Upgrade files from previous versions of Revit in the process.

 If you would like P.I.G. to silently run on every workstation at your firm, virtually eliminating the future need to monitor or batch through files, a site license is available. You can contact info@thepig.io for more information.

Video:

Updates:

Here are some of the changes in a recent update:

  • Your settings will now be stored in the cloud and appear on any machine you have activated with your Batch account.
  • We can group users together by ‘Company’. Users of the same company share the same settings automatically.
  • Added a new license type called ‘Desktop’. Desktop users can’t change company settings (only Batch users can). These users can run pig on individual families – either by clicking the button, or automatically when saving the family if that is enabled.
  • Improved the ‘Folder Picker’ dialog for choosing which folders of families to run P.I.G. Batch on.
  • Other minor UI improvements.

Over the years, Autodesk has provided various means for us to access, sync, backup and share files. Most recently we used “A360 Desktop” (see end of this post) and more recently “A360 Drive“. Autodesk recently released the Autodesk Desktop Connector, which allows you to:

  • Manage remote files from your desktop
  • Connect to Team Hubs
  • Work offline or online

Desktop Connector gives you access to your production A360 data. Using Desktop Connector  to modify files that reside in production A360 will automatically sync changes, updating your production file in A360.

You will see a link on your BIM 360 Team hub like this:

You can install from here which links to these downloads (Help page for install here).

x64

x86

mac


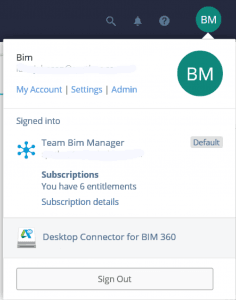
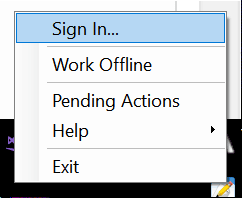
You need to sign in:

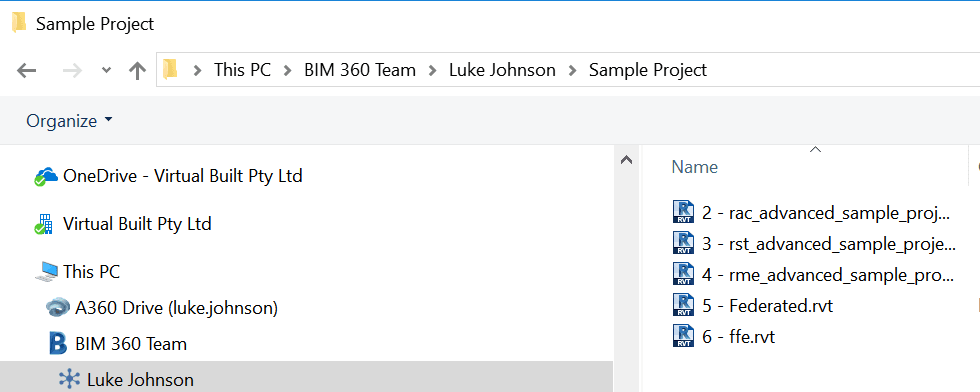
You should now see a BIM 360 Team link in Windows Explorer:

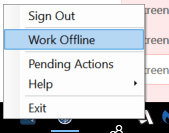
You can use the tray icon to “Work Offline”.

More Information

Release notes here

Getting Started guide here

Some notes about A360 Desktop retirement

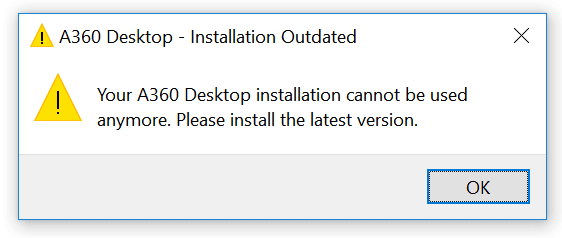
A360 Desktop older versions will get this message:

A360 Desktop current versions:

  • A360 desktop Windows Updater: All users except 2018 AutoCAD products
Windows 32-bit installer – A360 desktop Version 7.3 (exe – 362MB)
Windows 64-bit installer – A360 desktop Version 7.3 (exe – 409MB)
  • A360 desktop Windows Updater: For AutoCAD 2018 product users only
Windows 32-bit installer – A360 desktop Version 9.5 (exe – 373MB)
Windows 64-bit installer – A360 desktop Version 9.5 (exe – 409MB)


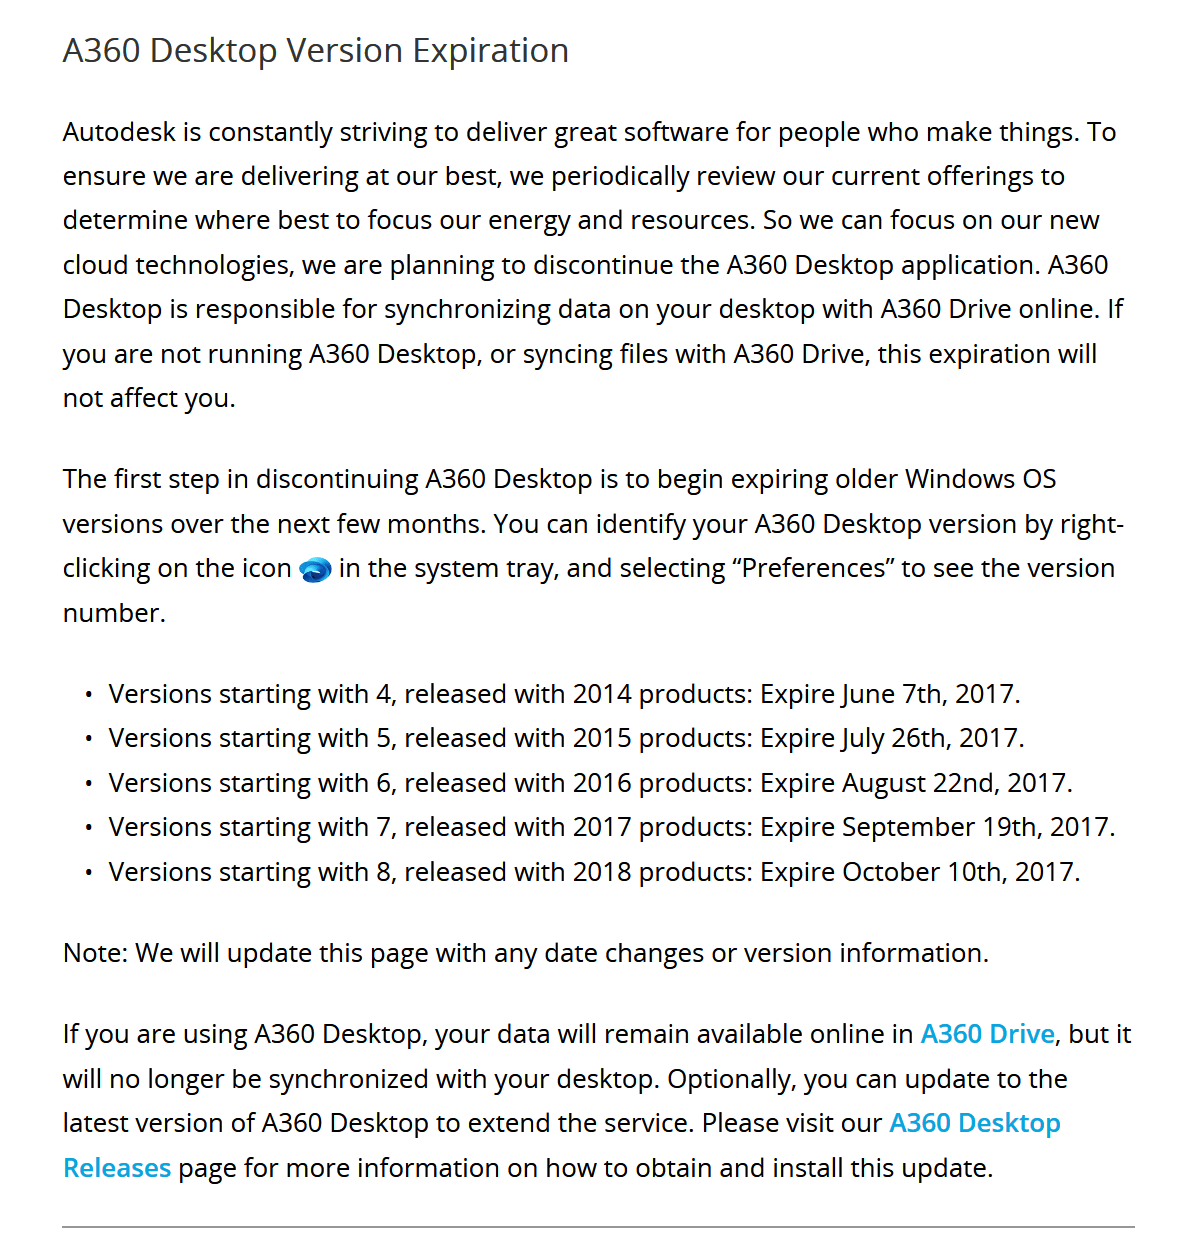
A360 Desktop Expiration link:

A while back I posted about how to setup and deploy Collaboration for Revit. Things are moving quickly in this space, as more projects now need concurrent access to centralized models from a distributed team (say that quickly 5 times!)

Here is an updated list of a few best-practices for initial C4R project setup:

  • generally its a good idea to do a Reload Latest before Sync with Central
  • its best to be on the most current versions of Revit and their C4R extensions
  • baseline all workstations to the latest ISV certified drivers, reinstall the C4R v6 components using the .exe installer and flush all 4 caches being – CollaborationCache, PacCache, Communicator, User Temp Dir. This will ensure all workstations are at exactly the same Revit environment.
  • confirm that traffic to/from pubnub.com is successfully moving across your firewalls to/from the C4R workstations? That’s an important requirement for the Communicator panel; a key reliability and performance enhancement depends on this connectivity and without it the Communicator will fall back on an earlier implementation behavior which is known to be less reliable.
  • ADSK recommends that all users should use the personal accelerator.
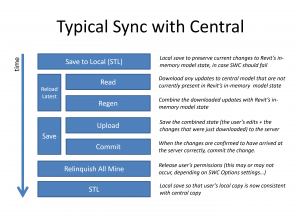
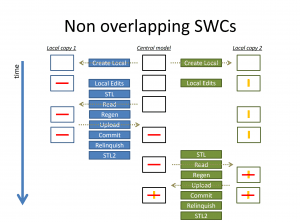
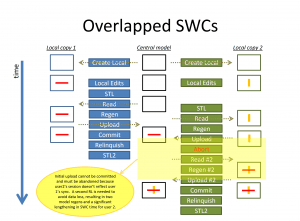
  • To the best of each user’s ability, ADSK recommends self-scheduling SWC activity by using the Communicator timeline to avoid syncing when another user is syncing. See images below to help the team understand why this is important.
  • The success of this project likely hinges on the team’s ability to develop a way to coordinate SWC activity, as poor SWC scheduling is responsible for the major pain point for project teams. It should also be noted that the most egregious cases of poor SWC performance are due to users failing to self-schedule their SWC activity. When multiple SWC operations are in-flight simultaneously, Revit must go through multiple RL phases to maintain model and data integrity. this has the effect of greatly expanding SWC time, which is why we recommend that users check in the Communicator panel to see if a SWC is already in progress before attempting one. See the attached pptx for an explanation of why this is important.
  • Please review this Link here to understand the Proxy Server settings to unblock Autodesk A360 services
  • Please use this Link here for Proxy Server and domain exceptions for A360
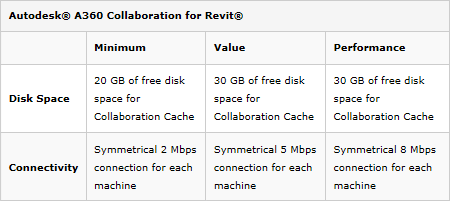
  • The table below provide further information on minimum system requirements.
  • Note the connectivity speeds:

Sync with Central diagrams

As you can see below, when SWCs ‘overlap’ there is a performance hit. Good C4R management will require:

  • attempting to sync on a schedule… because modelling projects are easy to schedule, right?
  • using the Communicator (or some other IM tool) to keep team informed that you are syncing / about to sync. You could use a Slack channel per RVT for this?

I have added the above information to the Best Practices section of the Revit Collaboration Public Help notebook I created:

https://1drv.ms/u/s!AmvJg0j4a7kRo61EJKCpdkr3lhTecg

When working with a large project, you may often close all or most Worksets for performance reasons.

Secret #1

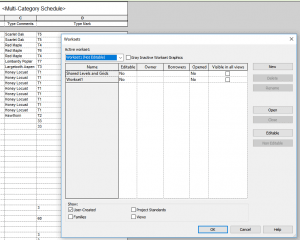
Did you know that objects still show in Schedules when the Workset is closed? And even if the Visible in all views checkbox is unticked?

Additionally, the Schedules dialog does not give us an easy method to filter by Workset. Sometimes this results in some weird workarounds like using Dynamo to copy the Workset name to a parameter in each element (yes, I have seen this on real projects).

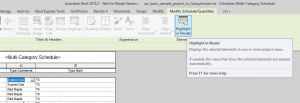
But what happens if we try Highlight in Model now, with these elements on closed worksets?

Secret #2

Interestingly, Revit will immediately and transparently open the Workset that the object resides on. This happens even if Revit can’t find the object in a view (such as because the Workset is set to be invisible in all views). You will not be warned or asked about this ‘open Workset’ action.

This automatic action does not create an entry in the Undo list, and therefore you must manually open the Worksets dialog and close the Workset yourself.

I’ll leave it up to you to decide if this is desired functionality or not? But it is definitely something to be aware of when working with Revit Schedules, Closed Worksets, and the Highlight in Model button.

Revizto works by maintaining a local copy of cloud models, that are synced periodically with the cloud. The Issue Tracker will always try and automatically remain in-sync if an internet connection is available. This allows you to do things like download all current models and sheets to an iPad, head out on site (where you may have no internet) and do some work, come back to the office and then sync the changes.

However, from time to time you may want to clear the cache of a particular project. Typically, this is so you can confirm you are running an identical version to the current cloud model. To do that, you have to clear your local cache of that particular model. Here is how you do it:

1. Sync the model if you have any recent local changes (this is to upload all of your local work)
2. Close Revizto.
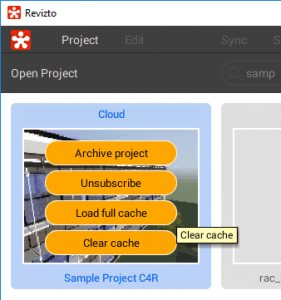
3. Open Revizto. While in the project gallery, click on “Edit” button in the top right corner. Then click on that project and choose “Clear cache” option.


4. Open Revizto project. Your project will re-sync with the latest cloud version.

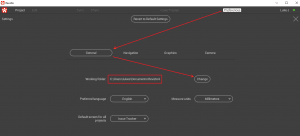
What if you want to completely remove all local project data at once? Or possibly, you are running out of disk space in the normal ‘working folder’ location (yourUser\Documents\Revizto4). In that case, you want to move the working folder. Then Revizto will download the latest cloud data for every project. As above, ensure you have synced all your local models first… Then take these steps:

  1. Open Revizto
  2. Click Preferences
  3. Click General tab
  4. Select ‘Change’ next to ‘Working folder’ and choose a new, empty folder. It should have sufficient disk space to download all the project data:

You probably should close and re-open Revizto, and then go ahead and open your project. Again, it will sync all data from the cloud for you.

Autodesk is looking at using “machine learning to automate speech and image recognition, make photos and videos searchable using system generated (automated) SmartTags, and to provide metrics on project safety, productivity and quality.”

From email:

Investment in Smartvid.io. Today Boston-based construction-focused startup Smartvid.io founder Josh Kanner announced the close of the company’s Series A funding round for which Autodesk is a proud investor. Smartvid.io embraces machine learning to automate speech and image recognition, make photos and videos searchable using system generated (automated) SmartTags, and to provide metrics on project safety, productivity and quality. The investment is expected to accelerate the delivery of AI to the Architecture, Engineering, and Construction (AEC) industry and the built environment as a whole. Smartvid.io is also now integrated into Autodesk’s BIM 360 software. Mr. Kanner was the co-founder of Vela Systems, which ultimately became Autodesk BIM 360 Field after Kanner’s company was acquired by Autodesk.

Revit creates a bit of a mess sometimes, leaving behind backup and journal files that can take up disk space and clog your system. I have posted about a few cleanup tools before, including:

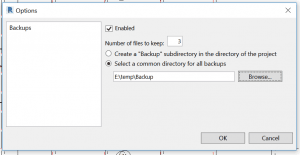
You may also have heard about MoveBackup. This tool was created by Maxence Delannoy and has now been renamed to Wormhole for Revit. It comes as a 30 day trial and it can move your Revit backup files to a directory that you choose.

You can download the Revit 2016 – 2018 version here and the 2015 version here.

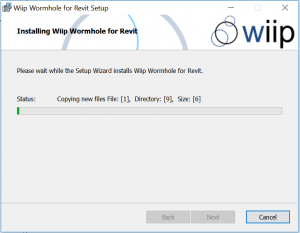
Installer
Set Path
Backups moved automatically

From the main page:

Wormhole for Revit with 2018 support (version 0.5

en-US version: https://docs.google.com/uc?export=download&id=0B_UzIApsl084UEdEb2dCQ2dsckU

fr-FR version: https://docs.google.com/uc?export=download&id=0B_UzIApsl084eFlHdjZNbTEwWms

Support for Revit 2015 has been dropped. So if you’re still using this version of Revit, please download the 0.4 here : https://docs.google.com/uc?export=download&id=0B_UzIApsl084dG9wWTYxUmRoTlU