Navisworks is pretty amazing at handling a huge set of properties across a large amount of elements. However, sometimes it can be hard to diagnose why a particular parameter, such as a Shared Parameter, is not displaying or grouping in a way that you might expect.
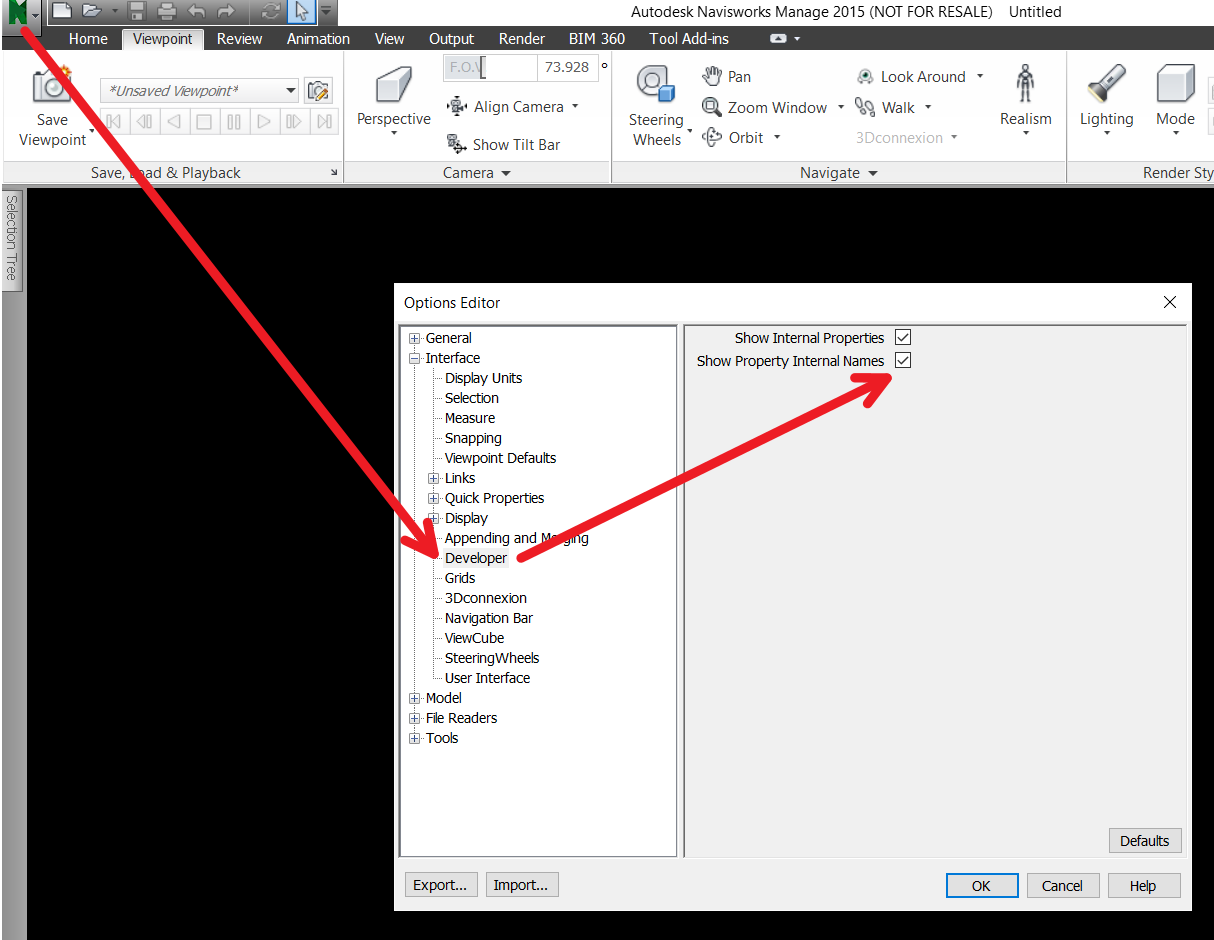
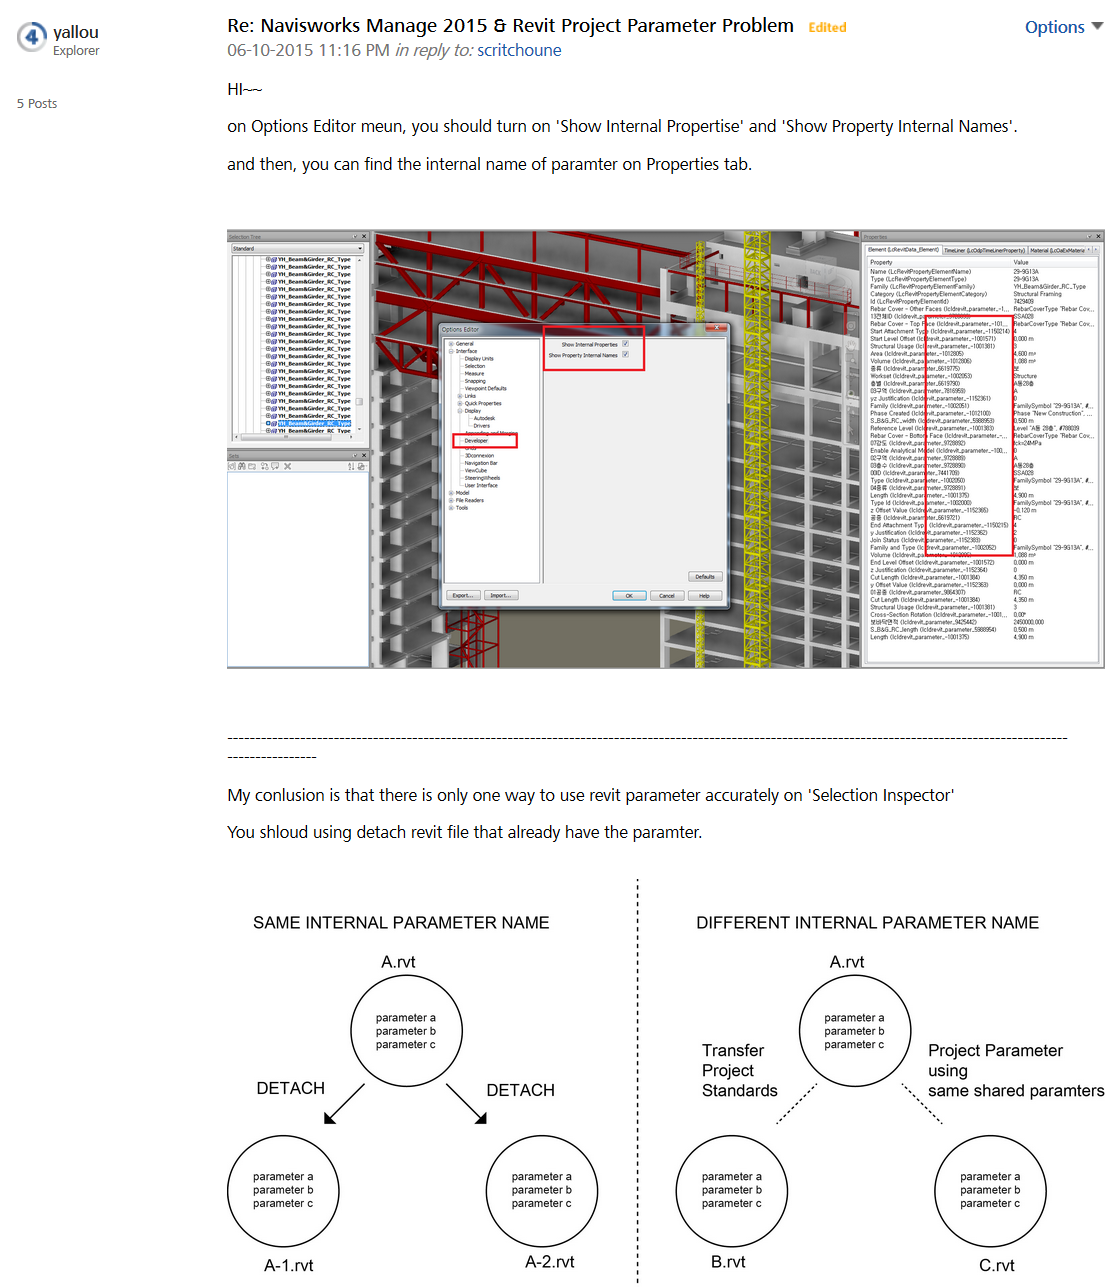
To figure out what is going on, go into Navisworks Options – Interface – Developer and tick the two boxes: Show Internal Properties Show Property Internal Names
Now, when you use the Properties palette you will see additional information in brackets, which essentially amounts to the Navisworks ‘internal parameter name’ for a given piece of data. Pretty cool!
You would like to assign OmniClass numbers using the 2012 standards but are not able to because the default file shipped with Revit provides numbers from the previous standard.
Symptom: When trying to assign OmniClass 2012 numbers in the family editor the numbers supplied from the table are incorrect.
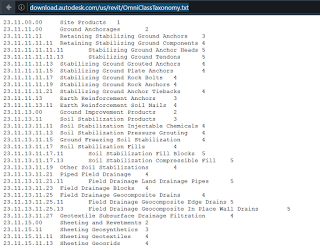
Issue: The OmniClassTaxonomy.txt file installed with Revit is an older version of the table. The file installed with Revit needs to be replaced with the updated OmniClassTaxonomy.txt file which can be downloaded here.
Solution: Download the attached file and follow the procedure to update the file in the Revit installation.
Note: The AppData folder is a hidden folder, so you need to first enable the viewing of the hidden folders on your system before performing the procedure.
Navigate to C:Users\AppDataRoamingAutodeskREVIT Example: “C:Users\AppDataRoamingAutodeskREVITAutodesk Revit 2015”.
Rename existing “OmniClassTaxonomy.txt” to “OmniClassTaxonomy_bak.txt”.
Copy the downloaded file to this location. Repeat this processfor each user on this local machine.
In addition, copy the file to the following location. This step ensures that any new future users of this computer will get the updated file. C:ProgramDataAutodesk\UserDataCache Example: “C:ProgramDataAutodeskRVT 2015UserDataCache.
Repeat process for each Revit product installed (RAC, RME, RST….) as needed.
Note: When using the updated OmniClass file, category sorting is not available. You must manually navigate to the correct category to assign an OmniClass number.
Update notes forIFCforRevit2015 (v15.6): General:
– Added some minor export performance tweaks.
– Added IFC4 Design Transfer View as an option. With this option, Revit will attempt to create IfcAdvancedBReps in some cases.
– The import log file now contains the importer version at the end.
New Export Functionality:
– Display the element id for each element as it is exported.
– Create IfcGroups for multiple IfcReinforcingBars created by one rebar element in Revit.
– (IFC4) Add support for ConicalFace and fix RevolvedFace forIfcAdvancedBRep.
– (IFC4) Reuse IfcCartesianPoints when exporting an IfcAdvancedBRep.
Export Bug Fixes:
– Associate some entities with IfcBuilding if they have no other spatial containment, or there are no levels.
– Correctly export DirectShapes of Ramp, Stairs, or certain MEP categories.
– Correctly relate IfcAssembly to IfcBuildingStorey in certain cases.
– Export some elements with geometry that couldn’t be correctly split into multiple solids.
– Fix crash in certain cases where we can’t create a valid tessellation for a face.
– Fix crash when exporting certain vertical roofs.
– Fix crash when exporting elements with no bounding box when splitting elements by level.
– Fix crash when exporting filled regions with invalid color definitions.
– Fix the name of IfcArbitraryClosedProfileDef entities.
– Never export curtain wall panels independent of their curtain walls.
– Remove invisible geometry when exporting families when exporting elements in the current view.
– (IFC4) Correct export of IfcMechanicalFastener.
New Import Functionality:
– Add support for extra currency types.
– Allow import of unbounded grid lines, with a warning and an arbitrary length.
Import Bug Fixes:
– The IfcSweptSurface “Position” attribute is now optional.
When setting upViewFilters in Revit, you can only select Filter parameters that are ‘common‘ among the Categories that you have ticked… If I haven’t lost you yet, here is a quick way to build aViewFilter that uses a custom parameter (like a Shared Parameter) and works across all possible Categories.
Firstly, add the Shared Parameter toall Categories using Manage – Project Parameters
Create a new Filter
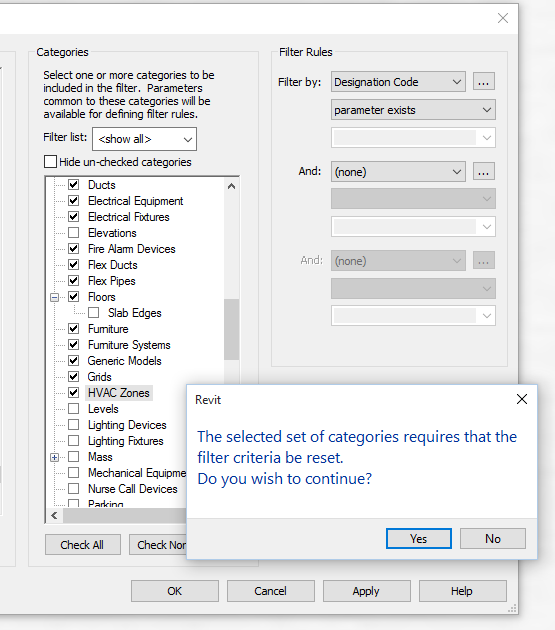
Tick one of the top Categories in the list, and choose your desired Shared Parameter as afilter criteria
Now, start ticking the categoriestoapply this to one by one…
As you go down the list, Revit will occasionally give this prompt: “The selected set of categories requires that the filter criteria be reset“
When you see this message, click No, and then move on to ticking the next Category
In this way, you retain you Shared Parameter as aFilter Criteria for as many Categoriesas possible…
subtitle: Most Revit hacks ever in one blog post??
Have you ever faced flexduct modelling problems in Revit? Revit fails to generate these in some cases, usually when the spline becomes too tight for the geometry engine to handle.
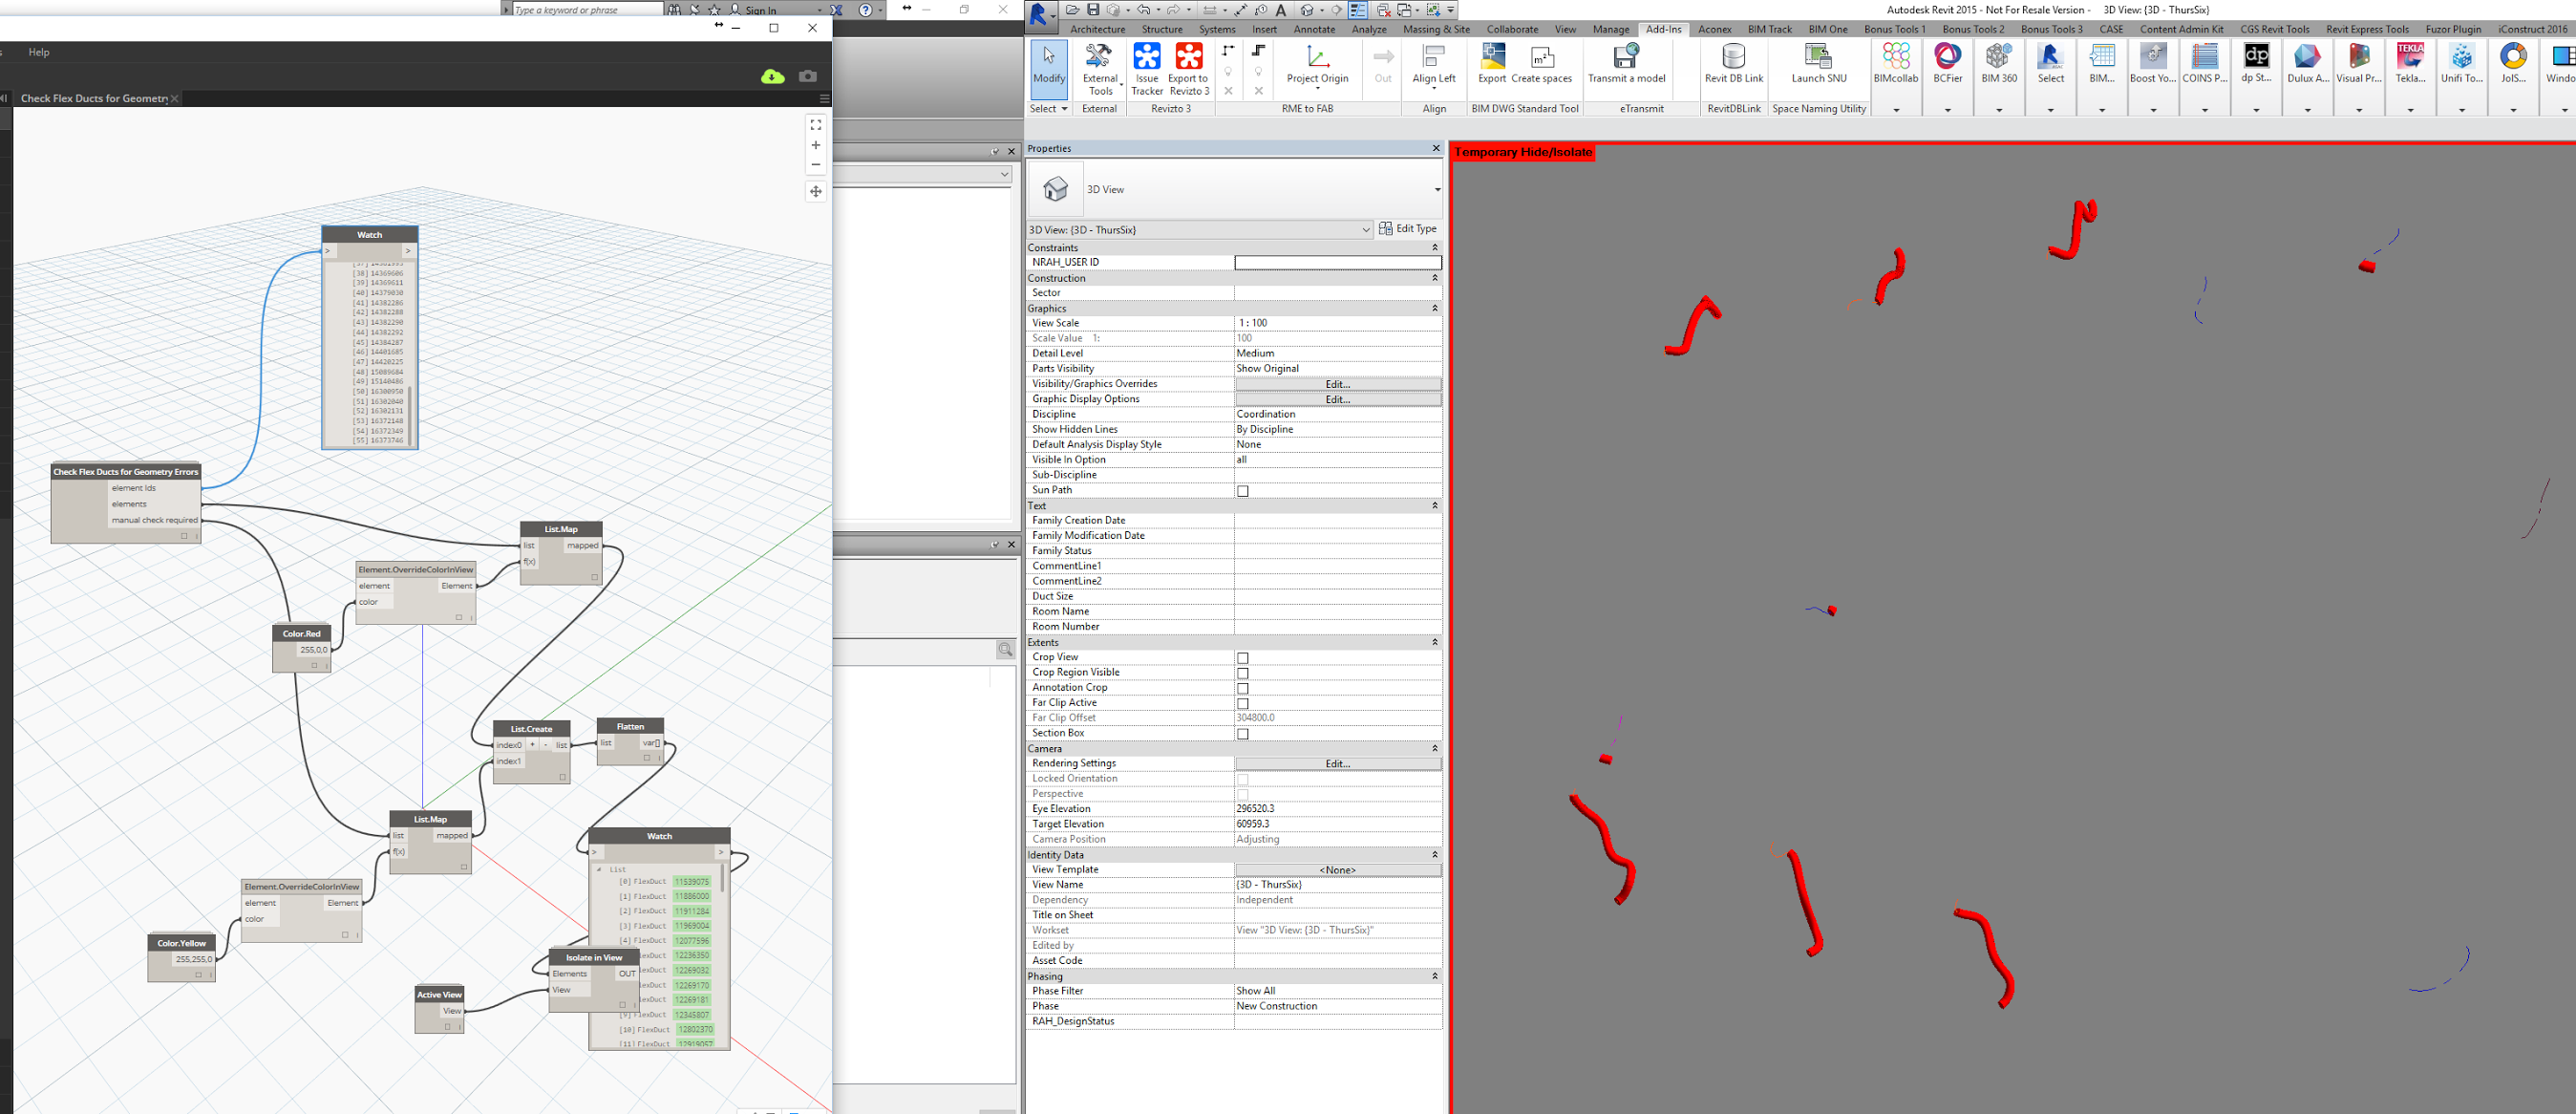
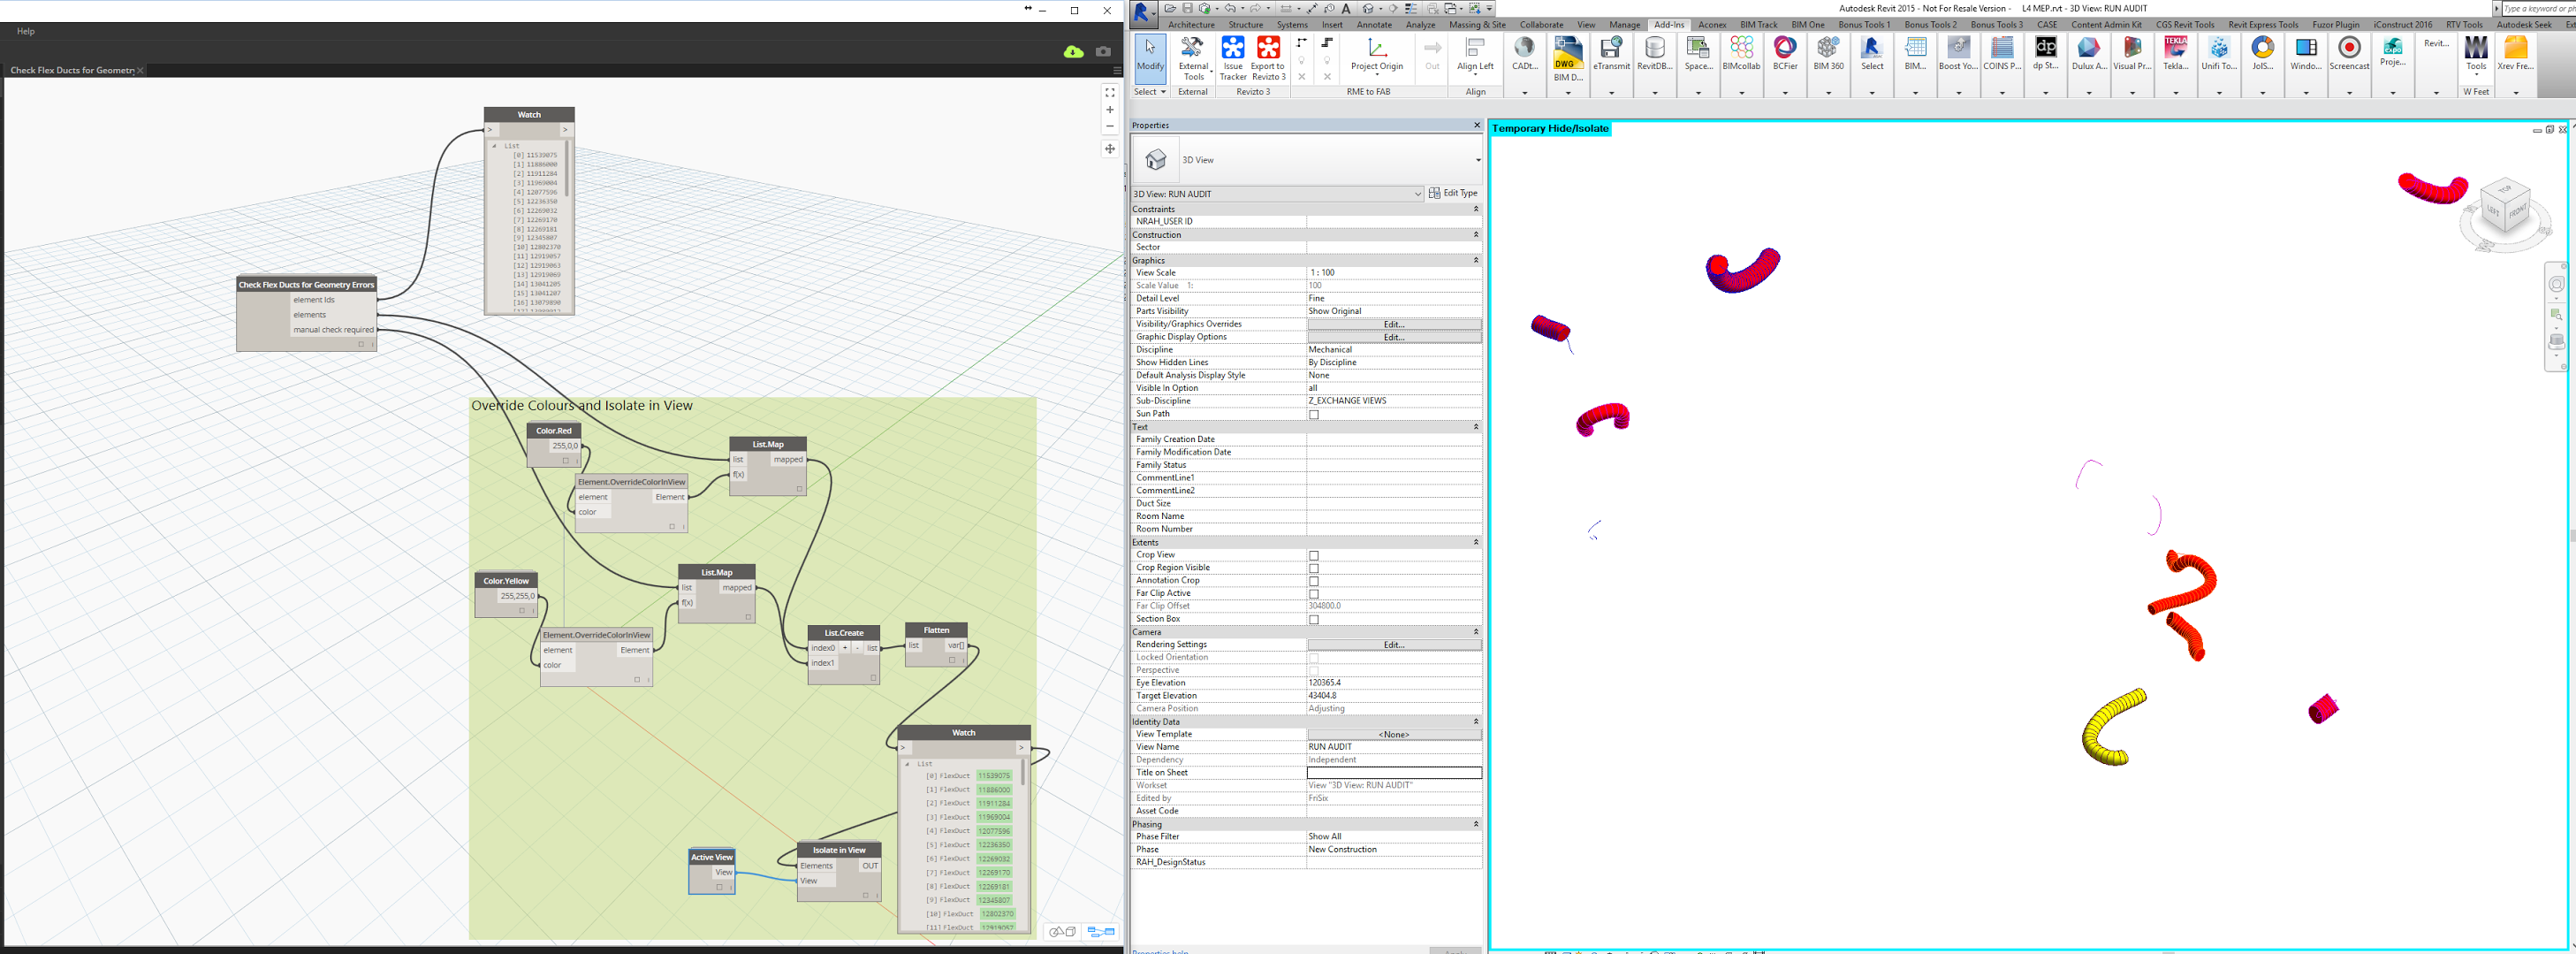
With a view to finding and correcting this, I built an audit tool that basically goes through these steps:
Collects a list offlexducts in the current model
Checks their 3D geometryagainst what it should be (usinga Volume calculation)
Reports a list of problem element ids
Overrides these elements to red in the current view
Isolate the elements in the Current View
It looks something like this:
Having established a list ofgeometry failure objects, what can we do to fix them? Well, essentially they are failing because the spline curve is too tight for the relevant duct or pipe diameter, so we need to rationalize or ‘smooth’ these curves out until we get to a point that the geometry works again.
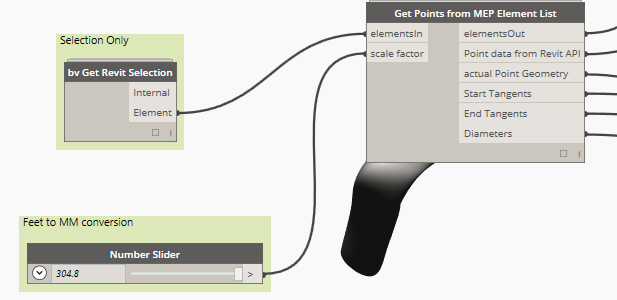
So first ofall, we need to get the driving points from the Revit MEP element, so that we can start playing with curves. At the same time, we should get start and end tangents, and Diameter too. I created this node in Python for this task:
You can see that I have added conversion input here, because the units coming out of the API were a little weird (back to the old feet units thing). Ok, now that we have points, we have to regenerate the driving curve and then play around with it a bit… it looks a bit like this:
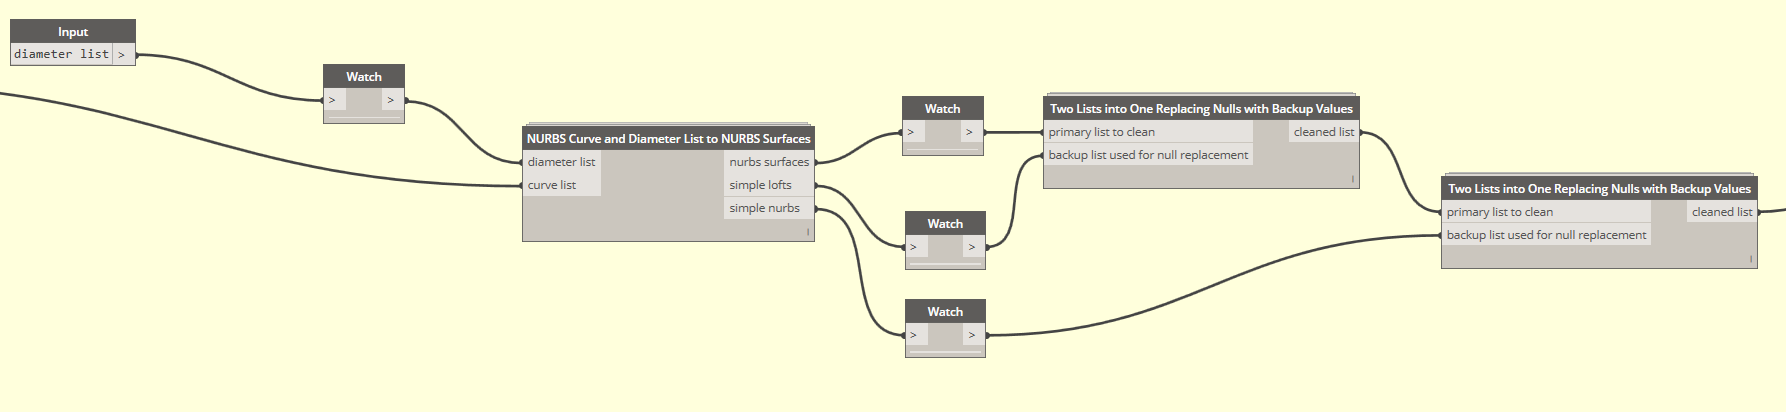
You will notice I try both Nurbs and Polycurves, because sometimes either will fail. Using both seems to be pretty reliable.
Then, with some nice Nurbs curves in hand, we have to try and make some circular-ish sweeps along them. I actually sampled a number of circle profiles by 3 points, and used nurbs surface UV degree of 3, as this seemed to be the most ‘reliable’ form creation for strange paths. However, even this still failed occasionally, so I created some ‘backup’ forms (using only start and end circle profiles), and then I rolled them all together into one (hopefully) reliable ‘no nulls’ list:
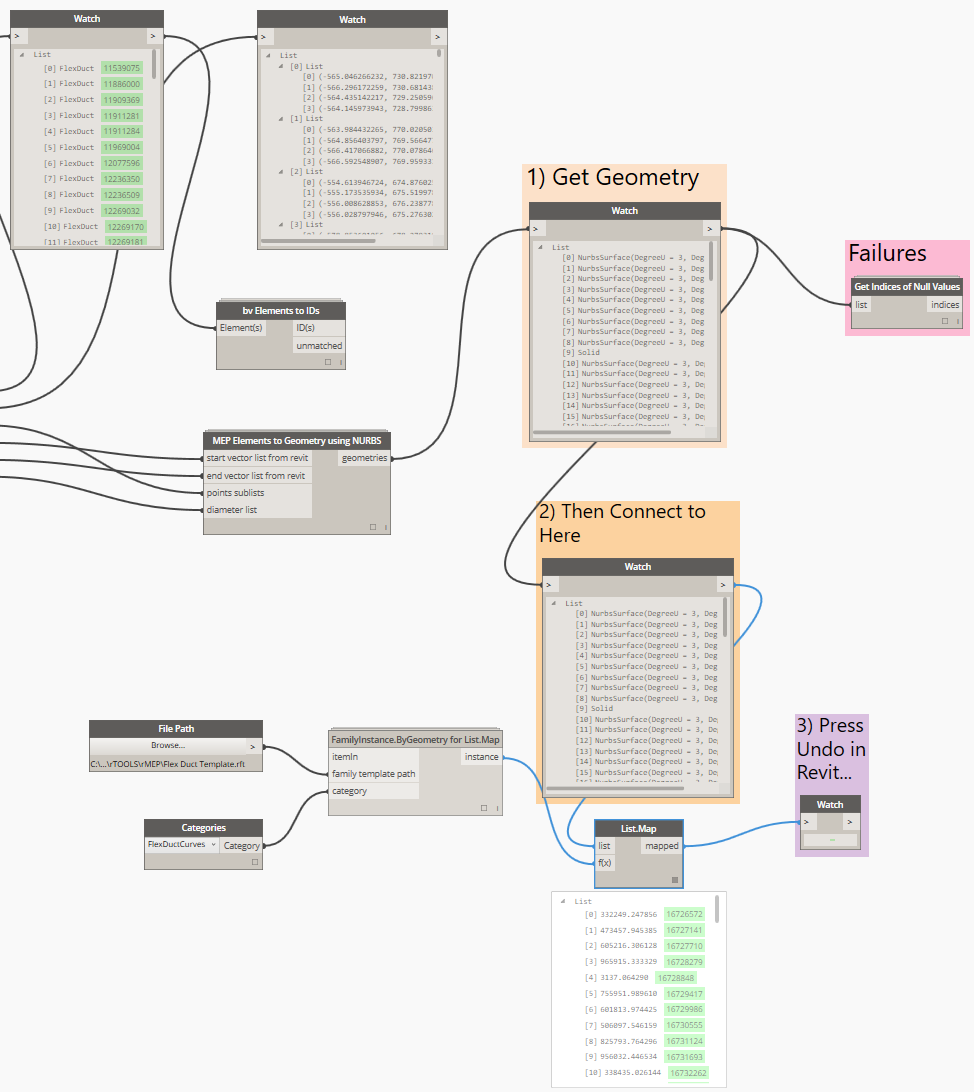
Now we can basically take a set ofFlexDuct elements (where Revit is failing to generate the right geometry), and smooth out and generate our own FlexDuct ‘form’ in Dynamo. From there, we have a few options to get it back into Revit:
ye olde but pretty reliable ImportInstance.ByGeometry or .ByGeometries
Dynamo 0.9 users can go with DirectShape
you could try betaSpring Nodes FamilyInstance.ByGeometry (thanks to Dimitar Venkov)
we can also use Mesh Toolkit to convert to Mesh, make Watertight, and export to file..
I wanted the most ‘Revit’ solution, because after all, this blog is about What Revit Wants! So for me, that was trying to get these forms into a family on the right category. First problem: there is no FlexDuct Family Template available, because that just isn’t allowed… so I had to make one usingthe IFC roundtrip (with custom IFC mapping files), then saving inplace to a component family, and renaming to RFT.
Now, with the Geometries in one hand, the FlexDuct Family Template in the other, and a wrapper node to run FamilyInstance.ByGeometry once per geometry, let’s see what happens!
Well, initial results from running the node weren’t great, but I noticed that the families were getting generated in the 3D View in Revit, and then disappearing… so I went to Revit and pressed ‘Undo’ and all my nice new FlexDuct Families re-appeared!
Screencast:
Want to give it a try yourself? Here’s how to use the dyn:
Go to a 3D view and select some FlexDucts
Open Dynamo, and the definition from link below, and press Run. Confirm there are no ‘failures‘…
This should collect list ofGeometry
Connect the two orange boxes, 1) and 2)
Press Run again
This should have made families for you, usinga random number as the family name
Press Undo in Revit to make the families ‘reappear’
Close Dynamo and save your project
You may need to open individual families and set the Subcategory to something new so that you can override colours and materials in the Project.
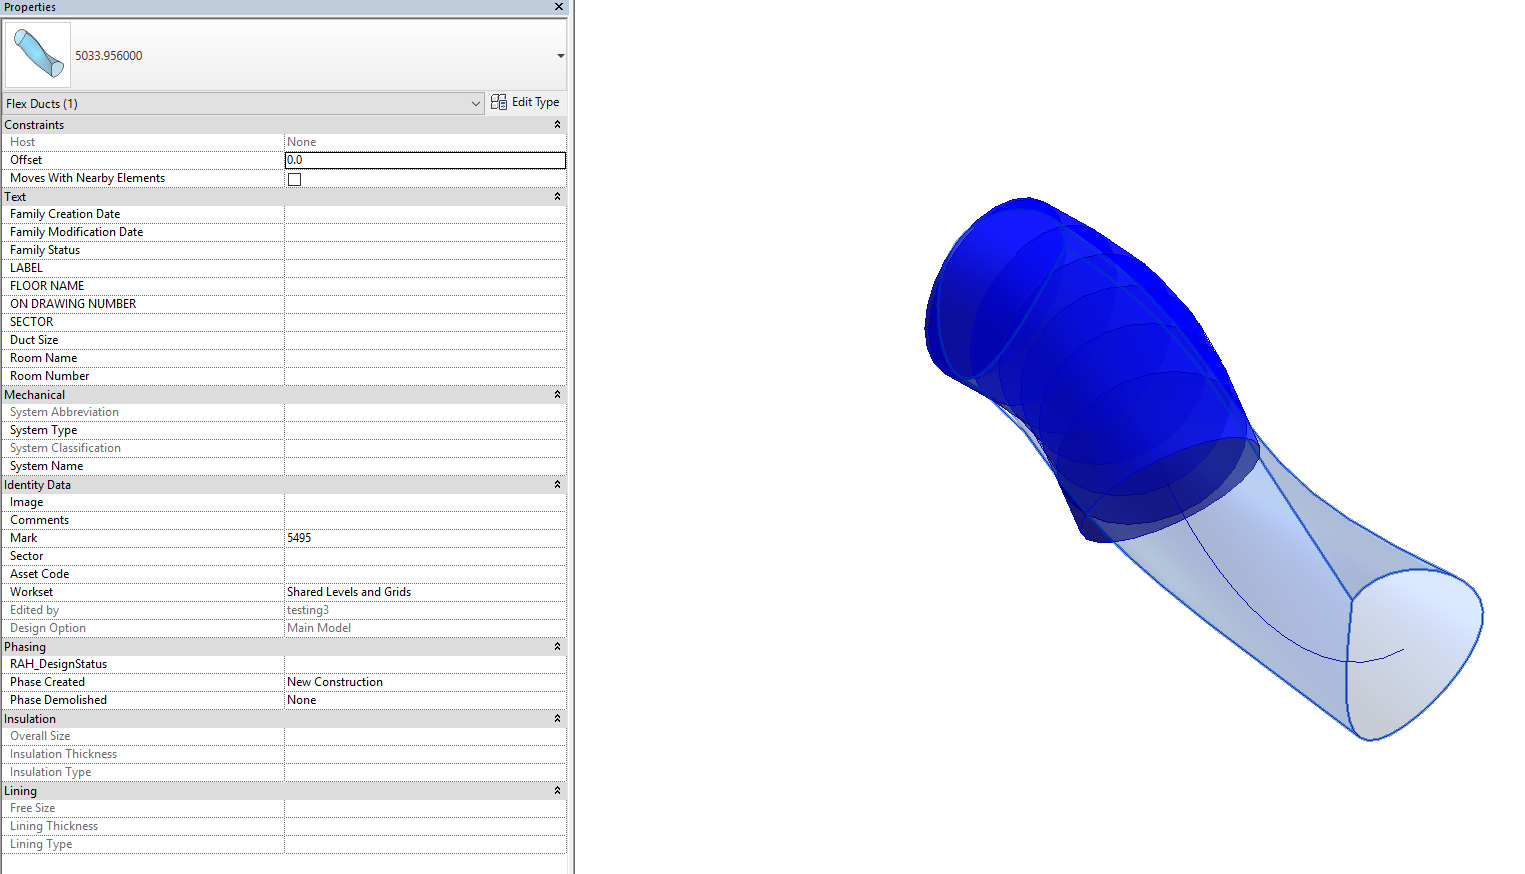
Here’s one instance in the project:
This is the main definition:
This is the project browser list of families:
Needless to say, this workflow comes with as many disclaimers as possible, because we are:
using Dynamo before v1 (0.8.2 in my case)
using hacked family templates to
make component families on categories they shouldn’t exist on with
a beta custom node and then
working around some weird issues by pressing Undo after running Dynamo
etc 🙂
You will need Bakery package (version from around 9 December 2015, and its dependencies) to get all this working. Here are some other required resources for download: FlexDuct family template and main Dynamo definition
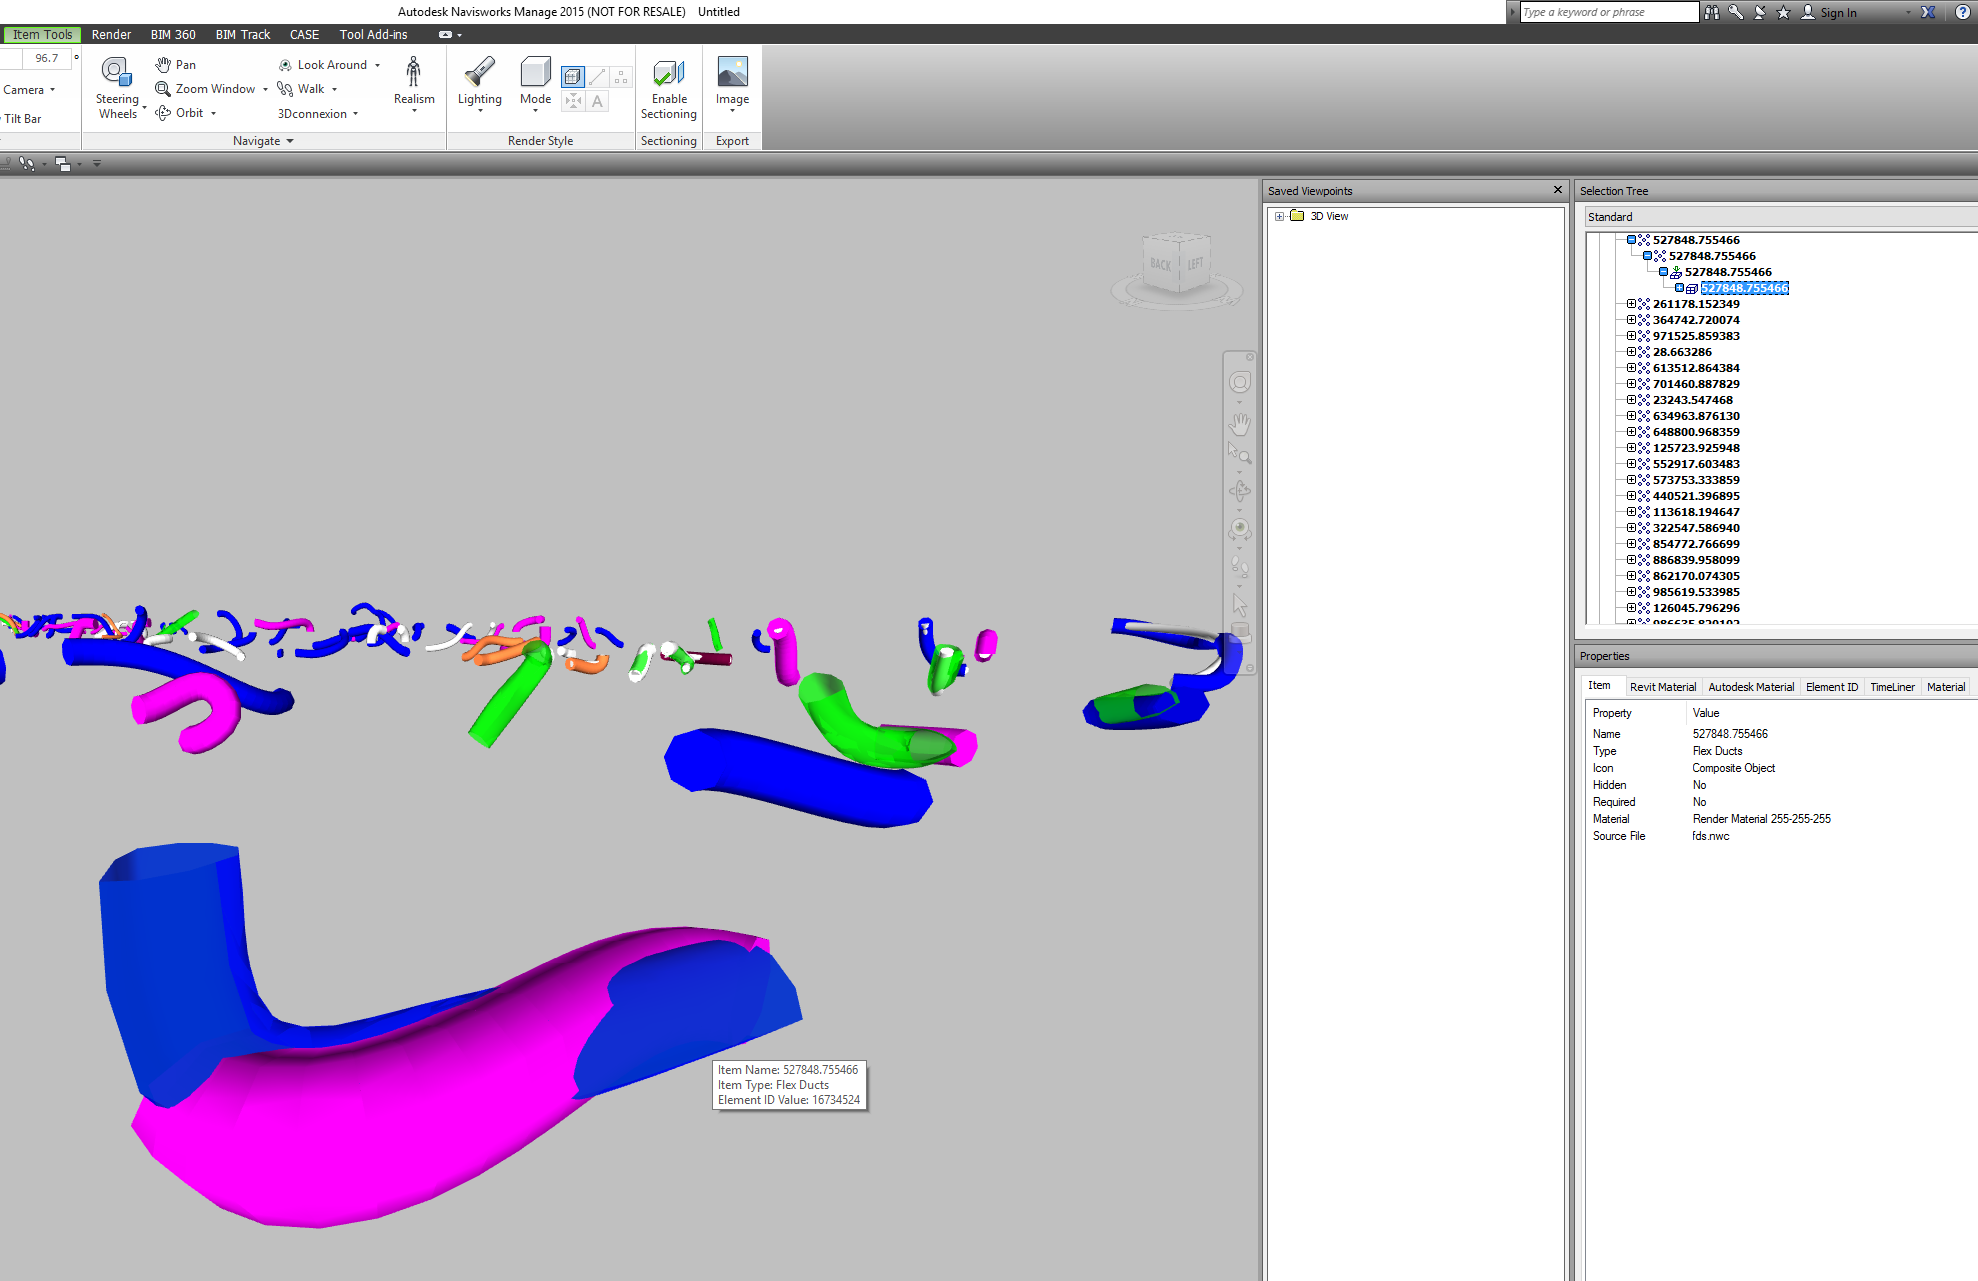
Exporting these families using Navisworks exporter seemed to work ok, as shown here:
You can also import building models to Revit from Google Earth, but in my experience the families created by CADtoEarth are not realistic in terms of height:
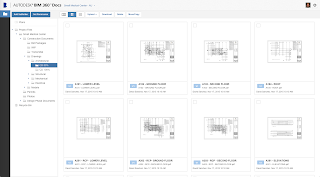
Interestingly, there is some talk of a completely free offering, after the free preview: Autodesk is now accepting reservations for a limited release and free preview version of Autodesk BIM360Docs at www.bim360.com/docs. The product is expected to come to market in early 2016. In addition to the free, limited version of BIM360Docs, Autodesk will offer the option to subscribe to additional capabilities that scale to meet more advanced needs of construction firms. The product will initially be available in English only.
Click Reserve your spot here and then fill out the form if you want to get access to the Preview:
Details:
Publish and manage all project document file types in a single system with support for unlimited users and unlimited storage.
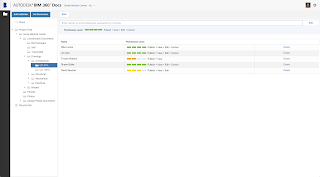
Maintain control and secure project data with folder-level, permission-based access.
Easily extract and organize individual project documents from multi-sheet files & 3D models, featuring title block OCR for organization.
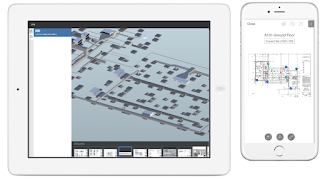
Ensure that the entire project team is working with the correct documents with version control and online/offline access on mobile devices.
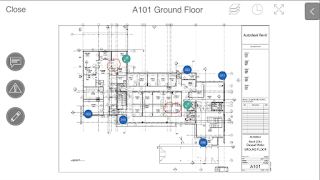
View 2D PDF drawings with optimized zoom capabilities to quickly review details.
Create and share markups for collaborative design reviews with the team.
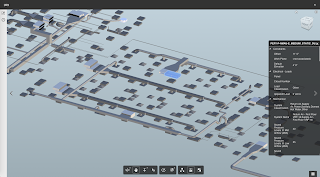
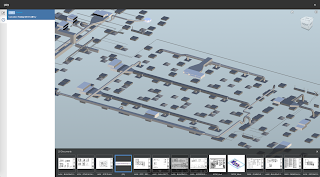
View and navigate 3D models, access object properties, use sectioning tools and explore models with gravity-based walk throughs.
Quickly navigate between 2D plans and 3D models on any device, without having to close the viewer.