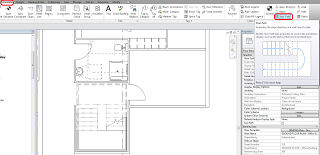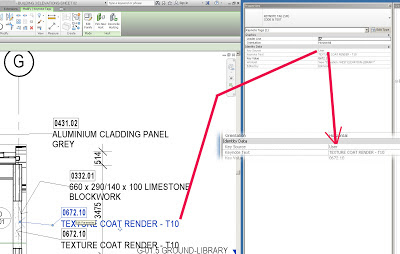
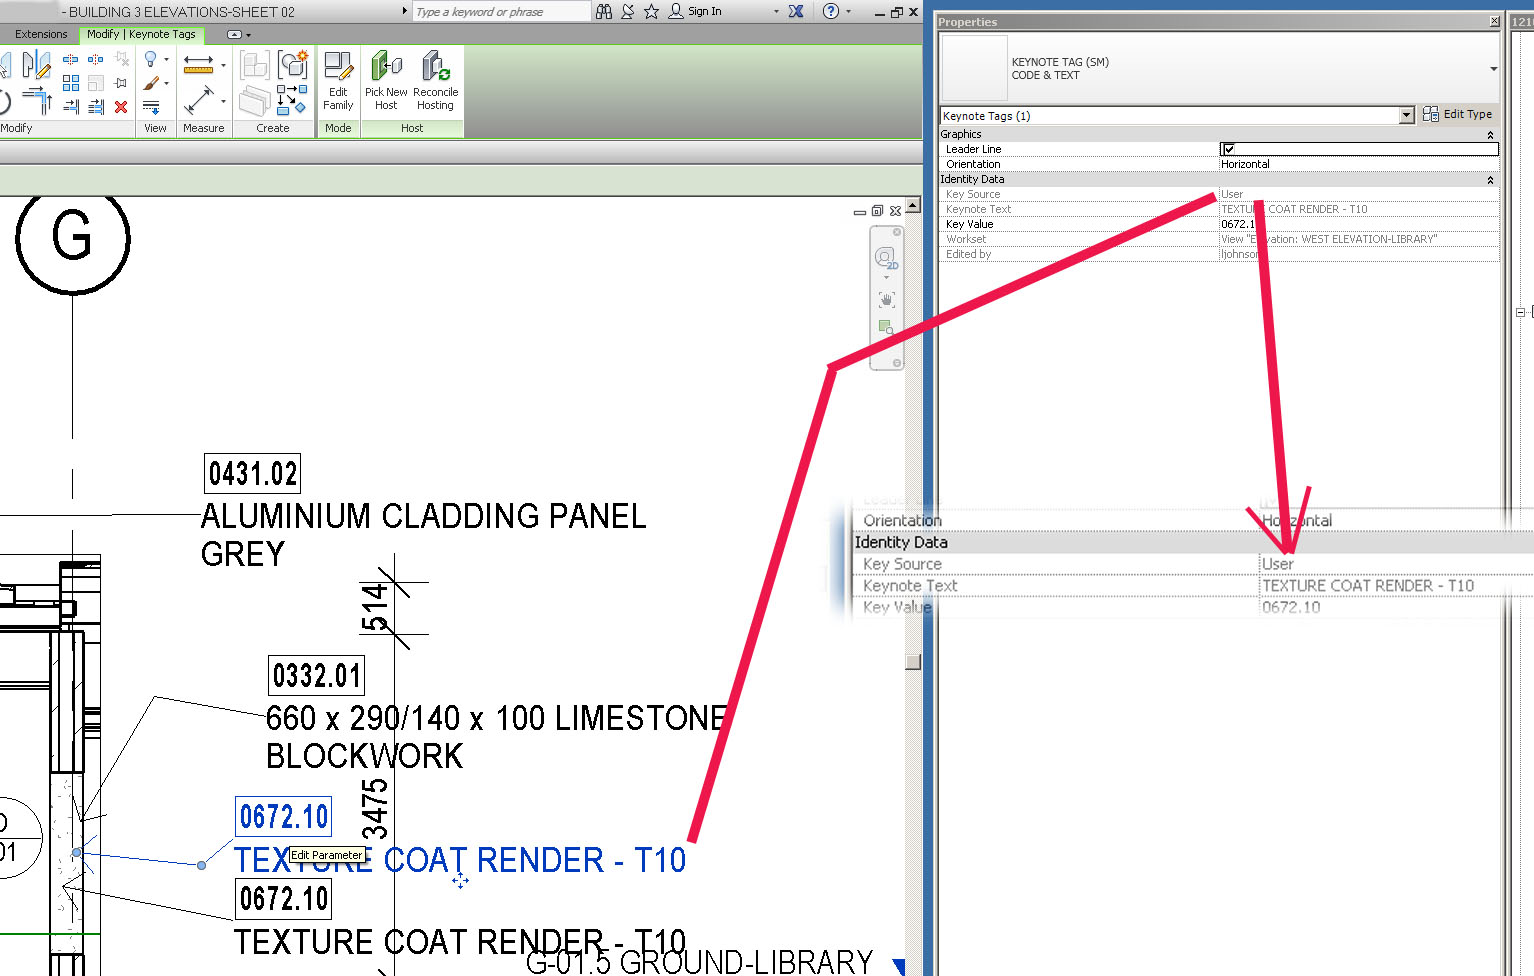
Easy – just check the Properties for that Keynote:
What Revit Wants

Easy – just check the Properties for that Keynote:
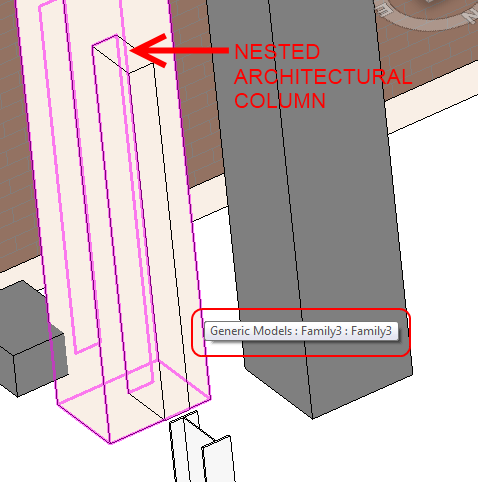
Ever wanted to get a Tag to pick up the hardcoded Elevation value given to a nested Family? Then check out this great little thread and cool answer by Julien!
Answer:
You need to set a SP in the nested family.
Make the plate geometry attached to ref planes that are not the 2 from the template. Assign a SP to the distance between the RP at center of geometry and the RP that defines origin. SP will be by instance. Beware of directions for correct behavior when loaded in the host.
In the host family, add the same SP, select the plate, and in properties palette, look for the tiny button on the left. Click and choose the SP you’ve added. The insert point of the plate must be set to the ref level of the host.
Now you have the elevation of the plate driven by a SP in the host. Create a tag for this SP. You’re done.
By Julien Benoit at
How can I get this parameter into a tag?
Some of you probably already realise that Case Apps have released a suite of Subscription tools (in other words, these are not free).
One in particular caught my eye – Super Tag. It provides a “simple means for tagging specific family types by category using a specified tag on as many views as you choose.”
Video:
Offsite link:
http://apps.case-inc.com/content/subscription-super-tag
Steve posted a few interesting things about Tags recently, including:
These categories are immune to Rotate with Component:
Foundations, Floors, Ceilings, Roofs, Furniture, Furniture Systems, Casework, Generic Models, Structural Columns, Detail Components, Massing, Mass Floors, Curtain Panels, and Specialty Equipment.
and
Architectural Columns, Shaft Openings remain immune to tagging at all.
Now, in the first instance, this proves again why some holistic Category Definition document is urgently needed. I have called for this a few times before, but I haven’t seen one yet. In relation to Steve’s post, the Category Definition document would have to further describe how the Tags of each Category operate…
Secondly, I’m assuming that Steve means you can’t Tag by Category on Architectural Columns. Because you can use a Multi-Category Tag on Architectural Columns without any issue. Obviously, this is an annoyance. A couple of ideas on how to get around this:
Read more:
Revit OpEd: Rotate with Component
Pre-2013 sketch based stairs have the Stair Path bound to the actual Stair element. In Revit 2013 when using Component Stairs, the Stair Path becomes a separate element. Think of it as a special Tag for Stairs. The Stair Path tool is located on the Annotate ribbon:
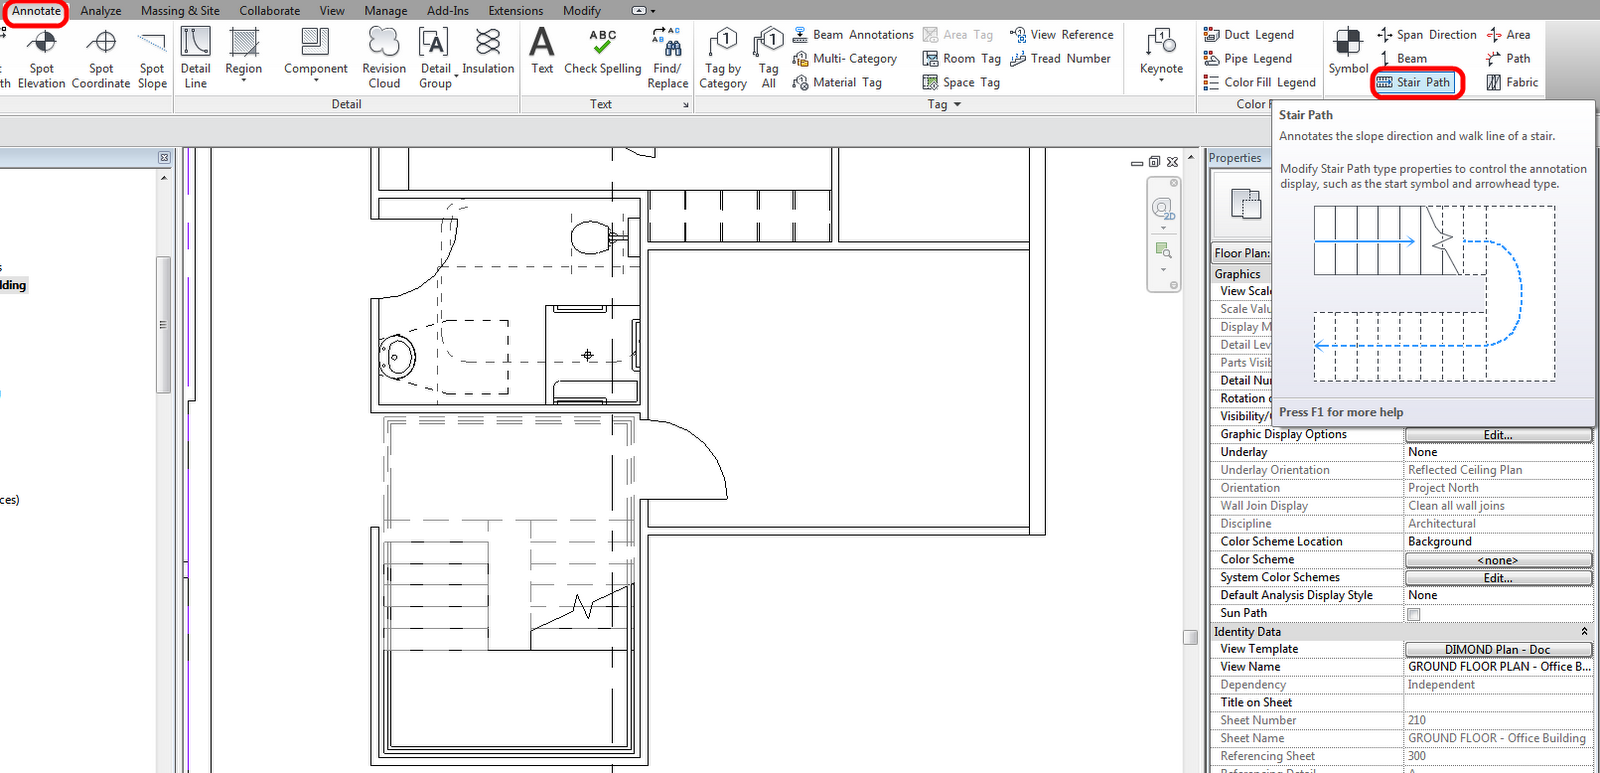
You can safely delete the path from views where you don’t want to see it. It seems that these are automatically created in certain Plan views – I’m unsure what the ‘rule’ governing the automatic creation of Stair Paths is, yet.
The Stair Path is a System Family. You can Duplicate existing Path types to create and customize the Stair Path to your liking:

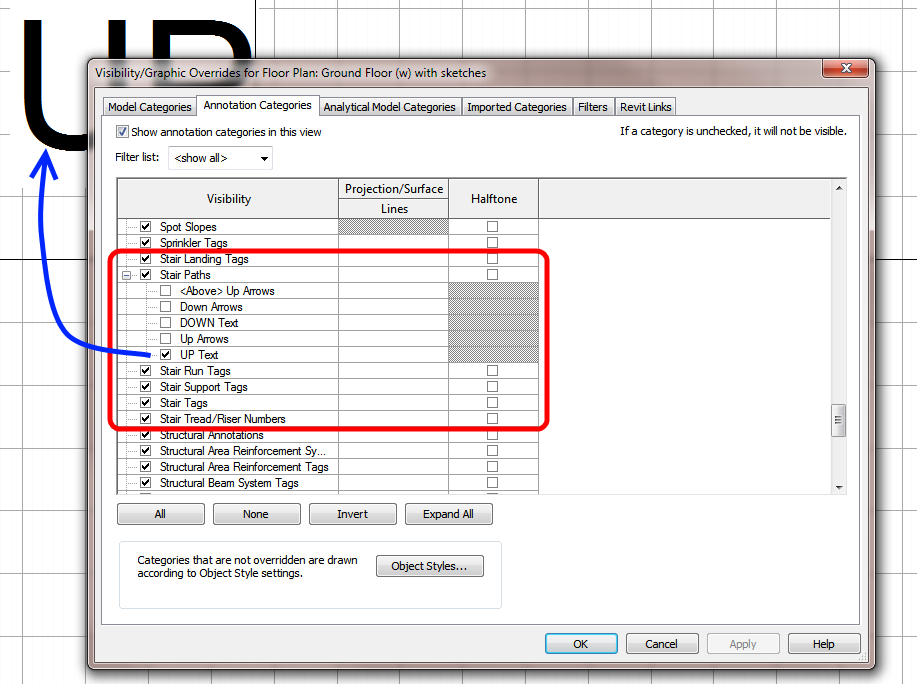
Also, the Categories related to Stair UP and DOWN text have all been moved to the Annotation Categories in Visibility / Graphics! You won’t find them under Model – Stairs anymore:
You can learn more at:
Annotating the Stair Path – WikiHelp
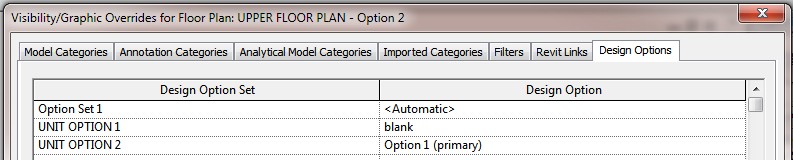
Here is the problem – I have two linked files, set as separate options in the same Option Set. If any of the Room elements overlap in the two linked files when placed in the host file, and I have the view set to a Secondary option, the Room Tag fails:
None of the created elements are visible in Floor Plan: UPPER FLOOR PLAN – Option 2 View. You may want to check the active view, its Parameters, and Visibility settings, as well as any Plan Regions and their settings.
If I move the link in the secondary option AWAY (geographically) from the link in the primary option, the Room Tags work fine.
The workaround that I am currently using is this:
EDIT:
If the above doesn’t work for you, do this:
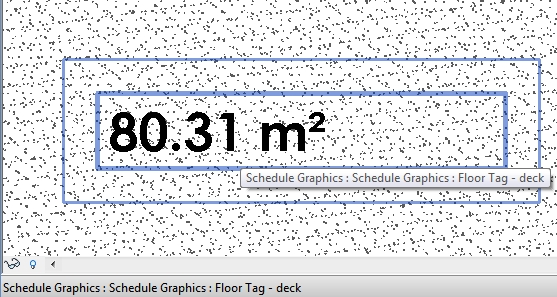
As you may have realised, you cannot add the Area parameter to a Floor Tag annotation.
Here is a workaround:
OK, I understand that this is not the most manageable or elegant solution, but it may be useful in certain situations.
This is a subtle change that you may have missed. In Revit 2011, we had to access the ‘Section Tag’ properties through the Manage tab on the Ribbon (which was a bit annoying).
However, in Revit 2012 we can access the Section Tag properties directly from the properties of any Section that we have selected! See images below:
 |
| The old way |
 |
| Click on the ‘dots’ to access the Section Tag properties |
This definitely allows for an improved workflow. It is a faster and more intuitive way to change the properties of Section Tags.
Sometimes you will want a component family to ‘always’ show a certain label. In other words, you do not want to have to manually ‘tag’ the family after placing it in project. How can we do this?Basically, while in the component family (for example, a Plumbing family), load the following Annotation family:
Generic Label.rfa Now, place an instance of the annotation family. You can drag the type directly from the Project Browser and drop it into the Ref Level view.You should link the parameter in this annotation family to a parameter from the Plumbing host family (you should know how to do this by now!) When you load this Plumbing component into the project, it now comes with an ‘automatic tag’, of sorts. However, there are some things to keep in mind – the main one being that this annotation will show in any view where the host family is included in the view range – it will not be masked by geometry.So, use this method with care. I have found it useful for things like a Hot Water System family, where you always want to show ‘HW’ in plan views. And I have handled the visibility issue with some trickly view filters.
A Note Block schedules the instances of a Generic Annotation (Symbol) in your project. They are useful for repetitive tagging of detail elements. I say ‘detail’ elements, because I feel that the use of tags should be in the following order of preference:
(The above is based on the fact that you should be trying to make your Model as intelligent as possible – detail lines and text should be the exception when using Revit, not the rule).Here is a crash course in using Note Blocks:
The Revit documentation shows this in use. You can label things with ‘numbers’ and then use the Note Block to refer these numbers to the appropriate text or note.This Note Block can then be placed on a sheet, just like any schedule.It is an interesting little tool, and it may be just what you need to solve that little problem that has been annoying you!