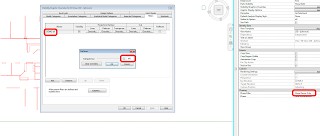
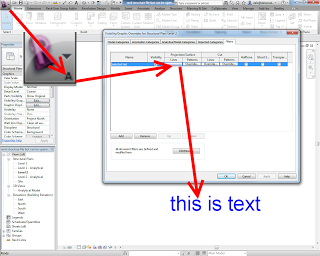
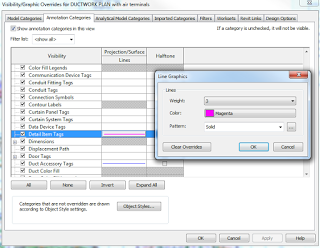
Did you know you can override the lineweights and colors of a Generic Annotation or Tag and its Leaders in Revit? You can use Visibility / Graphics annotation tab like this:

But what if you have two Tags that are of the same category, say Detail Item Tags, but you want to override them differently? You can’t use a normal model-based filter, as these generally do not act on annotations. However, you can use a selection-based filter…

Just:

  1. Ensure you are using a unique Type of Tag, then right-click, Select All Instances, In Entire Project
  2. Save Selection, and choose an obvious name
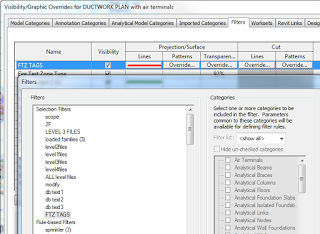
  3. Go to your view filters (in the relevant View Template if necessary) and add the Filter you named in step 2
  4. You can now freely override those Tag elements separately to any existing overrides

Now, keep in mind that you need to manually update this selection-based filter. You might make it part of your printing workflow to do steps 1 and 2 above immediately prior to printing, thus updating the saved selection set to be in line with the current status of your model.
In the Revit 2015 Project Environment, you can access the tools to Manage Selections from the Manage Ribbon:

However, this Ribbon Panel is not available on the default Manage Ribbon in the Family Environment  (Build 20141119_0715(x64) Update Release 5). What to do? Well, we can just add these tools to the QAT (Quick Access Toolbar), so then at least we can use them while building families. There are a couple of ways we can do this, but here is how you can do it while staying in the Family Editor:

  1. In the Family Environment, select more than one element
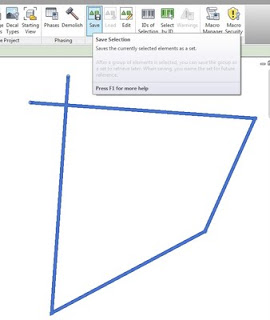
  2. Right-click on the Save Selection button that appears in the contextual ribbon (the green one) and “Add to Quick Access Toolbar”
  3. Save a Selection
  4. Select more than one thing
  5. Right-click on the Load Selection button that appears in the contextual ribbon (the green one) and “Add to Quick Access Toolbar”

You can also just add these items from the Project Environment, and as the QAT is shared with both environments, they will show when you edit a family.

However, while you can add the “Edit Selection” button to the QAT, it will not work in the Family Environment 🙁

I have been searching for a quick and easy way to compare exclusions between Group instances – and nothing really exists at this point.  So, I have developed a method to do this by using Revit and some schedules.  It doesn’t require add-ins, macros or extensions – but it does require full Revit 2014.

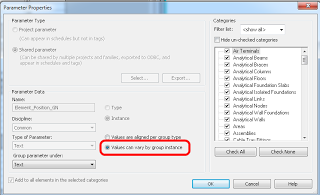
Part A – create a Shared Parameter, applied to all Categories, that can vary by Group instance

Part B – To automatically create selection sets for each group instance

  1. Open a new 3D view
  2. Edit the most complete version of the Group (the one with the least exclusions, ideally none)
  3. Select everything
  4. Save Selection set
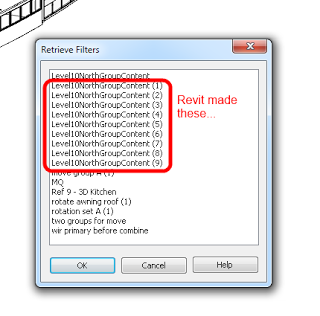
  5. Finish Group – Revit will automatically create a unique Selection Set for each Group instance

Part C – fill the parameter from Part A with appropriate values for each Group instance:

  1. Load one of the automatically created selection sets
  2. Determine what parameter value represents that Group instance (for example “Level 8”)
  3. Filter the Selection – you will need to untick Lines, Wall Openings and Curtain Wall Grids (these items do not accept parameters)
  4. Make Elements Editable
  5. Edit the Shared Parameter with the appropriate value and Apply (ie. “Level 8”)
  6. While the elements are still selected, save the filtered Selection Set
  7. Deselect everything
  8. Select the Group instance and Isolate it
  9. Load the Selection Set from step 6 and Temporary Hide
  10. Any elements left over will need to be selected and have the same parameter from step 2 applied to them
  11. Rinse and Repeat steps 1 to 10 for each Group instance you want to audit / compare.
Make a set of Schedules.  You will typically need at least these Schedule types (depending on what Categories exist in your Group):
  • Multicategory Schedule
  • Walls
  • Floors
  • Ceilings
  • Columns
Make sure the Schedules have at least these fields:
  • The Shared Parameter you created in Part A
  • Family and Type
  • Count field added and set to Calculate Totals
Filter the schedules – you can use the Shared Parameter you set up with an “is greater than” blank operator to show only elements that have something in that parameter.

Using Sorting to make things look right, you can end up with a schedule you can quickly scroll through to find differences in Model Groups:

Additionally, using Highlight in Model directly from the schedules will help you to figure out exactly what elements are missing or different.

EDIT Along similar lines, you can check out Dave Light’s post at:
Revit : Scheduling Apartments

It can be difficult to stop Demolished items from occluding New items in Revit.  There is no easy way to say “make everything Demolished wireframe, but leave other elements as-is” in a Hidden Line view.

However, you can use a normal Filter to “override” the Phase Filter.  This works because normal VG Filters operate at a higher level than Phase Filters.  Just create a Saved Selection Set, add it to a View or applicable View Template as a Filter, and set the Transparency for that Filter to be 100%.

You could do this by making a Filter that operates on a Shared Parameter that is added to all Categories likely to include Demolished items – meaning you would have to set this property manually.  However, it may be easier to manage if you just graphically create the Saved Selection Set and use that instead:

  1. Make a new Phase Filter that shows only Demolished items (all the rest “Not Shown”)
  2. Go to a 3D view, enable this Phase Filter, select all the Demo items and Save them as a New Selection Set (Manage tab — Selection)
  3. Add the filter to a View or applicable View Template as Filter, and set the Transparency for that Filter to be 100%.

If you need to add or remove items to the Demo set:
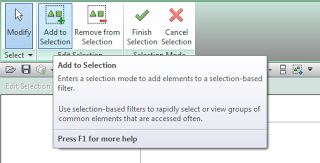
You can use the Edit option under Selection on the Manage tab to enter a Selection Edit mode, where new items can easily be added.  Or you can just select the whole lot again, use the same Selection Set name, and you will be prompted to overwrite the existing DEMO set.

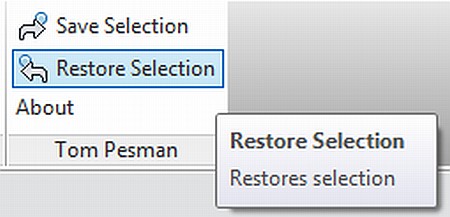
In response to my post yesterday about using Selection IDs to save selections, Tom Pesman of tnux.net has created a free Revit add-in to automate the process.

At this stage, it only allows the you to save and restore one selection set.  However, it is very easy, very fast, and I’m sure some of you will find it useful:

DOWNLOAD PAGE for Revit Save Selection – Tom Pesman

Interestingly, his About box for this add-in states:
This is a very tiny add-in to demonstrate how usefull small add-ins can be. For more information visit my website (tnux.net).

I agree – I wish certain things were built-in to the program, but at times, these little add-ins can quickly and successfully satiate the common needs of users.

Here is Tom’s blog post on the subject:
Save Selection Add-in – Tom Pesman

Thanks Tom!

I was going to title this “Even Better Save Selection Workaround for Revit Architecture users”, but that wouldn’t really be accurate.

I am posting about a work method that will allow you to select a group of objects and quickly re-select those same objects.  It will not allow you to use the View Filters like the true Save Selection feature would.

Here’s how:

  1. Select the group of objects
  2. Manage – IDs of Selection
  3. Copy these IDs somewhere (for example, to Notepad or Excel)
  4. When you want to re-select those objects, go:
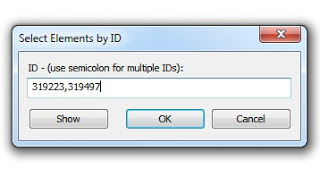
  5. Manage – Select by ID
  6. Paste the text from step 3 (including commas) and click OK
  7. Your ‘set’ has been selected!

Tip – you could make a spreadsheet for each project that contained these ID selection sets.  One column could have a descriptive name for the selection set.

Here is a quick video:

Thanks to http://www.nazdi.cz/2011/11/pitvame-projekt.html for this heads-up (translated as):
If you enter a list of numbers (separated by commas or semicolons), select the corresponding Revit several objects at once. 

I previously posted about Save Selection here:
What Revit Wants: Save Selection Workaround for Revit Architecture users

And here:
What Revit Wants: RAC Users – lets get the Save Selection feature now!

A while back, I asked you guys to request that the ‘Save Selection’ feature be added to Revit Architecture. Even though we all apparently made quite a bit of noise with all of our requests, the Factory has not yet come to the party and given us a nice little Subscription Advantage Pack with the Save Selection feature.

It is a bit disappointing really.

In any case, if you want to use Save Selection now, there is a workaround. Just Save a Selection using Revit Structure, open the file in Revit Architecture and you should be able to apply that saved selection to applicable views. You can’t edit it in RAC though, you have to go back into RST to do that. It is an unwieldy and painful workflow – but it does work.

I guess you could also workshare the file, have an instance of RAC and an instance of RST open and working on the same file…but it probably won’t be much faster by the time you Synchronise / Reload.

Here is a little video:

Here is where I originally requested that we ask for the Save Selection feature in Revit Architecture:
What Revit Wants: RAC Users – lets get the Save Selection feature now!

In Revit Structure,  you can select a number of elements and then ‘save’ that selection as a Selection Set.  That selection set automatically becomes a Filter that can be used in Visibility / Graphics.  Very handy!

Now, why should us Revit Architecture users be without this time-saving, highly useful feature?

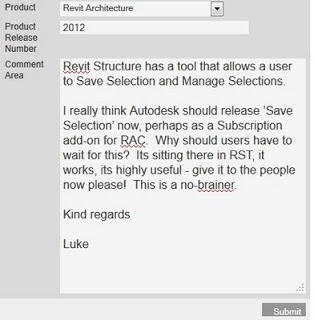
Here is what you can do – go to the feedback form at Autodesk – Contact Us – Products.  Fill it out in a similar way to that shown below:

Here is some text you could put (copy-paste) in the box:
Autodesk should release the ‘Save Selection’ feature from Revit Structure to Revit Architecture users.  This feature would increase productivity and be highly useful for many RAC Users.  Ideally, this function would be available on the Multi-Select ribbon panel.

Let’s see how long it takes before we get some action!

Here are the previous posts where I have mentioned the Autodesk feedback form:
What Revit Wants: Legacy Mass Forms – follow up
What Revit Wants: V/G Dialog does not scroll when Overriding Category