Parts allow some extremely powerful workflows in Revit. Did you know that you can take an in-place family, and when you Divide Parts, Revit will make an individual Part for each geometric element?

For example, let’s say you have a big sweep that represents a large part of a Building, and that Sweep is inside an in-place Generic Model family in the project.

Firstly, use some Voids to cut the sweep into the sections or pieces that you want…

void-ext-7106677

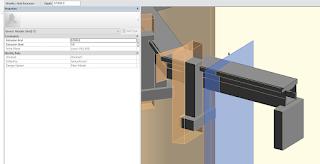
and then select that Generic Model Family and click Create Parts. You will get a Part for each geometric piece, like this:

part-8430234

Then, if you edit the underlying Family and divide it with more Voids, Revit will automatically create and update the Part elements as needed. Very cool.

From here, you can export those Parts to Navisworks for animation or sequencing, if you so desire.
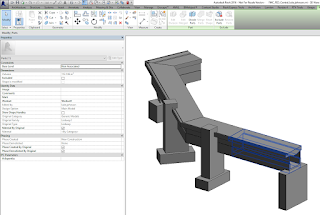
Ok, Parts are pretty cool, particularly when working with Linked Files. But there is a strange behaviour in Revit that exists between the Parts Visibility setting of a View, and the Parts category Visibility / Graphics.

Here’s what I’m talking about:

  1. In a 3D view, with a Linked Revit file, make some Parts from the linked elements. You could use something like this in Dynamo.
  2. Now, switch the Parts Visibility of the view to Show Parts. Revit is now hiding the linked elements you made the parts from originally, and showing you the parts in the host model.
  3. Let’s say you want to verify that the linked elements are really hidden… ok, let’s go into V/G and turn off Parts… drumroll please…
  4. Revit decides that this means you want the Parts Visibility setting of the view to be turned back to Show Original, and so it goes ahead and does that. Um, thanks, I guess? In essence, the Parts V/G is linked to the Parts Visibility switch for the view.

So, what is the workaround?

Just make a filter for the Parts category, and turn that off:

parts.png

Using this Filter, Revit does not switch the autopilot on, meaning you can have Show Parts turned on for the view, with the actual Part elements switched off.

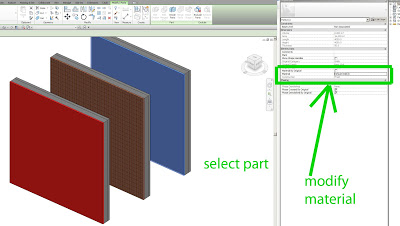
In the past, having multiple instances of a Linked RVT was quite problematic if you wanted to apply different materials to each instance.  Parts have mostly solved that problem (thanks to Steve for reminding us).

Here is a quick how-to:

  1. Place a Wall with multiple layers into one RVT file
  2. Link that into another RVT (the host)
  3. Make 3 copies of the linked RVT in the host project
  4. Tab select a Wall that resides in one of the links while working in the host file
  5. Click Divide Parts
  6. Select one layer of the wall (the Part)
  7. In Properties Palette, untick Material by Original
  8. Set Material as desired using Properties
  9. Rinse and repeat steps 4 to 9 for each layer / material option you want to explore

Some tips on using IFC with Parts from http://danielgijsbers.blogspot.com/2012/08/revit-parts-and-ifc.html

It’s important when you export a Revit model to IFC that the following conditions are met:
  • Export with “Current View Only” option
  • Parts must be visible in the view
  • If the “Split Walls and Columns By Level” option is chosen, then wall parts will be assigned to the appropriate level as determined by their spatial position


Be aware:
Parts import / export done for all categories except Roofs
Parts import from IFC : only geometry is imported not the parts information

via
Revit parts and IFC