After selecting an Import instance, you can choose to Full Explode or Partial Explode.  Most users realise that exploding is a bad idea, and it can get very messy.  In fact, a number of experienced Revit users feel that you should NEVER import a CAD instance, always use Link.
In any case, the main difference between a full explode and a partial is this:
  • Full Explode will explode all blocks and XREFs into their most basic elements, such as lines and arcs.
  • Partial Explode will explode the instance into its nested blocks and XREFs.  You can use Partial Explode again to explode these blocks into their nested blocks, and so on, until you get down to the lines and arcs etc.
You can explode (disassemble) the import symbol into its next highest level elements: nested import symbols. This is a partial explode. A partial explode of an import symbol yields more import symbols, which, in turn, can be exploded into either elements or other import symbols. This is analogous to exploding in AutoCAD with nested xrefs and blocks. For example, you explode an xref into other xrefs and blocks. Those xrefs and blocks can, in turn, be exploded into more blocks and xrefs.
You can also explode the import symbol immediately into Revit text, curves, lines, and filled regions. This is a full explode.
Stairs and railings in Revit can be extremely frustrating.
In fact, I’m often annoyed that I can’t even model a Railing in-place, as the Railing category isn’t available for in-place families!
So, how do you make an unusual ‘custom’ railing connection work?
In 10 steps:
  1. Create a 3D view with section box around the connection you would like to resolve
  2. Export this 3D view to a DWG file.
  3. Create a new Generic Model family.
  4. Import the 3D DWG.
  5. Using the context you have now imported, model the rest of the baluster / railing connection.  I recommend that you use Reference Lines and then create Sweeps using ‘Pick Lines’.
  6. After you have modeled the custom 3D geometry in the Generic Model family, create a Baluster Post family.
  7. Load the Generic Model family into the Baluster Post family.
  8. Load the Baluster Post family into the Project.
  9. Apply your new custom Baluster Post to the Start / Corner / End post of the Railing you are trying to correct.
  10. In the Baluster Post family, rotate and move the Generic Model family around until it is in the right place and reload into the Project.
For a sample project showing one of these connections, open the following file:
For a sample Baluster Post family, download the following file:
I found this ‘section box’ technique in the book Mastering Revit Architecture 2011.

I posted recently about the excellent book, Mastering Revit Architecture 2011.

If you wish to access and download the sample files, head over to the Sybex resource page for this book.
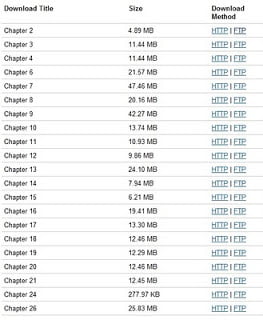
http://www.sybex.com/WileyCDA/SybexTitle/Mastering-Autodesk-Revit-Architecture-2011.productCd-0470626968,navId-290572,pageCd-resources.html

I received my copy of Mastering Revit Architecture 2011 yesterday, and it is truly an impressive tome! I don’t know of any other book that could so fittingly bear the designation ‘Revit bible’. At 1122 pages of Revit Architecture goodness, if it isn’t in this book you probably don’t need to know it.

I am particularly interested in the Revit Certification information. When I completed the Revit 2010 Associate and Professional Certifications, it was a real struggle to find quality information online. Well, having received the book, I don’t need to search aimlessly anymore. This book should certainly help you to prepare for and pass the Revit Architecture 2011 Certifications.

You may remember the ‘Tips and Tricks’ competition that the authors of the book held a while back, and that I was one of the winners. Here is the quote from the book (page 1069):
” What Revit Wants…is an online resource put together by Luke Johnson that is peppered with great tips and workflows with everything from tips on creating graphics to dealing with crashes. See www.whatrevitwants.blogspot.com “

If you want to become a true Master of Revit, it seems quite clear that this book will be part of that process. How can you get it? Click on this link or the image below:

And thanks Eddy, James and Phil for all your hard work, and for sharing your vast knowledge and experience.