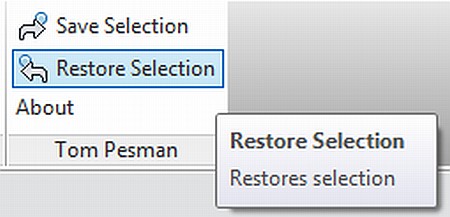
In response to my post yesterday about using Selection IDs to save selections, Tom Pesman of tnux.net has created a free Revit add-in to automate the process.

At this stage, it only allows the you to save and restore one selection set.  However, it is very easy, very fast, and I’m sure some of you will find it useful:

DOWNLOAD PAGE for Revit Save Selection – Tom Pesman

Interestingly, his About box for this add-in states:
This is a very tiny add-in to demonstrate how usefull small add-ins can be. For more information visit my website (tnux.net).

I agree – I wish certain things were built-in to the program, but at times, these little add-ins can quickly and successfully satiate the common needs of users.

Here is Tom’s blog post on the subject:
Save Selection Add-in – Tom Pesman

Thanks Tom!

Ever wanted to replace a font with a different one in a Revit project, including adjusting all text, dimensions, and labels?

I came across a very handy add-in through the RevitDE blog.  Its called BIMTools, and its from a company called Sofistik.  Here is some translated text from the original blog post:
have to change all text, dimension styles and lettering families…
This can be in a very simple way, the text of all type of label types to adapt quite easily.

via
RevitDE Blog Post

Here is some further explanation from the company site:
This tool allows all project elements such as text labels, dimensions, beams, columns and wall labels will be changed and adapted in a step within a Revit. Filter functions allow a targeted selection of the desired label text. The tool works across multiple projects such as converting, saving an enormous amount of time while drawing standards.
BIMTools download page (Translate)

Actual German download page http://www.sofistik.de/loesungen/soficad/bimtools/registration/

The above text hints at the fact that the replacement is ‘filter based’.

  • After registering, you will get a link to a ZIP file.  After unzipping that file, you will get access to two EXE files – one for Revit 2012, and on for Revit 2012 x64 (64-bit).

  • Run the installation for your version.

NOTE 1:  I was able to select ‘English’ during the installation, but it appears that the add-in is not in English after it is installed!  Anyone know German out there?

NOTE 2:  The installation process adds the BIMTools ribbon to RST 2012, but not to RAC.

Here is a bit of an excerpt from the help PDF that may assist you in interpreting the Ribbon:
Text Change type
With this additional feature you are able to type the text of your dimensions, annotations
and change text of your project on time and to appoint a uniform. The change affects
from here to all families in the project located. 

search for objects that match the filter rules, GE
starts and earnings in the lower left of the dialog box is displayed.


The text type-name can be changed by this function automatically. The advantage here is one
unambiguous syntax and therefore a similar designation of text types. If the name of Textty-
groups want to change so you can uncheck “Rename” is activated. 

http://translate.googleusercontent.com/translate_c?rurl=translate.google.com&sl=auto&tl=en&twu=1&u=http://ftp.sofistik.de/freeware/revit/installation/BiMTOOLS/BiMTOOLS_0.pdf&usg=ALkJrhitS-97RqHPah3DBGTEhOTsIHhNcA
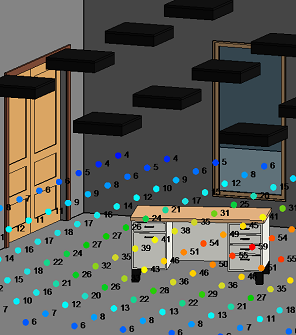
I have previously posted about the ElumTools add-in but now it looks like they are going to release the add-in for public beta.

Please join us in the FREE public beta period and try ElumTools for yourself! This is our Beta Sign Up page where you can tell us you are interested in participating in our public beta for ElumTools…
Lighting Analysts, Inc.

via
Revit3D.com / IamBIM.com – BIMBoom Revitlution – BIM Unfiltered: New Revit Tool: ElumTools is the first fully integrated add-in for Autodesk� Revit� designed to calculate point by point illuminance on any workplane

Are you an Autodesk Revit power user with an interest in becoming even more productive? Would you like to automate or extend the capabilities of Revit, but are new to computer programming? If so, then this guide is designed for you.

“My First Plug-in” is a self-paced tutorial guide for a smooth introduction into the programming world. This is a “one-stop shop” learning path for users who know Autodesk products but are absolutely new to programming and are thinking about taking the plunge. In this guide, you will be working with the Autodesk Revit .NET API and the C# programming language. The supported product version is Autodesk Revit Architecture 2011 and succeeding versions.

Product: Autodesk Revit 2011 or higher
Programming Language: C#
Application Programming Interface (API): Revit .NET API

via
Autodesk – My First Plug-in Training – My First Revit Plug-in Overview

It is hard to keep up with all the free add-ins and associated utilities that are available for Revit.  Here is a partial list:

–ADDED 6 JULY 2011–
Excitech Revit Toolkit

Charlotte’s Revit User Group Tools

Autodesk Labs Utilities eTransmit for Revit

Revit SDK (includes samples)

blog.bimkicks.com | REVIT Multi-Sheet (Placeholder) Creator

blog.bimkicks.com | Revit Journal Analysis and Parsing Program (Rank Keyboard Shortcut Use)

Emc2 Keynote Manager

blog.bimkicks.com | REVIT COMMAND PROMPT

IMAGINiT Free Room Renumber, Change Case, Space Update and GridSelect

GetLevel – What Level is that on?

ElumTools Beta – Lighting Analysts, Inc.

Save All Families in a Project to RFAs and Folders AUTOMATICALLY (pre-2012)

RevitLookup – View the Revit Database

RevitTV.com (Free – Shared Parameter Manager, Keynote Manager, RTV Paint)

Maybe someone (WikiHelp, AUGI, Revit Forum, RevitLink) should create and maintain a current list of the free add-ins.  Is anyone volunteering?

Here is a similar list from 2009:
Fear and Loathing In a CAD vs. BIM World: Current (?) Revit Tools and Addons

“Free of charge you can try IMAGINiT Utilities for Revit Lite which includes four popular utilities:

Room Renumber, Change Case, Space Update and GridSelect.”

Register / download link

Room Renumber Easily renumber existing rooms into an order defined by selection. Insert rooms into an existing series with the subsequent room numbers “shifted” to make space for the inserted one.

Change Case Instantly match your organization’s or client’s standards on naming with UPPER CASE, Title Case, or lower case. This tool scans your model and automatically fixes “case issues” to whatever standard you specify.

Space Update Seamlessly transfers room names and numbers from the linked Revit Architecture model to the Revit MEP model. Eliminate tedious manual input of room names and numbers in different places.

GridSelect Select Revit elements based on the grid they are on. Select walls, columns, beams and more. Choose the current level or all levels and select collinear or touching beams.

For more info, head over to http://imaginit.com/software-solutions/building-architecture/imaginit-utilities-for-revit

Do you ever get a little annoyed by the things Revit doesnt let you do?  There are some irritating limitations in our favourite BIM program – but SAuBIM aims to workaround one of them.

Out-of-the-box Revit does not let you use a ‘calculated parameter’ in a Tag.  Don’t ask me why.  It is just a fact of life at the moment.  SAuBIM (pronounced saw-bim, and meaning ‘semi-automatic BIM’) takes the pain out of this with regard to one specific task – calculating room occupancy data and then displaying it in a tag.

Basically, you take the following steps to use SAuBIM:

  1. Close your Revit project.
  2. Install and register SAuBIM.
  3. Open the SAuBIM utility.
  4. Set your Revit ‘Program’ location in the top Browse box.
  5. In the middle Browse box, select the Revit file that you want to calculate Room Occupancy for.
  6. Click ‘Import Schedules and Tag’.  Wait for Revit to do its thing.

    TIP 1 – If you come across a dialog that says ‘Enter Interactive Mode‘, then something hasn’t quite worked properly.  I recommend that you:

    – Close Revit WITHOUT saving
    – Follow the steps above again, but between steps 5 and 6, tick the ‘I am Importing into a Revit Template File ( *.rte) box.  Even though you are using your .rvt project file, this step may actually cause SAuBIM to complete the import correctly.

    TIP 2 – If the above also does not work, you can manually complete the following steps (on your project BEFORE applying any SAuBIM items):

    – Copy (from Project Browser) the 2 x schedules from
    “C:Program Files (x86)SAuBIMSAuBIM InstallTest Project – Code Calc.rvt” (for Windows 7 64 bit)
    and Paste (Ctrl+V) them into your project
    – Load the Room Tag from
    “C:Program Files (x86)SAuBIMSAuBIM InstallRoom Tag – OL.rfa” (for Windows 7 64 bit)

  7. Once you have saw-bimmed your file, you can now use the Update Occupancy Data function (Revit must be closed to do this)
  8. Tag your rooms with the Room Tag – OL.rfa tag.

You have to keep in mind that it is semi-automatic – you need to ‘Update…’ the data before plotting / exporting.

However, it is a good proof-of-concept, and will prove extremely useful to some architects.  Thanks SAuBIM!

Now, here is a little request / challenge to the SAuBIM guys:  What if you ‘exposed’ some of the functionality of this program, and made it more customizable?  
This is what I’m thinking:  you allow us to select Calculated Parameters FROM a specific project file, and then use your tricks to push these into Shared Parameters, which we can then Tag?
I think it would be pretty easy, with the functionality you already have in place?