I love unique tools. In the BIM world, we are presented with a wide array of visualization software, each supposedly better than the last. But I am interested in something that has real power, that is truly unique, something that can give me and my work an edge over the competition. And Lumion is one of those unique, powerful tools.
It is fast, easy to use, and the visuals are so immediately pleasing. In just a few minutes, you can go from a Revit model with links and topography, into a beautiful 3D environment. There is a huge library of People, Trees and Vehicles included with Lumion that can be placed immediately into the scene. The more time you spend working up the scene, the better and more realistic it looks.
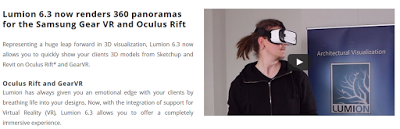
During the preparation of this article, Lumion 6.3 was released. I have made an effort to discuss key points from that new release here. The big new feature of 6.3 is that Lumion now supports Samsung Gear VR and Oculus Rift! Find out more at this link.
So that’s the quick summary, but how does Lumion integrate with a real Revit environment? What considerations are there when working on federated models? What tips and tricks did I discover along the way? Read on to find out…
This review is divided into the following major sections:
- Real World Use
- Summary of New Features
- Basic Use
- Specific Tips and Workflows
- Learn More
Real World Use
If you want a quick overview of what can be achieved, check out this Showcase page on the Lumion website.
Test System
Lumion uses a live rendering engine, so effects and animations all essentially occur in real time. This means that you need a decent computer, with a good graphics card, if you want to get the most out of Lumion. I tested Lumion on my 2 year old workstation, with these specs:
- Intel Core i7-4930K (6 cores, 12 HyperThreaded) CPU
- 64gb RAM
- NVIDIA Quadro K4000, 3gb GDDR5, driver 353.62
- Samsung SSD 840 EVO 500GB + 3tb secondary drive
The above specs were more than acceptable for my use, but you may find that a newer gaming graphics card would compensate for a current mid-range system with less RAM.
From Revit
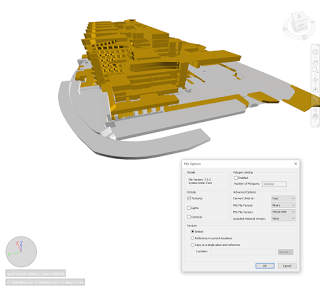
Lumion imports a number of native 3D formats, including FBX and DWG. However, there is also a Revit export addin (called the Revit to Lumion Bridge) available that gives better optimization to the exported 3D data. I found the addin very quick to use, even on a large site with multiple buildings. After exporting into one container DAE file, you then use the Import option in Lumion to bring that model into the current Scene.
If you have some well developed Topography in Revit already, you probably just want to ‘feather’ the edges of the Lumion Terrain. A Lumion scene is made up of a number of parts, but it always has a base Lumion land surface (that could be flat or modelled to really any land form), and then you typically have a model imported from some other software, following which you would usually add content and entourage to the scene, such as People, Trees and Vehicles.
After you have imported a model and integrated into it into the scene, I feel that it is very rewarding to add some content to the scene immediately. The large library of content allows you to quickly get a ‘look and feel’ happening that will help drive the artistic process from this point forward.
I say “artistic process”, because that is actually how Lumion makes me feel – like an artist, not like a boring BIM technician. And that is a good thing! Rather than wrestling with the usual mind-draining, complicated Revit modelling tasks, Lumion is like a breath of fresh air. The payoff is immediate, unlike some other rendering workflows that often require many hours of material mapping before anything remotely aesthetic can be generated.
From Navisworks via FBX
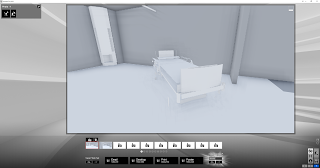
I thought it might be interesting to try and play with a relatively basic building form or mass, and see how Lumion can make even basic geometry look quite impressive. To start with, I used a model in Navisworks of Room spaces (which were exported from Revit via NWC). Then I exported these Room masses from Navisworks to FBX.
The resulting FBX file was 167mb.
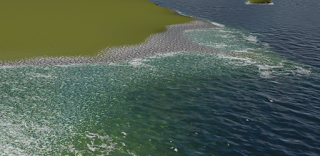
I opted to try the Mountains in Spring scene template. The water in Lumion is nothing short of beautiful. Its almost too good to try and demonstrate with a screen capture, but I’m going to try anyway… Keep in mind that as you navigate in Lumion, the water is moving and rippling and lapping away at the smooth stones. Amazing!
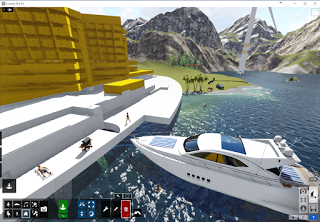
In just a few minutes, I had trees, a power boat, a sunbaking man, and even a fish, horse, and offshore wind turnbine placed in the scene. Lumion has this potential for rapid, beautiful scene development that is unparalleled in my experience.
Modifying Placed Objects
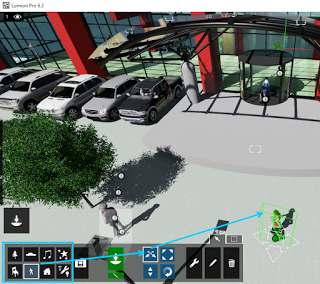
The Lumion interface is clean and uncluttered. Sometimes, you will ‘discover’ how something works in Lumion, and it will just make sense. For example, if you are trying to move a Person and can’t select them, keep in mind that you should pick the object Category from the bottom-left corner of the window, and then you will be able to modify objects of that Category.
Modifying the Environment
I was impressed with the fact that the sun height is extremely easy to modify, to get things looking just right, as the screencast below shows:
Key points to remember
Some of the features added in Lumion 6.0.1 and 6.3 are focused a lot on improving the image quality, which means you are getting the very best output from the scene creation work that you undertake. Another key differentiating feature of Lumion is the overall ease-of-use. It does not feel like a complicated piece of software, and it allows you to get up and running quickly. Then, as you learn more about Lumion, you can progressively discover the additional features that are just below the surface of the main user interface.
Summary of New Features
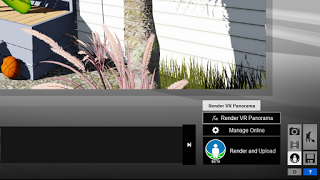
Lumion 6.3 now supports the rendering of VR panoramas for Gear VR and Oculus, and it is very simple to use. First, press the MyLumion button, Set a Viewpoint, then click Render VR Panorama:
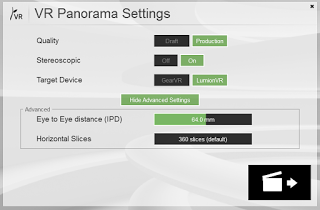
For Oculus Rift, choose LumionVR to render an LVR file:
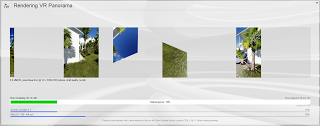
You can watch as the renderer works its way through the left eye and right eye:
Finally, open that file in the LumionVR viewer (included with your Lumion 6.3 installation) and interact with the scene using the Oculus Rift.
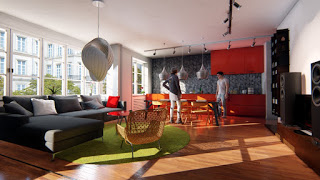
There are also some key aesthetic additions that became available during the releases of Lumion 6 through 6.3, and the imagery below gives you an idea of what each effect can accomplish once applied to your projects.
Hyperlight 2
OmniShadow

PureGlass

SpeedRay Reflections

Basic Use
Download and Installation details
Download size: 6.26gb
Installed size: 14.6gb
First Launch
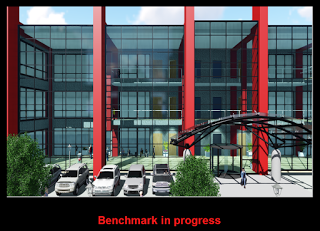
On first launch, Lumion will benchmark your system so that it can self-configure the best performance settings for your particular hardware.
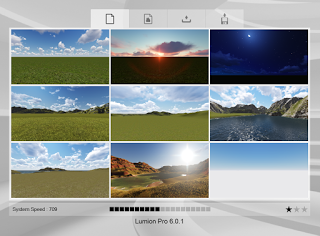
After the benchmark you will be presented with this Start screen, which will allow you to quickly create projects for a variety of different scenes and enviroments:
Specific Tips and Workflows
We all work in different ways. And we all have our own artistic style. So when considering how to best integrate Lumion with an existing design and presentation workflows, there will obviously be some variations. But essentially, you will take models from a content creation suite (such as Revit) into Lumion, and then perform various tasks such as site modelling and adding entourage, after which you will tune various presentation style settings and export to a video or still image.
You can read a real world example of how UK architectural practice Lovelock Mitchell has made Lumion a part of their day-to-day design pipeline at this link. I could certainly identify with this comment that Michael Chevasco made in the article:
“If you like the visualization side of architecture like I do, then you might find experimenting with Lumion artistically rewarding, for example, positioning the sun just right to create a certain mood, or the getting the wind to blow through the grass in a scene. I enjoy those things and Lumion makes it easy.”
How to Use Lumion with Revit
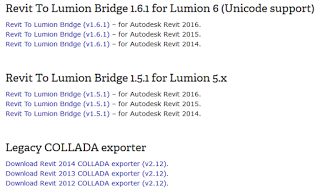
Latest Revit exporters are available here:
Export Revit models to Lumion – Revit to Lumion Bridge
To install the exporter addin:
- Run applicable installer, such as RevitToLumionBridge_Revit2015.exe
- Restart Revit
- The addin will now be available on the Add-Ins ribbon
Export and Import to Lumion:
- Open a Revit project
- Go to a 3D view
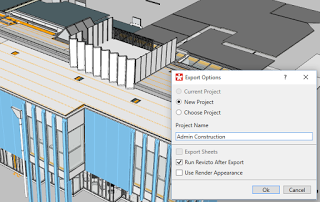
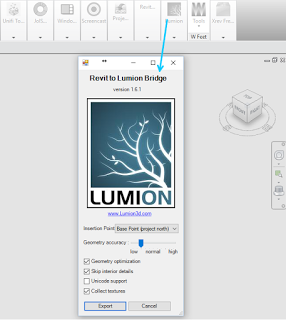
- Run the Exporter
- Go to Lumion
- New Scene based on Template of your choice (I chose ‘Hills’)
- Import using this button:

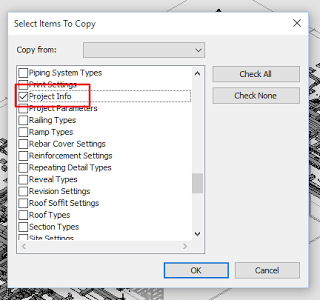
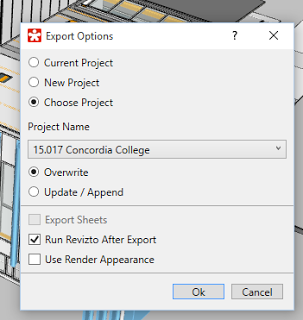
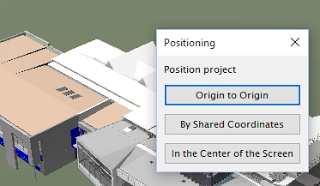
- Name your import and tick the box
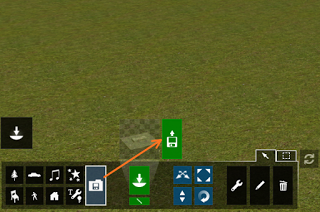
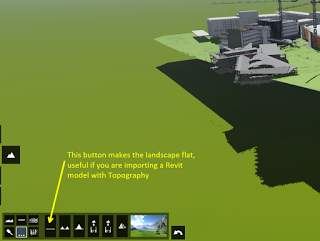
Tip: Make landscape flat:
You may want to ‘flatten’ an existing landscape prior to matching Revit topography with Lumion terrain. The image below shows which button to use:
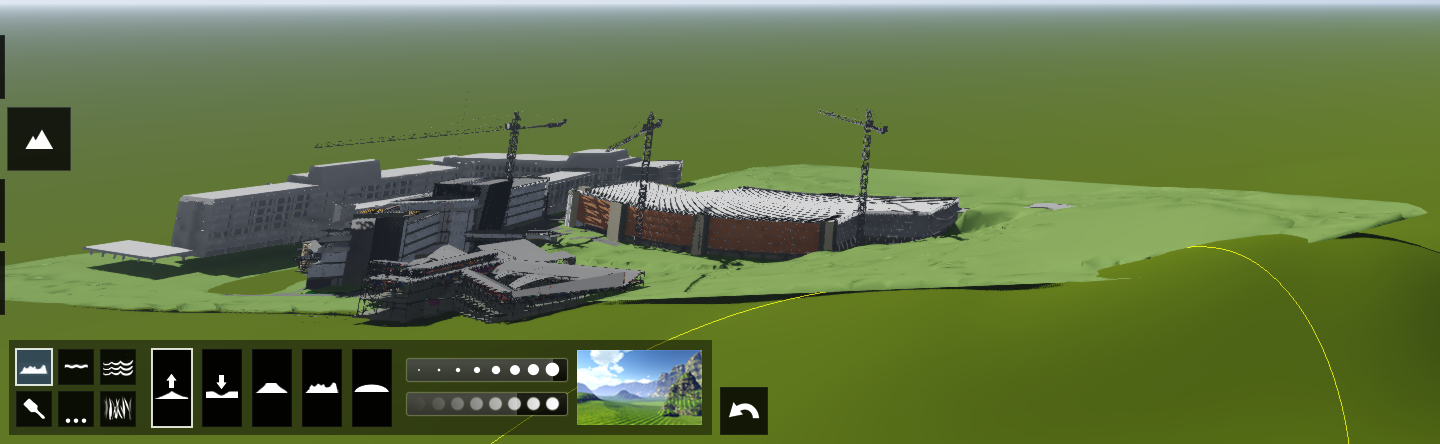
Use large terrain brush to quickly match Lumion surface with Revit topography:
More information on terrain material and feathering here
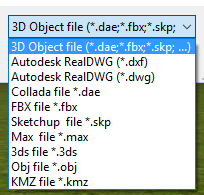
Here is a List of File types that can be directly imported to Lumion:
Performance Notes
- The Revit exporter was very fast, taking about 300mb of Revit data to a 230mb Collada file in 90 seconds
- Saving in Lumion is very quick and unobtrusive
Saving Viewpoints
You can use the Camera tool to Store a Camera, and return to that same position later:
Learn More
For more tutorials, including how to “Learn Lumion in 15 minutes”, check out this Tutorials page.
What about using Lumion on very large infrastructure projects? See:
Lumion for large infrastructure projects
Interested in finding out more about materials included with Lumion? Check out this link.
Using Lumion 6.3 for Virtual Reality – Video Tutorials
Tutorial: 01 – Render For Gear VR
Tutorial: 02 – Advanced Render Settings Gear VR
Tutorial: 03 – Copy Gear VR Panorama to Your Phone (1st time)
Tutorial: 04 – Copy Gear VR Panorama to Your Phone
Tutorial: 05 – Render For LumionVR (Oculus Rift)
Tutorial: 06 – Advanced Render Settings LumionVR (Oculus Rift)
Tutorial: 07 – Three ways to open LVR files
Tutorial: 08 – Move Between Viewpoints in LumionVR (Oculus Rift)
Tutorial: 09 – Add Effects to 360 Panoramas
Further reading:
- Product range: Lumion – Elegant software built for architects
- New in Lumion 6: Lumion – Elegant software built for architects Lumion Tutorials
- My previous review:
Using Lumion 5.3 with Revit for Rapid, Realistic and Effective Presentations - Other reviews and information at: Lumion 6 Review: New Features and Updates