Going back in time, there was 123D Catch and related processing engines. Basically, it was a tool that took photos and turned them into something real in 3D. There was also something called Remake.
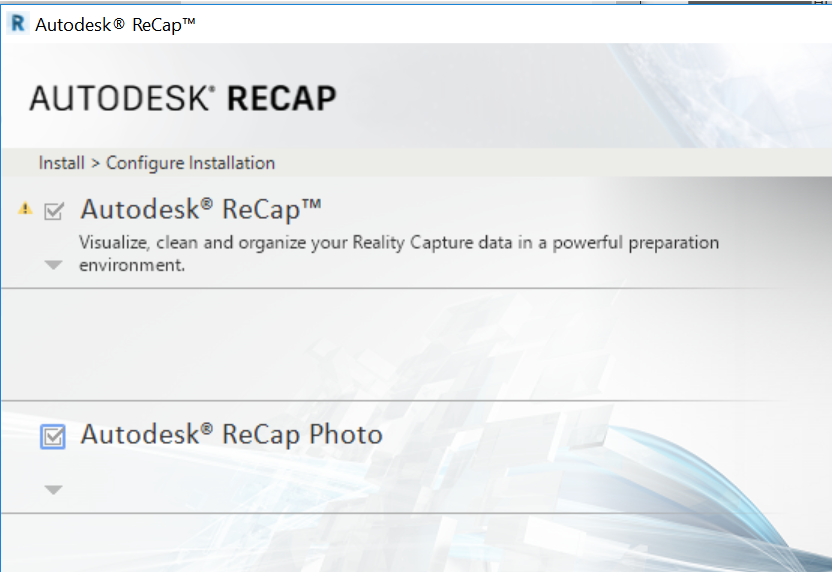
Now, we have Recap Photo, which basically does the same things. Over time, the processing engines have improved. Recap Photo is part of your Recap Pro licence, and now integrated into your Recap Pro install. It looks something like this when you install the latest version of Recap (I downloaded the web installer from manage.autodesk.com):
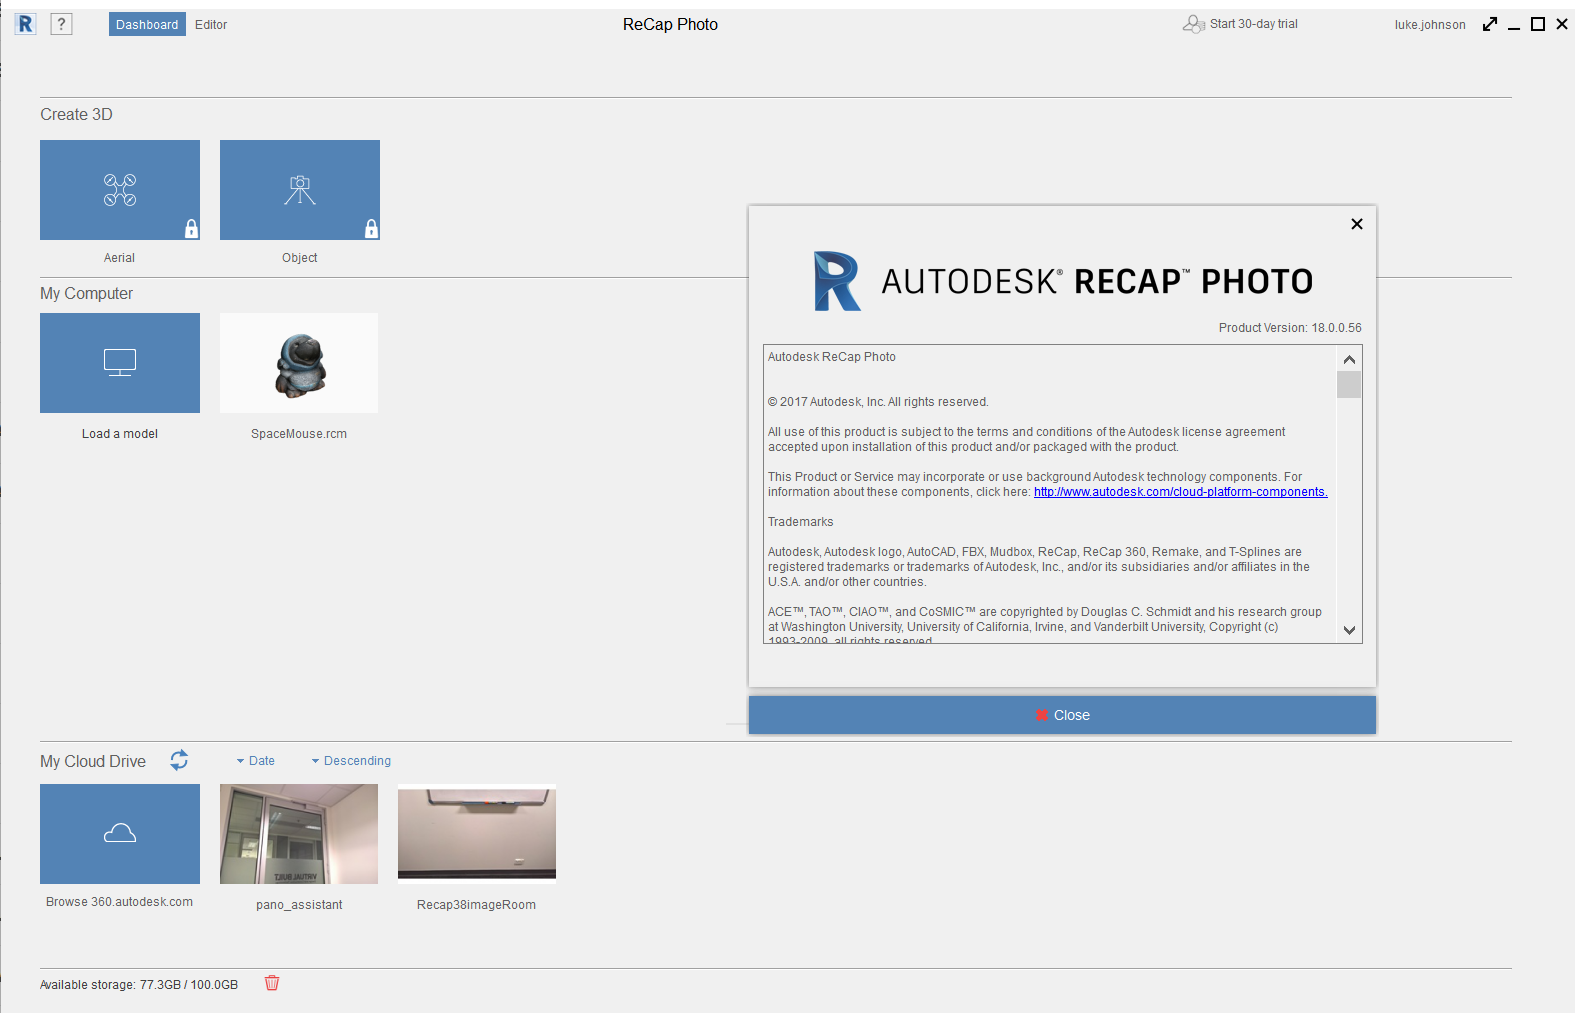
Once installed, you can start the standalone ReCap Photo app:
Features of ReCap Photo include:
A new photogrammetry engine that can process up to 1,000 photos, a 4x improvement from the previous maximum of 250 photos (note: using the cloud service consumes Autodesk Cloud Credits)
The ability to set GPCs (Ground Control Points, survey points) in any coordinate system.
New functionality to support vertical and nadir photos (photos taken by drones and UAVs at 90 degrees above the site)
View your 3D photo-textured mesh
View the geolocated orthographic view, zoom in and out, and add measurements, tags, and annotations.
Share the project, including its additional metadata (measurements, tags, annotations), with anyone.
Merge laser scan point clouds with UAV-based point clouds.
In this webinar, LHB’s Dan Stine walks through a proven workflow for collaboration and client engagement using Revizto. This presentation simulates a client meeting, highlighting ways Revitzo can be used to explore the model and capture client comments and requested changes. You can see how several Revizto features can be used collectively to demonstrate the design intent and react to client questions with minimal effort.
In case you missed it, the AEC Collection now includes:
Revit Live
Robot Structural Analysis Professional
Structural Bridge Design
Dynamo Studio
Advance Steel
Fabrication CADmep
You should find these in your Autodesk account after logging in.
Quote from In The Fold:
Here are some highlights of what we’re adding to the AEC Collection.
In the new Collection, you’ll find Revit Live. Revit Live allows you to visualize your Revit models by turning them into immersive visual experiences. You can even take your designs into a virtual reality environment—in just two clicks of your mouse.
Also included is world-class analysis and computational design software. Robot Structural Analysis Professional and Structural Bridge Design work with Revit to extend your capabilities to perform structural analysis for any structure. And, you can now access the Dynamo Studio standalone programming environment to help solve challenges faster by automating workflows that drive the geometry and behavior of your design models.
Finally, the AEC Collection now extends capabilities from design to fabrication. Interoperable with Revit and Navisworks, we’ve added Advance Steel and Fabrication CADmep to the Collection so you can conceive, model and fabricate better MEP and structural steel systems on an integrated platform.
Curtain Walls in Revit are strictly a Family of the Walls Category. Then you have Types for each type of Curtain Wall. What if you want to select all Curtain Walls at once? You can’t multi-select types in the Project Browser to do this, but…
You can make a suitable Schedule to do it. Here’s how:
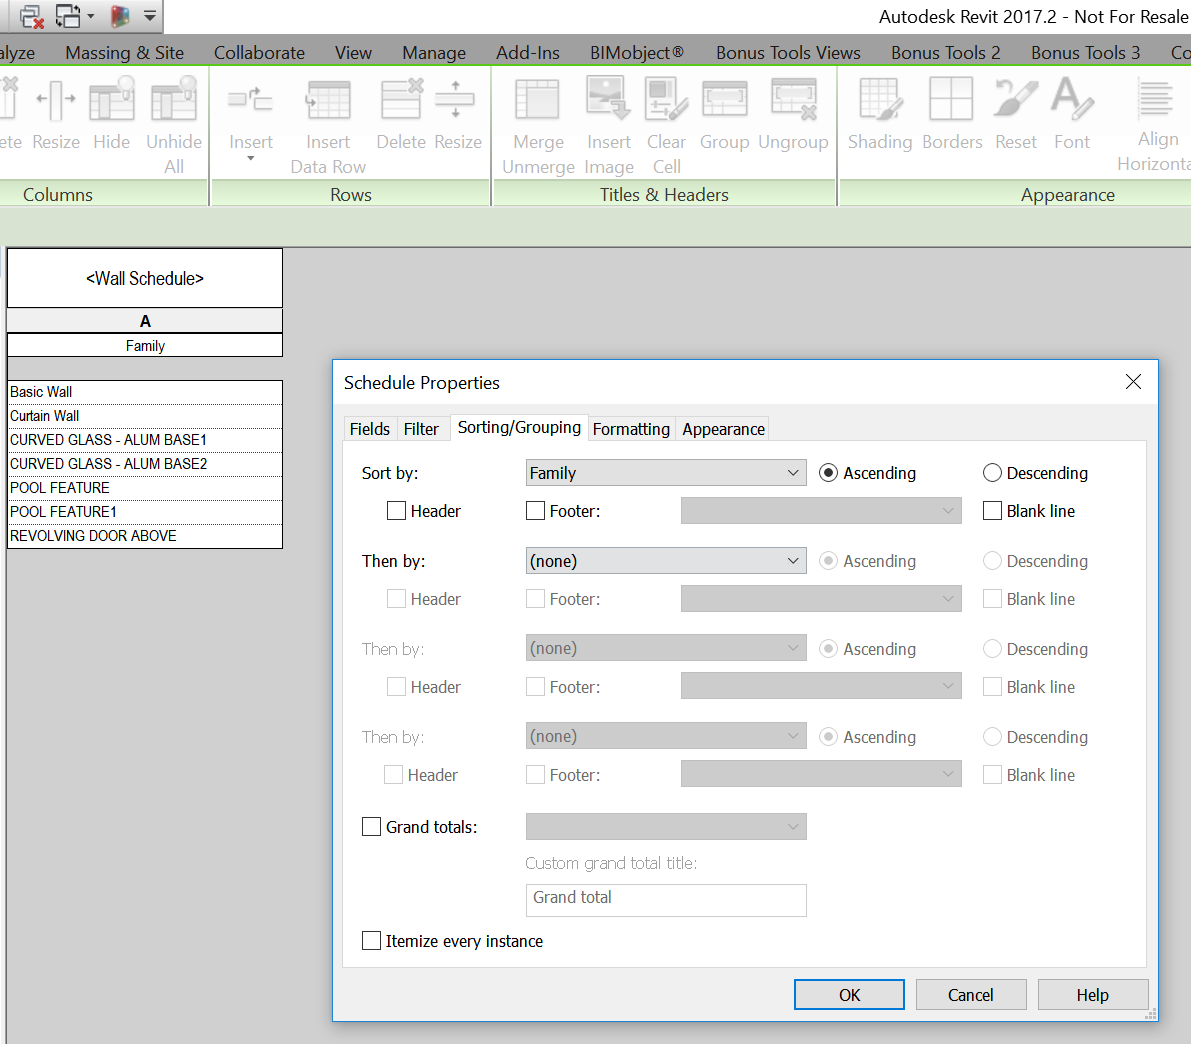
Make a new Wall Schedule
Only add the Family data field
In Sorting / Grouping tab, Sort by: Family and untick ‘Itemize every instance’
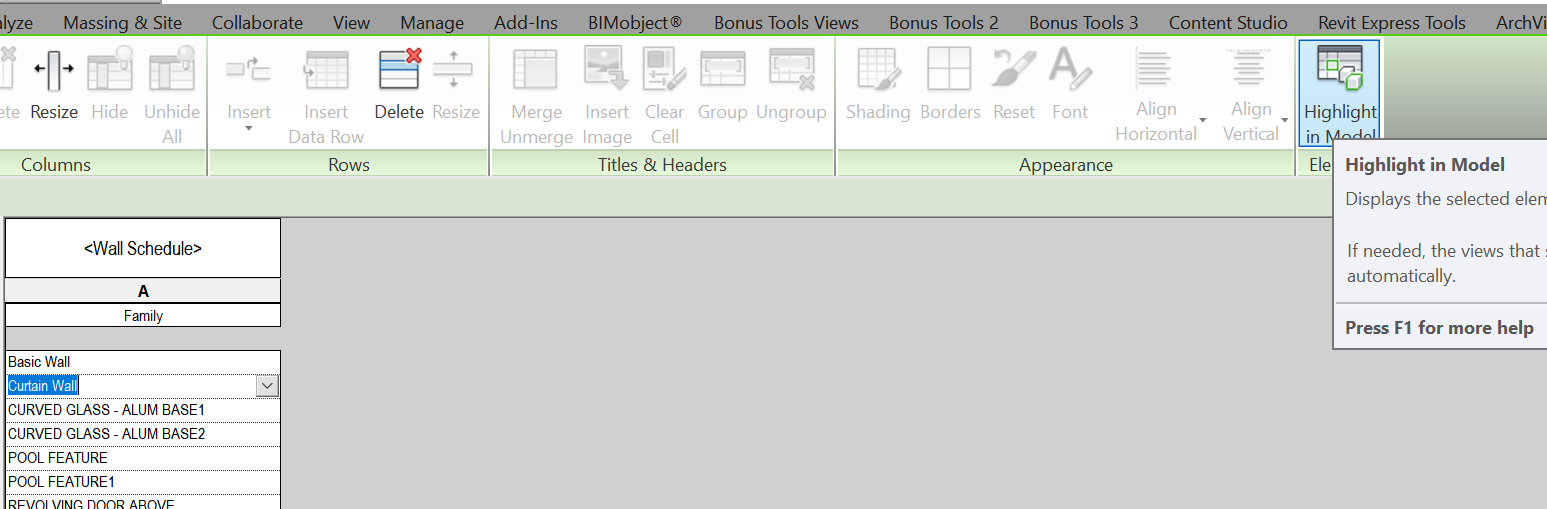
Now, in the schedule, click inside the Curtain Wall cell, and
Use Highlight in Model to select them all
You could then use Save Selection, or Temporarily Isolate Elements in View, depending on what you want to do next.
Slightly over 6 months ago, I was approached by one of my associates over at Unifi with an idea. They wanted to engage in a detailed competitive research project focused on content management systems for Revit. I was pleased that they approached me, because I obviously love Revit and I also love helping people to improve the whole ecosystem of software tools that surround Revit and BIM. In fact, I often provide too many suggestions to software companies I think 🙂
In this case, I was particularly interested in the topic as well. Having used Revit now for around 10 years, I had started to observe a trend in how Revit gets implemented into firms. Typically, they:
Buy some Revit licenses
Teach their people to use Revit
Look at ways to standardize their use of Revit, perhaps through standards and template files
Try to maximize the impact and benefit of BIM through some vertical products, such as Enscape
Start thinking about how to deal with the many gigabytes of ‘content’ they have now gathered and that is sitting on the file server in their office…
Having seen this over and over again, I knew that evaluating, choosing, and setting up a Revit content management system is no easy task, yet it is a hugely important one. It is something that often gets neglected for too long, and results in many wasted hours as people go blindly looking for ‘that family’. As you know, I willingly share time-saving knowledge, tips and workflows here and via Twitter, so this competitive research project really ticked a lot of boxes for me. I would be able to:
do a deep analysis of content management products for Revit
observe the strengths and weaknesses of each
be better informed and able to assist people who often ask me about Revit content management
provide some feedback to Unifi about how their product and offering could perhaps be improved (and as I said above, this is something I often do for free)
In this particular case, I knew that there would be a lot of time involved. I was going to have to obtain, install, test, benchmark, and document a whole lot of information about various Revit content management systems. As a father of three, a technology blogger, and someone who works almost daily for different companies delivering various projects, time is extremely hard to come by. So I felt it was quite appropriate in this instance to be commissioned by Unifi to perform this research task. I had never been part of a commissioned, competitive research project before, so I knew there may be some challenges. However, given the amount of time that would be involved, I would only be able to do a proper and thorough job if I was reimbursed for the time I would need to dedicate to it.
You might say that being commissioned for the task introduced some bias, but I’ll tell you why that cannot be true. Unifi wanted to know how to improve their product, they basically wanted to know what could be improved so that they could remain competitive with their competitors. For me to somehow do a biased job would have been way off-base. I needed to be honest, and brutally so. I had to show the Unifi people if and how their competitors were stronger than they were. I admire the fact that Unifi undertook this whole project. Evidently, they wanted to make sure their product was the best it could be. Personally, I would have an avid listener, someone who would be happy to hear all of those software ideas that I come up with!
So I accepted this project as a commissioned, competitive research task. I would record my results and provide a number of comprehensive deliverables back to Unifi. How would I go about this job? There were a few logical steps:
establish the list of products that would be researched
obtain the products
install them onto a test workstation
evaluate the features available in the product and fill out a detailed comparison matrix
perform benchmarks to establish speed, performance, and capability of each product
use some large sample content datasets to really put the products through an intensive test to check for problems that may occur with huge content libraries
Looking at the above steps, you can see how much time would be involved. But I also thought it would be a good idea to involve the developers of the competing products in the research. I thought that if I could be better informed about the other products, my research output would be more complete and accurate. And I still think that this was the right approach. I spoke to some of the competing companies and described the fact that that I was doing a detailed research project and would like to discuss their product with them. Most of them knew me as a blogger and technology professional, and so they were pleased to meet and discuss their content management product.
And then I made a mistake.
I should have started those meetings by saying that I had been commissioned by Unifi to do the research project. But I did not mention that fact. We had informative meetings each time, that helped me to get a better understanding of each product. But I can see now that I should have simply told them how the research project came about. I actually don’t think it would really have influenced the discussion a whole lot, because I still think it was in their interest to assist me in understanding their product. However, I do feel like I should have been transparent at the time. I would like to publicly apologize to those competing companies for not initially disclosing that I was commissioned to do the research.
This was a lesson learned for me, and one I won’t make again if I undertake a similar research project in the future.
I do not apologize for taking on the research project, because it was simply the best way that a task like this could be handled, and I do believe I was the right guy for the job. I understand that it is quite common for companies to engage 3rd party professionals to perform market research, but for me it was my first time. As stated above, my thought process was basically that:
I would receive some reimbursement for my research time, that
I knew the research output had to be complete and accurate and honest, and that
It would be beneficial to speak to the individual developers about their product.
Following the consultation phase and data gathering phase of the project, I had quite a substantial amount of data to work with! How would I filter through all of this and truly make it comparative?
To begin with I put a lot of information and notes into a detailed OneNote notebook. I then started an Excel document where I would store most of the comparative results. I had a few key worksheets where most of the raw data was stored:
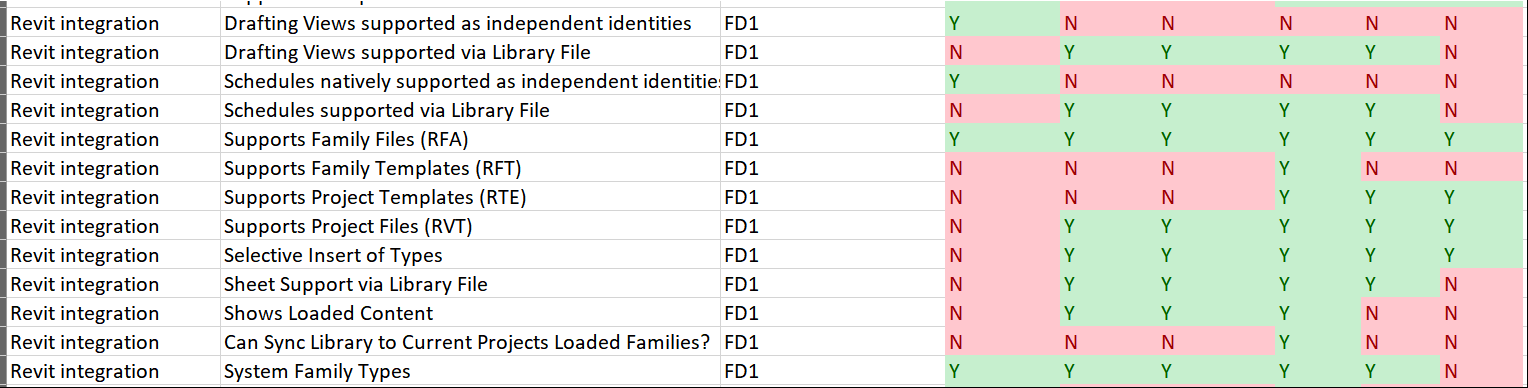
The Matrix worksheet contained a whole lot of data, over 150 rows and 15 columns. I broke the testing and comparison up into some major categories:
Note: the UX2 value above refers to things like bugs or user interface problems, and in that case a higher score would be worse (more bugs).
For feature comparison, I used a weighting value and a formula. Here is a sample of some of those weighting values:
So, in the case above, I viewed Parameter Searching as more important (5) than Uniformat Filtering (2). These weighting values are based on my experience and my association with other BIM professionals.
From this point, I reviewed the capability of each product and used a Yes / No value to determine if a given product would ‘score’ for that feature:
If a product achieved a Yes value here, it would also obtain the Score for that Feature.
I used a set of PivotTables and Charts to break down and review that feature data.
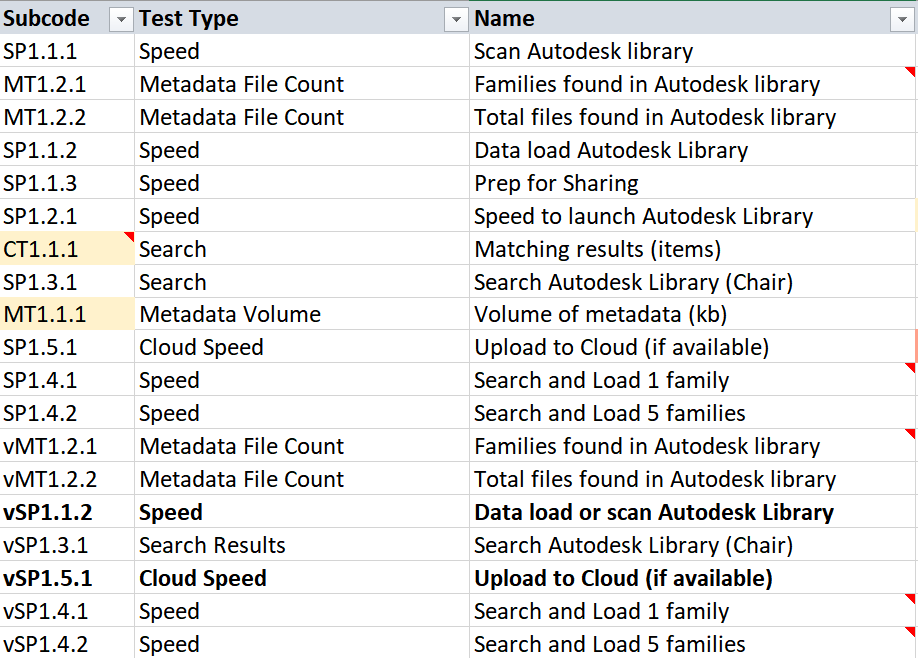
I also performed some performance and speed benchmarks, and stored these in another worksheet:
Ultimately, this data was all collected and provided in combined form along with some Powerpoint slides. The slides cover topics like:
What is BIM Content?
What is Revit Content?
Why Content Management?
How is Content Managed?
How do I choose?
Along the way, we had to do a few interesting things. We were finding that the Australia internet speed was not really a good place to start with cloud benchmarking. So we obtained a cloud based virtual workstation that more closely reflected the type of internet speed you would experience in the USA, and I then had two sets of ‘cloud speed’ benchmark data, the Australian and the US versions.
An example of how some of my research was used may be seen in the recent new offering by Unifi. The research identified some differences in the pricing models of the various products, and this information assisted Unifi in the creation of an additional pricing model.
Where can you learn more about this research? A couple of weeks back I mentioned that the details and results of the competitive research project will be shared in a global webinar.
In summary, I really enjoyed doing this research project and I think the results will be useful to Revit users and BIM Managers who are trying to evaluate different content management tools. It is true that they each do have certain strengths, so which will you choose?
PS. It is interesting to look back, to where almost a year ago I asked you all:
Which content manager for Revit would you recommend?
Have you ever wondered how to convert a Revit macro into an addin? You can follow Harry’s steps over at this post.
What about getting some sample code for Python and Ruby Revit projects? From AEC DevBlog:
… the code examples are hidden in the default macro projects created by macro manager, see below image, the project is the default python project, there are several “if False” statements, if you remove the line of “if False”, uncomment and unindent 4 spaces to methods below it, the methods will become available macros and appear in the macro manager, and you will see the same “if false” in Ruby projects too:
I experienced an issue where some Windows 10 updates broke my favourite screen clipping tool, OneNote. Typically I’m using it all day long with the Winkey+Shift+S shortcut to send screenshots to OneNote. Is yours broken too, perhaps by Windows replacing it with the built in clipping tool? Here’s how I fixed mine:
Disable the Global Windows + S Shortcut Key
Another workaround is to disable the global shortcut key Windows + S. Follow this how-to article or make the registry changes using command line:
Press the Windows key + X to open the WinX menu, and then click “Command Prompt” or “Windows PowerShell“.
Copy the following command and then paste it into the command line. Press Enter. reg.exe add HKEY_CURRENT_USER\Software\Microsoft\Windows\CurrentVersion\Explorer\Advanced /v DisabledHotkeys /t REG_SZ /d S /f
Reboot your computer and OneNote screen clipping shortcut key should resume to work.