Autodesk is looking at using “machine learning to automate speech and image recognition, make photos and videos searchable using system generated (automated) SmartTags, and to provide metrics on project safety, productivity and quality.”
From email:
Investment in Smartvid.io. Today Boston-based construction-focused startup Smartvid.io founder Josh Kanner announced the close of the company’s Series A funding round for which Autodesk is a proud investor. Smartvid.io embraces machine learning to automate speech and image recognition, make photos and videos searchable using system generated (automated) SmartTags, and to provide metrics on project safety, productivity and quality. The investment is expected to accelerate the delivery of AI to the Architecture, Engineering, and Construction (AEC) industry and the built environment as a whole. Smartvid.io is also now integrated into Autodesk’s BIM 360 software. Mr. Kanner was the co-founder of Vela Systems, which ultimately became Autodesk BIM 360 Field after Kanner’s company was acquired by Autodesk.
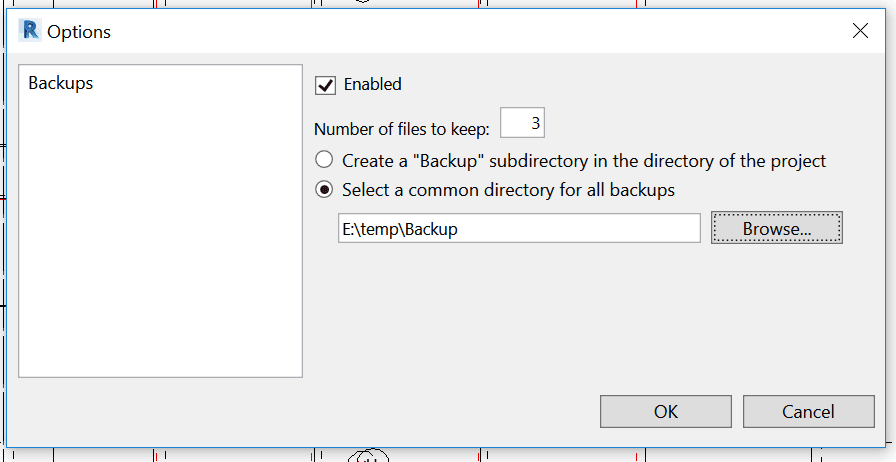
Revit creates a bit of a mess sometimes, leaving behind backup and journal files that can take up disk space and clog your system. I have posted about a few cleanup tools before, including:
You may also have heard about MoveBackup. This tool was created by Maxence Delannoy and has now been renamed to Wormhole for Revit. It comes as a 30 day trial and it can move your Revit backup files to a directory that you choose.
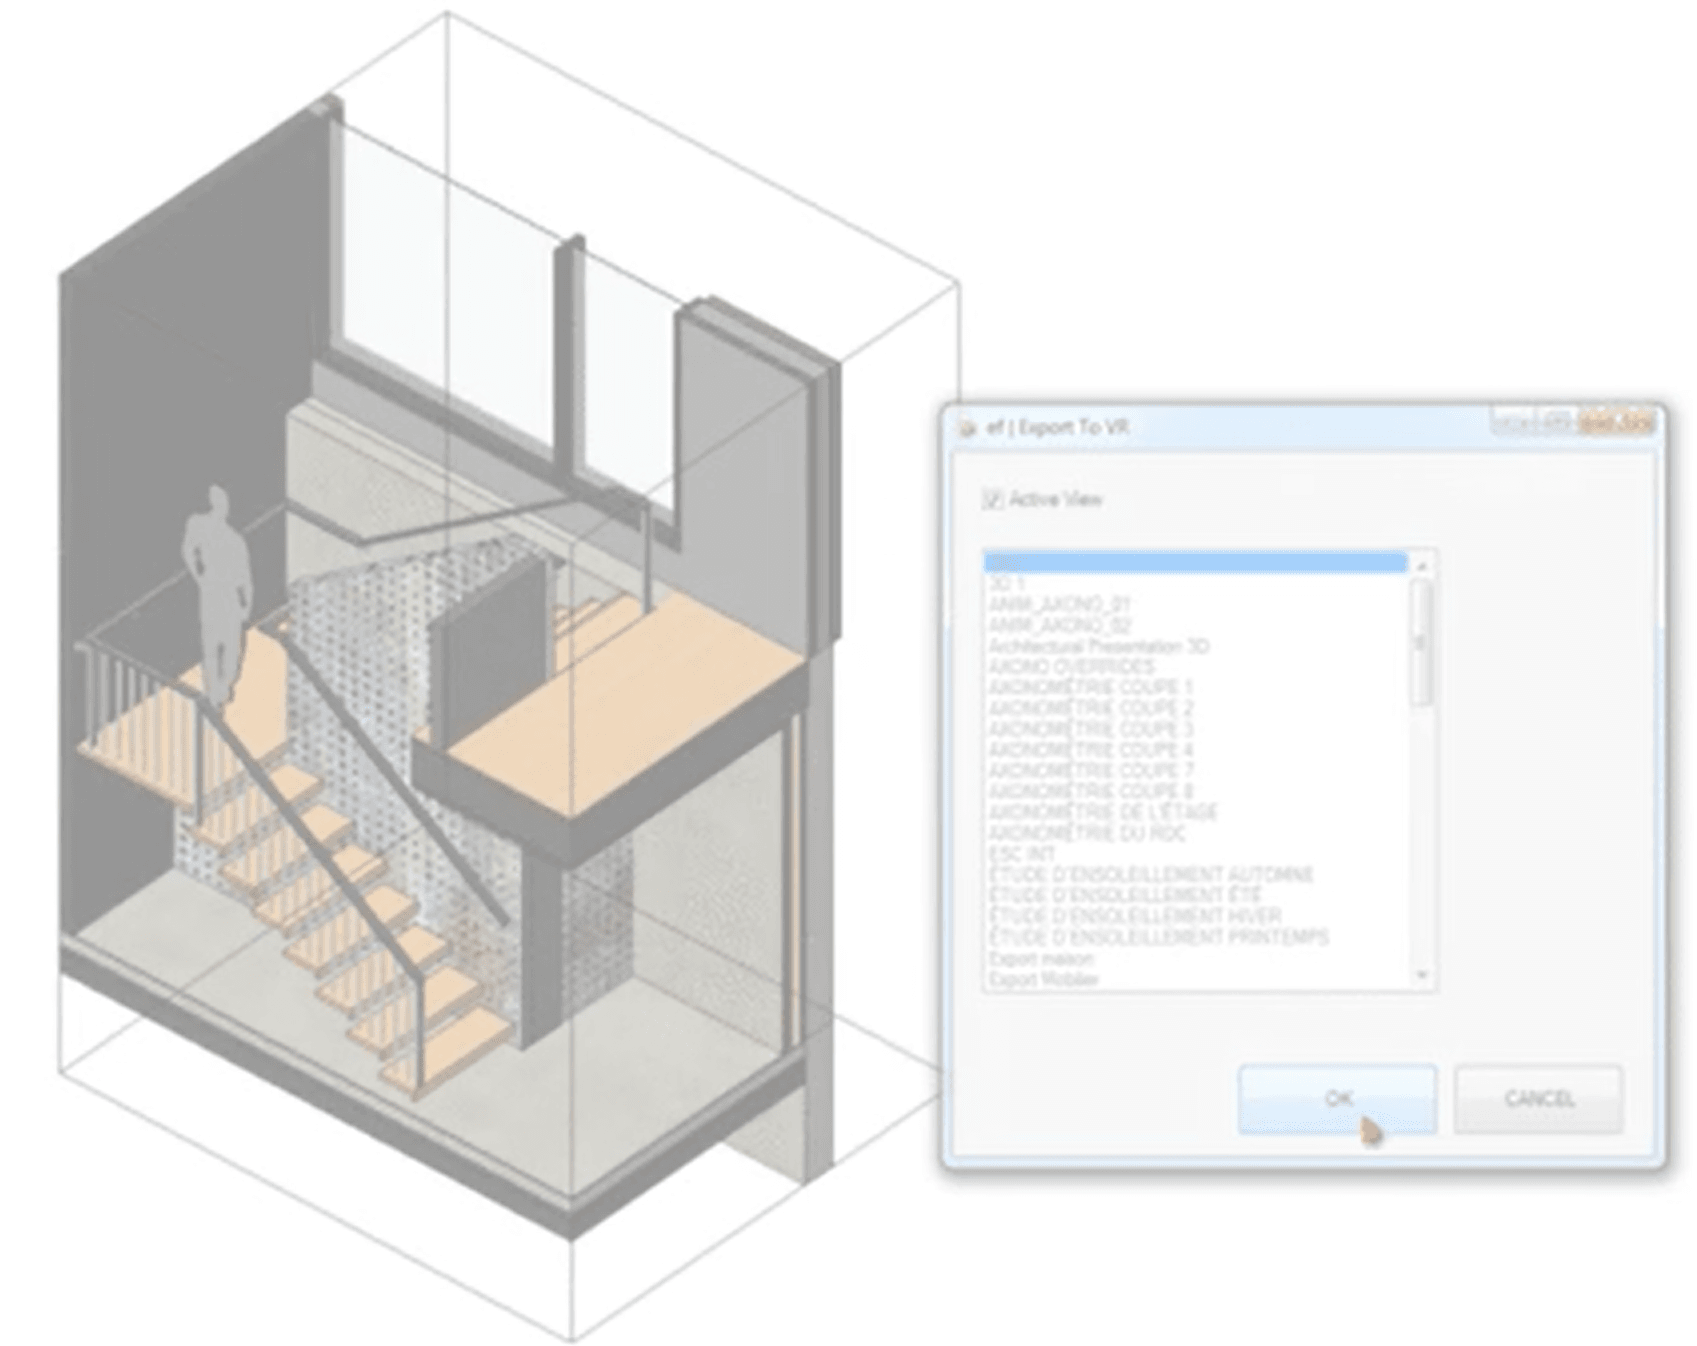
There is a nice little addin in the works from Emanuel Favreau … he is working on a Revit to Unity exporter that includes all materials and textures. You can open a sample model in WebGL here (probably should use Chrome).
There is obviously a lot of development in the industry at the moment to create the best experience in moving BIM models into gaming environments for various reasons, and there are a lot of solutions that are doing this in various ways. Typically, these offer real time rendering and visualization, and the side benefit of allowing models to be viewed in VR. Which method do you recommend?
The add-in supports export of 3D model geometry from Revit to Unity allowing users to have the first person 3D shooter game like experience while using Revit created model as the 3D environment.
The main features of the add-in includes:
Export of 3D model geometry with materials and textures from Revit to Walk-Through-3D.
Manipulation of the resulting 3D model in a similar fashion to a 3D first-person shooter game.
Support of textures along with an ability to apply weather effects.
Generation of a standalone executable package to view the exported Revit model in a three-dimensional representation that requires neither Autodesk Revit nor Unity installations.
Support of HTC® Vive virtual reality headset and controllers.
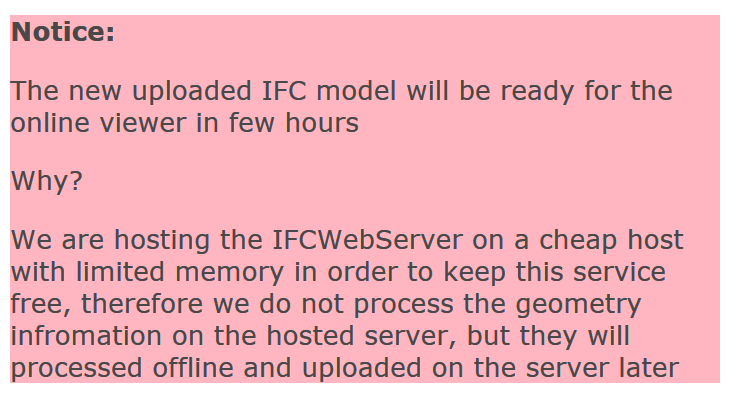
I have posted about BIMserver a few times before, including how to setup and run your own IFC web server. It seems that BIMserver and IFCWebserver are actually different but similar things (see this page). There is a publicly accessible instance of IFC Web Server over at this link.
The hosted version seems to be a bit of tech demonstration rather than a full production tool? Here is a link to the GitHub repos as well.
To test it out, you can take these basic steps:
Create a user account and login
Upload an IFC file (I tried a 20mb file which took quite a while)
Wait for processing
View and work with your file
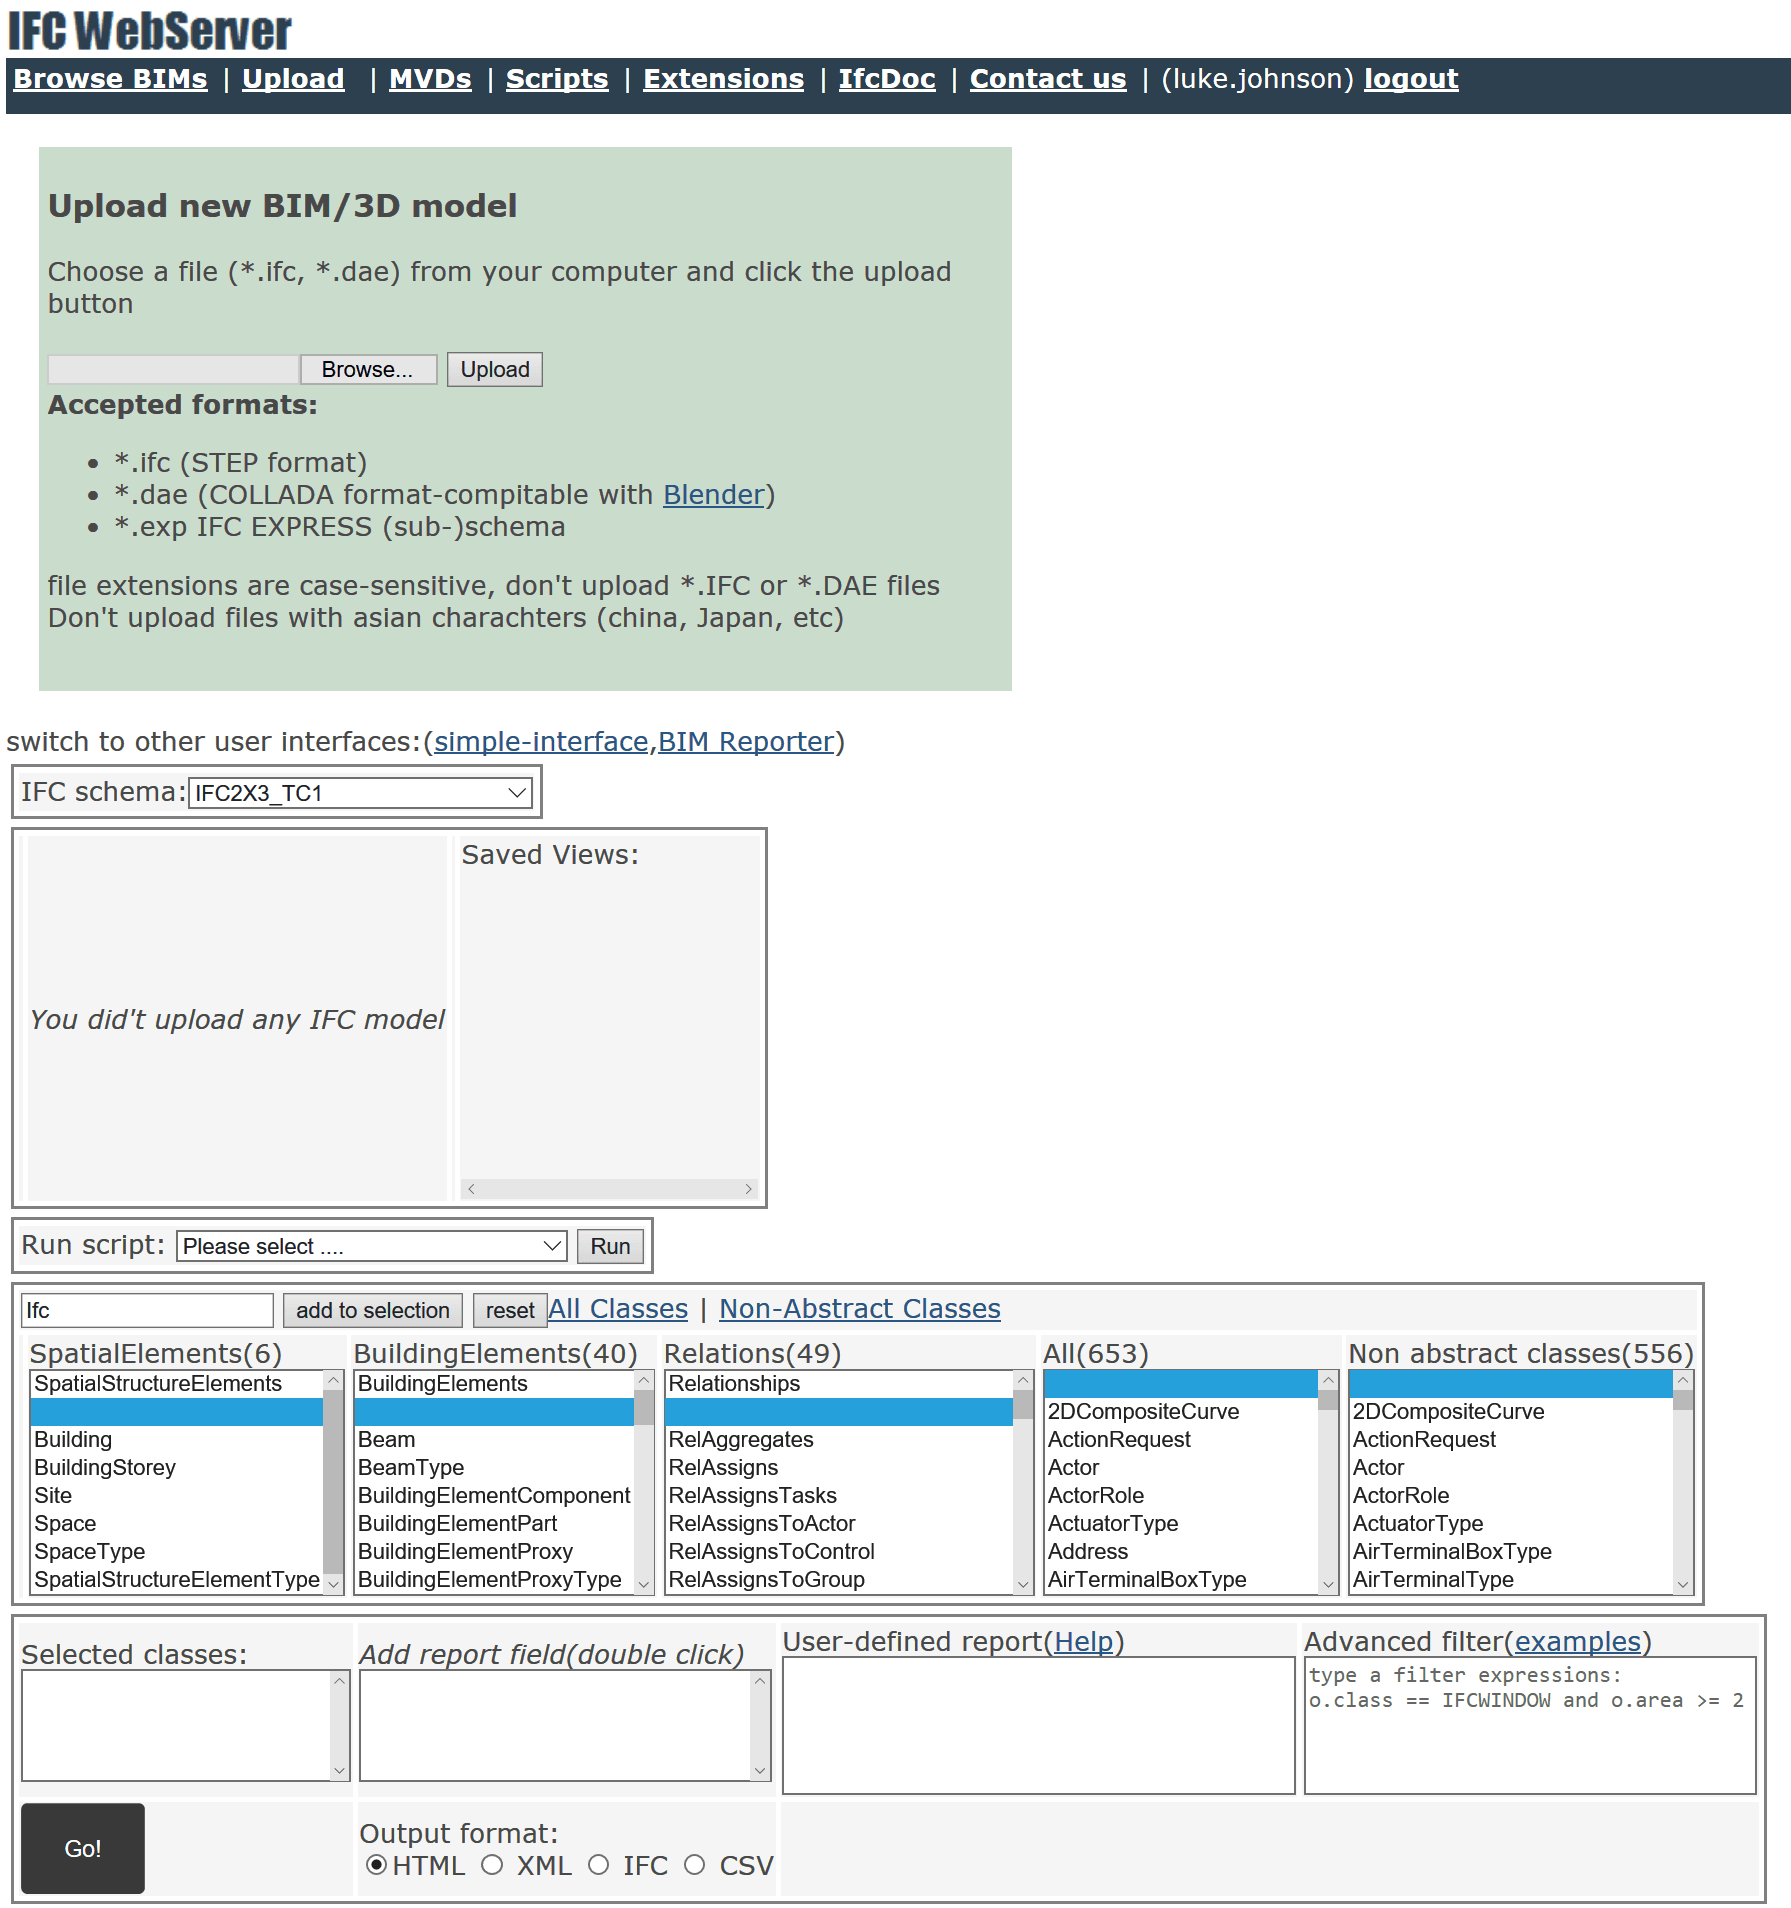
Here is a look at the basic interface:
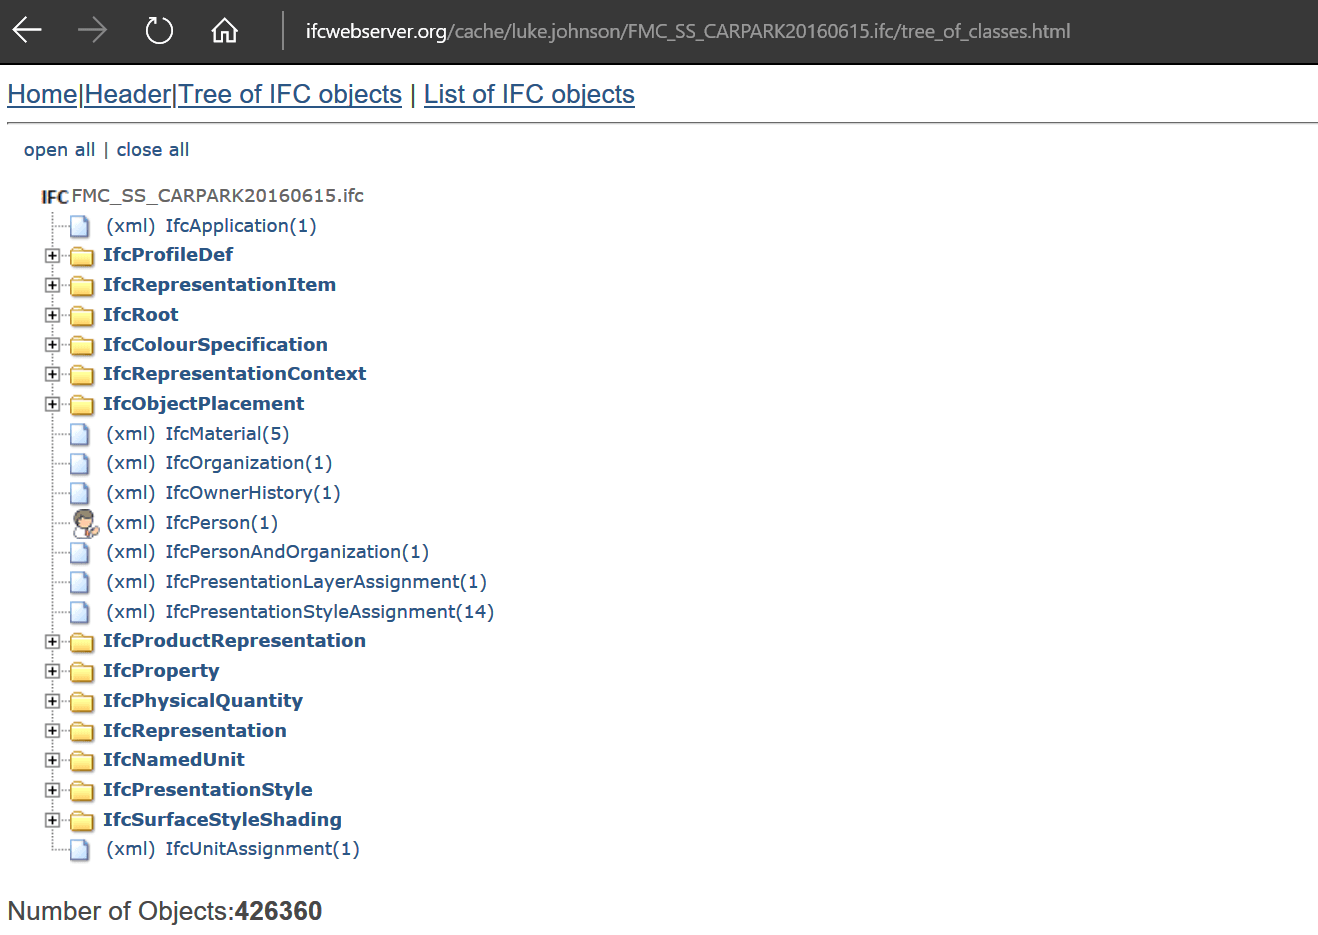
It offers a few interesting functions, including the ability to browse the data as a tree:
From the website:
IFC WebServer is a data model server and online viewer for Building Information Models (BIM) based on IFC standards.
It aims to simplify sharing and exchanging of information from BIM models using open and standard formats like (IFC, HTML, XML, CSV, JSON) and check the quality of BIM models (Level of Details, Level of Development). BIM managers and designers can query, filter and make reports about any information inside IFC models easily.
The project consists mainly of two parts:
(1) Data model server IFCWebServer
IFCWebServer enable 100% access to all information and relations inside IFC models. It supports all IFC official release starting with IFC2X_Final issued on 2001 to the latest release IFC4 Add 2 release issued on July 2016. Moreover, it supports any valid IFC sub schema or extended schema so it can be used by researchers and IFC developers .
The IFCWebServer can be used also in universities as an easy to use portal within BIM courses. Students can register and upload IFC models, explore the models structure, apply filters, create sub-models, generate reports, study the IFC data model and compare IFC official releases.
Despite of having easy access to the information in BIM models as the main interest (through queries, filters, scripts and reports), the online 3D visualization offered by BIMViewer provide an handy way to view, share BIM models and visualize the results of data queries online inside the web browser.
scale a fill pattern without having to reload it (plus it automatically previews the scale change)
Note:
As per the release notes, it will force a Dynamo upgrade onto your system. Currently for me, I keep DynamoInstall1.2.1.exe handy: so I uninstall Dynamo 1.3.2 and install 1.2.1. This allows me to have backward compatibility to Revit 2015, which I still need (for now).
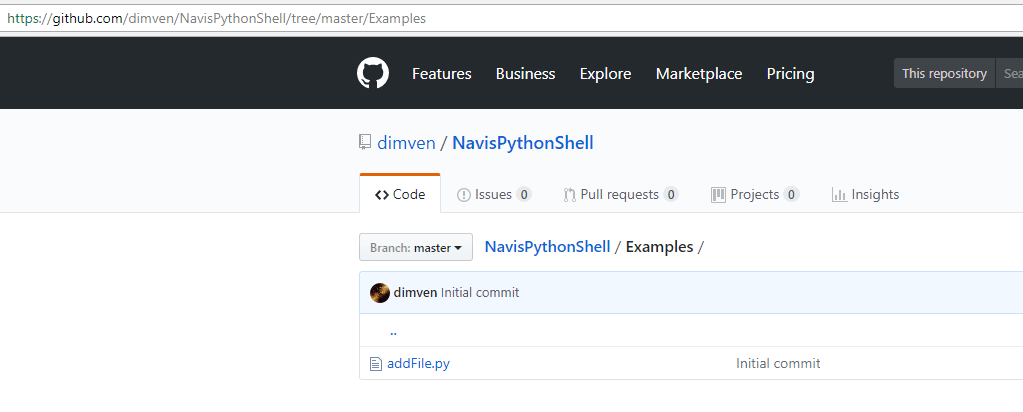
Interesting little release by Dimitar Venkov on Github a few months ago. It is essentially a Python shell for Navisworks 2016. You install by unzipping as per instructions below. You may have heard about RevitPythonShell, but obviously this one is for Navis.
To install, simply extract the zip archive in the below folder:
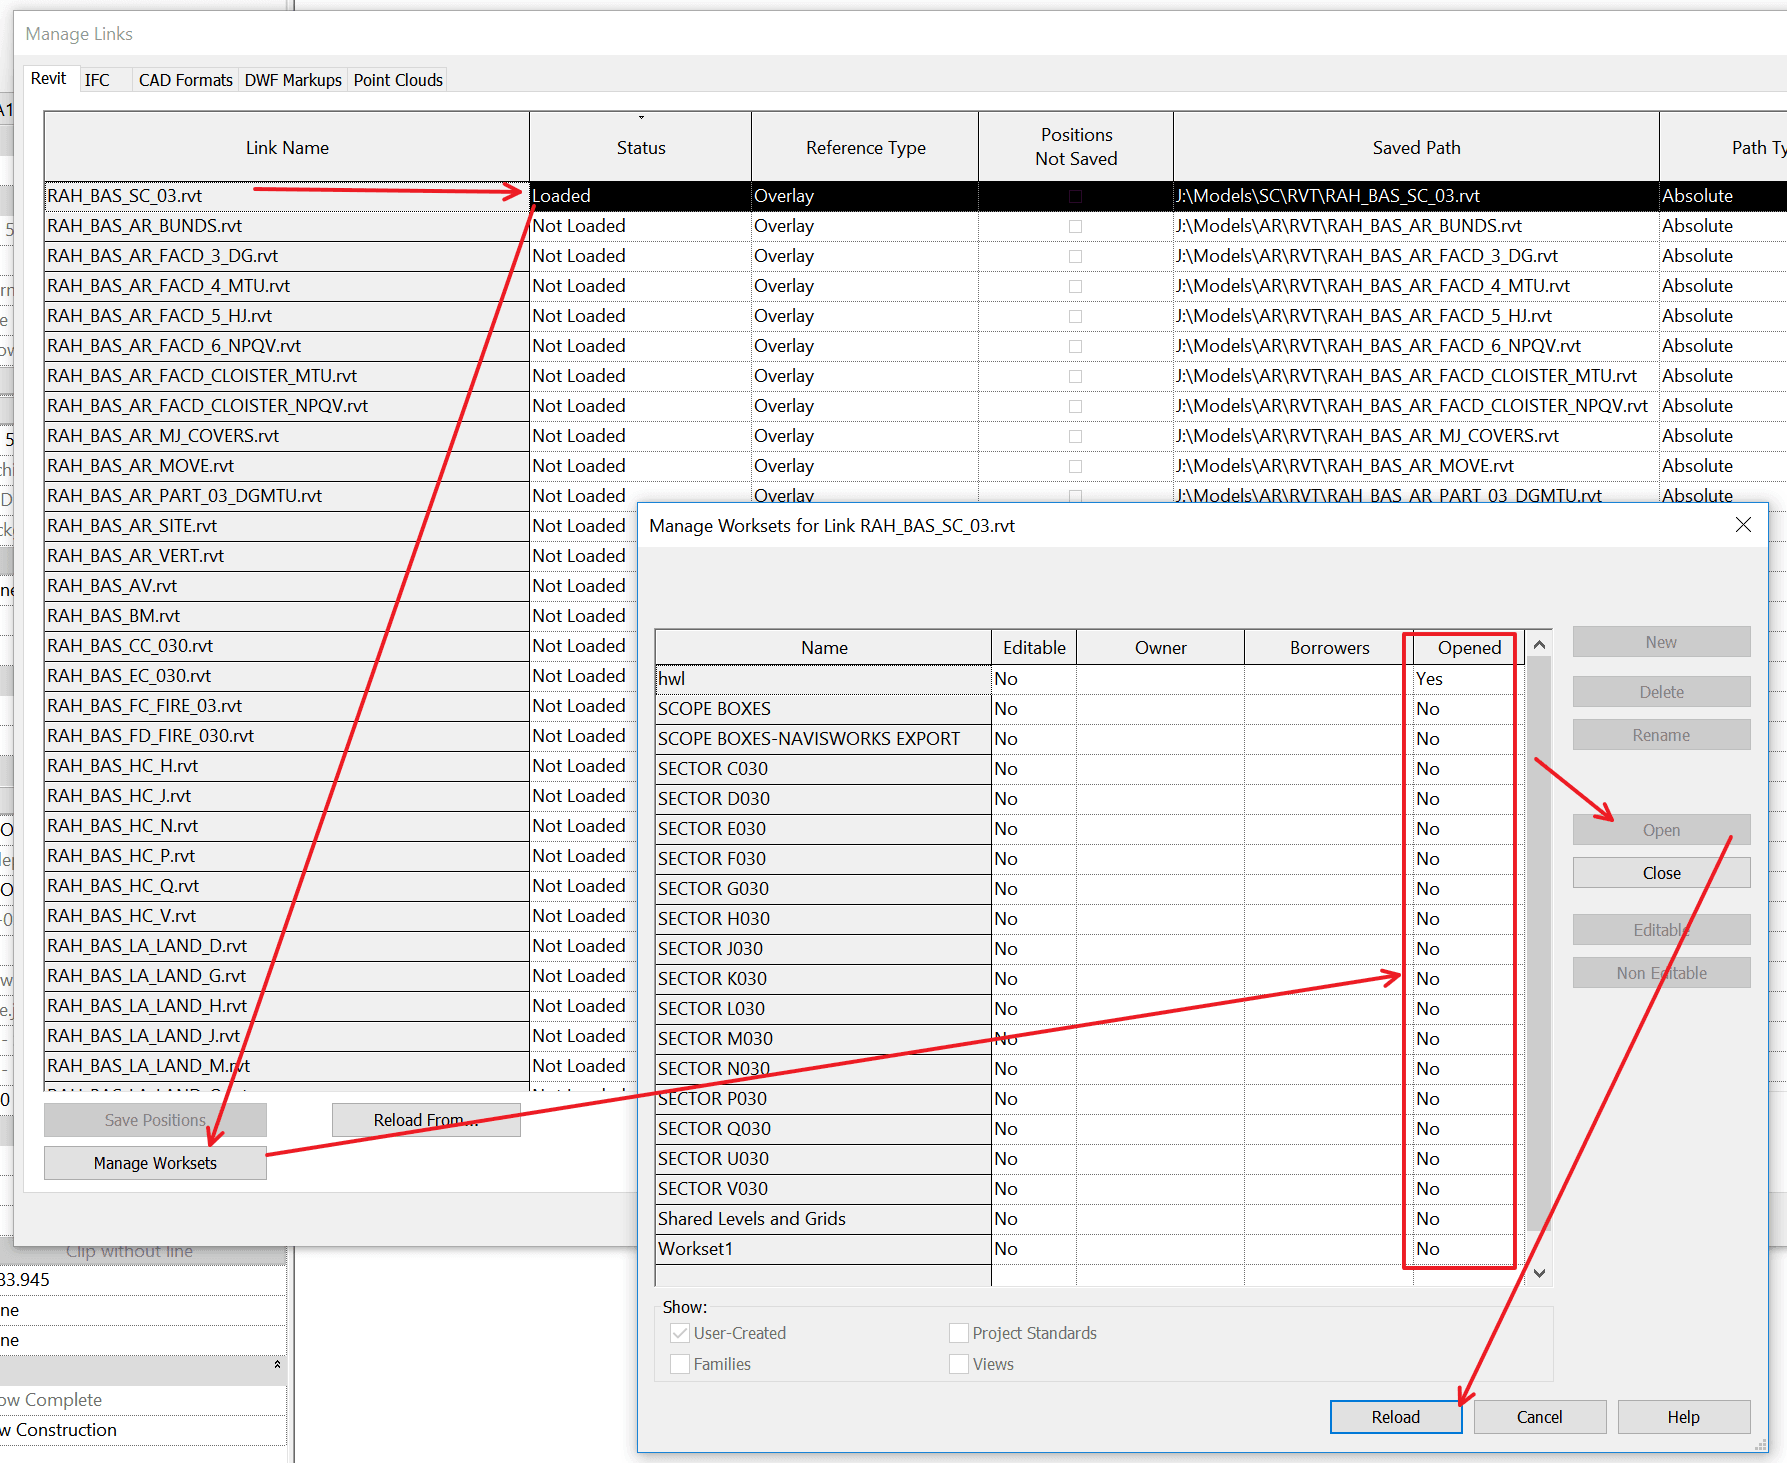
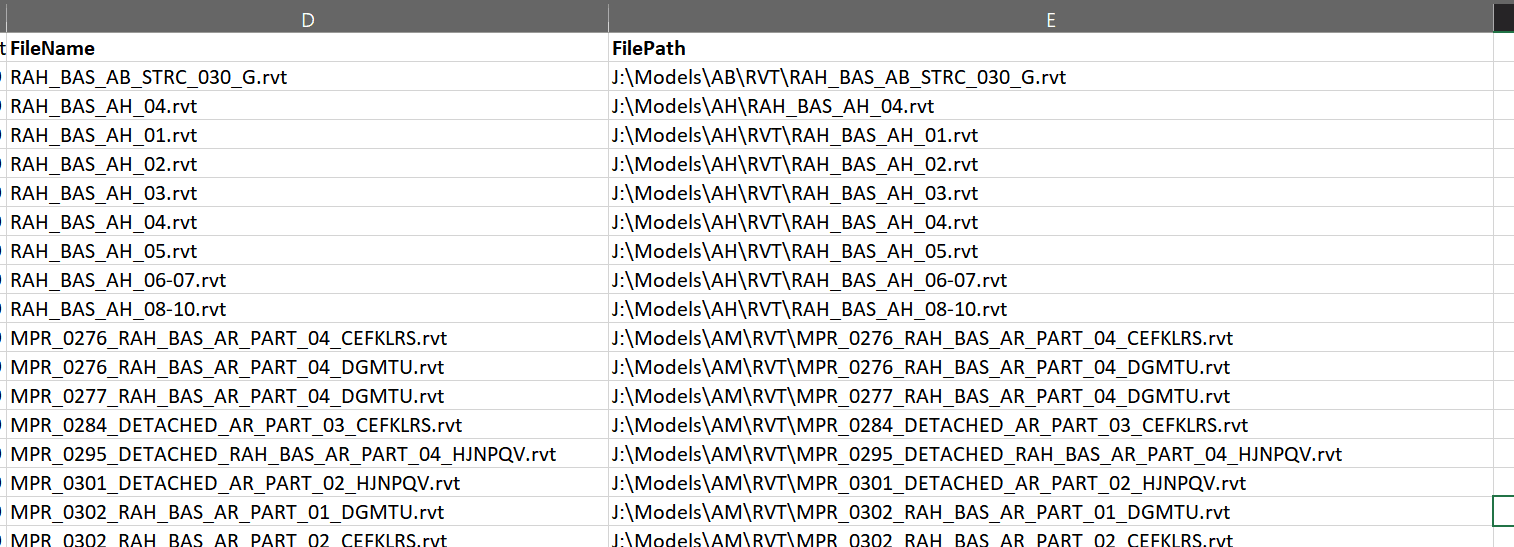
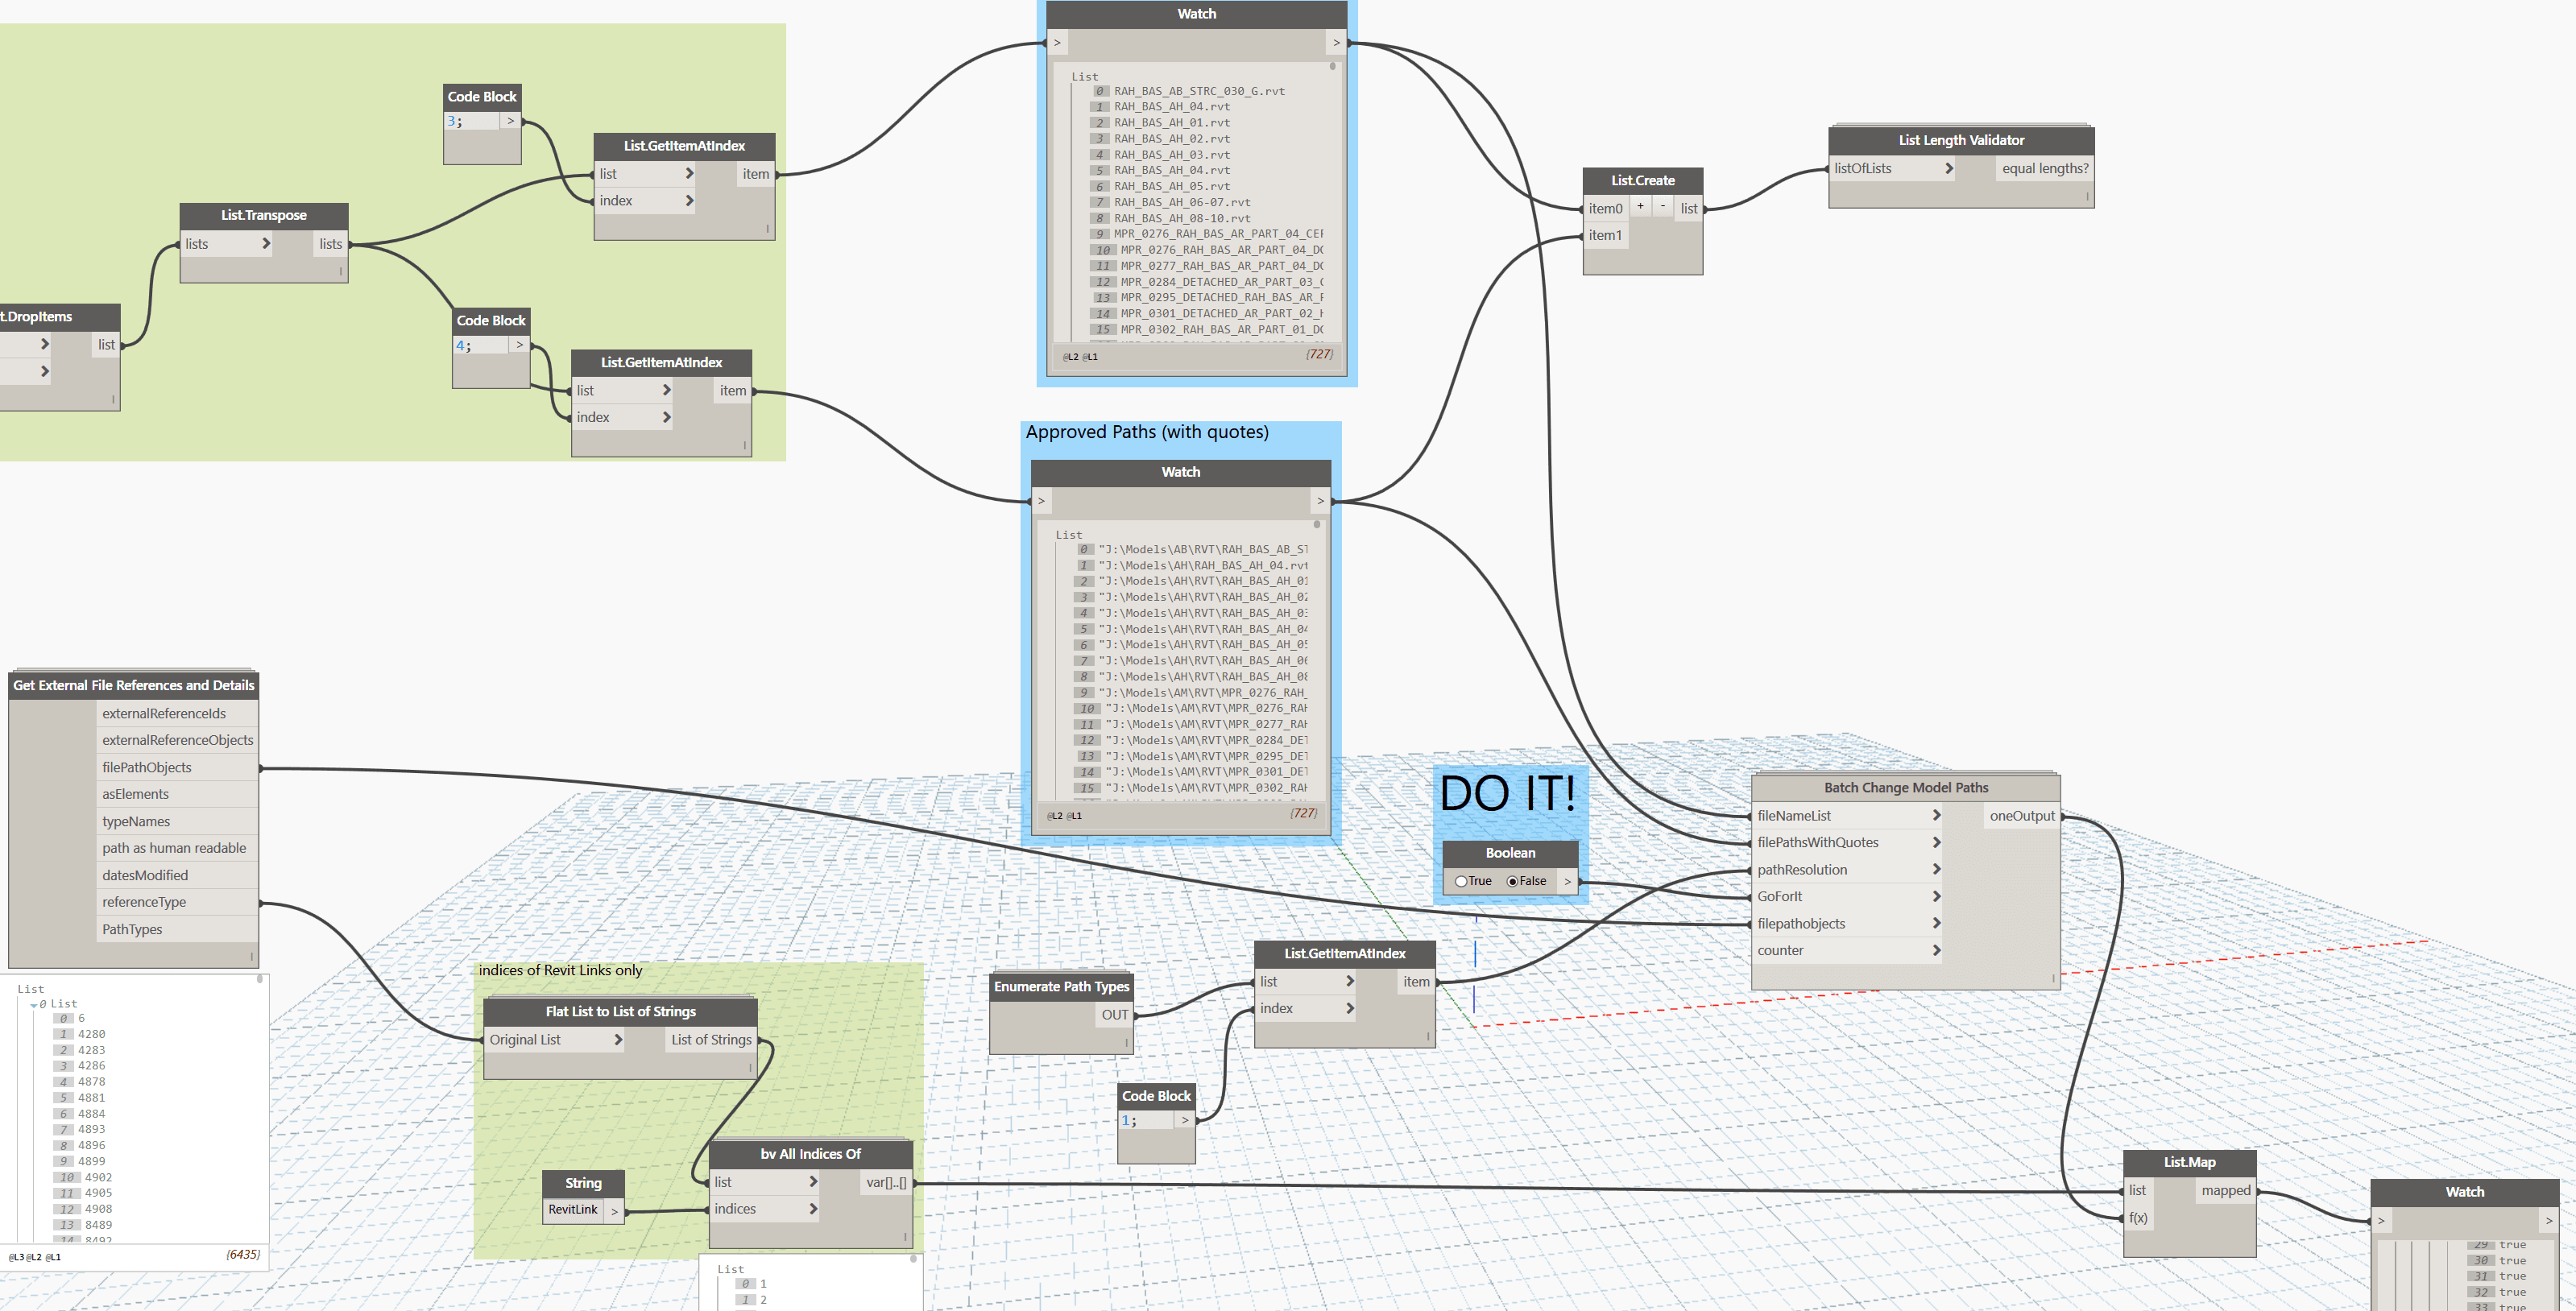
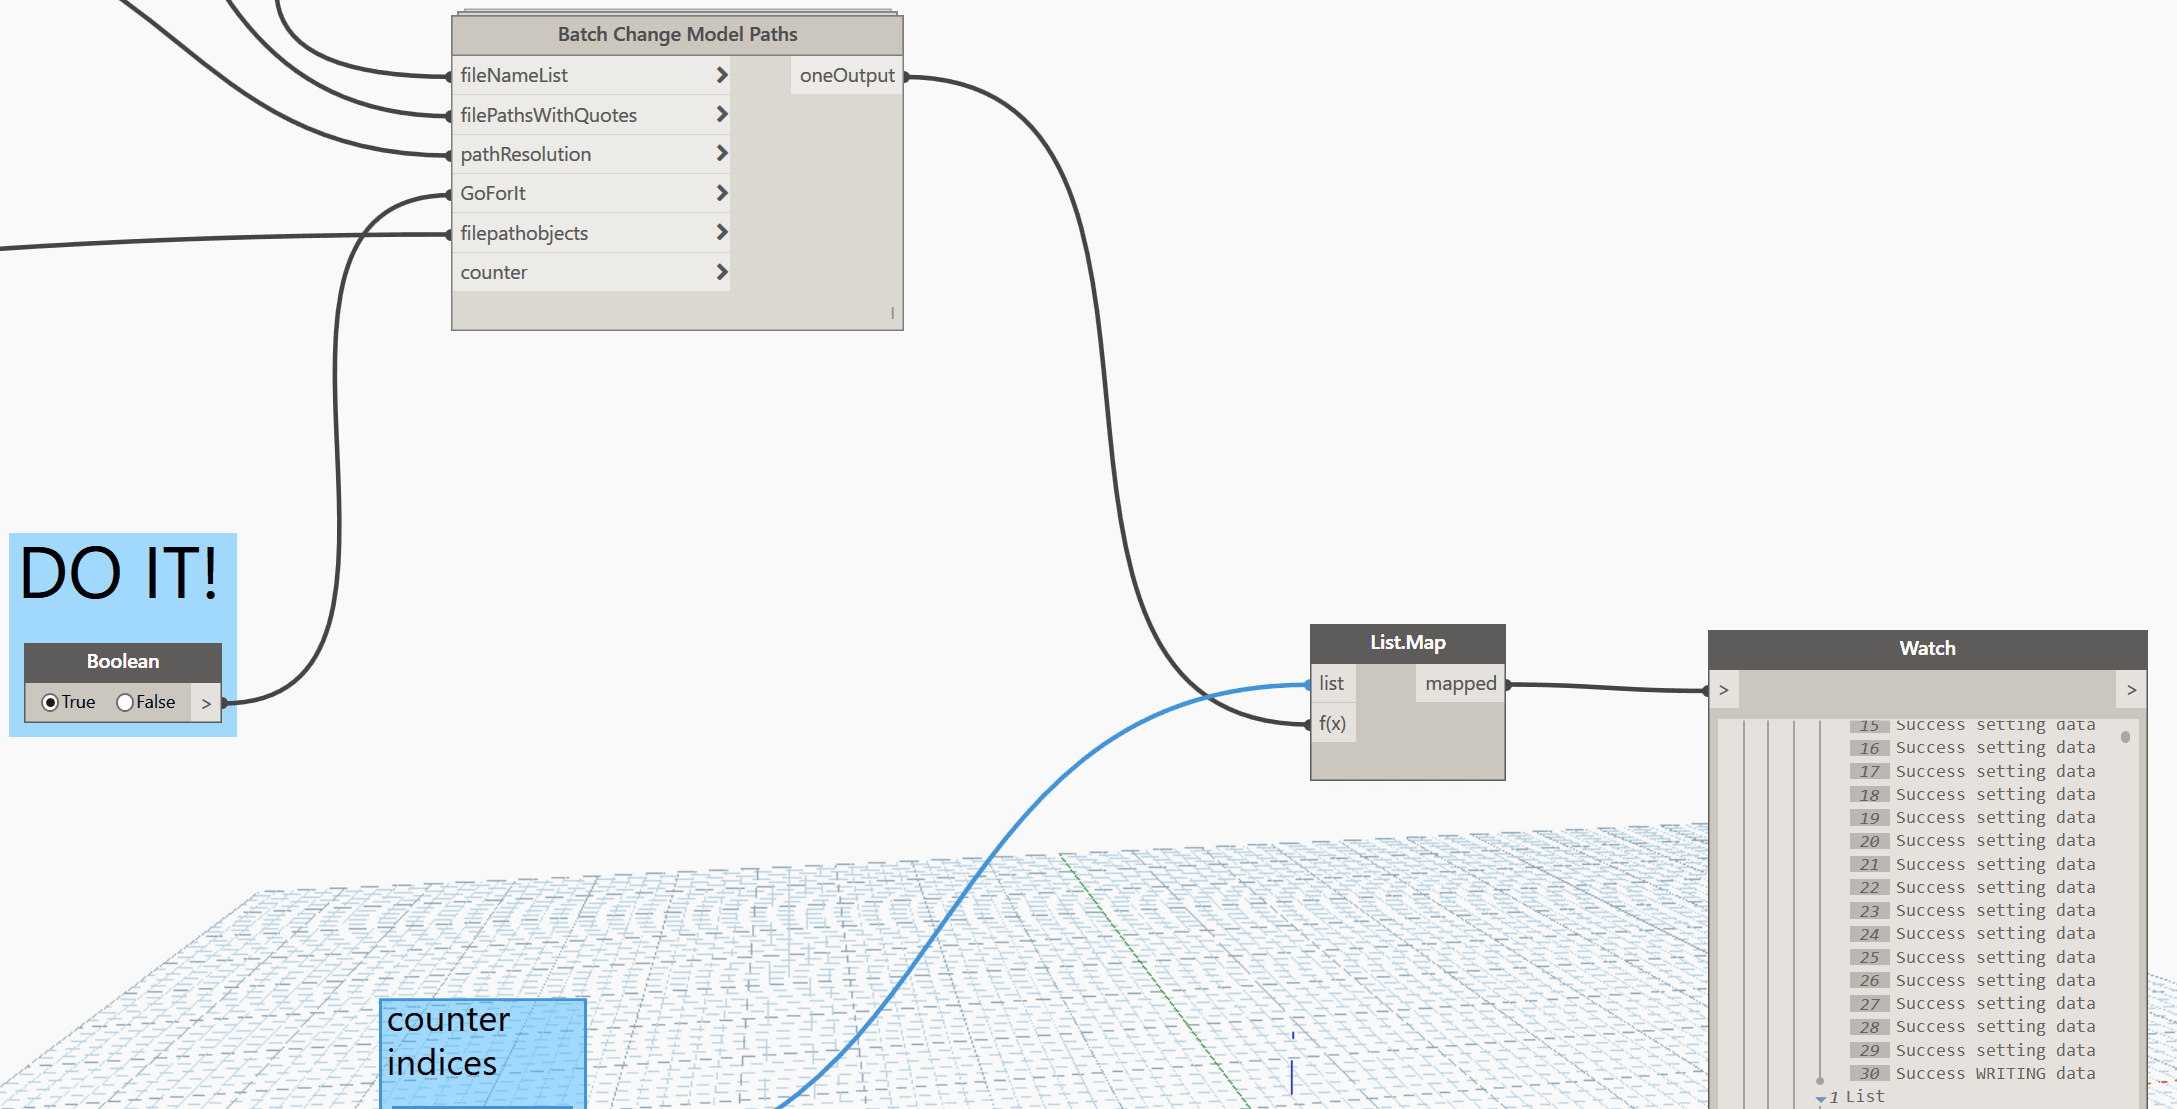
The Revit API is actually something pretty special. People will go on and on about how Revit needs this feature or that feature, but the fact is that you can build almost any feature you like with the API. Recently, I have been running quite a few batch operations from the scope of a federated Revit model: so I will have one RVT file, with hundreds of Revit links, and I will process them from that main federated model.
On one recent project, we had to deliver to a Client a linked dataset, with Revit link file paths resolving correctly. As you know, people work in many different IT environments, and the pathing of Revit links may vary widely.
I set up an ‘approved’ list of Revit file paths, that looked something like this:
I knew that in Dynamo with Python I could get a lot of information about linked files using the ExternalFileReference class. What I discovered during this process is that there is a TransmissionData API class that let’s you do some pretty interesting things…
You see, I was thinking I would have to set up a batch method to open this files, change the file paths, and close them. But the TransmissionData class is basically what is implemented in eTransmit for Revit – it allows you to ‘lightly touch’ the Revit file and simply change the Revit link paths, and also set a switch saying ‘this file has been transmitted’. This puts the file in an appropriate state for re-opening in the new path environment. Pretty cool huh?
Once I figured out how to implement those TransmissionData actions in Python, I just had to build a node that, running from the federated model:
examines each link for the links inside of it
replaces erroneous paths with the correct file path
sets the new paths to the file
I did this in the hacky way of a “counter with List.Map” in Dynamo. In the future I’ll probably fix it up to be a ‘proper’ Python script but this works for now. In about an hour it fixed the linked file paths of 600 Revit links, all with the click of a single button 🙂
Whenever you are looking to implement a new technology in your firm, you typically go through a few steps:
Figure out what is out there in the marketplace – What products are available?
Collect data about all of the technologies that may suit your use case
Rigorously compare and analyse all the data
Make a decision and go for it
There are some excellent content management tools out there for Revit now, so how can you choose? I went through a very comprehensive research analysis of a number of Revit CMS platforms, and I posted about the process here.
Then I caught up with Steve Germano over at Unifi to talk about the results. You can view (or just listen) to it here:
Feel free to comment here with your thoughts and we can keep the conversation going!
In Windows, you will often use either Map Network Drive dialog or net use command to map a network drive. You can use that method with a shared folder trick to map a local folder as a drive too, as described here.
But there is an even easier way, that is more flexible in some ways. It is the subst command, and it basically tells your Windows system to refer to a folder as a drive letter. Its usage is very simple, for example:
subst J: "E:\some folder\J_DRIVE"
If you want that to show up as a ‘drive’ at each reboot, just put the above command into a CMD file and point to it from your Windows startup folder.
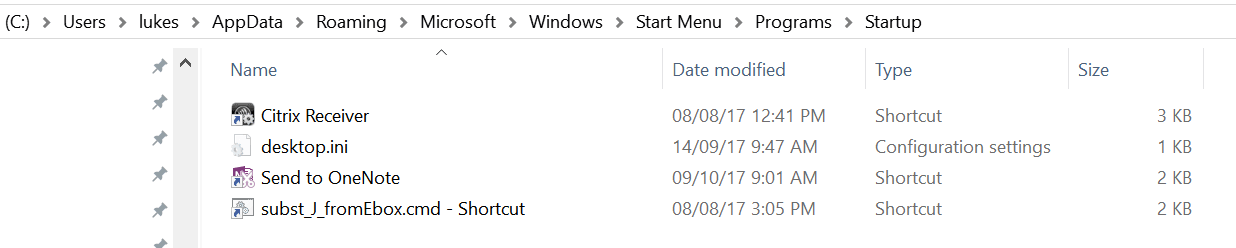
For your assistance, here is the path to your typical User Startup folder in Windows: