Great tip from Philip Chan.  Basically:

  1. Make a Material Take-off / Multi Category
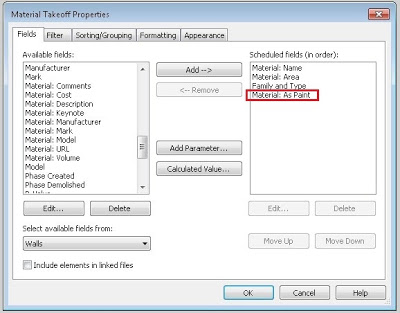
  2. Add the Material: As Paint parameter
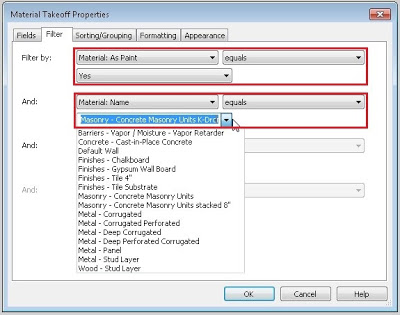
  3. Filter by this parameter = Yes (now the schedule is only showing painted surfaces)
From here, you can right click on a row in the Schedule and click “Show” – this will open a relevant view and highlight the element that is hosting the Split Face.  Nice!

Here’s his workflow:
Next window allows me to add fields to my schedule, I then notice there is a field/parameter called “Material: as paint”. Sounds like something suitable in this occasion.

As I move on to the filter tab, something interesting shows up…
I can now set the “Material: as paint” to equal to “Yes”, which means I tell Revit that this schedule only look for the “Paint” surface on all walls; the next filter rule, I can even set it to a specific material to be included in this schedule.


The last thing is to tell Revit to calculate total area for this particular material.

Once this is done. Volia! I can now let Revit to keep track on all my “paint” surface.


via

“new ability to import and visualize massive datasets captured from reality as point clouds. If you are a modeler, you can view point clouds in true color in the 3ds Max viewport, interactively adjust the extent of the cloud displayed, and create new geometry in context by snapping to point cloud vertices.”

Coming 30 September 2013

Read more:

There is a difference between BIM and automation.  Using Revit for BIM isn’t automatic – you need skills, time and effort to make it work.

Certain Revit add-ins fill a real need to make that leap between ‘hard work BIM’ and ‘automated BIM’.  SAuBIM – Code Calcs is a proven tool for automating compliance checks related to room areas.  It has been updated to version 2.0, and is working with 2013 and 2014.

Oh, and did I mention that Harry Mattison has been involved in the process – you won’t be disappointed!

As Jeff says:
Simply click “Update Tags” and you have calculated data semi-automatically updated into your room tag!

You can get hold of Code Calcs for Revit 2013 and 2014 by using this link.

If you haven’t heard of it before, it automatically creates schedules for:

·         Occupancy Loads (Per Room)
·         Required Male Water Closets
·         Required Female Water Closets
·         Required Lavatories
·         Required Drinking Fountains
 
and it allows you to tag this important data in intelligent Room tags.

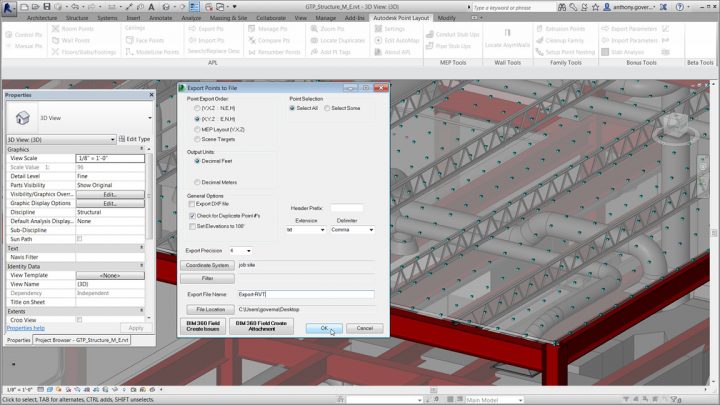
Interesting – this kind of turns the point cloud technology upside down… It goes something like this:

  • Revit model 
  • to points
  • to site survey hardware (set out the building)
  • build it
  • then laser scan the as constructed
  • compare points of the as built model for quality control
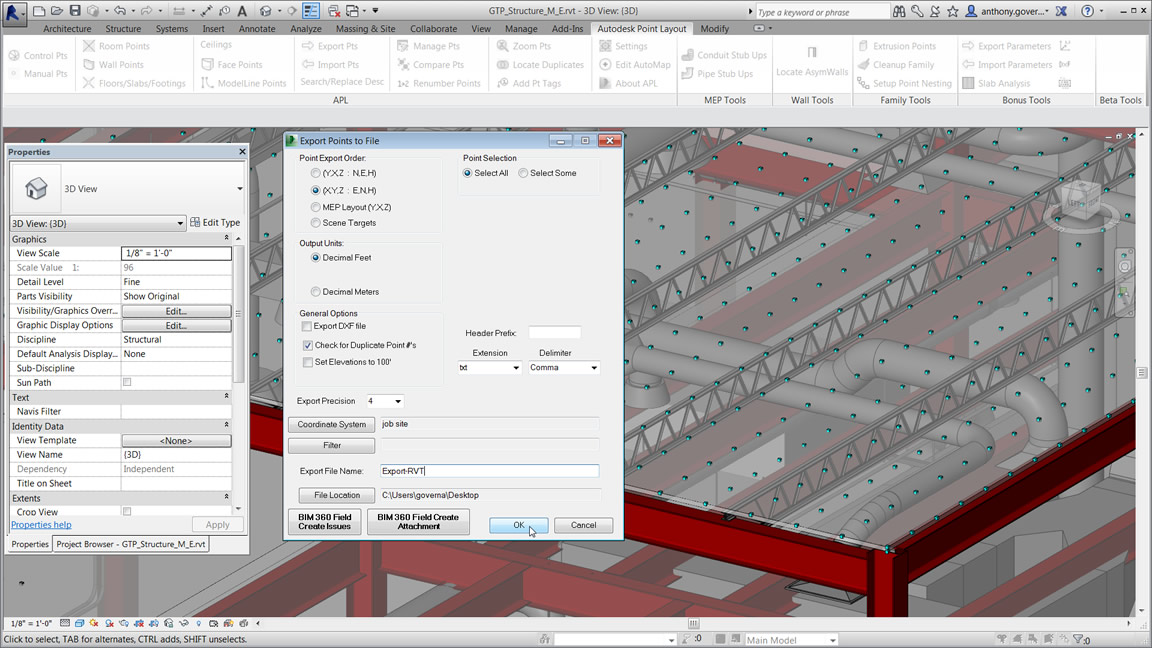
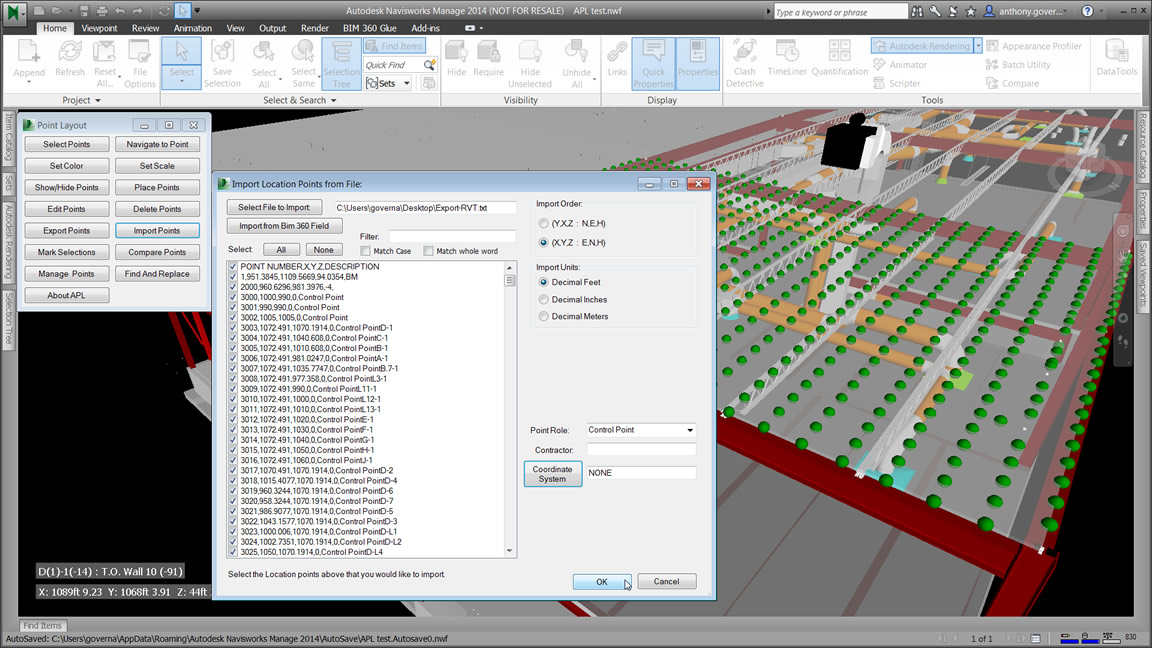
The part I’m trying to get my head around is this – these aren’t really point clouds, but rather, they are setout points of Revit BIM 3D elements for construction use.  Perhaps the word ‘point’ is going to be more popular than the word ‘BIM’ this year 🙂

Learn more / trial at:
Point Layout | Construction Layout Software | Autodesk

Dunn Edwards have provided an adsklib file for download that matches their paint colours to Revit materials.

I previously posted about Lysaght adsklib way back in 2011:
What Revit Wants: Lysaght Bluescope Colorbond Autodesk Material Library

I look forward to the day when all manufacturer materials come in adsklib format – would save us all some work 🙂

Here are the Dunn Edwards links:

Revit Materials 
‘adsklib’ file (20mb)
  D.E. 5000 – 5093 colors

(dropbox access request)
http://www.arch-intel.info/revit-dunn-edwards-paint.html

They also provide some informative videos —

Getting the adsklib into Revit:
Setting up corresponding colours:

Ever noticed how the Graphic Surface Pattern of a Material will override a Walls surface in a Realistic (ie. materiality / render check) view, but not the edges?

Firstly, I don’t think Graphics values should affect Realistic view at all.  Secondly, it should at least be consistent: either override wall faces and edges, or don’t override at all, yeah?

Anyone know if this was fixed in 2014?

I thought I got in a loop today:

  1. Export DWG
  2. Expand All
  3. Select all rows
  4. Try to delete the number in the Color ID box
  5. This warning will come up:

You have to press Close for every selected row (could be hundreds) – quickest way is to hold down the Enter key until the warning goes away.

Originally I thought this was a looping bug, but it is just Revit being overly thorough 🙂