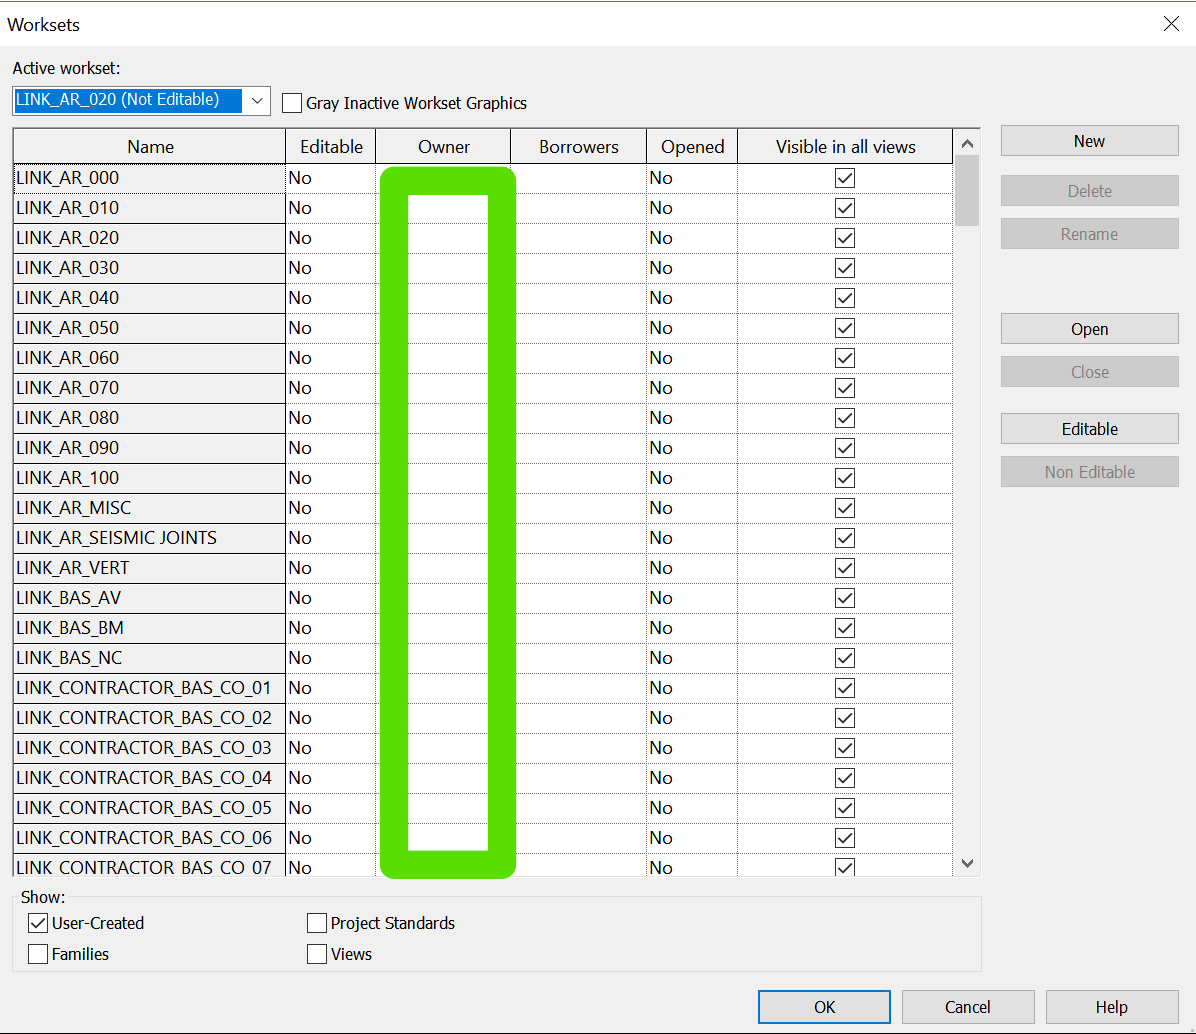
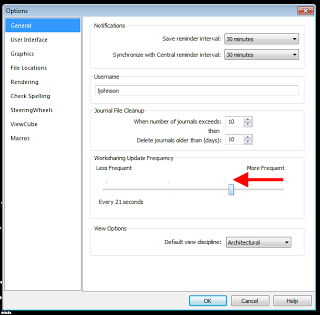
If you have gone through a process of saving Central models, and you have forgotten to ‘Synchronize with Central’ before closing them for the first time, you may find that your user has all User Created Worksets checked out in those files. A quick recap:

  • Workshared Revit files use a persons Revit user name (sometimes linked to an Autodesk SSO login) to determine if things are checked out
  • If someone has a User Workset checked out, you won’t be able to edit it until they Relinquish. (Note: you can Detach and recreate the file but that is dangerous if you have multiple people working on something)

Basically I had a bunch of Revit files that had all User Worksets from certain usernames checked out. They were upgraded and they were Central files. All that was needed was a simple Open and Relinquish. As I didn’t want to do this manually, I sourced some macro code from here and adapted it for my situation.

What does it do?

This Application level macro starts with a dialog box where you can select files. After you select them, it then loops over each file and Opens it, then does a Relinquish All Mine on User Created Worksets, and then it Syncs with Central and Closes the file. The key part of the code is here:

How to set it up?

First, get the code below. Copy and paste it into a new Application Macro in Revit.

 /*
  * Created by SharpDevelop.
  * User: lukes
  * Date: 1/10/2018
  * Time: 2:54 PM
  * 
  * To change this template use Tools | Options | Coding | Edit Standard Headers.
  */
 using System;
 using Autodesk.Revit.UI;
 using Autodesk.Revit.DB;
 using Autodesk.Revit.UI.Selection;
 using System.Collections.Generic;
 using System.Linq;
 using Autodesk.Revit.ApplicationServices;
 using System.IO;
 using System.Windows.Forms;
 
 namespace relinquish
 {
     [Autodesk.Revit.Attributes.Transaction(Autodesk.Revit.Attributes.TransactionMode.Manual)]
     [Autodesk.Revit.DB.Macros.AddInId("30EBC375-5A4C-4917-AB07-D7212C9ED3FA")]
     public partial class ThisApplication
     {
         private void Module_Startup(object sender, EventArgs e)
         {
 
         }
 
         private void Module_Shutdown(object sender, EventArgs e)
         {
 
         }
 
         #region Revit Macros generated code
         private void InternalStartup()
         {
             this.Startup += new System.EventHandler(Module_Startup);
             this.Shutdown += new System.EventHandler(Module_Shutdown);
         }
         #endregion
         public void RelinquishMineFromFiles()
         {
             
             
 OpenFileDialog theDialogRevit = new OpenFileDialog();
 theDialogRevit.Title = "Select Revit Project Files";
 theDialogRevit.Filter = "RVT files|*.rvt";
 theDialogRevit.FilterIndex = 1;
 theDialogRevit.InitialDirectory = @"C:\";
 theDialogRevit.Multiselect = true;
 if (theDialogRevit.ShowDialog() == DialogResult.OK)    
             
     {             
 /* string mpath = "";
         string mpathOnlyFilename = "";
         FolderBrowserDialog folderBrowserDialog1 = new FolderBrowserDialog();
         folderBrowserDialog1.Description = "Select Folder Where Revit Projects to be Saved in Local";
         folderBrowserDialog1.RootFolder = Environment.SpecialFolder.MyComputer;
         if (folderBrowserDialog1.ShowDialog() == DialogResult.OK)
         {
          mpath = folderBrowserDialog1.SelectedPath;*/
                 foreach (String projectPath in theDialogRevit.FileNames)
                 {
                  FileInfo filePath = new FileInfo(projectPath);
                         ModelPath mp = ModelPathUtils.ConvertUserVisiblePathToModelPath(filePath.FullName);
                         OpenOptions opt = new OpenOptions();
 /*                        opt.DetachFromCentralOption = DetachFromCentralOption.DetachAndDiscardWorksets;*/
                          WorksetConfiguration openConfig = new WorksetConfiguration(WorksetConfigurationOption.CloseAllWorksets);
                         // Set list of worksets for opening 
 /*                        openConfig.Open(worksetIds);
                         opt.SetOpenWorksetsConfiguration(openConfig);
                         mpathOnlyFilename = filePath.Name;*/
                         Document openedDoc = Application.OpenDocumentFile(mp, opt);                               
 /*                        SaveAsOptions options = new SaveAsOptions();*/
                          TransactWithCentralOptions twcOpts = new TransactWithCentralOptions();
                         SynchronizeWithCentralOptions syncopt = new SynchronizeWithCentralOptions();
                         RelinquishOptions rOptions = new RelinquishOptions(true);
                         rOptions.UserWorksets = true;
                         syncopt.SetRelinquishOptions(rOptions);
                         syncopt.SaveLocalBefore = false;
                         syncopt.SaveLocalAfter = false;
 /*                        options.OverwriteExistingFile = true;
                         ModelPath modelPathout = ModelPathUtils.ConvertUserVisiblePathToModelPath(mpath + "\\" + mpathOnlyFilename);
                         openedDoc.SaveAs(modelPathout, options);*/
                         openedDoc.SynchronizeWithCentral(twcOpts, syncopt);
                         openedDoc.Close(false);
                }
         }
 }}}

Then,

  • Add the System.Windows.Form reference and
  • Build the Solution

Note: I built and tested this on Revit 2018.2.

How to Use It?

  1. Set your Revit User Name to the user that you want to Relinquish the Worksets for…
    • You may have to logout of your own SSO first
    • Go to Revit Options
    • Input the exact user name (including @ if an email address)
  2. Start a new blank project in Revit
  3. Start the Macro Manager
  4. Select the RelinquishMineFromFiles macro that you built
  5. Click Run
  6. Select the files you want to fix
  7. Click Ok
  8. Wait for the result. The macro will step through them, Relinquish, Sync and Close the files.


Note:

Please use at your own risk, this has the potential to be pretty risky in a real project environment. Only use it if you understand what is going on 🙂

Also, you can refer to this Revit API Doc page.

I’m sure you have probably seen this message before:
Can’t edit the element until ‘problemUser’ resaves the element to central and relinquishes it and you Reload Latest

This may be caused by one of your team members not syncing with Central, and then experiencing a crash, or just logging out and going home. Before you send off an angry email, perhaps you could use one of these methods to get rid of the element locks and keep being productive. Method 1 is a bit more disruptive to a large team, while Method 2 is a bit more ‘hacky’. Important: Both methods will mean that ‘problemUser‘ has lost their work and will have to redo it.

So, maybe Method 0 is ‘call problemUser on the phone’ and see if they want to come back into the office to try and sync their work back to Central… but if that isn’t an option, you may have to use one of these methods:

Method 1 – Recreating the Central File:

  1. Notify all team members to Sync with Central and Close Revit
  2. Make a copy of your current Central file and _backup folder and put it somewhere for safekeeping
  3. Detach from Central
  4. Save As Central – overwrite the same file
  5. Notify your team members to open the model again, using ‘Create New Local’ tickbox

method1.png

Method 2 – Using a Known User Name to Relinquish Element locks

First, make a note of the user name that has the lock. In the image below, it is ‘rds check3‘:

c1.png

Open a new Revit instance and set that as the user name in Options:

c2.png

Open the model normally (Create New Local) under that user name, and immediately click ‘Relinquish All Mine’…

c3.png

… and then Synchronize with Central. The element locks should now be gone.

c5.png

In one of the other model instances (ie. your own user name), you can now Sync with Central… (or Reload Latest)

c6.png

… and you can successfully modify the element that was previously locked.

c7.png

As usual, the best idea is to do What Revit Wants and Sync with Central regularly so that lost work is minimized.

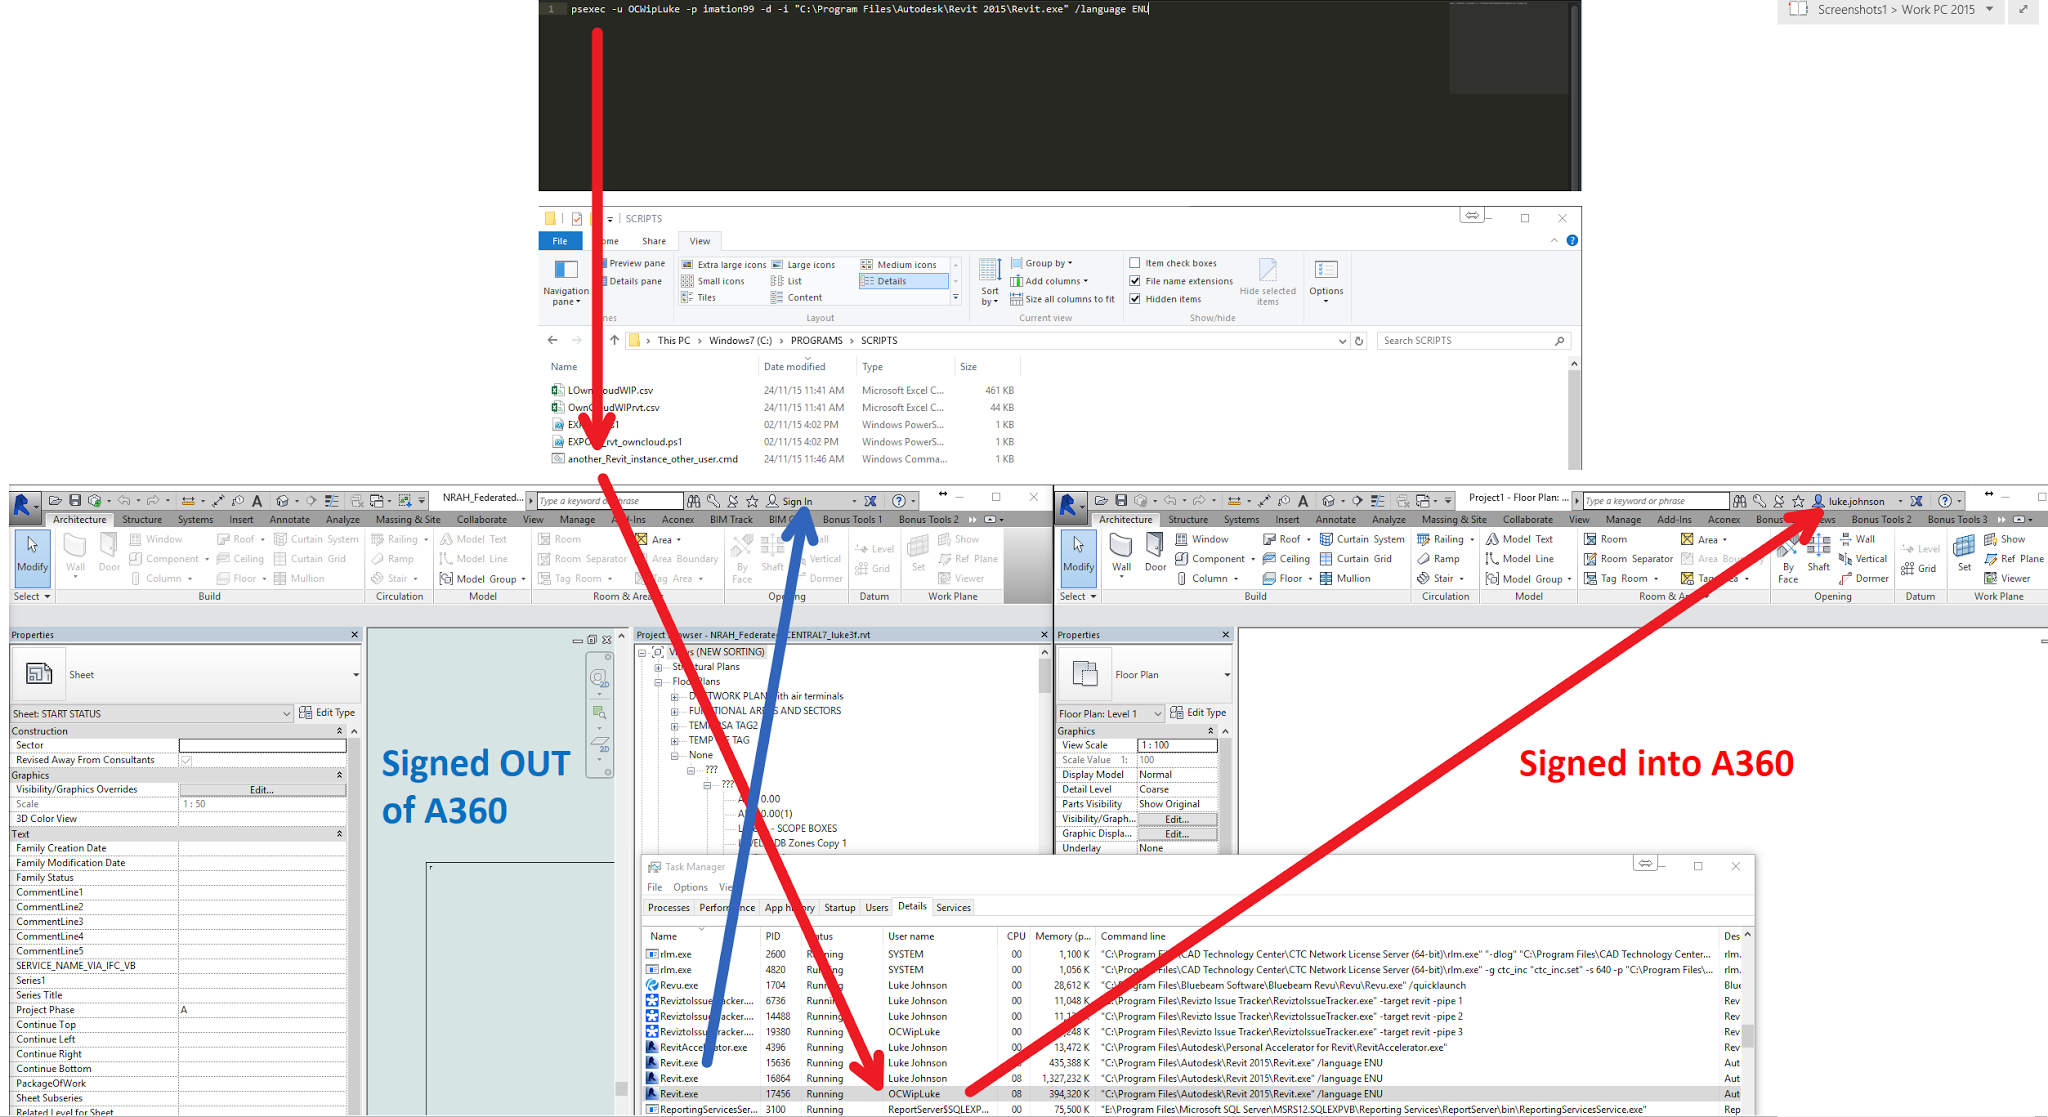
If you are using multiple instances of Revit, against one Central file, using different ‘pseudo’ usernames, you may have run into trouble because Autodesk single sign on (SSO) always keeps you logged out in that situation. As soon as you log in, all your Revit usernames get switched back to your SSO username.

Okay, so how can we work around this? Basically, by using psexec to launch Revit using another Windows user. This allows us to have SSO running in one ‘Windows user’ and SSO logged out in the other.

Steps:

  1. Ensure you have psexec available
  2. Make a CMD with this text (for Revit 2015):
    psexec -u OtherWindowsUsername -p OtherWindowsUserPassword -d -i “C:\Program Files\Autodesk\Revit 2015\Revit.exe” /language ENU
  3. Open Revit in current user and sign out of A360
  4. Run this CMD file, and in the new instance of Revit you can sign back into A360

The workaround and outcome is shown in the image below:

 As usual, there may be complications with this method (such as access to different network resources etc), so please use at your own risk 🙂

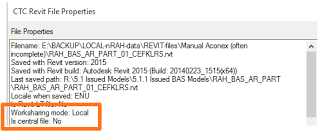
Revit Wants you to transmit ‘detached copies’ of Central files for linking into other models. If you ignore this and transmit your Local copy instead, Revit always remembers where that instance of the Local file was saved, and it causes havoc in a federated model situation. You can use the free CTC explorer extension to quickly check this:

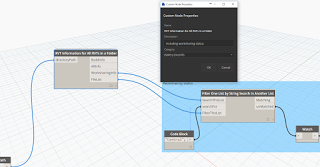
Or you could use Dynamo with my Bakery package:

 Hypothetically, let’s say you have received a file from a consultant, and after reloading you realise it was a Local file, not a Central. Now, your federated model may already have changed the name of the file to match whatever the local was called. Let’s say this problem has caused another problem: multiple instances of that same model have been loaded into this file.

If you are using View Templates, only one of these instances will be the point-of-truth for your View Template Revit Link Overrides. Time to get out your magnifying glass and investigate. Firstly, we will create multiple copies of the RVT file with different names, and then use Reload From (in Manage Links) to get these loaded into the current Revit session. This will create a Local alias:

Now, only one of these is the historical, correct link in the context of this federated model. How do we know which one to keep and which ones to remove?

We can use our View Template Revit Link Overrides to tell us… after all, they are the reason we are going through this process, right? We want Revit to ‘remember’ the overrides we have made in those templates. So let’s have a look at the View Template and see what it tells us.

Basically, by reviewing the Custom overrides here, I was able to determine which version of the Link to keep. It just so happens that the correct historical link had:

  • a lower number as its instance name (shown above as 149), and
  • a lower number as its element ID (450048 compared to 1288492). I found this by using Project Browser, Select All Instances – In Entire Project and then Manage – IDs of Selection

The above two ‘numerical’ investigative methods are probably not 100% reliable, but they may give you a good idea of which link instance is older in terms of this project.

Now, simply Remove the wrong links using the Manage Links dialog, and be aware of not re-linking multiple new instances if you just so happen to get a Local copy from someone in the project team. And remember…

What does Revit Want? Central copies for linking purposes.

There is no immediately easy way to override the colour of an entire Revit Link. Of course, you can set up a View Template and override all of the individual subcategories, but that can get time consuming when working with many links…

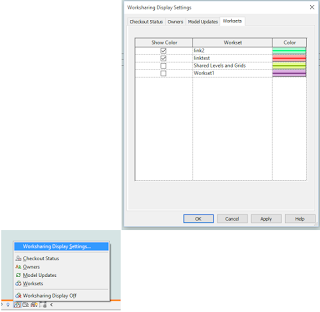
Worksharing Display Mode gives us a quick way of visualising Worksets. What if we put each Revit Link on its own Workset? Then if we set Worksharing Display Mode to Worksets, these Links are overridden with the Workset colours selected in the dialog:

Unfortunately, the Worksharing Display Mode setting is a temporary override (notice the border around the view?), and it will be switched off when we close and open the file. However, the colour choices will be retained. Is there a way we can quickly ‘turn on’ the Worksharing Display Mode for all views in the document? Perhaps this could be done just prior to printing, or at the start of an editing session?

Enter… you guessed it… Dynamo.

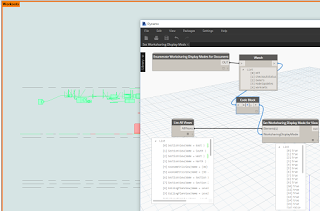
I made a node to Enumerate Worksharing Display Modes available, and another one to Set Worksharing Display Mode for View. Finally, I adapted the archi-lab Get All Views node into a List All Views node. Now, we can set them in one click:

And a Screencast:

Each time you print, you will be prompted to “Leave the mode on and print…“, but the colour override will print fine 🙂

Update:
Colours will transfer using Transfer Project Standards, as per:
Transfer Project Standards

If you populate a project with the desired worksets, usernames, and colors you can automatically transfer most of this data over to another project.  Under Manage > Transfer Project Standards, there is a new option for Worksharing Display Settings.

Keep in mind this will not transfer over workset names from one project to another. 

It will however transfer over workset colors, should the same name workset appear in both projects.

Each category has a Show Color column with a checkbox; these are project specific and do not transfer.
Revit 2012 Worksharing Display Modes and Transfer Project Standards – The Revit Clinic

Non-recent comment from Kyle (Autodesk staffer):
Recognizing that Worksets alone were not flexible enough to facilitate productive collaboration in many cases, we implemented Element Borrowing. This enabled the transparent borrowing of elements when a user operation required them to be editable, without the need to explicitly “check out” of the entire Workset that contained them.

So Element Borrowing is really the implementation of Worksharing in modern Revit. Worksets were never deprecated, since many existing users at the time still used them for their original purpose. Even today, we see the pre-Element Borrowing understanding of Worksets discussed and implemented in the market. Ultimately, that’s our fault for not communicating as effectively as possible with the Revit community. 

Check out the whole thread:
Some thoughts on Revit Worksets and Worksharing | LinkedIn

From Daniel Gijsbers blog:
“if you try to open a revit workshared file (central file) with LT it right away makes a copy of the file with LT added to it’s name.

But what is even more surprising it leaves the central file intact. With that I mean I saved the central file in Revit LT and next I open the same file in it’s bigger brother. Big Revit says right away: Would you like to create a new local? In other words, you are trying to open a central file. Revit LT doesn’t throw away the worksets!

When you have opened the file take a look at the worksharing display


Revit LT has created it’s own workset… called Revit LT user”

Read more about the implications of this:
Daniel on Autodesk AEC software: Revit files and Revit LT

Until Revit comes up with some kind of advanced and granular permissions management for workshared files, we are left with a situation that requires best-practice Revit use combined with 100% obedient staff.  If you would like to take matters into your own hands in the meantime, you can use this somewhat scary hack to check out worksets using a concealed user name.  As with many posts on What Revit Wants – use at your own risk!

In short:

  1. Copy the username into Microsoft Word and change it to a different font in this example the font called AIGDT. (which is just associate symbols to letters).
  2. Copy the username (AIGDT font) back into Revit and as you can see Revit just shows it as bullets.
  3. Worksets checked out to that user will appear to others like this:

 
Image and idea by Navid at:
Locking WorkSet with a hidden user name!