Nice tip + addin coming from Trevor Taylor via Jeremy Tammik – it shows how to rename Interior Elevation views by the Room that they reside in.

Download:
Here is a complete sample project including a test model in case you’d like to check it out yourself.
Many thanks to Trevor for this useful tool, his research, implementation, and generous sharing.

Read more / via: 
The Building Coder: Rename View by Matching Elevation Tag with Room

Follow these steps:

That should get you to the Room Separation line entry in Visibility / Graphics.  Then, you can:

  • press Spacebar to toggle visibility on / off
  • press Right Arrow, then Spacebar to open the Override sub-dialog

As you probably know, I’m a big believer in Keyboard Shortcuts.

However, in all honesty, if you have mouse and are using Revit 2013, it is probably going to be quicker to:

  • Select a Room Separation line
  • Right-click
  • Override Graphics in View – By Category…

There are quite a few renumbering add-ins available for Revit.  This free little package from CTC includes a tool to renumber both Rooms and Doors…

Room and Door Renumber for Revit 2013 – CTC
via
Revittize

Sequence numbering on doors numbers doors independently. The tool remembers the previous door’s number and will maintain the proper sequence on subsequent doors.

More info:
Revit Renumbering Video Tutorial – 2:00
pdf Revit Renumbering Product Information
  
Revit Renumbering available on Autodesk Exchange:
http://apps.exchange.autodesk.com/RVT/2013/en/Detail/Index?id=appstore.exchange.autodesk.com%3arevitrenumbering%3aen
 
You can also get Imaginit Room Renumber on Exchange at:
Autodesk Exchange Apps

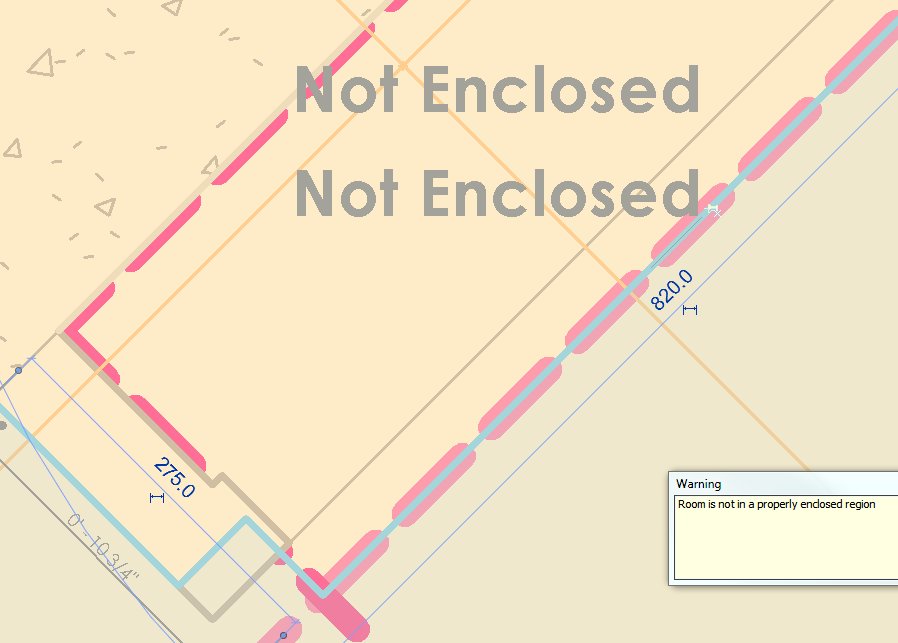
Here is the problem – I have two linked files, set as separate options in the same Option Set. If any of the Room elements overlap in the two linked files when placed in the host file, and I have the view set to a Secondary option, the Room Tag fails:
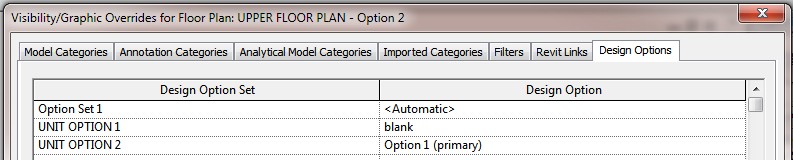
None of the created elements are visible in Floor Plan: UPPER FLOOR PLAN – Option 2 View. You may want to check the active view, its Parameters, and Visibility settings, as well as any Plan Regions and their settings.

If I move the link in the secondary option AWAY (geographically) from the link in the primary option, the Room Tags work fine.

The workaround that I am currently using is this:

  1. Place the two link files in different Option SETS.  In this way, both the Revit links can be a ‘primary option’.
  2. Make a ‘blank’ option in each of the Option Sets.
  3. In a plan view, set the Visibility / Graphics such that the link you want to see is selected, and in the other Option Set ‘blank’ is selected.
  4. You should now be able to tag these Room elements through to both of the links in the different Option Sets. 

    EDIT:
    If the above doesn’t work for you, do this:

    1. In a plan view, move the link you want to tag ‘away’ from the other link a known amount.
    2. Tag the Rooms in the link in the new location, then
    3. Move the link back into the correct place.  Revit will prompt to move the Room Tags for you…

    Revit does not allow rooms to become smaller than certain dimensions – it simply switches to Not Enclosed when one dimension goes below about 276 mm (when using room separation lines on a rectangular room).  However, this dimension may be slightly different depending on the surrounding wall thicknesses.

    The following videos demonstrate the limitation:

    There is a forum thread at
    2011 Minimum room size? – AUGI

    On the forum, Dimitri Harvalias makes the following observations.
    When using room separation lines the minimum size seems to be limited to about 1sf. When using walls it appears to have some relationship to the wall thickness used.
    See the attached image.
    If walls are 150 wide then the minimum dimension of the room is 150. If some of the walls are 300 and some are 150 then it bottoms out about 85mm. If all the surrounding walls are 300 then I can get it down to virtually nothing.