From Michael Ruehr, download at:
https://www.sugarsync.com/pf/D6601245_87000438_296433
Sample slide:
Original post:
RevitworX: Collaboration and Work-sharing with MEP and Structure Consultants
What Revit Wants

From Michael Ruehr, download at:
https://www.sugarsync.com/pf/D6601245_87000438_296433
Sample slide:
Original post:
RevitworX: Collaboration and Work-sharing with MEP and Structure Consultants
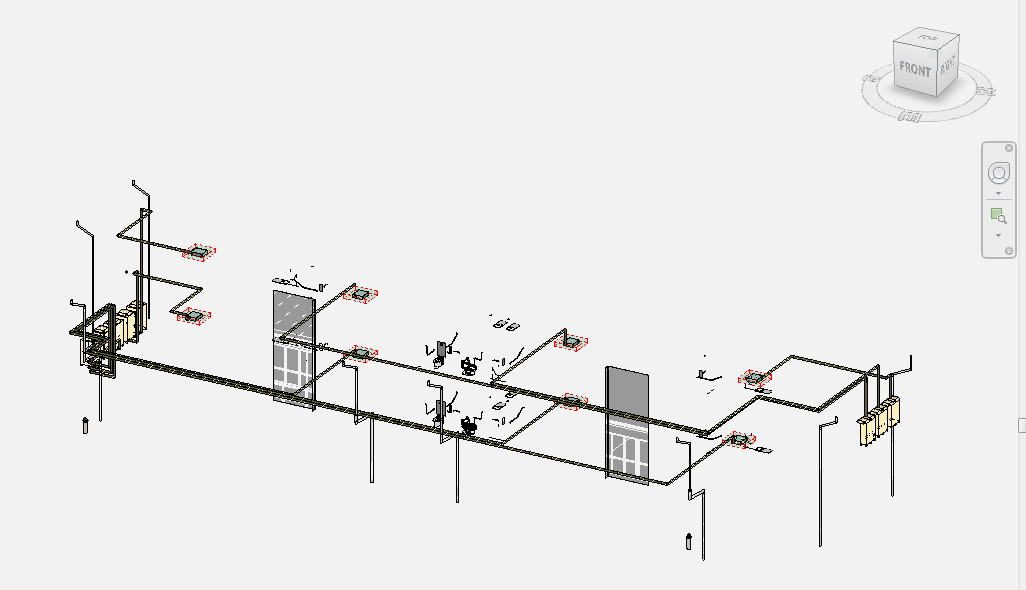
One of the most consistently “in-demand” job positions here in Australia at the moment is for Revit MEP Drafters. Personally, as part of my coordination role on the new Royal Adelaide Hospital, I’m spending lots of time in and around Revit models that have originated with a huge range of MEP subcontractors – mechanical designers and consultants, plumbing, drainage, fire sprinklers, syphonic roof drainage, medical gas, pneumatic tube – the list literally does go on from there. Invariably, these models end up as NWCs that I use to federate and clash against one another.
Accordingly, it made a lot of sense for me to investigate and fully understand the features of the originating “flavour” of Revit – RMEP, otherwise known as Revit MEP. Accordingly, I have spent the past week checking out The Aubin Academy: Revit MEP 2014publication, authored (somewhat obviously) by Paul F Aubin, along with Darryl McClelland, Martin Schmid and Gregg Stanley
One of the great things about the book is the way that the information is segregated. Do you want to learn specifically about Mechanical modelling tools? Turn over to Chapter 5 – Mechanical Systems. Or perhaps you are more interested in pipework tools? Then try Chapter 6 – Piping Systems.
The beginning of the book shows great sensitivity to the actual project procurement process – how does MEP Revit modelling fit in with the overally Revit model development? You will likely start by receiving a model from the Architect for context – the book describes “best practice” methods of linking and interacting with this data. It also provides some useful insight into data segregation (the kind of information you should definitely file away for future use), like:
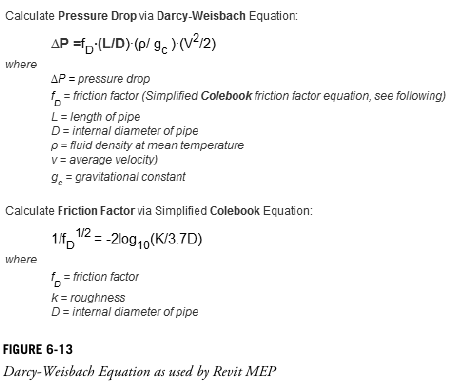
The book also considers the conceptual way that Revit considers and calculates various MEP related items. For example, it includes this illustration of the Darcy-Weisbach Equation as used by Revit:
Along with specific workflows for MEP, it also includes great tips that apply to all users of Revit, like this:
“We are going to actually delete all the levels. As such, it is important that you select all levels at once as Revit will not otherwise allow you to delete a single remaining level.”
Notes relating specifically to BIM Managers are included in the context that makes them most useful, like:
“BIM Manager Note:
Revit MEP has added Plumbing as a separate discipline and in conjunction has created a new Plumbing Template. For more information on templates and how to create one for your company refer to Chapter 3. Existing projects will be upgraded on open to add the Plumbing Discipline to Project Browser.”
“Avoid negative offsets of roofs as this might cause exporting errors through the gbXML tool.”
Finally, Paul and his team make sure that they include information that is useful on a day-to-day basis. Here are a couple of examples:
In this post, I have included just a small selection of the productivity- and knowledge-enhancing gems that you will find if you take the time to read The Aubin Academy: Revit MEP 2014.
To conclude, I would like to include this quote regarding the scope and intended audience of this book:
“If part of your job requires that you design building systems and produce construction documentation and engineering design drawings, then this book is intended for you. Specifically, this includes anyone in the Mechanical, Plumbing, Fire Protection, Electrical, and other building design engineering professionals.”
You can get it here:
http://paulaubin.com/books/the-aubin-academy-revit-mep-2014/

Dataset downloads:
Read Me
Chapter 4 Dataset Update (Replace your copy of this file)
Content used in the book:
http://www.titus-hvac.com/main/software/index.aspx?prod=TerminalUnits
Download:
complete Revit MEP project setup, using this MODULE
The guide includes detailed step-by-step processes, and screenshots.
Original post:
http://forum.indivirev.com/?p=580
via
Revit MEP (LinkedIn Group)
Quote:
“The Mechanical Contractors Association of America (MCAA), in a tripartite project with the Sheet Metal and Air Conditioning National Association (SMACNA) and the National Electrical Contractors Association (NECA), has published Achieving Spatial Coordination Through BIM – A Guide for Specialty Contractors. Dubbed “the Guide”, the publication was conceived, developed, and published to help MEP contractors negotiate one of the most challenging issues in the modern construction industry: how to best reconcile and incorporate leading edge technologies and processes into their projects’ spatial coordination efforts. Click here to get more information and download the Guide.
Lessons learned by early BIM adopters like MCAA BIM Committee Chairman Steve Shirley (University Mechanical & Engineering Contractors) and fellow members of MCAA’s BIM Committee members were combined to develop a set of best practices and proven, how-to information. The result is a guide that will help contractors better navigate this complex issue and make more informed business decisions about spatial coordination and BIM. It will also serve as an educational resource for their employees who must act on those decisions.”
http://www.mcerf.org/news/2013/mcerf-funds-landmark-bim-publication
…
The purpose of this Guide is to:
Download at:
http://www.mcaa.org/mepguide/M29PDF.pdf

Authored by Dave Quigley:
www.linkedin.com/pub/dave-quigley/0/66a/856
Thanks to Cindy James for referring me to this document.
From Hagerman & Company Blog:
This video tutorial explains how to do a rolling offset using Revit or Revit MEP. The concepts are shown in Revit 2014, but can be performed on 2013. The rolling offset can be done using duct, pipe of conduit.
via Twitter:
Tip: Pipe fittings in #Revit #MEP need CSV’s to operate. Centralize your Lookup Tables on your server to help standardize! @autodeskrevit
— Jeremy Schmidt (@BIMSchmidt) May 15, 2013
Don’t forget, you can set the View Discipline to Mechanical to get some in-built filtering to show something like this:
Quick video from Wikihelp:
(embedded JWPlayer)
Read more at:
Pipe – WikiHelp
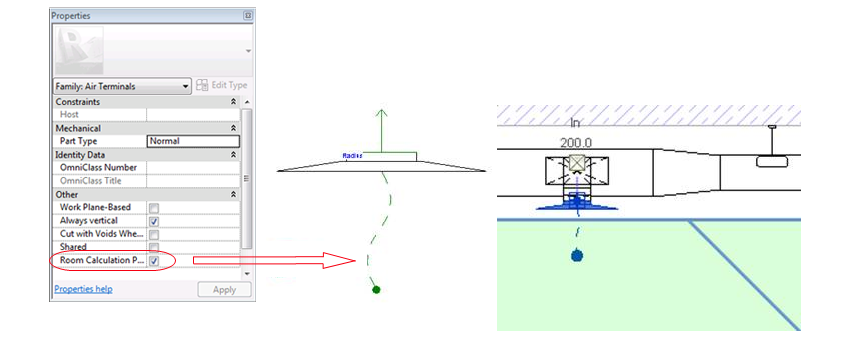
“the room calculation point specifies which space the air terminal is in, it is … reflected in schedules. For example, if you include a column in the schedule with Space data, such as name and number, the space dictated by the room calculation point will be used. “
via
Placing Air Terminals – WikiHelp
I have previously described how you can Link Excel spreadsheet data into Revit (through AutoCAD).
But what if you want to semi-automate the process of editing Lookup Tables using Excel? The blog http://www.revitmep.es/ shows you how:
We explain how to create a lookup table for the families…
The biggest impediment there is import and export these files, we use a macro in Excel to streamline these tasks.
via
Google Translate
of
And here is a direct link to the macro-enabled Excel file:
Editor Lookup Tables.xlsm