Let’s face it, sometimes Shared Coordinates can be a pain. Issues may arise when trying to make small adjustments to very large numbers, and that comes up in other places in Revit too. In some cases, using “Specify Coordinates at a Point” has almost no effect, and you need to resort to workarounds like these.

In Revit, if we follow certain steps in a certain way we can solve these issues. It may seem a fiddly, but if you want to fix coordinates on an existing model, perhaps one of these methods will work for you.

Method 1 – Transfer Project Standards, Project Info
This transfers the ‘location’ data of a Shared Site…

On a real project, you will probably have a control model you can use in the workflow below. The control model needs to have some lines showing at the desired Project Base Point position, probably in a Linked View, as well as a SITE fixed named site that has the ‘correct’ shared coordinates.

  1. Open one of your models to fix
  2. Go to a Plan view
  3. Link in the COORDINATES file Origin-To-Origin
  4. Set Linked view – COORDINATES
  5. Turn on Site – Project Base Point
  6. Select it and ‘unclip’
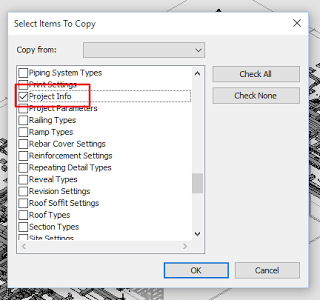
  7. Transfer Project Standards (from the link) – Project Info
  8. Choose ‘New Only’
  9. Go to the Location – Site dialog box
  10. Set the SITE fixed to ‘Make Current’
  11. Delete your old SITE, and rename SITE fixed to SITE (we have now replaced the shared site coordinate info with that from the control model). Now, to get a moved PBP in the right spot for the project
  12. Back in Floor Plan view, slightly drag the unclipped PBP away from the two green lines (the pbp position in the control file), then move it back to exactly that point
  13. PBP should now be fixed

tps.png

If this doesn’t work, you may try
Method 2 – neutralizing coordinates and re-Acquiring

  1. Select your PBP, unclip it, rightclick and “Move to Startup Location”
  2. Link in a new, blank RVT such as a NEUTRAL_COORDINATES.rvt and Acquire Coordinates from it (this resets coordinates)
  3. Save your file (your PBP should report 0,0 coordinates)
  4. Link in the control model PBP RVT
  5. Acquire coordinates from it
  6. Delete it (yes)
  7. Re-link it again (this is to get around a Revit bug, that sometimes ‘shifts’ the linked model after acquiring coordinates)
  8. Save your host file (shared coordinates are now set correctly, and the PBP can be moved into place as below)
  9. Select your PBP, unclip it, and move it to the location from the control model. You may need to set up a plan view that has PBP switched on, and view range all the way down to AHD 0.00.

Both of these methods are somewhat involved, but they may be useful to you in those situations where “nothing else works”.

If you are working on a live, shared, cloud Revizto project, you may wonder how to easily ‘replace’ the entire current model with a fresh version.

Note 1: if you Overwrite model content in Revizto, the Issue Tracker is not affected: Issue list, conversation history and related details are retained.

Here is one way to update the model by replacing with a fresh export:

  1. Export to Revizto
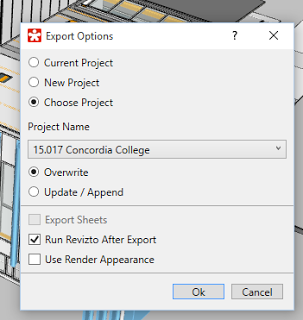
  2. Use ‘Choose Project’ and
  3. Use Overwrite setting
  4. Press OK and confirm
  5. Open In Revizto Editor, Sync to Cloud

overwrite.png


Note 2: remember you can revert to a previous version with the Cloud Revisions tool

To Merge Projects (add new Models to an existing Cloud model):

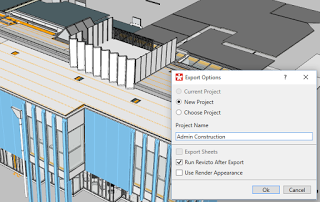
  1. Export new data to a New Project
  2. Open in Revizto Editor
  3. Optimize if you would like to…
  4. Project – Save (this is still a Local model)
  5. Open the Cloud model
  6. Merge Models with the Cloud project by doing this:
    1. Project – Merge
    2. Add Scene
    3. Select the exported scene
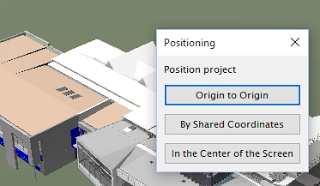
    4. Choose appropriate position (such as Origin to Origin)
  7. Save and Sync to Cloud


newproj.png

Export


optimize.png

Optimize


coords.png

Coordinates

Sometimes in Glue addin for Revit will fail with the message One or more gluing errors occurred“.

You may be able to workaround this problem by following these steps:

  1. After receiving the error, immediately browse to your Temp directory. To do this, open Windows Explorer and type %TEMP% in the address bar.
  2. Sort by Date Modified
  3. Look for a DWF or NWC that matches the View Name that failed to Glue in Revit
  4. Grab that file, and remove the suffix (usually a few digits) so that the DWF Filename = View Name = Glue Model name
  5. Using the Glue desktop app, upload that model manually
Renamed model ready for upload

This process opens up an interesting possibility… usually when exporting a DWF using plain Revit, it will always use Project Internal coordinates. However, the Glue addin can actually export DWFs with Shared Coordinates (if you choose that in the Glue export More Options dialog).

Using the above steps 1-5, you can ‘find’ this DWF with Shared Coordinates and use it wherever you please… such as in Navisworks.

Here is a few quick tips that I had sitting in draft post:

  • To delete lots of views quickly, select and then press Delete key. Do not try to right-click.
  • To combine multiple Clash Groups in the Clash Detective, select the groups, Ungroup (sub-clashes will be selected by default), then Re-group..
  • To delete multiple empty clash groups, drag a clash into one of them. Then, Select All the Groups and you can Explode Group
  • If you Append an NWD, the views with saved Hide/Required and Material Overrides will import “correctly” with these settings (but a Viewpoints XML cannot import these element hide and colour settings)
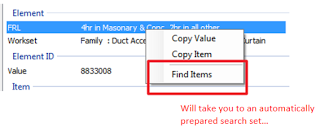
  •  Use Properties+ … it is simply the fastest way to test and build Search Sets

propertiesplus.png

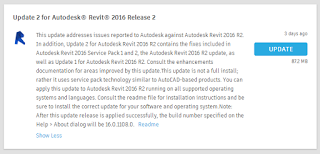
This might pop up in your Application Manager soon…

update2_2016-8596749

Update 2 for Autodesk Revit 2016 Release 2
Update 2 for Autodesk Revit 2016 Release 2 Readme

R2 download link
http://dds.autodesk.com/2016/RVT/Autodesk_Revit_2016_R2-x64_UPD2.exe

New build numbers for Revit 2016 R2:
16.0.1108.0
20160126_1600

Enhancements list is live at:
http://revit.downloads.autodesk.com/download/2016RVT_R2_UPD2/Docs/RelNotes/AutodeskRevit2016-R2-UPD2ReleaseNotes.html

non R2 download link:
pending…

IFC for Revit 2015 (v15.7):
http://apps.exchange.autodesk.com/RVT/en/Detail/Index?id=appstore.exchange.autodesk.com%3aifc2015_windows32and64%3aen

IFC for Revit 2016 (v16.4):
http://apps.exchange.autodesk.com/RVT/en/Detail/Index?id=appstore.exchange.autodesk.com%3aifc2016_windows32and64%3aen

Details:
New Export Functionality:
Append “(Type)” to all internal Revit type property sets, to avoid having multiple property sets with the same name assigned to the same IFC entity.
Changed how the classification code is parsed so that classifications can have brackets and colons in them.
“Extra Low” level of detail now applies to all faceted BRep geometry, allowing many more files to export without hitting the size limit.
If a userdefined property set contains the same property name more than once, take the last nonempty value (don’t duplicate the property name).
Rebar elements can generate up to 1024 consistent GUIDs for individual IfcReinforcementBars, up from 256.
(IFC4) Zones can now have a long name, set by the “ZoneLongName” shared parameter for nonMEP zones, and the “IfcLongName” parameter for MEP zones.

Export Bug Fixes:
Don’t create orphaned IfcStyledItems.
Don’t export invisible geometry in beams.
Export DirectShapes of Walls category.
Export elements with empty custom classification field values.
Floors exported as IfcSlabs correctly report if they are load bearing or not, using either the “LoadBearing” shared parameter or the Structural builtin parameter, in that order.
Improve performance in certain cases where we can’t create a valid tessellation for a face.
The “Use active view to generate geometry” option now works correctly.
(IFC4) Correct the orientation of some IfcAdvancedBRep faces.

New Import Functionality:
Import IfcProxy as Generic Models.

Import Bug Fixes:
Fix how the IFC GUID is set for certain elements.
Fix the orientation of some imported objects where part of the local placement needs to be calculated.
(IFC4) Read in some missing relations caused by “IsDefinedBy” split into 3 inverse attributes.

via email

ifc-7830420

The Case Apps were (are) great, but they are pretty hard to get now:

suspended.png

One thing you might try is downloading this zip and running the Application Reference file. Turns out something is still alive out there…

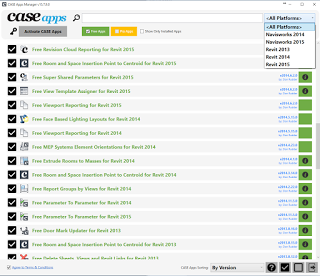
caseapps.png

at http://www.case-dev.com/revit/installer$/FreeAddInManager/CaseRevitAddInManager.application

Tick the Terms & Conditions box and then tick the boxes for the apps you want to install.

Note: we also had to disable Microsoft Security Essentials (Windows Defender Real-time Protection) to get this application reference to work.

Here is the big list of apps in the Apps Manager:

This recent post on Dynamo Nodes shows how a simple Navisworks Search Set can be built by Dynamo running inside of Revit:
Create Navisworks Search Set XML for Element Ids | Dynamo Nodes

In the first release, this node just uses Element Ids to build a long ‘orsearch set, but this basic idea could easily be extended and adapted to more closely connect Revit to Navisworks search workflows through Dynamo.

Here is a Screencast:

As you are probably aware, when moving from Dynamo 0.9 to 0.9.1 you lose backward compatibility… in other words, you can’t open 0.9.1 files in 0.9 or earlier.

backwardcompat.png

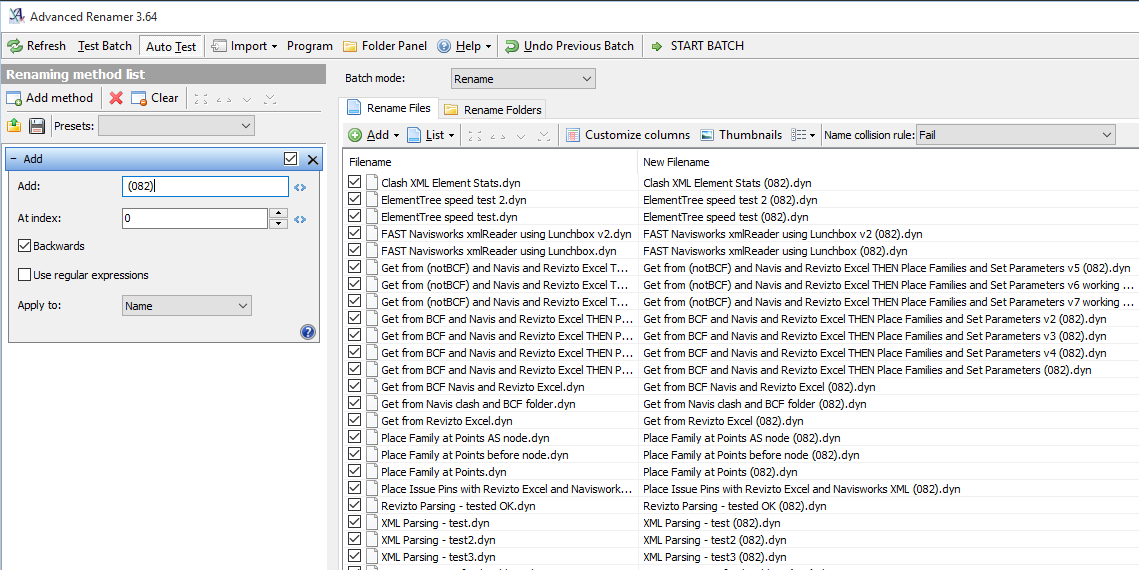
Before taking that step up to 0.9.1 and beyond, you may wish to apply a filename suffix to all of your DYN files, so you are reminded of this issue when you open a DYN. I have a single folder with subfolders containing most of my DYN files, and I added the suffix (082) to all of them at once with this method:

Install Advanced Renamer.

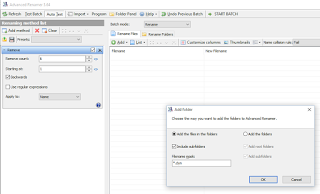
Add the Directory that holds all your dyn files:

add%2Bfolder.png

Then add a suffix to the filename:

Now, you basically have an inplace backup of files. When you open one of these dyns in 0.9.1 or newer, just remember that you should Save As in Dynamo, and then newly saved file will not be open-able in 0.9 or earlier.

At some point in the future you can then remove or upgrade all of these ‘older’ Dynamo files.