As you are probably aware, when moving from Dynamo 0.9 to 0.9.1 you lose backward compatibility… in other words, you can’t open 0.9.1 files in 0.9 or earlier.

backwardcompat.png

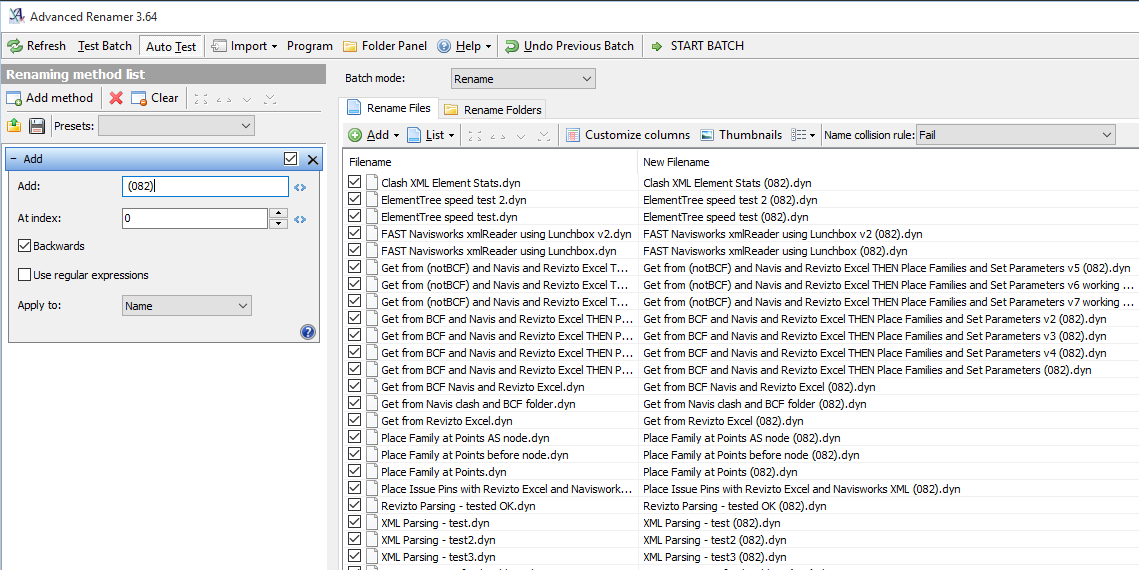
Before taking that step up to 0.9.1 and beyond, you may wish to apply a filename suffix to all of your DYN files, so you are reminded of this issue when you open a DYN. I have a single folder with subfolders containing most of my DYN files, and I added the suffix (082) to all of them at once with this method:

Install Advanced Renamer.

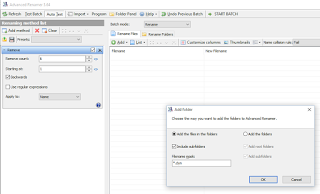
Add the Directory that holds all your dyn files:

add%2Bfolder.png

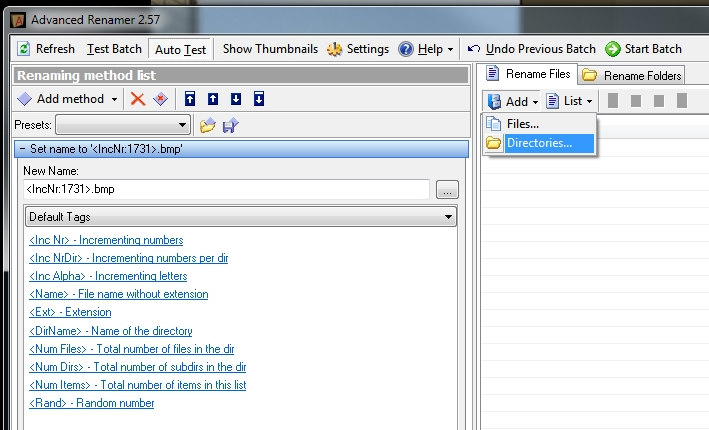
Then add a suffix to the filename:

Now, you basically have an inplace backup of files. When you open one of these dyns in 0.9.1 or newer, just remember that you should Save As in Dynamo, and then newly saved file will not be open-able in 0.9 or earlier.

At some point in the future you can then remove or upgrade all of these ‘older’ Dynamo files.

Are your renders taking ages?  Trying to output a big rendered walkthrough?  No matter how fast your PC is, these things can take time.  Why not enlist a few of the other computers in your office to help produce that high-resolution animation?

Distributed rendering (or Parallel Rendering) is possible when using high end visualization products, including 3D Studio (now part of the Building Design Suite Premium).

In pure Revit (without using 3D Studio), the solution is a little bit more crude.  However, it does work.

Here are the basic steps:

  1. Set up your walkthrough.
  2. Save the Project or Save to Central.
  3. Get your other computers running and open the same walkthrough on all of these PCs.
  4. On PC#1 in Revit, go to Export – Animation – Walkthrough, and pick a set number of frames for that PC to output.  For example, frames 1 to 600 out of 1800.
  5. Make sure you choose BMP for the output, and when naming the file, just put in 1- (this will make sense later.
  6. On PC#2, export frames 601 to 1200 to BMP.  Name it 601-.
  7. On PC#3, export frames 1201 to 1800 to BMP.  Name it 1201-.
  8. Using Advanced Renamer, rename all the files to suit the appropriate frames. (see associated post)
  9. Put all the BMPs in one folder on the server or on one of the PCs.
  10. Using Avisynth and VirtualDub, join the BMPs into an AVI. (see associated post)
  11. Then, either use some video compression software, or do some post-processing.

There you go, you have successfully done some distributed or parallel rendering in Revit!

  1. Download and install Advanced Renamer
  2. Open Advanced Renamer.  Add – Directory and choose the folder that contains the sequential set of files.
  3. Add method.  Choose ‘New Name’ from the dropdown list.
  4. In the entry box, use a name like the following:
    .bmp
  5. This will create 4 digit sequential filenames ending in BMP.  The first file name will be 1731.bmp
  6. Click ‘Start Batch’ (you can use ‘Test Batch’ if you want to check the results of the rename process first).

These sequential bitmaps can then be joined into a AVI file.  Refer to the main post entitled Distributed Parallel Rendering in Revit.