EDIT: This seems to be broken in 2014 at this point.  Even if you have it working in 2013, when you open in 2014 it will “break”.  I’m unsure if there is a good workaround yet…

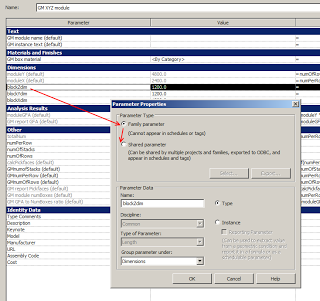
Absolutely awesome workaround from Dave Light!  He shows how to use an instance Shared Parameter to pass Keynote value via a Family formula to allow the tagging of Window Mark and Keynote in the same tag.  Read the whole post here.

On a wider level, this method shows that you can formulaically reference System parameters (built in family parameters) and pass their value to a Shared Parameter to allowing tagging.

Ever wanted to get a Tag to pick up the hardcoded Elevation value given to a nested Family?  Then check out this great little thread and cool answer by Julien!

Answer:
You need to set a SP in the nested family.
Make the plate geometry attached to ref planes that are not the 2 from the template. Assign a SP to the distance between the RP at center of geometry and the RP that defines origin. SP will be by instance. Beware of directions for correct behavior when loaded in the host.
In the host family, add the same SP, select the plate, and in properties palette, look for the tiny button on the left. Click and choose the SP you’ve added. The insert point of the plate must be set to the ref level of the host.
Now you have the elevation of the plate driven by a SP in the host. Create a tag for this SP. You’re done. 

By Julien Benoit at
How can I get this parameter into a tag?

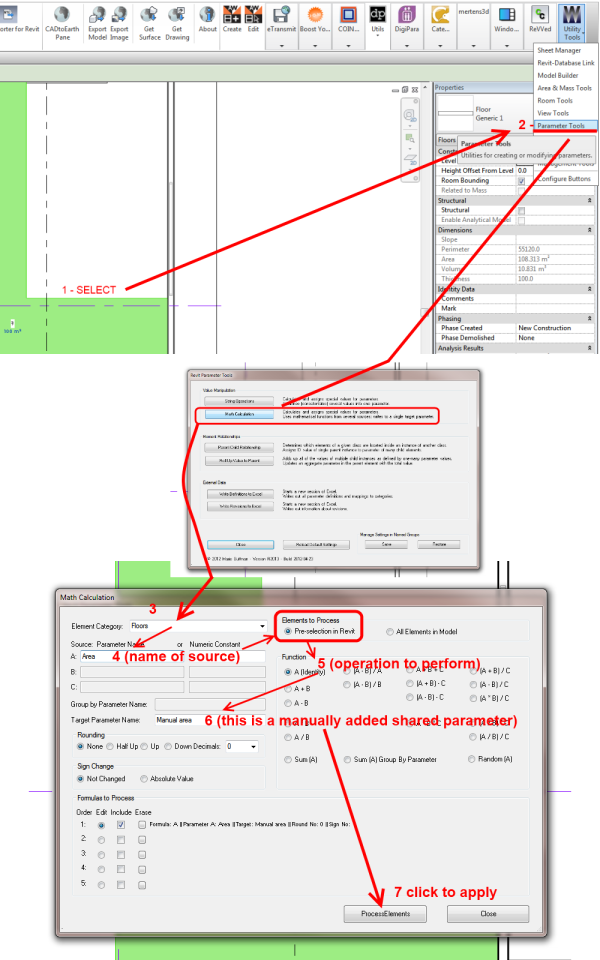
In the image below, I show the basic process used to drive a Floor Area parameter into a manually added shared parameter.  Obviously, this scenario is not ideal – the data link isn’t dynamic, so we have essentially created a mini-silo (that’s what I’m going to call “in-software unlinked BIM”) right inside Revit.

In any case, here is how you can quickly do it with Whitefeet tools (start at 1 and follow the arrows):


I previously posted another workaround for this – using a filtered schedule:
Tag Floor Area in Revit workaround

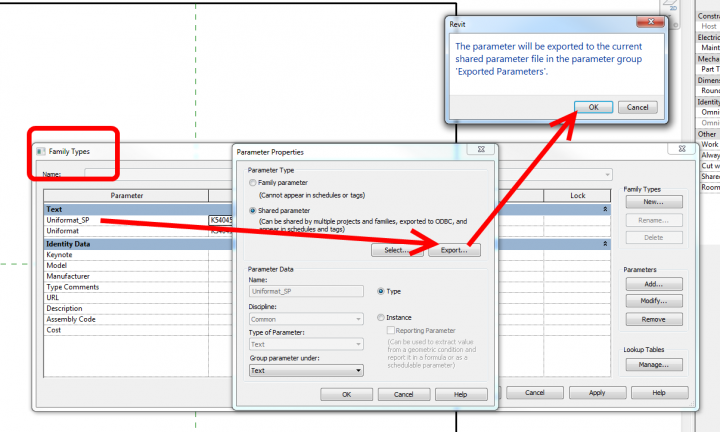
In the Parameter Properties dialog, click Export.

Note:  The Export option is not enabled if the selected parameter is already in the current shared parameter file.

A message displays informing you that the shared parameter will be exported to the shared parameter file you set up in Step 1.

Here is the rest of the how-to:
Exporting Shared Parameters to a Shared Parameter File – WikiHelp
Edit:

You can export from the Family or Project environment. If you already have a SP with the same name in your current SP file, you will need to switch to a blank SP file, export the parameter, and then possibly you can “hack” it into your current file by text editing the SP files (maybe).