When working across an entire healthcare facility and clashing combined NWDs, Navisworks may slow down to a crawl (we are talking single instance using 10gb RAM or more). Here are some tips to improve stability:

  • Make a “safe” home viewpoint inside a room somewhere, that won’t force Navis to draw the entire dataset in one window, and set some of the following as part of that viewpoint…
  • use Shaded View, not Full Render
  • Lights – Headlight
  • Don’t try and use Appearance Profiler if your dataset is large and your Appearance-related Search Sets are not at file level
  • When in Clash Detective, you can use the automatic Item 1 and 2 Highlighting instead of Appearances to visually examine clashing items
  • File Options – Clipping Planes – Near – Fixed at 0.1
  • File Options – Clipping Planes – Far- Fixed at 100 (or less if necessary)
  • Use Selection Tree instead of highly processor intensive Search Sets when possible
  • When appending a new model to an already huge dataset, you might get better results if you use the Project Browser. Import Sheets and Models -> bring the new model in and then after opening it and having a look, Append this model to your main model by right clicking in the Project Browser

Finally, I have found Navisworks 2015 to be much smoother and more reliable than previous versions. You can upgrade to 2015 and still downsave to 2013 for projects that require you to do so.

    An interesting discussion has been brewing over on LinkedIn about IFC Export from Revit. In my personal experience, the most predictable results come from deleting the IfcExportAs parameter and using the IFC mapping files to force the export result. However, this may not be the best path for data longevity and roundtripping.

    Here is one little excerpt from Wawan Solihin:
    The use of IfcExportAs is more suited for mapping detailed subtype or predefined type of MEP components that are mostly defined by families and often they do not correspond 1-1 nicely with IFC definitions. So instead of getting a generic IfcBuildingElementProxy for a family type that does not have clear mapping to the IFC entity, one can use IfcExporAs to define the IFC type it is intended to be plus its subtype for example IfcSensorType.CO2SENSOR that will create IFC entity IfcDistributionControlElement with type IfcSensorType and predefinedtype=’CO2SESNSOR’ in IFC2x3 (or entity IfcSensor in IFC4). This is just one example. There are other entities in IFC that must have mandatory attribute set, e.g. IfcReinforcingMesh which has several mandatory attributes such as LongitudinalBarNominalDiameter. Unless those attributes are set and Revit IfcExporter knows where to get the relevant information, you will get invalid entity information in IFC.

    Read the whole thread:
    http://www.linkedin.com/groups/Revit-IFC-Exports-3690870%2ES%2E5891816567016034308

    Heads up via @theoryshaw

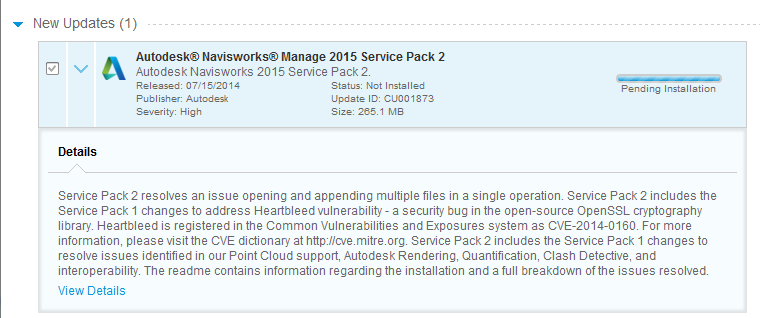
    Now available in Application Manager, direct links:

    Autodesk_Navisworks_2015_Service_Pack_2_Multilingual_Freedom_64bit.msp (msp – 201Mb)
    Autodesk_Navisworks_2015_Service_Pack_2_Multilingual_Manage_64bit.msp (msp – 265Mb)
    Autodesk_Navisworks_2015_Service_Pack_2_Multilingual_Simulate_64bit.msp (msp – 265Mb)


    Service Pack 2 resolves an issue opening and appending multiple files in a single operation. The Service Pack also resolves issues identified in our Point Cloud support, Autodesk Rendering, Quantification, Clash Detective, and interoperability.

    Readme and install links:

    Main Autodesk page:
    Navisworks 2015 Service Pack 2 | Navisworks Products | Autodesk Knowledge Network

    Adam Sheather, aka gytaco, has put out some pretty interesting content in the past week. He was trying to solve a programming puzzle to do with pre-cast panels, molds, concrete curing etc. Based on his post and video, he punched a heap of programme data in Excel, made Dynamo read and write to his master spreadsheet, and then got Dynamo to push some data into some Revit families with arrays so that he could visualise his pre-cast yard at a given point in time. Very smart stuff!

    As Adam says, the Excel-Dynamo-Revit solution can:
    “effectively give me a week by week view of what the precast yard will look like based on the updated Revit data, installation dates, actual to date and the pre-cast managers forecasting all in one. Plus I would be able to tag and print out if required the information!”

     Video below:
    “example of using Dynamo to update Revit and excel at the same time and push the updated values back into Revit objects”


    via
    https://twitter.com/Gytaco/status/488281607485145089

    And one final Dynamo tip from his post:
    Due to the lack of nodes, familiarity and examples in 7.1 I ended up ditching it and jumping back to 0.6.3 which had alot more examples including both the Solar Optimizer and nodes I thought I needed for input/out of excel files that were not in 7.1.
    Whole post:
    http://stuffandbims.blogspot.com.au/2014/07/introducing-revit-pre-cast-panel.html

    Happily, it is becoming less and less common that we have to actually justify why we do BIM.

    But if you do, Daniel Hughes has put together an interesting list based on his experience:
    “Here’s my list of the ten best process features in Revit; that can offer the biggest Return On Investment (ROI) in the initial phase of Revit implementation.

    1. Automatic Sheet set Management and Tag Coordination
    2. Automated Floor Planning Tools
    3. All Model & Sheet Views Update When the Revit Model is Edited
    4. Annotation Graphics Resize Based on View Scale
    5. Power of Parametric Dimensioning
    6. Pre-built Building Product Manufacturer Model Libraries
    7. Building Schedules SynchronizeAuto-Update With Model Changes
    8. Views: Independent & Automated Visibility Controls
    9. Multiple people can simultaneously Access and Edit the Project File
    10. Link DWG Files Into Revit Project”

    Read the whole post at:
    http://bradleybim.com/2014/06/03/revit-implementation-secrets-10-best-revit-process-features/

    I’m very interested in where Paul is heading with this:
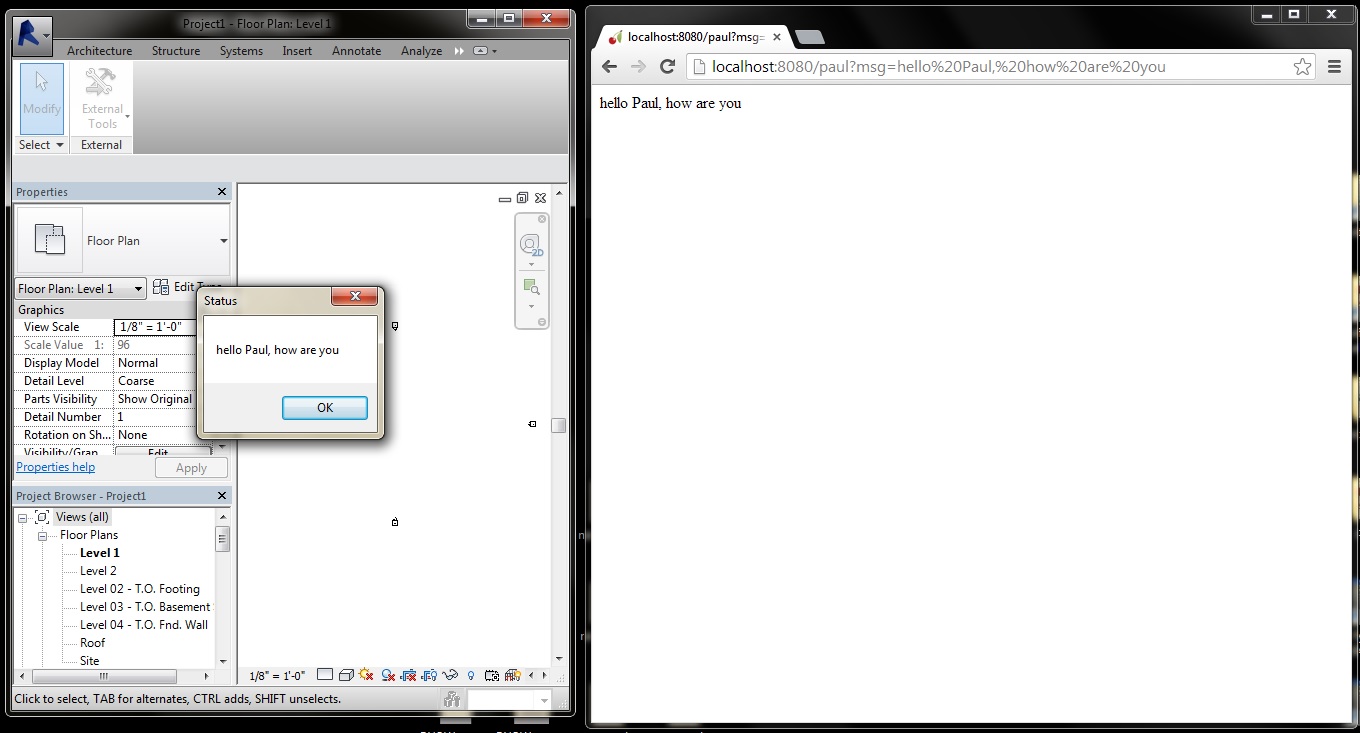
    The QR Code pictured below, when scanned, will pull up the website, triggering the data in it to be sent to Revit. Picture a QR Code with info on a HVAC Unit, you scan it and the data is passed to Revit for when it was installed or serviced.

    Sending Data in a URL to Revit. Data can be parsed to up date parameters of object.

    Sending Data in a URL to Revit. Data can be parsed to update parameters of object.

    This project fits into the larger scope of connecting our desktop Revit content creation with actual site information and making all of this accessible to entire teams on the cloud.

    Read the whole post:
    Revit and RabbitMQ: Passing Data in to Revit from Outside Applications | Architecture and Planning

    EDIT: Paul provided the code in the comments below:
    I found the code for this example. It is not pretty, but should be very simple. There are two files: the Revit Plugin and the Website.

    REVIT PLUGIN
    using System;
    using System.Collections.Generic;
    using System.Linq;
    using System.Text;
    using Autodesk.Revit.DB;
    using Autodesk.Revit.DB.Architecture;
    using Autodesk.Revit.UI;
    using Autodesk.Revit.UI.Selection;
    using Autodesk.Revit.ApplicationServices;
    using Autodesk.Revit.Attributes;
    using RabbitMQ.Client;

    [TransactionAttribute(TransactionMode.Manual)]
    [RegenerationAttribute(RegenerationOption.Manual)]
    public class RevitRabbit : IExternalCommand
    {
    public Result Execute(
    ExternalCommandData commandData,
    ref string message,
    ElementSet elements)
    {

    string msg = null;
    var connectionFactory = new ConnectionFactory();
    IConnection connection = connectionFactory.CreateConnection();
    IModel channel = connection.CreateModel();

    BasicGetResult result = channel.BasicGet(“hello”, true);
    if (result != null)
    {
    msg = Encoding.UTF8.GetString(result.Body);
    System.Windows.Forms.MessageBox.Show(msg, “Status”);

    }
    else
    {
    System.Windows.Forms.MessageBox.Show(“No Messages Waiting.”, “Status”);
    }

    return Result.Succeeded;
    }
    }

    WEBSITE
    import cherrypy
    import pika

    class HelloWorld(object):
    def index(self):

    return “hi”
    connection.close()
    index.exposed = True

    def paul(self,msg):
    connection = pika.BlockingConnection(pika.ConnectionParameters(host=’localhost’))
    channel = connection.channel()

    channel.queue_declare(queue=’hello’)

    channel.basic_publish(exchange=”,routing_key=’hello’,body=msg)
    return msg
    connection.close()

    paul.exposed=True

    cherrypy.quickstart(HelloWorld())

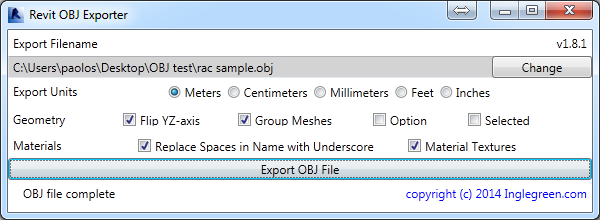
     A long while back, I posted about an OBJ Exporter for Revit by Jeremy Tammik. Looks like there is another way of doing this now, and it has been released for Revit 2014 and 2015. The purpose behind this addin is to allow easy import to Blender for rendering – but it could be used for many other things too.

    >>Download ZIP File<< – Version 1.8.1 – Revit 2014 & 2015

    Main page at Ingelgreen:
    OBJ Exporter for Revit – free plugin – New v1.8 « INGLEGREEN.com – BIM/Revit and Architectural IT in Bournemouth and Southampton


    A free Revit 2014/2015 add-in to export Projects and Families to OBJ format. The OBJ files have been tested with 3ds Max Design 2014/2015, Blender and Octane Render.

    Heads-up from Punto Revit:


    Here’s the link to the zip file containing instructions and .dll and .addin manifest

    via
    Punto Revit: Free plug-in OBJ Exporter for Revit

    Let’s say you have 15 RVT links in FileA, and you want to copy them into FileB. Revit doesn’t usually want you to have two instances of the same linked file loaded into two different open files in a single instance of Revit (that was a mouthful!) 

    However, we need to work in the same instance of Revit to be able to copy/paste. So, here is how you can do it (relatively reliably):

    1. Open FileA.rvt
    2. Open FileB.rvt
    3. In FileA.rvt, Select all of the Revit links that you want to copy (easiest in a 3D view)
    4. Switch to a Plan view and Ctrl+C
    5. Still in FileA.rvt, open Manage Links dialog and unload all of these links that you are copying
    6. Switch to FileB.rvt, and go to a Plan view that matches the one in step 4
    7. Modify – Paste – Aligned to Current View
    8. Even though they are unloaded in FileA, the important stuff is in the Clipboard in memory, so Revit can still paste properly into FileB, and you don’t have a “conflict” of the file being loaded in two files at once
    9. Save FileB, close FileA without saving (or reload the links etc)

    There you go, you have learned how to copy unloaded RVT links. Enjoy!

    (Note: this was tested on Revit 2013 Update Release 3)

    IFC Exporter for Revit 2014 (v3.11):
    http://apps.exchange.autodesk.com/RVT/en/Detail/Index?id=appstore.exchange.autodesk.com%3aifcexporterforrevit2014%3aen

    IFC Export Alternate UI for Revit 2014 (v2.11):
    http://apps.exchange.autodesk.com/RVT/en/Detail/Index?id=appstore.exchange.autodesk.com%3arevitifcexportalternateui2014%3aen

    IFC for Revit 2015 (v15.1):
    http://apps.exchange.autodesk.com/RVT/en/Detail/Index?id=appstore.exchange.autodesk.com%3aifc2015_windows32and64%3aen

    Updates from the previous version are listed below.  Please upgrade to the newest version!

    If you do not wish to receive upgrade notices, please reply and I will remove you from the mailing list.

    NOTES:
    1.       IFC Exporter for Revit 2013 will no longer be getting regular updates.  IFC Exporter for Revit 2014 will continue to do so for the next year

    via email from Angel Velez