In less than 10 steps, can you set up all the PCs in your office with all required software?  Here’s one way:

  1. Set up a Windows PC with all required programs
  2. Navigate to %WINDIR%system32sysprep and run the following command from command line:
    sysprep /generalize
  3. Pick options to Generalize and to Shutdown
  4. Reboot into some decent imaging software
  5. Make an image of the hard disk and partitions to an external USB
  6. Apply that image to as many PCs as you have software licenses for
  7. Upon bootup, you will have to re-enter proper Windows key for that hardware, and activate
  8. Also, you will need to set proper computer name and join domain if needed
  9. Done!

Sysprep /generalize will essentially make the image “non-unique” to that system, meaning it can easily be imaged to other hardware without activation or driver headaches.

Sysprep must always be run from the %WINDIR%system32sysprep directory

Sysprep Command-Line Syntax

EDIT2: new version (January 2014) at
Code: codice sorgente

Compiled  DLL and ADDIN
(copy to C:ProgramDataAutodeskRevitAddins2014 and Unblock the DLL)

via
http://puntorevit.blogspot.it/2014/01/view-depth-override-polar-distance_8.html

EDIT1: The code is at
Punto Revit: View Depth Override – Codice Sorgente

Paolo has created a macro that overrides elements based on their distance from the viewpoint.  Check out the video:

On his blog, he offers to share the code, if you ask 🙂

via
Google Translate
of
Revit Point: View Depth Override

I think that every BIM decision, for standards, LOD, deliverables etc will always be project based, and while you can have a preferred company standard and champion it, different requirements will mean it’s all about the BIM Execution Plan.
– Cyus

Coordinating amongst just the design teams is cute, but it’s not the real world.
– Aaron Maller

when I first started using Revit 3.1, BIM was all about production with a capital P. It seemed that Revit’s development was heavily focused on how to help me do my work faster & better.

Now you’ve got a lot of people online, in articles, and at conferences talking about BIM who haven’t actually delivered a project in BIM, and saying things like “everything has to be modeled down to the hinges otherwise it’s not BIM”.
– JeffreyMcGrew

Thread link:
http://www.revitforum.org/architecture-general-revit-questions/15112-bim-detailed-modelling-2.html

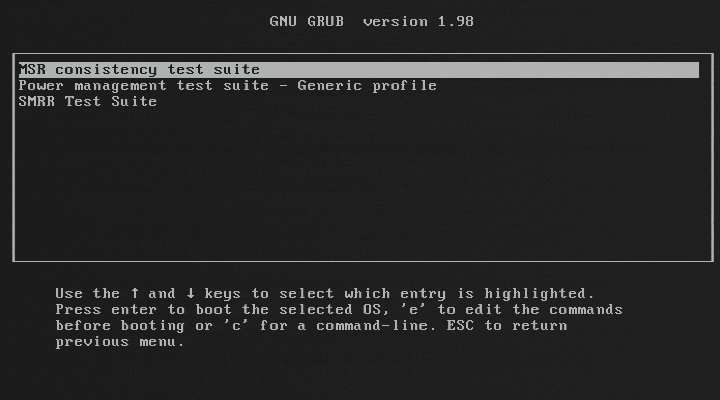
… provides a bootable pre-OS environment for testing BIOSes and in particular their initialization of Intel processors, hardware, and technologies. BITS can verify your BIOS against many Intel recommendations. In addition, BITS includes Intel’s official reference code as provided to BIOS, which you can use to override your BIOS’s hardware initialization with a known-good configuration, and then boot an OS.
http://biosbits.org/

Some download links:
https://downloadcenter.intel.com/Detail_Desc.aspx?agr=Y&ProdId=2371&DwnldID=19763&ProductFamily=Processors&ProductLine=Server&ProductProduct=Intel%C2%AE+Xeon%C2%AE+Processor+5000+Sequence&lang=eng

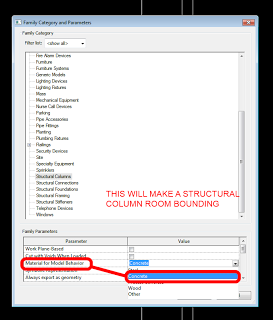
In almost every case, I prefer Structural Columns over architectural Columns in Revit.  However, the architectural versions can easily be made Room Bounding.  How do we do this for Structural Columns?

Change the “Material for Model Behaviour” property in Family Category and Parameters to be Concrete or Precast Concrete.

Strangely enough, changing back to Other after reloading this Family had no effect – I could not make it non-Room Bounding again…

EDIT: In the comments, Chris describes the behaviour of Structural Columns in the Project – “Deleting the columns and placing new columns with the material as “other” will make the space non-room bounding again.”

See image:

Make this registry setting:

Note: The creation of a client log file is optional for network deployments. You must enable the option in the Autodesk® Deployment Wizard. 
Not all products create a client log file by default. In the event that no client log file was created, you can use Microsoft® Windows® Installer to create a log file.
To create a log file using Windows Installer
  1. Click Start menu (Windows) > Run.
  2. Enter REGEDIT and click OK.
  3. In the Registry Editor, browse to the following folder:
HKEY_LOCAL_MACHINESoftwarePoliciesMicrosoftWindowsInstaller
  1. Right-click a blank space in the right pane. Click New > String Value.
  2. Enter Logging for the name.  
  3. Double-click Logging.
  4. Enter voicewarmup in the Value Data box and click OK.
  5. Close the Registry Editor, and run the installation again.
Log files created using this method are located in the %TEMP% folder and are named MSI#####.log.

via
Autodesk – Autodesk AutoCAD Services & Support – Using log to troubleshoot installation errors

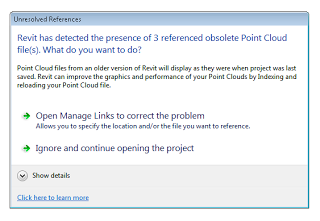
This is basically what will happen:

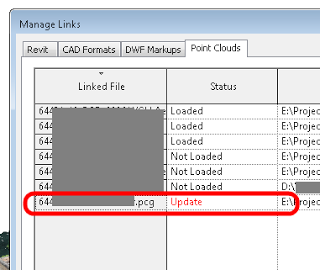
So, basically you can choose to re-index to RCP, or leave them as-is and continue to use the PCG.

While there is much to love about the smooth performance RCP point clouds, I have to admit that PCG point clouds seemed to allow:

  • greater point density, perhaps due to different default indexing settings, 
  • more consistent display (ie. once the view had regenerated, that’s how it would stay – while RCP seems to slowly and continuously re-gen until you get a very realistic view)
  • and didn’t have cropping problems – I’ve noticed that a 3D Section Box with an RCP point cloud will require a greater “buffer” than with PCG.  If you crop it too close, the RCP points won’t show (even if they physically exist in that section box space).
On the flip-side, PCG point clouds are typically much larger than the RCP / RCS equivalent.

Related forum post:
Point cloud disappears partially revit 2014 – Autodesk Discussion Groups

Just use Bluestacks:
http://www.bluestacks.com/

After installing the program and performing all the requisite login / setup steps, you will essentially have an Android emulator running – you can browse and search the Google Play Store (and other Android app stores), install apps and use them in either full screen or window mode.

While on the subject of Android applications, if you want to download an APK file from the store, you may want to try APK Downloader beta.  It can only be used on free, not paid, apps.