Month: May 2011
1. Warning message displays if the current selection contains elements that cannot be included in an assembly.
The following elements cannot be included in an assembly:
- Annotations and detail items
- Assemblies and elements that are already part of another assembly
- Complex structures (trusses, beam systems, curtain systems, curtain walls, stacked walls)
- Elements in different design options
- Groups
- Imports
- Images
- Links or elements in a link
- Masses
- MEP-specific elements (ducts, pipes, conduits, cable trays and fittings, HVAC zones)
- Model lines
- Rooms
- Structural loads, load cases, and internal loads
See the rest at:
Assembly Usage Tips – WikiHelp
“WhatTheFont is a service available on several platforms that allows user to submit an image and it will automatically find the closest matches from all fonts available in the database.
To use WhatTheFont service, just head to the following URL:
http://new.myfonts.com/WhatTheFont/
“
via
How to Identify Font Used in Image, Photo or Web Page � My Digital Life:
“Anyone who has played with Revit for an hour or so will know that there is an initial love affair, followed by a sudden realisation that you are staring into an abyss of complexity.”
“Only when you give yourself up and accept that the world as you know it will never be the same again, do you finally break through.”
“It helped to … have an evangelical desire to make it work.”
“… an extreme discipline is required to use Revit properly.”
“Revit is what everyone thought that CAD was when they were buying it in the 1980’s, only for them to find that they had actually bought Etch-a-Sketch. We love it, and there is no going back.”
This was just a few quotes from:
Barton Engineers: Essays & Blog 12/05/11:
“a Revit expert is one who doesn’t use locks”
via sloArch:
What do you think, Revit Masters? Should we lock:
A. everything
B. nothing
C. some things
D. depends on the project and situation
???
You can make certain layers export as non printable layers when exporting from Revit 2012 to AutoCAD DWG or DXF files.
First, you need to set the following checkbox in the Modify DWG/DXF Export Setup dialog box:
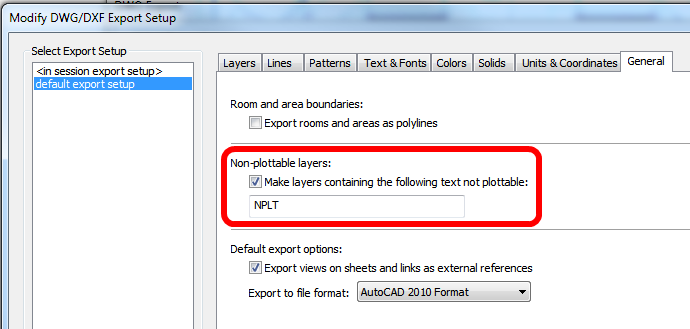 |
| Make layers containing the following text non plottable NPLT |
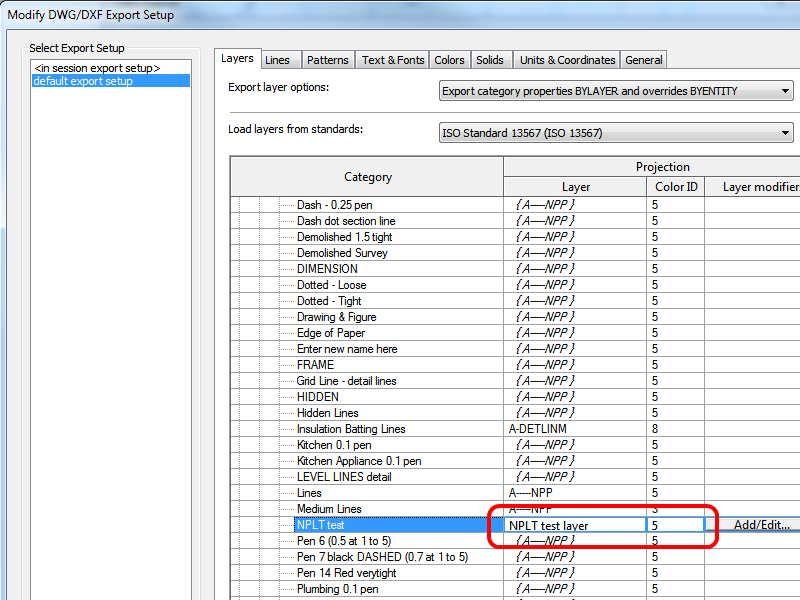
Then, make a line style and map its layer to a layer name containing the text ‘NPLT’:
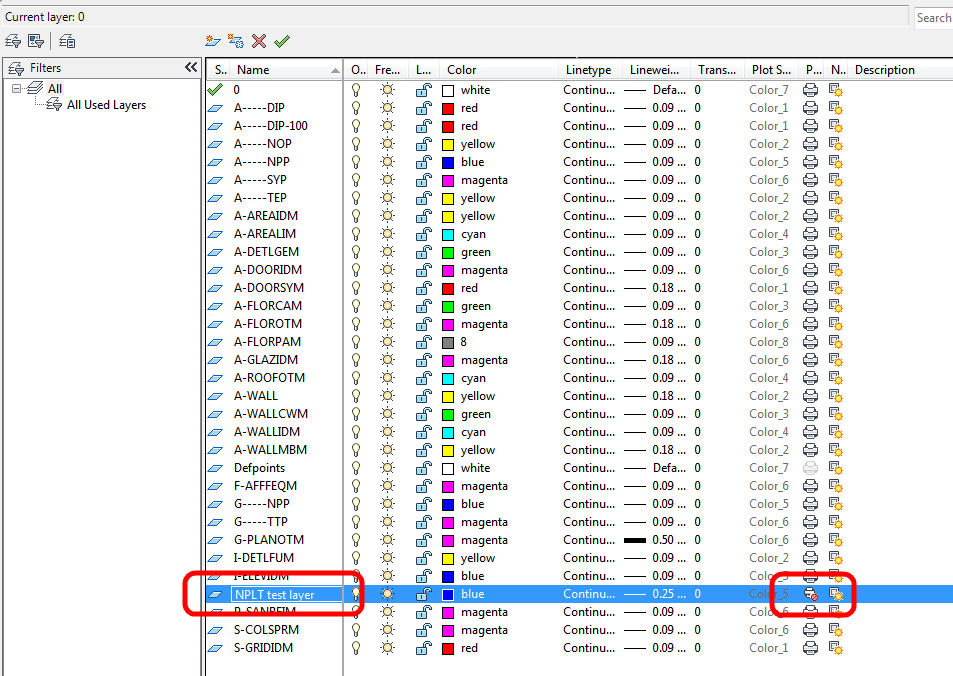
After the file has been exported, you will see that the layer has been set to non printable in the AutoCAD Layer Manager:
A previous attempt to install or uninstall an Autodesk® product failed to successfully complete and now you are unable to install or reinstall an Autodesk product on your system.
Solution
In these cases, it is strongly recommended that you clean your system by uninstalling all Autodesk products and supporting applications (add-ins, utilities, enablers, etc.), and by removing related files and settings before attempting to reinstall. The end result is a clean system on which you can install your new Autodesk product.
This is pretty drastic stuff, but sometimes it is the only way…
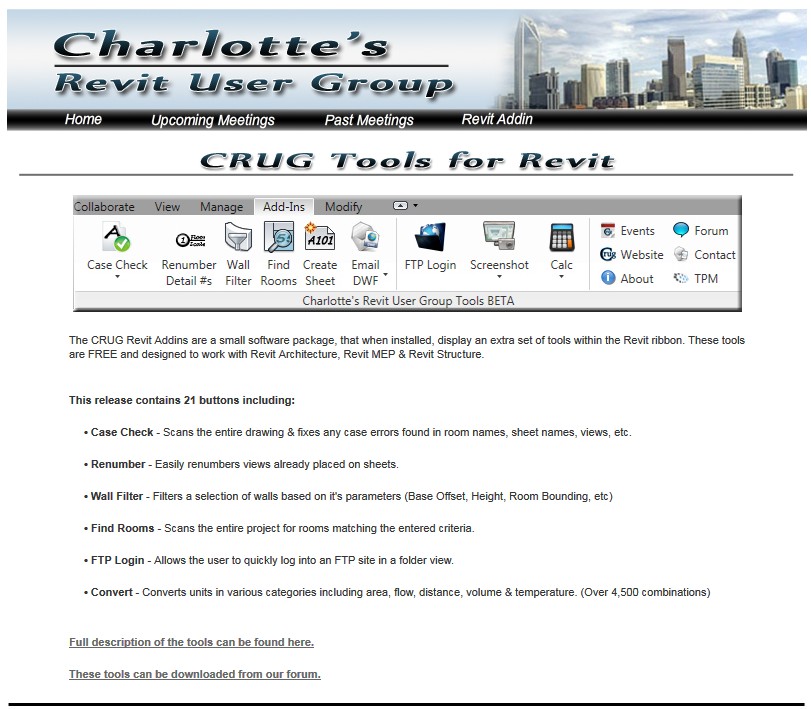
This release contains 21 free features including:
• Case Check
• Renumber
• Wall Filter
• Find Rooms
• FTP Login
• Convert
Here are some direct links to the setup files:
Revit 2012 – Windows 7 and Vista
Revit 2011 – Windows 7 and Vista
Here is a link to the main page for these tools:
Charlotte’s Revit User Group