Previously, this was all working with the old Desktop Connector and b360provider.exe (I think?) but the new versions of Desktop Connector seem to have broken the ability to ‘browse’ C4R Revit models on BIM 360… and guess what? There is no Solution. This functionality is in fact ‘by design’. You can copy and paste a non-C4R Revit model to BIM 360 Docs via the connector, and that RVT will be visible in Windows Explorer. But if you have C4R initialised Revit models on BIM 360 Docs, they will not be visible under the BIM 360 (Preview) node in Windows Explorer. You can only view those C4R Revit files in their folder structure by navigating through Revit 2018.3 or newer.

This is the feedback from Autodesk:

Revit cloud models (C4R models) are not supported in Desktop connector. They won’t be showing up in Desktop Connector. Published C4R models are only available in Revit and Docs.


For C4R models, published models will have all versions in BIM 360. This will be recommended workflow to manage models:
https://knowledge.autodesk.com/support/revit-products/learn-explore/caas/CloudHelp/cloudhelp/2016/ENU/Revit-CAR/files/GUID-AE6DBCDF-3DB1-41CB-9DC5-B0C336E6C851-htm.html

You can also save copies of the model locally to put in your backup system. Also from each user’s machine, C4R cache will be another source of backups. 

Also refer to How to backup Revit cloud models

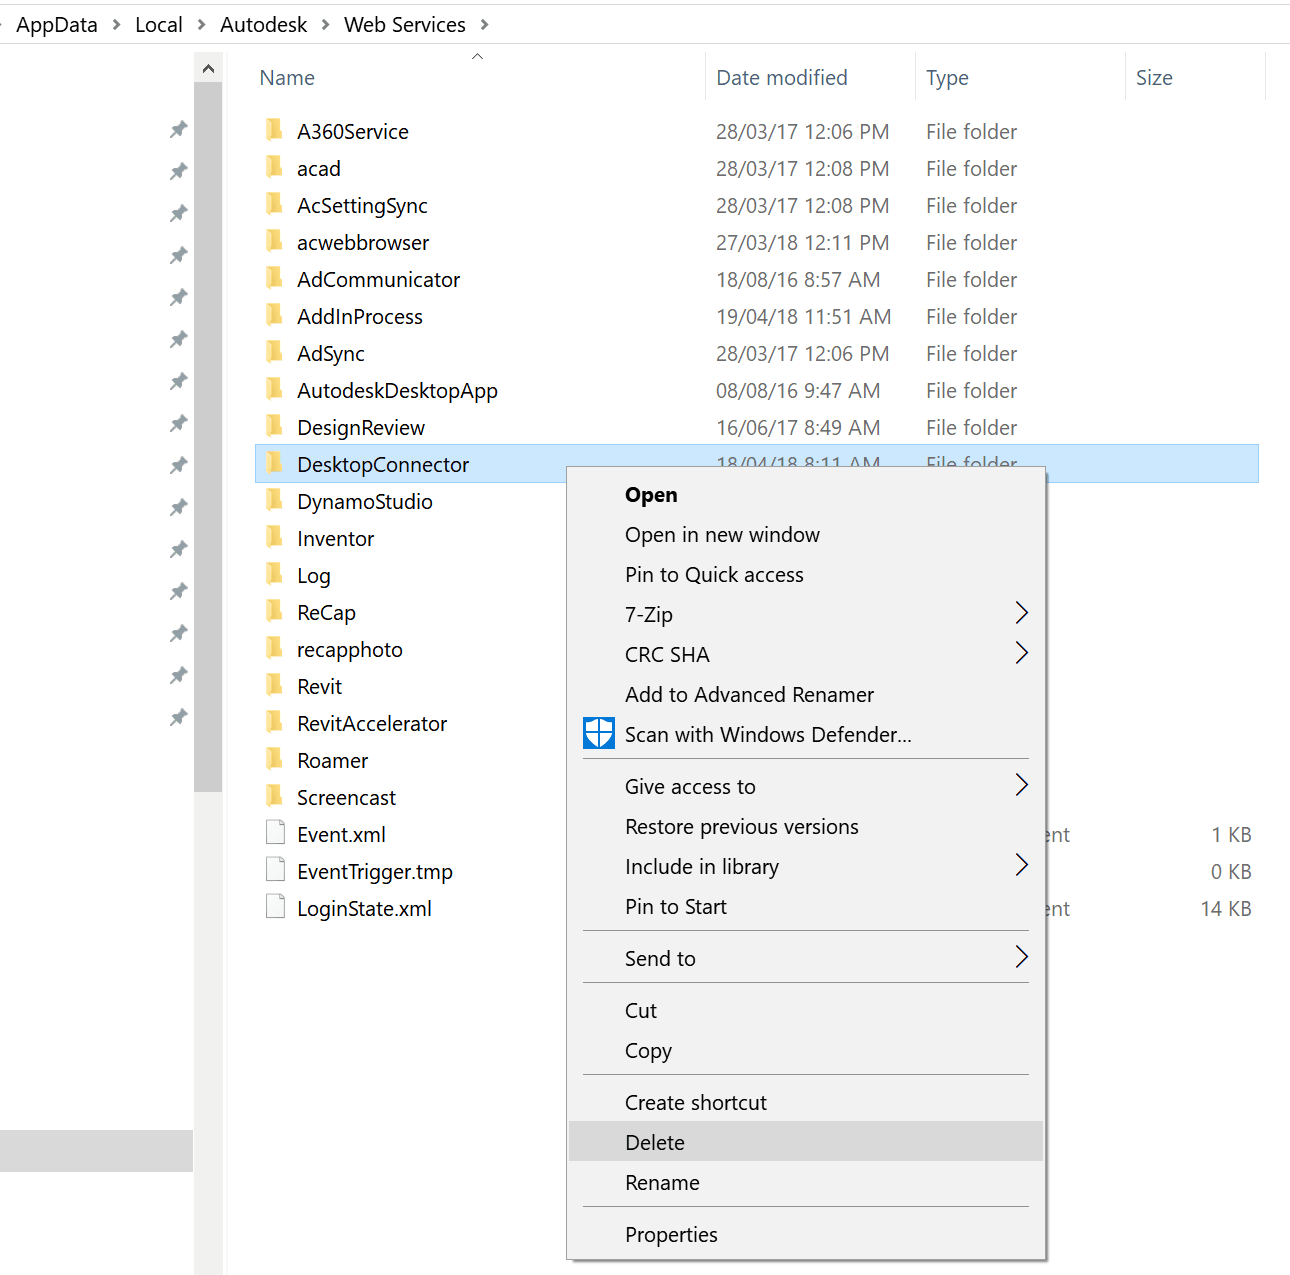
I went looking for another answer, but there really isn’t one. Below is a list of steps I took to play around with the Desktop Connector installation. In the end, the only way I can foresee being able to ‘automate’ onsite BIM 360 Docs backups will be to leverage the CollaborationCache folder. You will need some Revit API know-how to forcibly populate this through some BIM 360 Reload methods (refer here).  Unfortunately this will be a flat list of files without descriptive names, so there will have to be some workarounds and cleanup scripts in place (we already have a system of BIM 360 file management in VirtualBuiltApp).  I intend to post some more about these workarounds in future.

Keep reading for excessive detail on my Desktop Connector journey …

___________________________________________________________________________________

I used Glary Utilities Uninstall tool:

Entry shown:

"C:\ProgramData\Package Cache\{b46602fe-a358-48c4-a0e0-905010df08e2}\DesktopConnector.exe" /modify

Uninstalled this old version. Interestingly, there were 3 different uninstall processors triggered? Like I had three different versions installed?


Also tried removing this folder and reinstalling:

I found a pile of errors in the diagnostic logs:

CDX pipleline builder output
Output=Warnings received from AddInStore.Rebuild
========================
Could not connect up a part in a pipeline to its neighbors: AddInAdapter Name: "ISecureSettingsProviderViewToContractAddInAdapter" Location: "AddInSideAdapters\Comet.AddInFramework.DataSourceProviders.ProviderAdapters.dll".

and a few of these

========================
Could not connect 2 valid add-in model parts.
========================

========================
While inspecting an assembly, caught a BadImageFormatException: The file is not a valid binary: C:\Program Files\Autodesk\Desktop Connector\AddIns\ADriveConnector\AdWebServices.dll This occurred while inspecting assembly C:\Program Files\Autodesk\Desktop Connector\AddIns\ADriveConnector\AdWebServices.dll.
========================

========================
While inspecting an assembly, caught a BadImageFormatException: The file is not a valid binary: C:\Program Files\Autodesk\Desktop Connector\AddIns\ADriveConnector\AdWebServicesUI.dll This occurred while inspecting assembly C:\Program Files\Autodesk\Desktop Connector\AddIns\ADriveConnector\AdWebServicesUI.dll.
========================

This note seemed useful:

Starting CDX pipline builder: C:\Program Files\Autodesk\Desktop Connector\Comet.Applications.PipelineBuilder.exe C:\Program Files\Autodesk\Desktop Connector


I scanned through the Registry and deleted old references to Desktop Connector.


Found this link with the command line switches: here

Tried an install from elevated command prompt:

C:\Temp>DesktopConnector-x64.exe /install /quiet

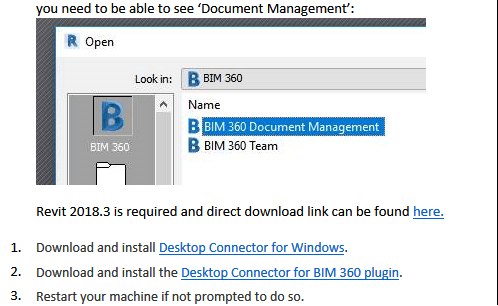
Note: you do not actually need the Desktop Connector to collaborate on BIM 360 Revit projects in the cloud. You only need Revit 2018.3 or newer, and the relevant license for Revit Cloud Collaboration (too hard to keep track of the names but I think ‘BIM 360 Design’ is the current terminology).

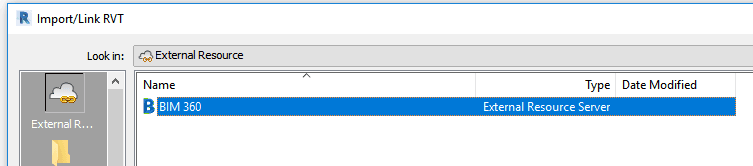
You will be able to see this link in Revit 2018.3 or newer:

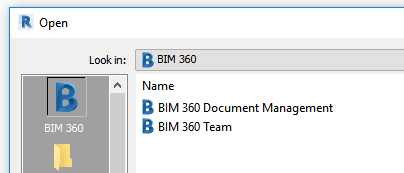
When ‘linking’ Revit models, CAD files, and other resources, you will see this option when working in a cloud workshared model:

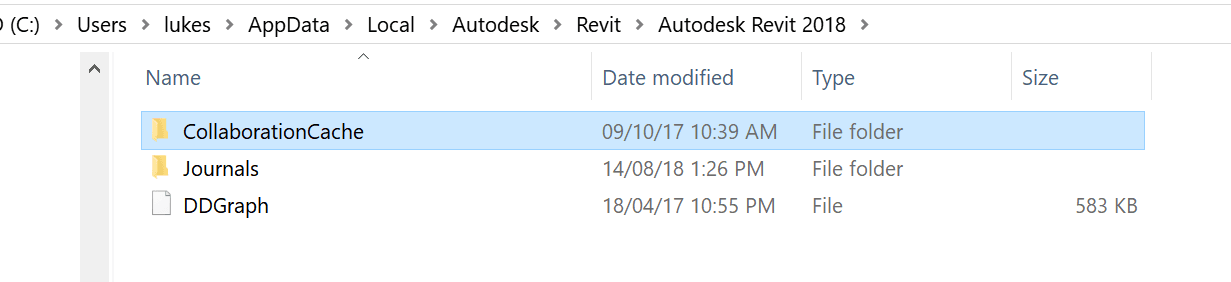
These models will be temporarily stored in the CollaborationCache folder:

From Autodesk: Here is the URL to download the Desktop Connector. Please download and install the latest version to continue to use the Desktop Connector.

PLESE NOTE: This update must be completed by July 31 in order to continue to use the Desktop Connector.

This update also includes the following improvements:

  • Support for right-click functionality to delete files & folders, rename folders, and create folders
  • Improved caching to improve the user experience and performance
  • Recent bug fixes. For updates, view our list of known issues.

Please download and install this new version to take advantage of these updates. NOTE: The new installer will remove any previous installations of the Desktop Connector automatically.

DOWNLOAD THE UPDATE
For additional details on the updates to the Desktop Connector and the latest BIM 360 releases, please visit the BIM 360 Release Notes.

If you Close All Worksets when opening a model on BIM 360 Design, you may get this error (related to Project Info):

Can’t edit the element. It was deleted in the Central Model.


As you can see, it is related to the Project Info : Project Information element:


The error looks like this. You must click Cancel to proceed:

It appears to be some synchronisation bug or similar, possibly related to BIM 360 cloud worksharing. You can force the error to reappear by clicking on the Location option in the Ribbon

To fix it, try doing a full Sync with Central. It seems that this rectifies the bug for that session and future sessions with that particular cloud workshared model.

If you have moved your project onto BIM 360 Docs, it might make sense to store related project resources (Shared Parameter files and Classification resources like Uniformat) in the same cloud as well.


Here’s how you can do it (using Revit 2018.3):

  1. Setup the BIM 360 connector still currently in beta
  2. Ensure you can see the BIM 360 (Preview) item in Windows Explorer
  3. Using BIM 360, create a suitable folder under the Project Files area, and upload your resource file, such as UniformatClassifications_2010.txt
  4. Browse to that folder in Windows Explorer:

  5. Open Revit
  6. Navigate to Manage – Additional Settings – Assembly Code Settings
  7. Click Browse
  8. Copy and Paste the folder address from Windows Explorer (which actually shows the local sync location for BIM 360 data, typically C:\Users\YourUserName\BIM 360\YourBIM360License\YourBIM360Project\Project Files\
  9. Back in Revit, after navigating to the correct BIM 360 folder, select the text file resource and click Open
  10. Revit detects that this resource is stored on BIM 360 Docs and you can proceed…
  11. Sync your model to save the settings

You should be able to use the same process to save other files like Keynote references and Shared Parameter files in the cloud. Keep in mind that you will still have to manage BIM 360 access control, as you probably don’t want multiple people actually be able to edit these files.

Assembly Code on BIM 360

Don’t forget you can also get the free Autodesk Classification Manager for Revit here.


If you are still running a relatively small SSD (like 512gb), you might see that your C drive fills up pretty quickly while working on a large BIM 360 Design Revit cloud worksharing project. See below image, where the CollaborationCache folder is using almost 50gb of space on my machine:


While I realise that the SSD is the best place to have that data in terms of performance, if you don’t have the space available you may consider moving your CollaborationCache folder to a secondary, larger hard drive. I used a symbolic link to do this, with the script below:

if exist "%localappdata%\Autodesk\Revit\Autodesk Revit 2018\CollaborationCache" rename "%localappdata%\Autodesk\Revit\Autodesk Revit 2018\CollaborationCache" CollaborationCache.old
mklink /d "%localappdata%\Autodesk\Revit\Autodesk Revit 2018\CollaborationCache" E:\C4R
if not exist E:\C4R MD E:\C4R
robocopy /mir "%localappdata%\Autodesk\Revit\Autodesk Revit 2018\CollaborationCache.old" E:\C4R


This creates a folder called C4R on your E drive, copies the CollaborationCache over, and sets up the symbolic link. To use it:

  1. Sync all Revit instances and shut down Revit completely
  2. Make a CMD from the code above and run it as Administrator (elevated privileges required for mklink )
  3. In Explorer, confirm you have the symlink and delete the .old folder :

  4. Start Revit 2018


Please use the script with care 🙂

You can also refer to my previous post where I did the same with the Tekla BIMsight cache folder.


Here is the CMD script to move the folder for Revit 2018 to a drive with R drive letter:

if exist "%localappdata%\Autodesk\Revit\Autodesk Revit 2018\CollaborationCache" rename "%localappdata%\Autodesk\Revit\Autodesk Revit 2018\CollaborationCache" CollaborationCache.old
mklink /d "%localappdata%\Autodesk\Revit\Autodesk Revit 2018\CollaborationCache" R:\B3D\R2018
if not exist R:\B3D MD R:\B3D
if not exist R:\B3D\R2018 MD R:\B3D\R2018
robocopy /mir "%localappdata%\Autodesk\Revit\Autodesk Revit 2018\CollaborationCache.old" R:\B3D\R2018


Here is the CMD script to move the folder for Revit 2019 to a drive with R drive letter:

if exist "%localappdata%\Autodesk\Revit\Autodesk Revit 2019\CollaborationCache" rename "%localappdata%\Autodesk\Revit\Autodesk Revit 2019\CollaborationCache" CollaborationCache.old
mklink /d "%localappdata%\Autodesk\Revit\Autodesk Revit 2019\CollaborationCache" R:\B3D\R2019
if not exist R:\B3D MD R:\B3D
if not exist R:\B3DR2019 MD R:\B3D\R2019
robocopy /mir "%localappdata%\Autodesk\Revit\Autodesk Revit 2019\CollaborationCache.old" R:\B3D\R2019


Here is the CMD script to move the BIM 360 cache folder for Revit 2020 to a drive with R drive letter:

if exist "%localappdata%\Autodesk\Revit\Autodesk Revit 2020\CollaborationCache" rename "%localappdata%\Autodesk\Revit\Autodesk Revit 2020\CollaborationCache" CollaborationCache.old
mklink /d "%localappdata%\Autodesk\Revit\Autodesk Revit 2020\CollaborationCache" R:\B3D\R2020
if not exist R:\B3D MD R:\B3D
if not exist R:\B3D\R2020 MD R:\B3D\R2020
robocopy /mir "%localappdata%\Autodesk\Revit\Autodesk Revit 2020\CollaborationCache.old" R:\B3D\R2020


Here is the CMD script to move the BIM360 cache folder for Revit 2021 to a drive with R drive letter:

if exist "%localappdata%\Autodesk\Revit\Autodesk Revit 2021\CollaborationCache" rename "%localappdata%\Autodesk\Revit\Autodesk Revit 2021\CollaborationCache" CollaborationCache.old
mklink /d "%localappdata%\Autodesk\Revit\Autodesk Revit 2021\CollaborationCache" R:\B3D\R2021
if not exist R:\B3D MD R:\B3D
if not exist R:\B3D\R2021 MD R:\B3D\R2021
robocopy /mir "%localappdata%\Autodesk\Revit\Autodesk Revit 2021\CollaborationCache.old" R:\B3D\R2021

Here is the CMD script to move the BIM360 cache folder for Revit 2022 to a drive with R drive letter:

if exist "%localappdata%\Autodesk\Revit\Autodesk Revit 2022\CollaborationCache" rename "%localappdata%\Autodesk\Revit\Autodesk Revit 2022\CollaborationCache" CollaborationCache.old
mklink /d "%localappdata%\Autodesk\Revit\Autodesk Revit 2022\CollaborationCache" R:\B3D\R2022
if not exist R:\B3D MD R:\B3D
if not exist R:\B3D\R2022 MD R:\B3D\R2022
robocopy /mir "%localappdata%\Autodesk\Revit\Autodesk Revit 2022\CollaborationCache.old" R:\B3D\R2022

Here is the CMD script to move the BIM360 cache folder for Revit 2023 to a drive with R drive letter:

if exist "%localappdata%\Autodesk\Revit\Autodesk Revit 2023\CollaborationCache" rename "%localappdata%\Autodesk\Revit\Autodesk Revit 2023\CollaborationCache" CollaborationCache.old
mklink /d "%localappdata%\Autodesk\Revit\Autodesk Revit 2023\CollaborationCache" R:\B3D\R2023
if not exist R:\B3D MD R:\B3D
if not exist R:\B3D\R2023 MD R:\B3D\R2023
robocopy /mir "%localappdata%\Autodesk\Revit\Autodesk Revit 2023\CollaborationCache.old" R:\B3D\R2023


Here is a way to store your Outlook signatures on OneDrive using a symlink:

if exist %userprofile%\AppData\Roaming\Microsoft\Signatures rename %userprofile%\AppData\Roaming\Microsoft\Signatures Signatures.old
mklink /d %userprofile%\AppData\Roaming\Microsoft\Signatures E:\LukeOneDrive\USERPROFILE\Microsoft\Signatures

I previously posted about how to quickly repath links based on some control mechanisms. Enter BIM 360, and the wild world of Revit cloud worksharing… I expect that it will be commonplace now for existing projects and datasets to move across to BIM360 ‘mid project’. But that creates some interesting problems, like creating folders, dealing with the initiation process, and replacing local Revit Links with their cloud versions.

This post is focused on that process of changing all of the Revit link paths to link to the BIM 360 models. Unfortunately, the previous method I used (TransmissionData, like eTransmit) is not available for cloud hosted models. So how do we automate this process?

We went about it this way:

  1. Initiate all Revit models on the BIM 360 Document Management cloud (manually, for now)
  2. Create one federated model on the BIM 360 cloud that links in all the other cloud hosted Revit models. You might do this one manually, using Reload From in the Manage Links dialog box.
  3. Once you have that one ‘super host model’, use a batch process to harvest all of the cloud model data
  4. Using the harvested data, create a script that implements a Reload From method to batch reload local models from their cloud counterpart

On the journey to solving step 3, I experimented with a few different methods. I discovered that you need to use the ExternalResource class to get information about BIM 360 cloud models (not ExternalReference).

I also realised that I had to deal with Reference Information, which appears to be a .NET dictionary per link that stores some funky Forge IDs and so on. But I want to store all this data in our VirtualBuiltApp BIM Management system, so I had to serialise the Reference Information to a string that could be stored in a database VARCHAR field (or push to Excel if you are still doing things the old way). Dimitar Venkov gave me a few tips about using JSON with IronPython in Dynamo (thanks mate!), so after that all the harvesting pieces were in place!

Here is some of the harvesting and JSON code. Notice that I played around with using a container class to pass data between Dynamo nodes. In the end, JSON string was the answer:

 data = []
for u in unwraps:
    data.append(u.GetExternalResourceReference(linkresource))

class dummy(object):
    def ToString(self):
        return 'container'
container = dummy()

sdicts = []

for y in data:
    dictinfo = ExternalResourceReference.GetReferenceInformation(y)
    container.dictinfo = dictinfo
    infos.append(container)
    shortnames.append(ExternalResourceReference.GetResourceShortDisplayName(y))
    versionstatus.append(ExternalResourceReference.GetResourceVersionStatus(y))
    insessionpaths.append(y.InSessionPath)
    serverids.append(y.ServerId)
    versions.append(y.Version)
    sdicts.append(json.dumps(dict(dictinfo)))

The next step was to create the ‘batch reload from’ tool. Now that we had the necessary data, we just had to use it to grab the matching cloud path information (from our database) and apply it to each Revit link.

I created a node that essentially built a new reference path from the JSON and other data that we had harvested. Here is some of that code:

 des = []
for x in referencesInfo:
    des.append(json.loads((x)))
newdicts = []
for y in des:
    newdicts.append(Dictionary[str, str](y))

serverGuids = []
for g in serverIdsIn:
    tempguid = Guid(g)
    serverGuids.append(tempguid)

newrefs = []
for z in range(len(referencesInfo)):
    serverIdIn = serverGuids[z]
    referenceInfo = newdicts[z]
    versionInfo = versionsInfo[z]
    sessionPathIn = sessionsPathIn[z]
    tempRef = ExternalResourceReference(serverIdIn, referenceInfo, versionInfo, sessionPathIn)
    newrefs.append(tempRef)

OUT = newrefs

The final step was to get a RevitLinkType and a matching ReferenceInformation and apply them to each other. I stored the data in our cloud based BIM Management Application, VirtualBuiltApp. Then I could easily just pull the data into Dynamo with a suitable database connector, and match up the RevitLinkType in the current file with its associated cloud identity. For that genuine 90s feel, you could use Excel to store the data as it is just a JSON string and some other strings:

Here is the key bit of code that actually changes the link path (without all of my other error checking bits and pieces):

     try:
        newCloudPath = newCloudPaths[l]
        reloaded = fileToChange.LoadFrom(newCloudPath, defaultconfig)
        successlist.append(reloaded.LoadResult)
        TransactionManager.Instance.ForceCloseTransaction()
    except:
        successlist.append("Failure, not top level link or workset closed")

To actually implement the script and get productive, I opened 4 instances of Revit, and then used this process in each instance:

  1. Open the Revit file from BIM 360, with Specify… all worksets closed
  2. Unload all links
  3. Open all worksets
  4. Run the Reloader Script
  5. Confirm link status in Manage Links
  6. Optional: Add ‘bim 360 links loaded’ text to Start View (just for tracking purposes)
  7. Optional: Add comment to VirtualBuiltApp (optional, for tracking purposes)
  8. Close and Sync

In this way I can have 4 or more sessions operating concurrently, fixing all the link paths automatically, and I just need to gently monitor the process.

One nice thing is that I set the script up to immediately Unload a link after it had obtained and applied the new Path information. This means that the Revit instance does not get bogged down with many gigs of link data in memory, and in fact this is way faster than trying to use Manage Links for a similar process.

Ideally I would like to fully automate this, to the point where it opens each file, runs the script, and syncs. Unfortunately, time didn’t allow me to get all the code together for that (for now).

Finally, because we are using our custom built schema and validation tools, we can easily create visuals like this:

Modified versions of the Dynamo graphs can be found on the Bakery Github here:

dyn folder

To be able to use the new BIM360 Design or BIM 360 Document Management in Revit you need to be able to see ‘Document Management’ after clicking the BIM 360 link in the Revit Open Dialog box:

  1. Revit 2018.3 (or newer) is required and a direct download link can be found here.
  2. Download and install Desktop Connector for Windows.
  3. Download and install the Desktop Connector for BIM 360 plugin.
  4. Restart your machine if not prompted to do so.

I have added these steps to my public OneNote notebook on using BIM 36o with Revit:

Installation  (Web view)


Check out this page from Autodesk Knowledge base. Notice how it describes three different ways of linking for BIM 360 Design projects that involve Revit worksharing:

  • Method 1 – Controlled Sharing – ‘Consume’ Published Models from Packages
  • Method 2 – Controlled Sharing – Link from the Shared Folder
  • Method 3 – Live Linking

Each method requires fundamentally different sharing standards, and varying degrees of prior BIM 360 permissions and team setup.

Notice that Method 1 includes the concept of ‘packages’. The overall intention here is to try to emulate some existing workflows. While BIM files continuously change during project development, in traditional workflows a ‘team’ only interacts with a snapshot of the available BIM data from other teams (a package).

At this point, it is key to keep in mind that these different methods exist, and if you are a BIM Manager on a BIM 360 Design with Revit project, you will need to discuss and agree on the linking Method for managing the Revit data throughout the BIM creation phase of the project.


Interesting to see that many BIM360 services are offline right now (approx 10am Australian time, 1 June 2018):

You can always check Autodesk online service health at this link:

Autodesk Health Dashboard


It is something to think about as we move forward with reliance on cloud services – how important is 100% uptime with collaboration cloud products in the BIM world? Is 100% uptime even possible with current technology services, and the stacks (like Autodesk cloud) that rely on other stacks (like AWS cloud)?

I’m looking into ways to batch initialize Revit models onto the new BIM 360 Docs (Document Management) platform. It is a work in progress at the moment – in Revit 2018, I think that there is limited ability to use newer API features for creating a Cloud ModelPath for batch processing. But more on that later…

For now, I wanted to replicate a folder structure from a local network onto the BIM 360 Docs platform. To do this, you just need the Desktop Connector + Preview installed, and then you copy and paste the data.

Here are the steps:

  1. Clear Pending Actions on Desktop Connector for BIM 360 (recommended, use with care)
  2. Work Offline (recommended). Folders will appear blue in Windows Explorer.

  3. Set the folder path in the and create a CMD script using code below. It populates each subdirectory with a text file indicating the contents of the directory.
    @echo off
    chcp 65001 >nul
    for /r "C:\Your\Folder\Path\Here" %%d in (.) do dir /a:-d "%%~fd" > "%%~dpnd\DirectoryFilePlaceholder.txt"
  4. Run the script on your target directory (the local directory that you want to mirror into BIM 360 Document Management platform)
  5. Run a FreeFileSync task with filters to include only the ‘DirectoryFilePlaceholder.txt‘ as a mechanism of building the file structure. This task copies those txt documents to the BIM 360 using the local Desktop Connector path, as shown here:
  6. Then, disable ‘Work Offline’, so the sync to cloud should begin.
  7. Wait for ‘Processing’ to complete

To force the sync you may have to toggle the ‘Offline’ status in the tray.

You can review sync state with the ‘Pending Actions’ link from the system tray:

After the file structure is copied and synced, you will be able to see it in BIM360 Docs.

You can then proceed with adding Permissions or uploading other files.