
“The download is available at 123dapp.com and is around 400MB.”
via
JTB World Blog: 123D free 3D solid modeling by Autodesk in beta:
Month: May 2011
“It boils down to this – bad habits easily translate between CAD and BIM packages – and the tools and models are only as good as the information you put into it. IT’s like saying the car made me drive home drunk, ’cause I didn’t know any other way to get home…”
The MEP CAD Engineer: Interesting article on a BIM failure:
I know I don’t need to say this again…but Revit WANTS you to put good information into it.
“the paint tool will open the Materials dialog, where now you can visually preview materials and access material properties in order to modify a material. You can see your changes without closing the Materials dialog.

Also, you can use the “Remove Paint” tool to remove a material that has been applied to a face.

Meanwhile, you can identify the quantities of materials used as Paint in material takeoffs.

”
EDIT In Revit 2012 and newer, the quickest way to identify paint is to use the Remove Paint tool. This does not load the Material selection panel, and will thus be faster. Also, switch 3D view to wireframe with Remove Paint to globally scan the project with your cursor for painted surfaces…
Like Life…or Wife? Funny Twitter exchange below:
davewlight David Light
Am I always right?no but more often than not I am, why? I treat #revit like life, understand the problem, get facts, digest, before answerin
in reply to @davewlight ↑
@simonwhitbread Simon Whitbread
@davewlight almost right Dave, one letter though. Treat #Revit like WIFE… Gently and with respect. You’ll achieve so much more 😉
There were some good guesses to this popquiz, but none of them quite nailed it.
Revit Solo said…
Its the alignment line that shows up when your draging elements to a new position.
And this is partly true – this particular line does show up when dragging. However, I wasn’t dragging when I took the screenshot. The answer is below:
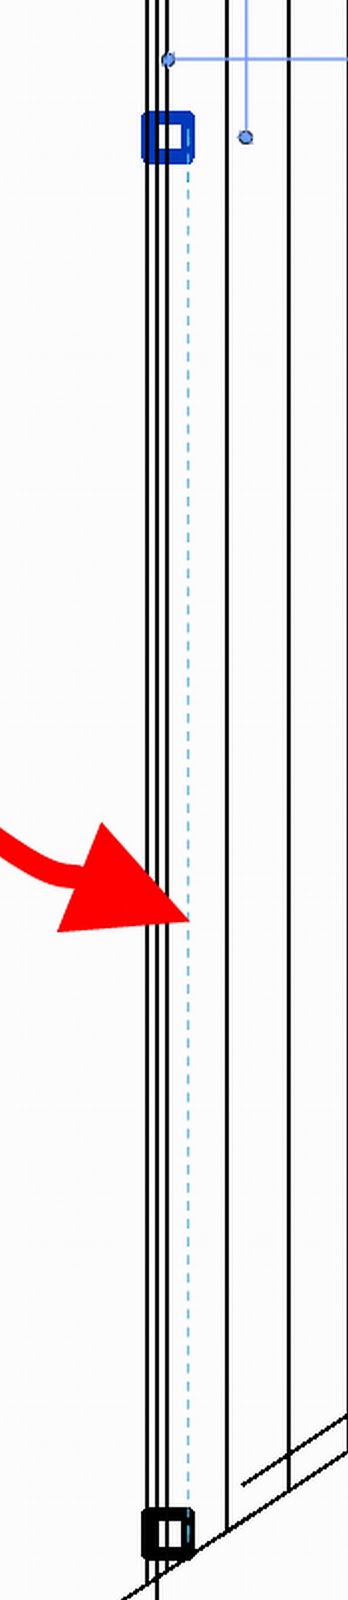
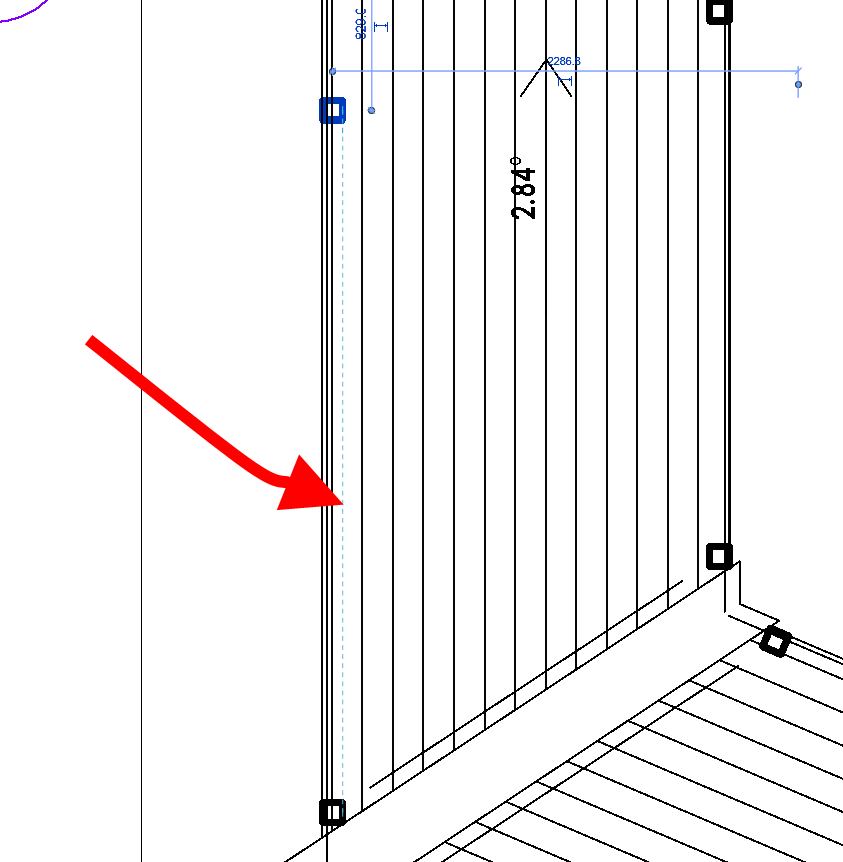
This is a line that is shown when a constraint has been applied to an element, and then you select that element in a different view. Usually, Revit gives you a clue as to what that constraint is, for example:
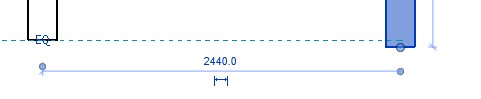
An equality constraint
Or a lock constraint

However, in the popquiz example, there was no feedback as to what that particular constraint line meant.
The other part of the question was: what possible ways are there to modify it in plan? In other words, what control do you have over a constraint line if you are working in a view that the original dimension does not exist in?
Well, you can select the constraint line, and even Edit Type – but it doesn’t get you anywhere:

Depending on the situation, you may be able to re-create the same dimension in the current view, and this will expose the constraint (ie. lock) that Revit is referring to.
If this does not work, the ONLY control you have over that constraint is to:
Select it and delete it
Thanks for your comments! Stay tuned for the next Revit Master Popquiz.
And what possible ways are there to modify it in plan?
Don’t be scared – please comment with your guesses.
EDIT – answer provided here:
What Revit Wants: Popquiz 5 – answer
This is a new feature in Revit 2012. You can access it by double clicking on the text of any dimension segment. Have a look at the images below for more information:
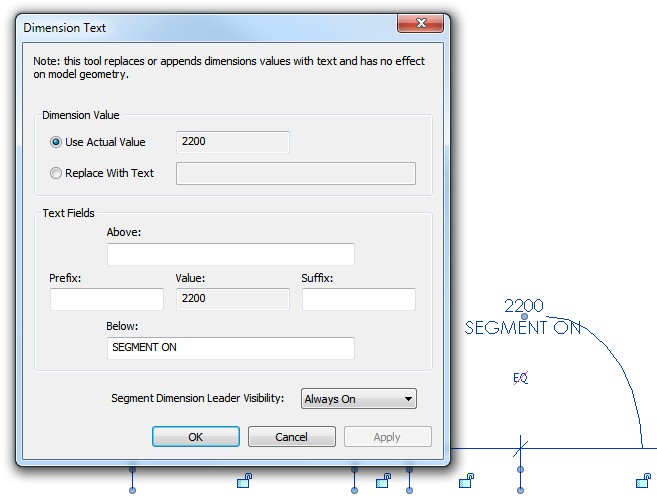 |
| Segment Dimension Leader Visibility drop-down box |
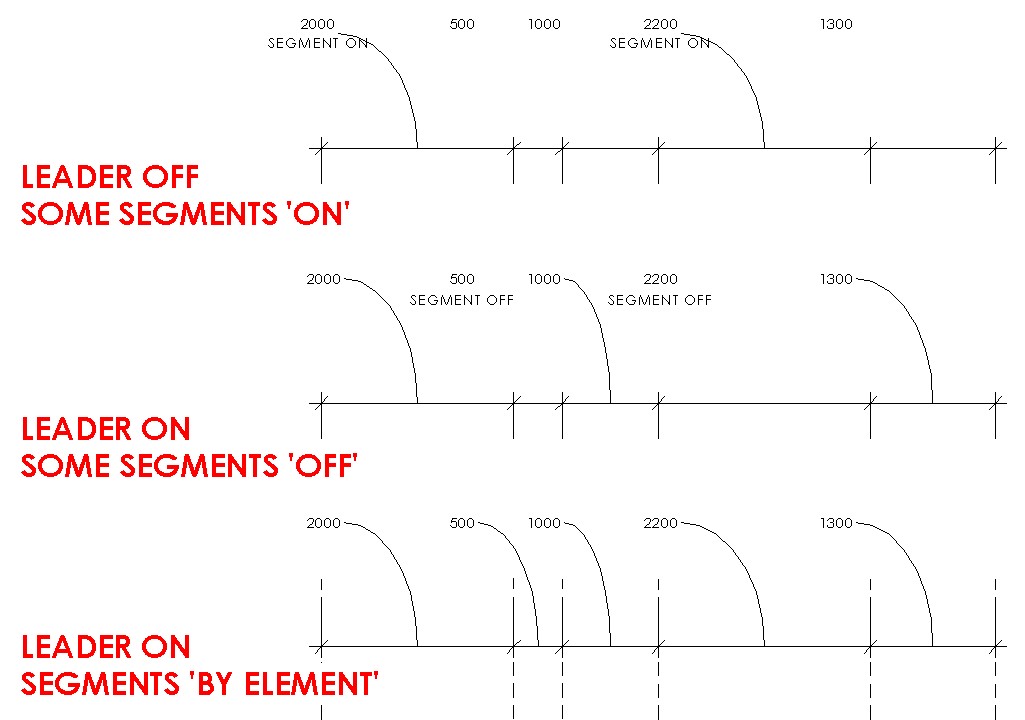 |
| Some possible combinations |
What I really want is a global override or option to turn dimension leaders ON or OFF for all newly created dimensions…
Interesting undertaking to develop a new RFO Style Guide (RFOSG), to enhance the possibility of sharing content – over at the Revit Forum.
Here is the latest PDF version:
Revit Style Guide v0.2 pdf
And here is a sample of some of the contents:
Naming Conventions 4
Separators and Case 4
System Families 4
Loadable Families 5
Materials 7
Fill Patterns (Surface) 8
Fill Patterns (Cut) 8
Line Patterns 9
Line Styles 9
Line Weights 9
Text Styles 9
It is also in a nice ‘open’ format:
This document is developed and released under the Creative
Commons with Attribution-ShareAlike 3.0 Unported (CC BY-SA 3.0)
(Commonly referred to as “CopyLeft”)
You are free:
to Share – to copy, distribute and transmit the work
to Remix – to adapt the work
Do you ever get a little annoyed by the things Revit doesnt let you do? There are some irritating limitations in our favourite BIM program – but SAuBIM aims to workaround one of them.
Out-of-the-box Revit does not let you use a ‘calculated parameter’ in a Tag. Don’t ask me why. It is just a fact of life at the moment. SAuBIM (pronounced saw-bim, and meaning ‘semi-automatic BIM’) takes the pain out of this with regard to one specific task – calculating room occupancy data and then displaying it in a tag.
Basically, you take the following steps to use SAuBIM:
- Close your Revit project.
- Install and register SAuBIM.
- Open the SAuBIM utility.
- Set your Revit ‘Program’ location in the top Browse box.
- In the middle Browse box, select the Revit file that you want to calculate Room Occupancy for.
- Click ‘Import Schedules and Tag’. Wait for Revit to do its thing.
TIP 1 – If you come across a dialog that says ‘Enter Interactive Mode‘, then something hasn’t quite worked properly. I recommend that you:
– Close Revit WITHOUT saving
– Follow the steps above again, but between steps 5 and 6, tick the ‘I am Importing into a Revit Template File ( *.rte) box. Even though you are using your .rvt project file, this step may actually cause SAuBIM to complete the import correctly.TIP 2 – If the above also does not work, you can manually complete the following steps (on your project BEFORE applying any SAuBIM items):
– Copy (from Project Browser) the 2 x schedules from
“C:Program Files (x86)SAuBIMSAuBIM InstallTest Project – Code Calc.rvt” (for Windows 7 64 bit)
and Paste (Ctrl+V) them into your project
– Load the Room Tag from
“C:Program Files (x86)SAuBIMSAuBIM InstallRoom Tag – OL.rfa” (for Windows 7 64 bit) - Once you have saw-bimmed your file, you can now use the Update Occupancy Data function (Revit must be closed to do this)
- Tag your rooms with the Room Tag – OL.rfa tag.
You have to keep in mind that it is semi-automatic – you need to ‘Update…’ the data before plotting / exporting.
However, it is a good proof-of-concept, and will prove extremely useful to some architects. Thanks SAuBIM!

Now, here is a little request / challenge to the SAuBIM guys: What if you ‘exposed’ some of the functionality of this program, and made it more customizable?
This is what I’m thinking: you allow us to select Calculated Parameters FROM a specific project file, and then use your tricks to push these into Shared Parameters, which we can then Tag?
I think it would be pretty easy, with the functionality you already have in place?
“Office 2010 Service Pack 1 (SP1) is set to released to manufacturing (RTM) and available for all by late June 2011”
via
Office 2010 SP1 To Release by June 2011 � My Digital Life: