It may not be immediately obvious how you can quickly transfer Project Parameters or Area Schemes between linked models (to allow scheduling of linked RVT data in a host project).

Turns out the answer is pretty simple – just use Ctrl+C (Copy to Clipboard) to copy the required Schedules from one RVT to another.

The full process is described at:
Including Project Parameters or Area Schemes from Linked Models in a Schedule – WikiHelp

I learned something from Wikihelp today:

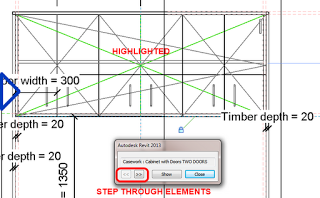
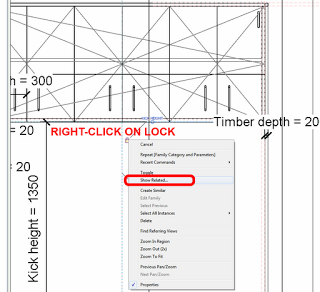
  1. In the drawing area, right-click a dimension lock.
  2. Select Show Related from the context menu. The appropriate element highlights and a dialog identifies the element.
  3. Click the arrow buttons to switch between the elements constrained by the lock.

From:
Distinguishing a Dimension Lock’s Related Element – WikiHelp
via
https://twitter.com/RevitWikiHelp

EDIT via MLD in the comments:
In a 3D view;
1 Ensure Section box covers all elements by,Unchecking then rechecking ‘Section Box’
2 Select some objects and the section box
3 Temporary isolate elements
4 Uncheck then recheck ‘Section Box’ again
5 Reset Temporary Hide/Isolate

Another way – is the COINS Auto-Section Box add-in available on Autodesk Exchange.  Install the add-in, restart Revit, select a few objects then click the button.  It will create a section box around those objects in the selected 3D view – very easy!

Download at:
Autodesk Exchange Apps

A third way – is through a nice tip posted by Trey at Wikihelp.  Here are the basic steps:

  1. In a plan or elevation view, create a Callout (View tab > Create panel > Callout).
  2. Open a default 3D view.
  3. Right-click on the View Cube.
  4. Select Orient to View > Floor Plans, and choose the Callout view you just made. Your 3D view will automatically have a Section Box that matches the Crop Region of the Callout!

via
Small 3D View – WikiHelp

“You can force Revit to always open in a maximized window by using the following steps:

  1. Locate the Windows shortcut Icon you use to launch Revit.
  2. Right-click on the Icon, and choose Properties
  3. In the Shortcut Tab in Properties, change the Run: dropdown menu from Normal Window to Maximized.
  4. Click OK to exit the dialog”

From
Setting Revit to Open in a Maximized Window – WikiHelp:

“the paint tool will open the Materials dialog, where now you can visually preview materials and access material properties in order to modify a material. You can see your changes without closing the Materials dialog.

Also, you can use the “Remove Paint” tool to remove a material that has been applied to a face.

Meanwhile, you can identify the quantities of materials used as Paint in material takeoffs.

via
 Paint Tool – WikiHelp:

EDIT In Revit 2012 and newer, the quickest way to identify paint is to use the Remove Paint tool.  This does not load the Material selection panel, and will thus be faster.  Also, switch 3D view to wireframe with Remove Paint to globally scan the project with your cursor for painted surfaces…