There is a macro at:
Finding those constraining dimensions | Boost Your BIM
Tag: constraint
Sometimes, putting a bit of thought and planning into your family design well lead to far better results than simply ‘diving in there’. The following post shows a list of such requirements. Essentially, you write a ‘brief’ for your family, and then seek to meet the requirements of that brief.
However, at times I do things the complete wrong way about – like modelling them inplace, then converting them to component families and trying to figure out the origin and constraints later on – very messy and definitely not best_practice 🙂
I learned something from Wikihelp today:
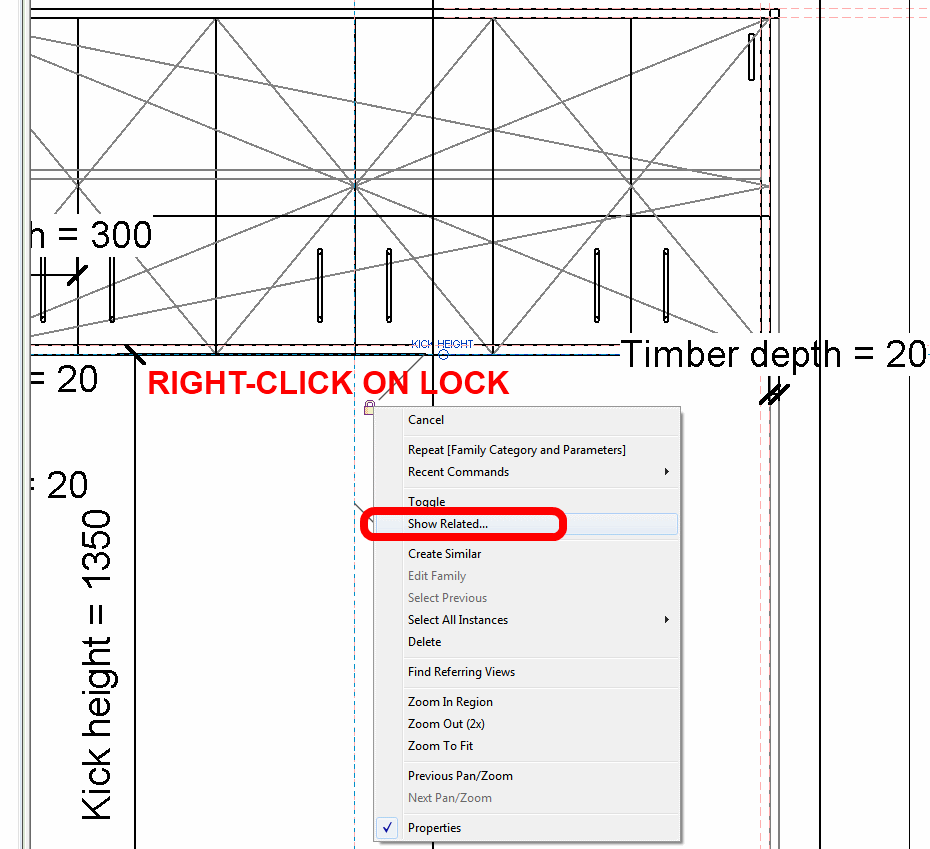
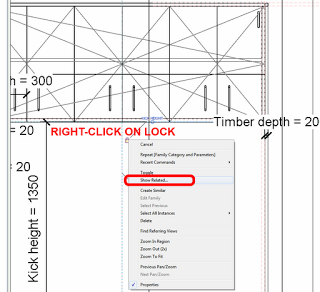
- In the drawing area, right-click a dimension lock.
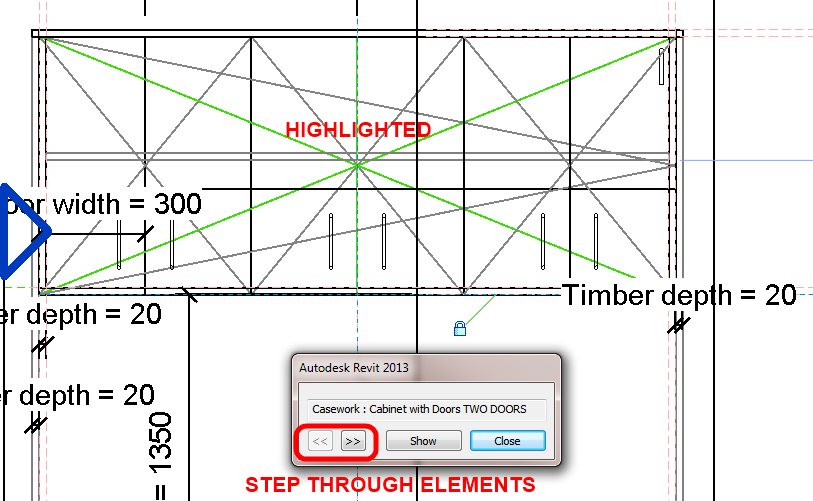
- Select Show Related from the context menu. The appropriate element highlights and a dialog identifies the element.
- Click the arrow buttons to switch between the elements constrained by the lock.
From:
Distinguishing a Dimension Lock’s Related Element – WikiHelp
via
https://twitter.com/RevitWikiHelp
Revit does not want you to constrain and lock every potential relationship.
When I first started using Revit, I thought, “Awesome, I can lock every little thing together and it will be great!”. And, it was, for a while.
We are only human, however, and eventually those constraints become a little fuzzy (“What did I lock that object to again?”). Or someone else in the office needs to work on the project. Suddenly, Revit does not want you to move anything – or that’s how it seems.
There are certainly times when it is ok, even wise, to constrain certain elements. I mainly constrain elements such as walls, roofs and floors to grids, and I do not constrain much else.
Please don’t tell Revit to constrain every little thing. It will be bad for you, and it is bad for Revit performance.