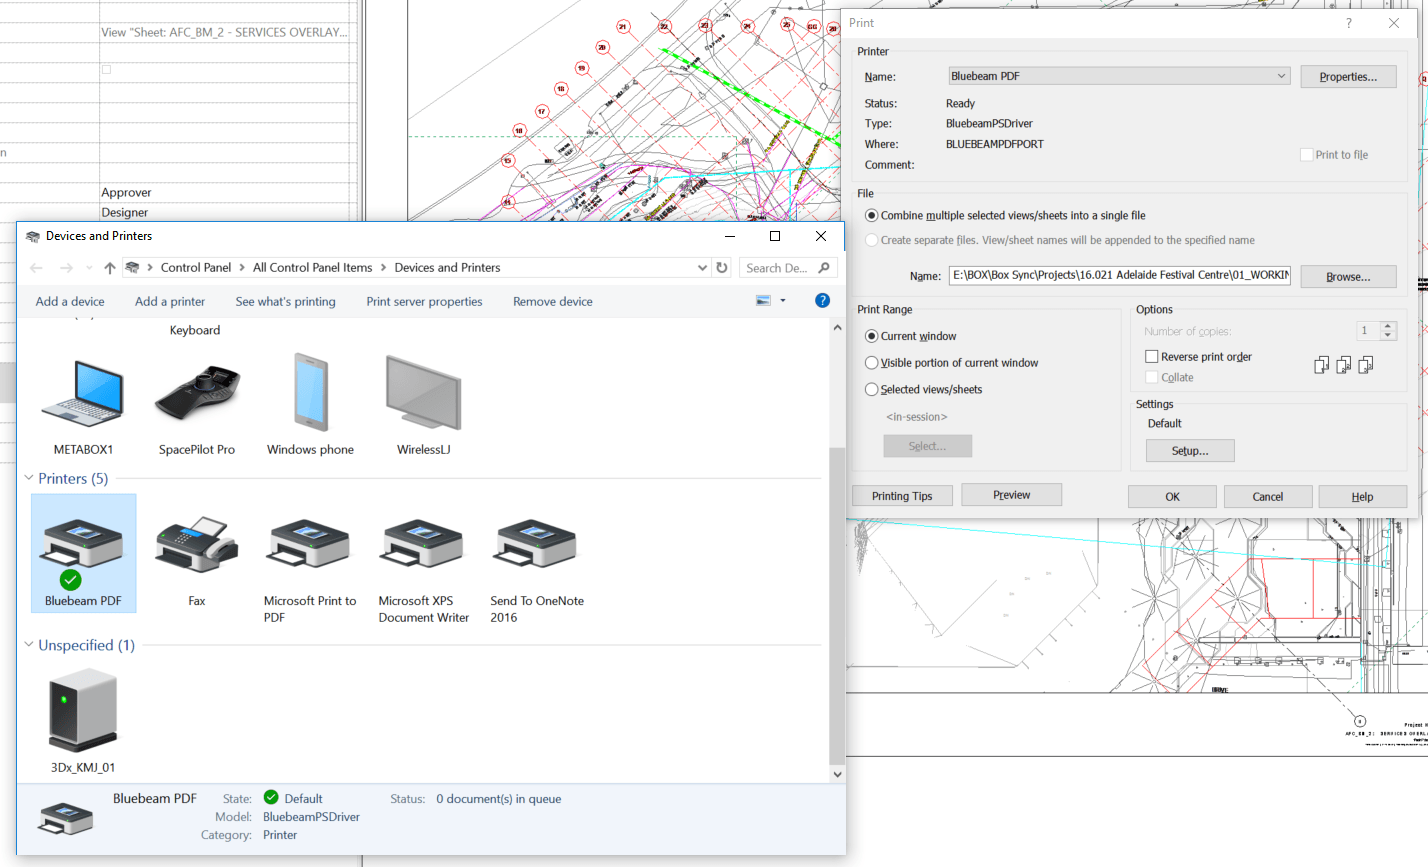
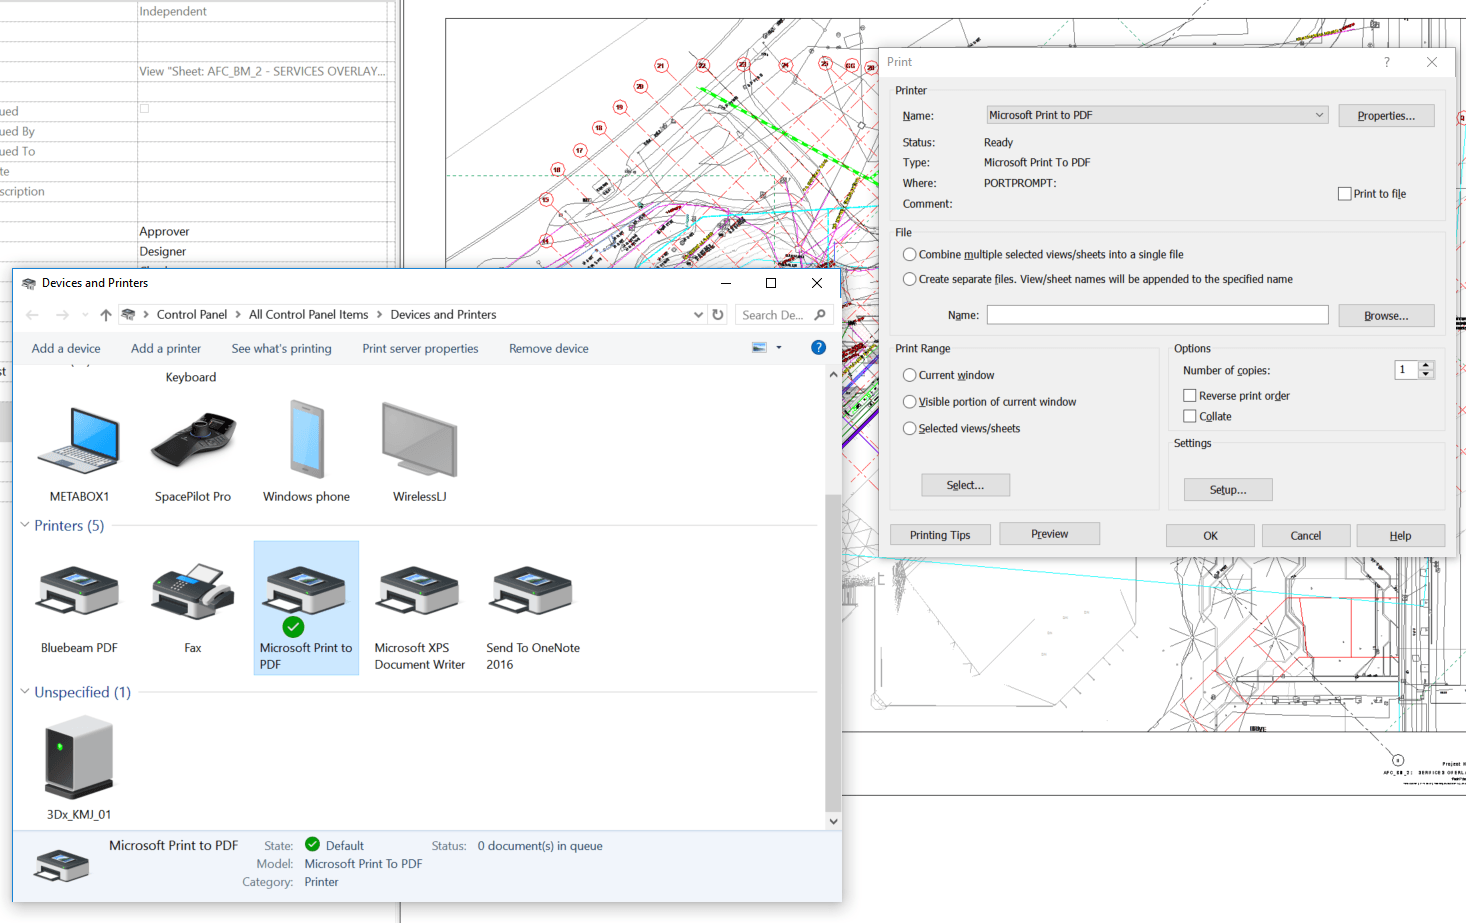
Have you experienced a blank and somewhat non-responsive Print dialog in Revit? Pressing Setup does nothing in this situation:

What’s going on here? Well, there is something in the Microsoft Print to PDF driver that Revit doesn’t like, possibly to do with paper sizes or something. How do we fix it?

Just set your default printer to something else, like Bluebeam or CutePDF. Then, Close and re-open the Print dialog in Revit:

As you can see, now the dialog is happier and you can proceed to setup your sheet print settings.

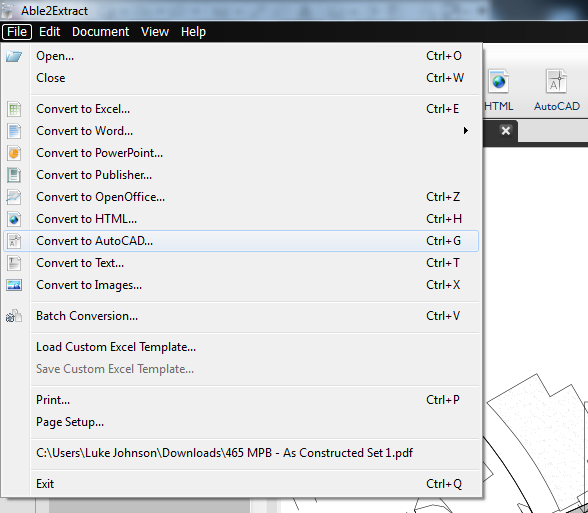
Able2Extract can export a pdf to various formats:

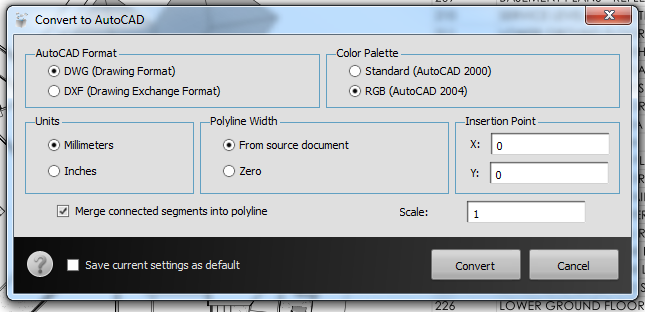
In my testing, I opened a 97mb pdf file in Bluebeam and extracted one page to a separate pdf file for conversion. I opened this pdf in Able2Extract and tested exporting to DWG and DXF with various export options. My results are shown below.

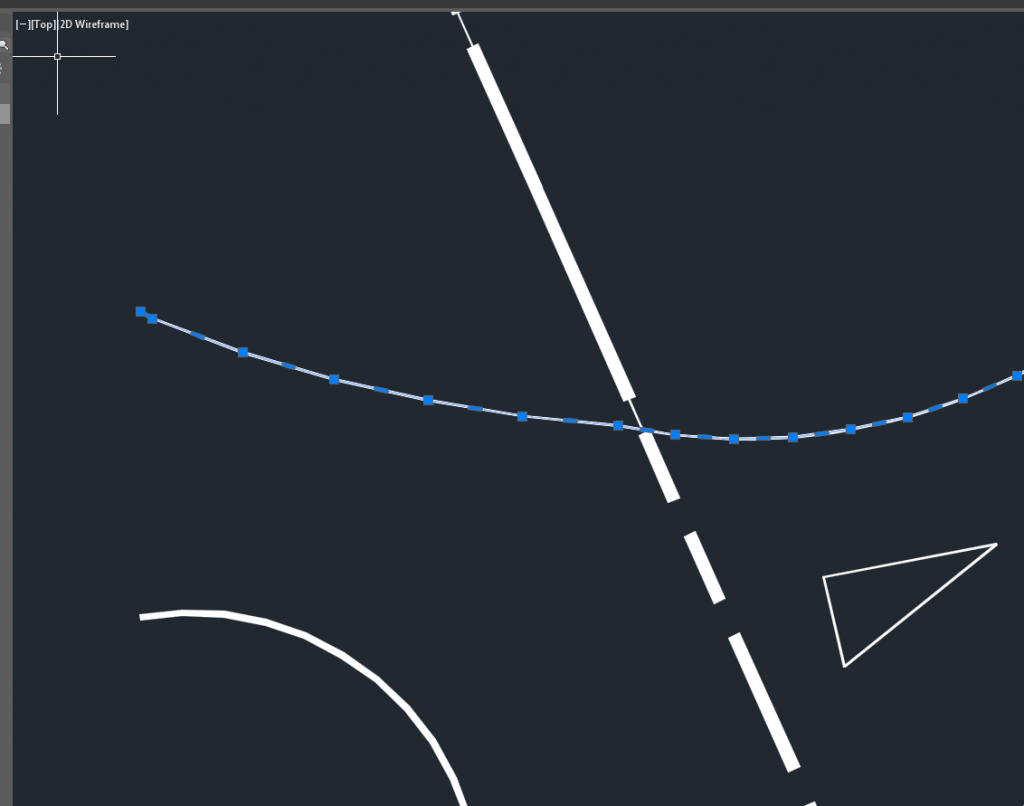
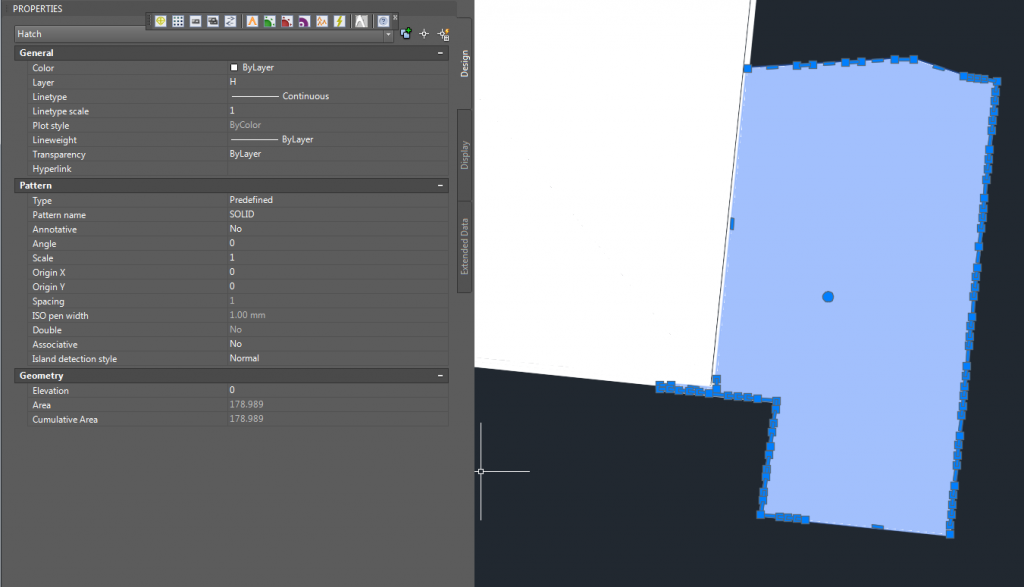
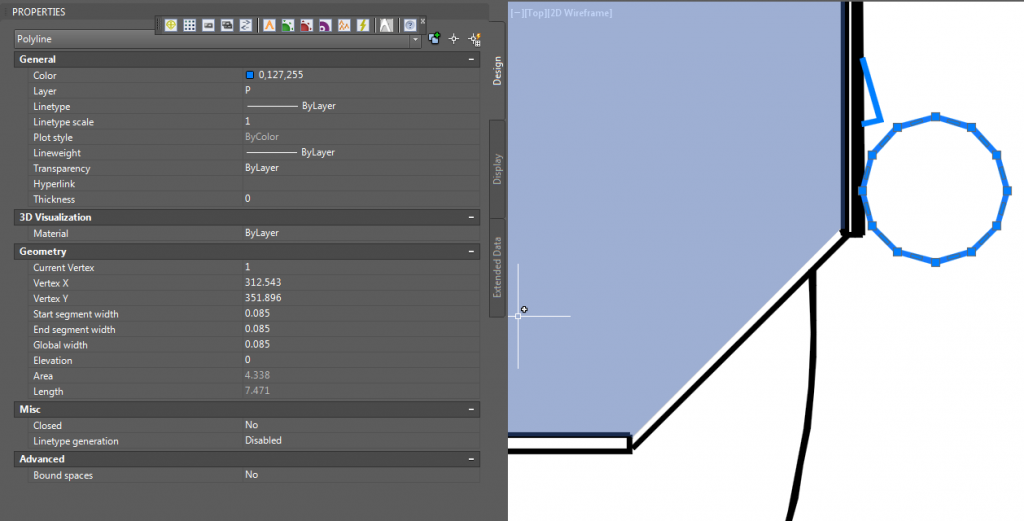
Polyline width detection: Good

Connected segments into polyline: Good

Hatch creation: Good, with colours when RGB ticked on export

Scale:
Good, probably best to export 1:1 then scale in AutoCAD using commands SC and ALL for selection (can also use scale export option)

Text detection: Not good
EDIT: Explanation “The PDF you used contains 4 embedded fonts with custom encoding (File>Properties>Fonts in Acrobat Reader). “Embedded” means that the PDF contains all necessary info to draw them correctly. But, according to PDF Standard 1.5 (http://partners.adobe.com/public/developer/pdf/index_reference.html), page 427: 5.8 Embedded Font Programs…

Font programs are subject to copyright, and the copyright owner may impose conditions under which a font program can be used. These permissions are recorded either in the font program itself or as part of a separate license. A font program may allow embedding for the sole purpose of viewing and printing the document, but not for creating new or modified text using the font (in either the same document or other documents); the latter operation would require the user performing the operation to have a licensed copy of the font program, not a copy extracted from the PDF file.

It means that we can extract from the PDF its content, but not fonts.”

Now, the real question: is it worth it? I think the ease of use is good, and the overall functionality also seems compelling for the US99.95 price tag. This is obviously a lot cheaper than buying a full standalone license of Adobe Illustrator. However, the lack of text support when converting to DWG / DXF is unfortunate. If you plan on extracting the vector information out of PDFs for tracing or use in Revit, and you don’t really need the text, Able2Extract could be worth a look…

How you can get it:
Direct link to 7 day trial for Windows

Main download page here and help page for DWG conversion here

I have previously posted how to convert pdfs to vector information using free tools and using Adobe Illustrator (with video).

I have also provided a guide on converting a raster image to vector information for use in CAD and BIM in this post:
Raster to Vector to DXF for use in AutoCAD, Revit or Navisworks (with video)

Limitations:
I loaded a 97 mb, 208 page architectural set into Able2Extract. It opened up quickly, but then it crashed before I could initiate a conversion.

Something popped up on Exchange recently, got tweeted, and then disappeared… but now its back!

This addin allows simple import of PDFs directly into the Navisworks 2015 Project Browser as sheets that can be reviewed, marked up and quantified. Previously, to accomplish this you could open the PDF in Design Review with vector information, save as DWF and “Import Sheets and Models” to bring the DWF sheet into Navis. As you may know, the 2015 release introduced a lot more Quantification functionality for 2D, and I believe this new PDF importing tool will become a key part of that workflow.

In short, it seems that the sheet import process for Navisworks 2D documets is about to get a lot easier!

Link to PDF Reader download page (sign in with your Subscription account login on Exchange and then the Subscription only button will change to “Free” and you can download AutodeskNavisworks2015PDFReader.msi)

Read the help document here

The entire Navisworks App Exchange is here

I hinted at the document aggregation possibilities in Navisworks back in this post.

One side-effect of moving home base closer to a city is the likelihood that one will have to commute, perhaps using public transport on a day-to-day basis. This means potentially having two hours a day in which you are sitting on a bus or a train. How to spend the time? Invariably, you will be surrounded by people with screens of all different shapes and sizes…

So, I began looking for my next device, something that would tick all the boxes for me. My Lumia 820 (a Windows Phone 8 device) is great, but leaves a few things to be desired due to the closed ecosystem – a plight shared by ios users, I’m sure. I considered getting a tablet – but I didn’t feel that Android would satisfy my needs, and iPads were out as I am essentially an anti-Apple guy (not for any real reason other than that we all have likes and dislikes, and I want to be an individual 🙂

I have a large library of PDFs, some Revit-related and others not, so I thought it would be good to find a way to read and potentially markup and cross-reference these during my time to and from work. I found out about a free Linux program called Okular – it stores markups in XML files, so the original PDF is unchanged. This idea appealed to me – with large PDFs, I would only need to transport or synchonize a small set of XML files between devices. Of course, iAnnotate PDF was out of the question (due to the aforementioned), and I didn’t like the fact that the Mendeley research tool required a pretty solid connection to the cloud.

Additionally I am, for-better-or-worse, a blogger, so it would be good to be able to type easily and quickly on whatever device I choose. So, drumroll please … what did I end up with?

It is a 4 year old piece of technology called a netbook. Haha, even *I* am laughing at myself. I’m sitting on the bus with a Lenovo Ideapad S10, which I found on Gumtree and bought for $100. It has 2.5gb of RAM and a 250gb hard drive. After purchasing it, I removed Windows 7 Pro and installed Linux Mint 15 Olivia, XFCE edition. It runs smooth and fast, the battery lasts (after a few Linux commands which I will include below), and I have installed Okular and copied my PDF library directly to the hard drive.

I can easily watch videos, listen to music, connect to wifi and bluetooth devices, work with documents and other files – but the real “killer app” for me is Okular. Its easy to use, has cool features like the ability to invert colours, and just generally makes it a joy to markup PDF files. As I’m running Linux, I have a huge library of open source software at my fingertips.

And who knows – the way things are going, if 3g/4g internet becomes super affordable, and Revit-in-the-cloud becomes globally accessible, this little netbook here could become my next workstation (joking, really).

Here is where you can find Linux Mint – I’m running 64bit Cinnamon on my main laptop, and 32bit XFCE on my “bus” netbook.

To get some simple power management happening, use these commands:
sudo add-apt-repository ppa:linrunner/tlp
sudo apt-get update
sudo apt-get install tlp tlp-rdw smartmontools ethtool
sudo tlp start

After you have marked up a few pdf files, can find the XML files for these Okular markups here (copy paste into File Manager):
~/.kde/share/apps/okular/docdata

PDF is ubiquitous.  As great as DWF is, it just will never have the market saturation that PDF does.  That is why there is definitely a market for a good tool to make 3D PDFs from Revit.  As Revit users, we already have access to a nice looking 3D model with BIM data, but how do we transmit it or show it to key stakeholders (who may not be tech savvy)?  Sure, we can easily make a DWF, but then we have to educate people about using new viewing tools etc.  Let’s just make a 3D PDF and email it across for review 🙂

I have previously posted at least 4 ways to make a 3D PDF for free from Revit:

  1. Using the i-model plugin (also using Navisworks FBX to i-model)
  2. Converting a DWF
  3. Revit to OBJ to DAZ Studio to U3D to Adobe 3D PDF
  4. 3D PDF from Revit STL using Meshlab, MiKTeX and U3D-2-PDF

So here is the point of this post (in the words of 3DA Systems rep):
we’re hoping you can review 3D PDF Converter, particularly from the point of view of seeing how it exceeds the free options out there.

That is the question – does this paid tool exceed the free methods?  And if so, in what ways?

I’ll be the first to admit that the four free methods I have shown have various disadvantages, such as:

  • they require the use of a plethora of middle man tools
  • they may not include real BIM data from the model
  • in most cases, you don’t get realistic representation of materiality (perhaps just an approximation)
  • topography export is a bit unpredictable

In other words, they can be a pain to create, and don’t produce a great result.

Installation
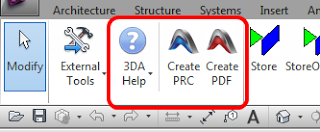
After installation, I opened a project in Revit 2013.  Switching to the Add-ins Ribbon, I could see the following new commands:

Usage

I then switched to a perspective view, but guess what?  You can’t export from a perspective view.  This makes sense, because all my add-ins were greyed out in the Perspective view.  As I wanted to take all the view settings from that particular view (which was a render scene), I created a View Template from it and applied it to a orthogonal (Default) 3D View.  I also applied a Section Box.  Finally, I picked Create PDF

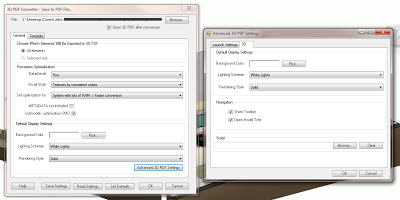
I was presented with dialog box that allows some very granular control of the resultant PDF.  Here is what it looks like:

I selected Shaded Illustration as the Visual Style, and then clicked OK.  Then – go and have a coffee… About 12 minutes later, I had my first 3D PDF.  A few things:

  • it did not respect the Section Box
  • it did not respect the Visibility show / hide settings of the source view

Basically, I had a 3D PDF (including BIM data) of “everything”.  It was highly detailed, but not visually appealing.  So, I figured I should try again – perhaps I missed something in the settings?

This time around, I noticed that I could export “selected” elements.  So I selected everything I could see in my Section Boxed view and triggered Create PDF again.  This time, I also tried CAD Optimized Lights.

The resulting file is lightweight and easily viewable.  However, you don’t get textured materiality – because 3D PDF itself doesn’t support that.

In short, you get what you pay for.  This is a mature, highly functional add-in that makes 3D PDF export simple and very easy to control.  It certainly exceeds the free methods, both in terms of ease-of-use and ability to customize the output.

So, how do you get it?  The download process is painless, just go to this link for a fully functional 30 day trial:
http://www.3dasystems.com/products/3d-pdf-converter-revit/3dpdf-access/

The main decision you will have to make is which version do you want to use?  What is the difference?

For the most current versions (2012/13 and 14), the only difference is the version of Revit they work with.

The difference between the 2014 release and the release from last year is that 2014 does not require Acrobat in order to create 3D models – it’s totally standalone (although you will still need Acrobat to create 2D models).
For me, this difference is a big deal.  I’m still happy to use CutePDF for 2D prints, so technically, I don’t need to purchase full Acrobat to use the 2014 version (that is, version 5).

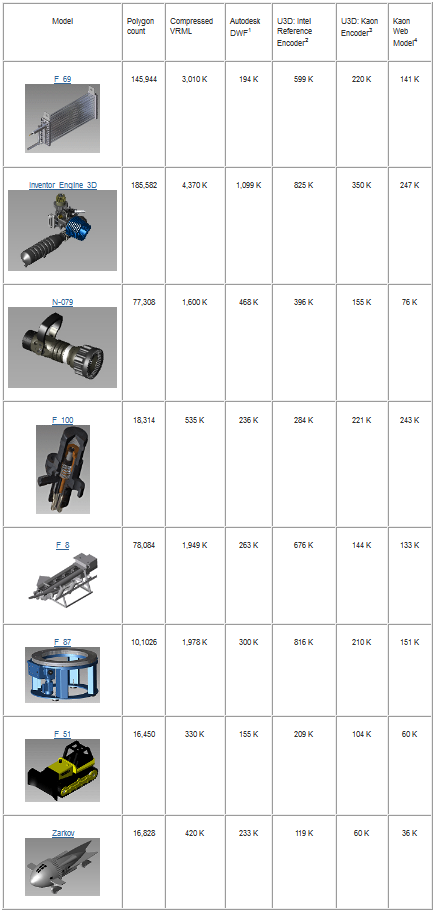
For a comparison between the compression methods of DWF and 3D PDF, check out:
Comparison of VRML, DWF, U3D (used in 3D PDF), and Kaon Compression – Kaon Knowledge Base
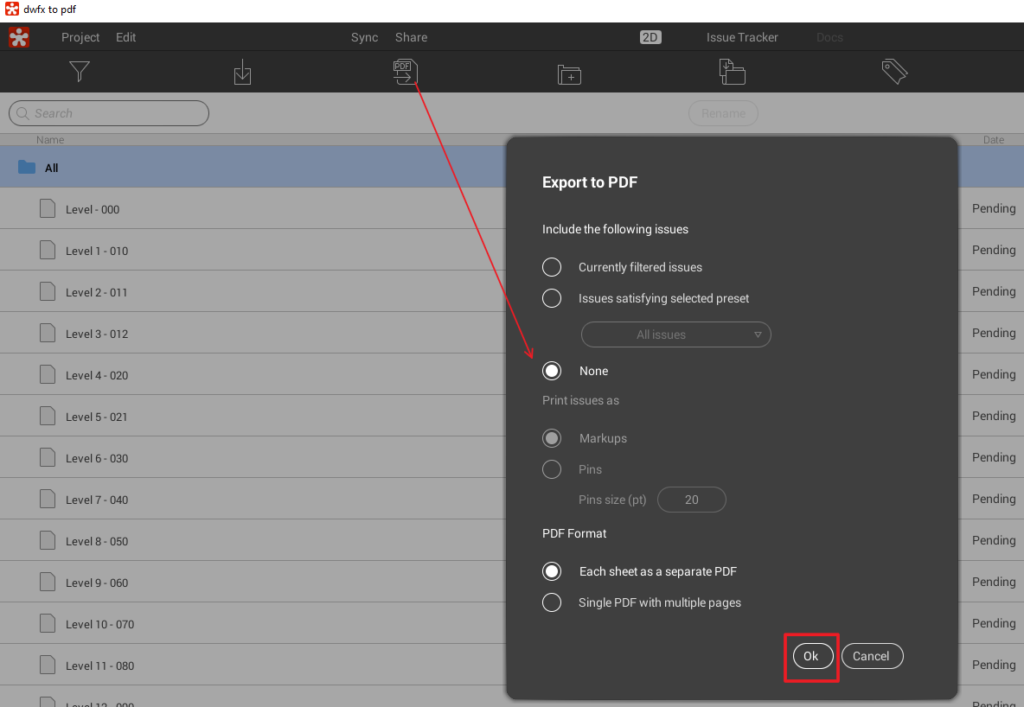
If you open PDF files using the embedded vector data (ie. lines), you can then use ADR (Autodesk Design Review) to snap to PDF lines in order to measure them.

This may be useful to you if you are using ADR for markup tasks.  In our office, we are still very much PDF-centric, and various PDF readers allow you to measure PDFs anyway, so … you get the idea.

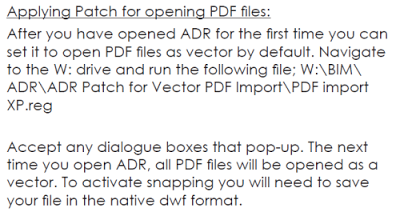
If you want to force ADR to open PDFs as vectors, follow the steps on the following post at RevitForum:
Design Review Tutorial

Some direct links (you will need to login to download):

Attached Files Attached Files

Thanks to Tim West for the post, the training guide and the registry tweak.  Nice job!

From Tim West’s PDF linked above

Manual steps from Instructions.txt:
XP
    Open your system registry editor with command ‘regedit’
    ‘HKEY_CURRENT_USERSoftwareAutodeskDesign ReviewPreferences’
    If there is not a key called ‘PDFImport’ please create it.
    Create a DWORD value whose name is ‘PDF Conversion Method’ and set its value as 2.
    Close your registry editor.
    Open your PDF files with ADR2012
    PDF will be converted to DWF as vector; you can save this DWF file by then.

Vista/7
    Open your system registry editor with command ‘regedit’
    Expand ‘HKEY_CURRENT_USERSoftwareAppDataLowSoftwareAutodeskDesign ReviewPreferences’ or ‘HKEY_CURRENT_USERSoftwareAutodeskDesign ReviewPreferences’
    If there is not a key called ‘PDFImport’ please create it.
    Create a DWORD value whose name is ‘PDF Conversion Method’ and set its value as 2.
    Close your registry editor.
    Open your PDF files with ADR2012
    PDF will be converted to DWF as vector; you can save this DWF file by then.

Do you have some large format black and white PDF drawings that are taking up excessive space?  Perhaps they contain multi-layered vector information that is clogging them up.  You can easily make them smaller by recompressing into TIFF format with G4 compression.

Option 1 – PDF Tools and Irfanview

  1. Convert PDF to multipage TIFF using PDFill PDF Editor with FREE PDF Writer and FREE PDF Tools
  2. Open TIFF and save as TIF with G4 compression in Irfanview (suggested dpi setting 200 dpi)

Option 2 – PDF-Xchange Viewer

  1. Open PDF in PDF-Xchange Viewer
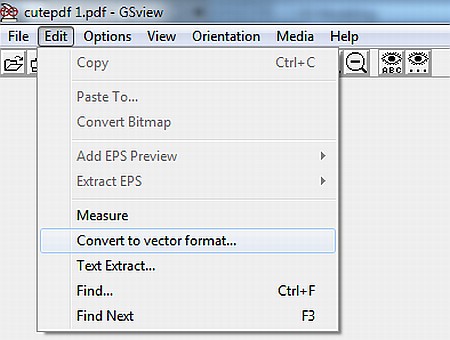
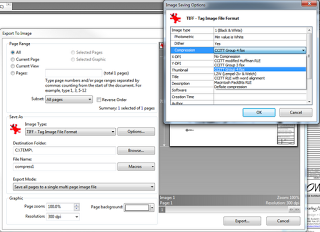
  2. File – Export – Export to Image
  3. Page Range – All
  4. Use TIFF format, Options – Compression – CCITT Group 4 fax
  5. DPI settings at 300 all round (for other settings also see image below)
  6. Click Export…

If you want to make a TIFF into a PDF again, just open in Irfanview and Print to PDF file using CutePDF or similar.  The resulting PDF will generally be way smaller than the original PDF.